Greetings, dear friends!
And we all continue to make crafts with the kids and share new ideas with you! I hope our activities inspire you and that you also engage with your kids! Well, today we will tell and show you how to make a kolobok craft with your own hands for kindergarten. Of course, we didn’t stop there, and in the evening, when my son came home from kindergarten, we arranged a continuation of our activities, so it turned out to be a themed lesson on the “Kolobok” theme, and not just an easy craft, as originally planned. But first things first. By the way, we recently did a themed lesson on the fairy tale Turnip, if you haven’t seen it, I advise you to look here. Let’s start making our own kolobok crafts with our own hands.
From a ball and twine
How to make a Kolobok from twine? Such a craft turns out to be original and creative. It doesn’t look much like Kolobok from a fairy tale, but it emphasizes the style and fits well into the country house ensemble, consisting of original wire parts. It is possible to supplement it with internal lighting and make it an element of decorative lighting.
The following master class will help with this:
- A regular round balloon is inflated. You should not set a goal to inflate as much as possible, otherwise further work will be difficult (Fig. 8). The thread connecting the inflatable hole is left short - it has no further significance.
- The end of the selected string is attached with tape to the flat surface of the ball (Fig. 9).
- The entire surface is smeared with glue, and twine, also treated with glue, is quickly wound around it (Fig. 10). Winding must be done evenly in all directions, trying to cover the coated surface as much as possible. The more string you attach, the tighter the bun will be. For more dense gluing, you can additionally apply glue to the already applied layer and, without waiting for final drying, work further.
- After the structure has dried, the rubber ball bursts by piercing (Fig. 11) and is pulled out through a specially made hole (Fig. 12).
The Kolobok layout is ready. Let's start decorating it. We make a cap, beret, bows or a hat from colored paper, fabric, cardboard or foam plastic (Fig. 13). We fasten with glue, preferably in several places.
INTERESTING: Summer-themed crafts with children
We design his face, especially focusing on his kind features and expressive eyes (Fig. 14). And Kolobok, made from scrap materials, is ready to decorate any area. The twine can be any color, but a yellow tint will be more realistic, because this is exactly what a creation from dough can be.
From papier-mâché
An interesting and unusual option for making a kolobok from papier-mâché (Fig. 6). The technique used here is to paste a round object with a mixture of moistened crushed egg trays and PVA glue. Applying such a layer will give the sculpture volume, heterogeneity, and visual naturalness. After the mold has dried, water-based paint, preferably white, is applied to it. As it dries, they begin to paint the Kolobok model with yellow paint (the final version).
To make facial features voluminous, the paper mixture is glued in a thicker layer at their locations. After complete drying with a knife, you can more expressively cut out dents and protrusions, fix the relief of the eyes, mouth (of course, in a smile), nose, and ears.
You can make a scarf or beret from the same material. Coloring will not be difficult.
In order for a figurine made of such material to be practical and stand intact until the end of the summer season, before painting it can be coated again with glue, drying oil or other composition to strengthen the structure during street work.
A DIY papier-mâché bun at the dacha looks original and interesting. Moreover, you can decorate it to your liking. Additional parts are made from:
- fabrics;
- wires;
- foam rubber;
- wood and other materials.
Simple ideas
The simplest option is to paint any round object and put eyes, nose, and a smile on it. Figures 1-3 show just such models. In this case, the figurine can be supplemented with design elements: a scarf, a cap, arms and legs, curls of hair, a basket (Fig. 4, 5).
For such work, paints should be used that are intended for outdoor use, since a hero installed outdoors is susceptible to precipitation, wind, and other negative environmental factors.
Such figures can be arranged in different ways, for example, strengthening the Kolobok on a stump - fig. 7. This is convenient for playing and will protect the product from becoming limp in puddles of rain.
From polyurethane foam
Another interesting way is to make a Kolobok from polyurethane foam, using a ball:
- We cover it with foam in several layers, allowing them to dry one by one (Fig. 15). We apply more foam to protruding areas (nose, mouth, etc.).
- For the arms and legs we prepare tubes, which we also treat with foam (Fig. 16).
- We paint the entire work yellow and highlight the facial features (Fig. 17).
Making a kolobok for a summer house with your own hands from plaster is similar (Fig. 18-22). Working on it for the garden with our own hands, we give the figurine a piece of our soul, we try to make it kind and cheerful, as well as recognizable. We often surround ourselves with vegetation, heroes of the same or other fairy tales.
Volumetric craft using modular origami technique
Modular origami looks very impressive. But assembling them is quite labor-intensive, since each such craft consists of many small parts that are inserted into each other. It is very difficult to read the description and follow it; it is easier to do such work by looking at an example.
The main part of the work is the assembly of parts - modules. Their appearance may vary. They can also be purchased ready-made, avoiding the most lengthy process. However, according to experts, it is this kind of work that has a calming effect on children and helps develop concentration and perseverance.
Will be useful: Modular origami for beginners.
Features of paper crafts for the fairy tale “Kolobok”
Paper crafts for the fairy tale Kolobok can be of different types:
- in the form of an application;
- in the form of paper dolls for puppet theater;
- in the form of children's masks for playing in skits;
- three-dimensional figures for plot installation, etc.
Depending on the purpose, the type of craft changes. Each of them is worth special attention.
Examples of paper characters from fairy tales
First of all, you need to remember who the main characters were in the fairy tale Kolobok. First of all, this is Kolobok himself. These are also his grandparents, thanks to whom he was “born.” And after that - all the animals he met in the forest - a hare, a wolf, a bear and a fox.
Paper bun
A paper bun can be in the form of an applique.
In the form of three-dimensional figures.
Kolobok head mask made of paper for theatrical scenes.
Or three-dimensional figures for acting out a fairy tale or modeling a plot.
Paper crafts of other heroes
You can make the rest of the heroes using the same principle as the kolobok. Moreover, most often they are performed in the same style.
How to make a bun from paper and cardboard
Do-it-yourself crafts of fairy tale heroes from colored paper and cardboard are made for different purposes and in different ways. But most of them are simple enough for a child to make a paper bun on their own.
Origami with diagrams
All the heroes of the fairy tale Kolobok can be made in the form of origami. To do this, you just need to follow the addition diagram.
Kolobok
You can make a kolobok in the form of a hexagon rather than a regular circle.
The resulting hexagon can only be added with eyes, a nose and a mouth to complete the craft.
Grandmother and grandfather
It is also possible to make a little man using the origami technique. Although it is already more difficult than a kolobok.
Hare, wolf, bear, fox
Other fairy tale characters for children are also performed using the same technique.
Source
Chicken Ryaba
The finger theater for the embodiment of the theatrical fairy tale “Ryaba Hen” includes: a village hut (from the inside), grandmother, grandfather, chicken, mouse and egg.
To create characters, you should stock up on consumables:
golden egg
To make a golden egg, you need to cut out 2 parts of an oval from yellow felt and sew them together, filling them with padding polyester.
There is no hole left for your finger in this toy.
Hut
To sew a beautiful hut as a decoration for the fairy tale “Ryaba Hen”, you will need:
Hut assembly:
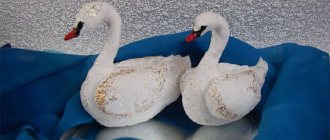
An original and beautiful version of the kolobok
You can construct a bun with your own hands from a balloon, glue and thread.
The stages are as follows:
We inflate a round ball, coat it on all sides with glue and wrap threads on top of the glue: the more threads, the more real the hero will turn out.
After the threads have dried, glue the mouth, eyes, and nose onto the intended face. On the top of the head there is hair made of threads. The hero is ready - the performance will take place.
A variation of this type of work can be called a pasta kolobok, when instead of threads on glue we “plant” pasta of a suitable shape, for example, as in Fig. 9.
INTERESTING: Playing theater: Cinderella
DIY kolobok craft for kindergarten
This kolobok craft is quite easy, we made it with our daughter while our son was in kindergarten (by the way, we got the idea from our son - they made such a kolobok in kindergarten and he brought it home to show us).
We will need:
- White sheet of cardboard - for the body of the bun
- Colored pencils/crayons/markers, what the child will use to color with
- Scissors
- A compass or something round so that you can draw an even circle.
How to make a kolobok craft with your own hands
- Draw a circle on a white sheet of cardboard. I drew using a small plate - I just put it on a piece of paper and traced it with a simple pencil
- Next, cut out the circle. Older children can practice cutting out a circle themselves (under the supervision of their mother, of course), while for kids their parents cut them out.
- Well, now we hand over our blank bun to the baby, give him markers/crayons/pencils and offer to paint the bun yellow
- After the bun is decorated, we draw its eyes, nose and mouth.
That's it, the DIY bun for kindergarten is ready.
How to do:
- Let's prepare a house-base for a fairy tale. To do this, take a sheet of blue paper and bend it on both sides, as shown in the photo. Bend the upper corners on both sides so that you get the shape of a house. Trim the folded corners. Cut out two small rectangles from white paper and write the name of the fairy tale on them.
- Decorate the outside of the house. Cut out windows from yellow paper. Use a felt-tip pen to draw frames on the windows. Draw patterns on the roof. Cut out two bushes from green paper. Draw and cut out the flowers. Glue green bushes under the windows of the house, and flowers on them.
- Now expand the fairy house. Let's make a house for grandparents and a forest inside. First, cut out the grass from green paper and glue it to the left side of the fairytale decoration. Fold a small rectangle of brown paper in half and cut out the shape of a house as shown in the photo. Glue the house onto the grass so that it can open.
- Uncover the grandparents' house. Draw a stove inside. Glue the table from colored paper, gluing only the side legs. Then you can “seat” your grandfather or grandmother at the table. You can decorate the house the way you want. We completed the clock and the shelf with dishes. Close the house and stick the windows and door on it.
- Now we need to make a forest for the bun to run through. Cut out bushes, grass, and Christmas trees from green paper of different shades.
- Glue the grass and bushes without applying glue to the top of these parts. This way you can put fairy tale characters in the grass and behind bushes like in pockets. Glue Christmas trees and trees, you can draw them. Cut out clouds from white paper and glue them to the sky. Cut out and glue a sun from yellow paper.
- The scenery is ready. It's time to start making fairy-tale characters. You can draw them and cut them out, that’s what we did. You can print out the necessary pictures from the Internet or cut them out from old children's magazines. This is how we turned out to be the main character of the fairy tale - Kolobok.
- Look how we drew grandpa.
- And this is what our grandmother turned out to be like.
- When Kolobok ran away from his grandparents, the first thing he met was a bunny. This is the bunny we drew and cut out.
- Then Kolobok met the wolf, sang a song to him and rolled on. Look what a wolf we got.
- After the wolf, Kolobok met a bear. Here's how to draw it.
- And of course, the cunning fox, who in the fairy tale deceived Kolobok and ate him. This is how we drew the fox.
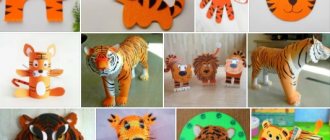
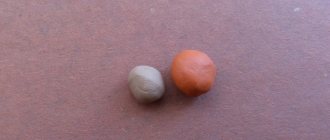
Making a bun from plasticine with your own hands
First we read the fairy tale about Kolobok. Since the kids already know all the words of the fairy tale, we read by role - Lenya speaks for the hare, bear, wolf and fox, Nastyushka says the words of Kolobok, and we all sing the song together.
After the fairy tale was read, the children wanted to sculpt all the characters from the kolobok fairy tale out of plasticine. They took out plasticine and began to sculpt and make.... When all the animals were ready (instead of the fox, we had a crocodile... red, because the children liked the mold))) well, the crocodile, well, the crocodile, he probably also loves delicious fluffy buns), we staged a real plasticine show.
To do this, I drew on a piece of paper a house, a forest and a path along which the bun rolls and meets various animals. I also cut out grandfather and grandmother, whom the children and I decorated. And this is what we got out of it...
Once upon a time there lived an old man and an old woman. So the old man says to the old woman: “Come on, old woman, scratch the box, mark the bottom, see if you can scrape some flour into a bun.”
The old woman took the wing, scraped it along the box, swept it along the bottom and scraped up two handfuls of flour. She kneaded the flour with sour cream, made a bun, fried it in oil and put it on the window to cool.
The bun lay there, lay there, took it, and then rolled - from the window to the bench, from the bench to the floor, on the floor to the door, jumped over the threshold - and into the entryway, from the entryway to the porch, from the porch to the yard, from the yard through the gate, further and further.
Kolobok is rolling along the road, and the Hare meets him:
- Kolobok, Kolobok, I will eat you! - Don’t eat me, Hare, I’ll sing you a song:
I am Kolobok, Kolobok, I am scraping the box, sweeping the bottom of the barrel, Meshon on sour cream, Yes, pryazhon in butter, Stuzhon on the window. I left my grandfather, I left my grandmother, I’ll leave you, the hare, even more so!
And he rolled down the road - only the Hare saw him!
Kolobok rolls, the Wolf meets him:
- Kolobok, Kolobok, I will eat you! - Don’t eat me, Gray Wolf, I’ll sing you a song:
I am Kolobok, Kolobok, I am scraping the box, sweeping the bottom of the barrel, Meshon on sour cream, Yes, pryazhon in butter, Stuzhon on the window. I left my grandfather, I left my grandmother, I left the hare, I’ll leave you, wolf, even more so!
And he rolled down the road - only the Wolf saw him!
Kolobok is rolling, the Bear meets him:
- Kolobok, Kolobok, I will eat you! - Where can you, clubfoot, eat me!
I am Kolobok, Kolobok, I am scraping the box, sweeping the bottom of the barrel, Meshon on sour cream, Yes, pryazhon in butter, Stuzhon on the window. I left my grandfather, I left my grandmother, I left the hare, I left the wolf, I’ll leave you, bear, even more so!
And he rolled again - only the Bear saw him!
Kolobok rolls, the Fox meets him:
- Kolobok, Kolobok, where are you going? - I'm rolling along the path. - Kolobok, Kolobok, sing me a song! Kolobok sang:
I am Kolobok, Kolobok, I am scraping the box, sweeping the bottom of the barrel, Meshon on sour cream, Yes, pryazhon in butter, Stuzhon on the window. I left my grandfather, I left my grandmother, I left the hare, I left the wolf, I left the bear, It’s easy to leave you, fox!
And Lisa says: “Oh, the song is good, but I can’t hear well.” Kolobok, Kolobok, sit on my toe and sing one more time, louder. Kolobok jumped up on the Fox's nose and sang the same song louder. And the Fox told him again: “Kolobok, Kolobok, sit on my tongue and sing for the last time.” Kolobok jumped on the Fox's tongue, and the Fox - ah! - and ate it.
DIY bun fairy tale
Let's depict the plots of different fairy tales in sculpture! And we will show how you can do this, using the example of the fairy tale “Kolobok”.
- Salty dough
- Gouache
- Toothpick
- Baking foil
- Artistic gold outline or outline for fabric.
Dough recipe: 1 tbsp. flour, 0.5 tbsp. salt, 1 tsp. PVA glue.
For the base of the chanterelle's body, crumple a foil cone to cover it with dough.
Place a ball of dough on the cone – the head. To make the fox have a sharp muzzle, we pull out the ball with our fingers. We sculpt ears.
We attach the dough sausages to the body, these will be the legs. We narrow the thicker sausage towards the end and make a fox tail, using a toothpick we will make stripes on it. You can glue strips of dough onto the fox’s paws to represent sleeves, and you can also fashion mittens.
On the chanterelle's clothes we will make a vertical decoration from a thin sausage, like on old sundresses. Having rolled out a piece of dough, cut a triangle out of it and put it on the fox’s head like a scarf.
For the base (“scene”), we flatten, but do not roll out, a piece of dough and stick it with a toothpick, as if it were uneven forest soil. We will place the dough ball on the backing next to the fox; this is a blank for our bun. You can make a nose from a tiny ball, and use a toothpick to squeeze out the cheeks and mouth.
After the craft has dried, paint the fairy tale in bright colors. By creating several such scenes, you can collect a whole collection of fairy tales!
Gingerbread man for a dacha made from scrap materials
The area around the house should be positive and give a charge of vivacity. In addition to the desired vegetation, it’s great when unusual fairy-tale characters are located on it. Looking at their smiling faces, you always want to believe that everyone around wishes us happiness.
Such figures are offered in an assortment by professional manufacturers. Their products are impeccable, beautiful, practical and bright. But many people prefer to decorate their yard with homemade crafts. Even if they are not so professional, they are made with soul, according to their own views and tastes.
The fairy-tale hero that all children become familiar with from a very early age is Kolobok - this cute character who carries an entertaining and instructive load. Thanks to the simplicity of the forms, anyone who wants to work in this direction can make such a dacha dweller.
How to make a kolobok for the garden with your own hands from scrap materials
The area around the house should be positive and give a charge of vivacity. In addition to the desired vegetation, it’s great when unusual fairy-tale characters are located on it. Looking at their smiling faces, you always want to believe that everyone around wishes us happiness.
Such figures are offered in an assortment by professional manufacturers. Their products are impeccable, beautiful, practical and bright. But many people prefer to decorate their yard with homemade crafts. Even if they are not so professional, they are made with soul, according to their own views and tastes.
The fairy-tale hero that all children become familiar with from a very early age is Kolobok - this cute character who carries an entertaining and instructive load. Thanks to the simplicity of the forms, anyone who wants to work in this direction can make such a dacha dweller.
Simple ideas
The simplest option is to paint any round object and put eyes, nose, and a smile on it. Figures 1-3 show just such models. In this case, the figurine can be supplemented with design elements: a scarf, a cap, arms and legs, curls of hair, a basket (Fig. 4, 5).
For such work, paints should be used that are intended for outdoor use, since a hero installed outdoors is susceptible to precipitation, wind, and other negative environmental factors.
Such figures can be arranged in different ways, for example, strengthening the Kolobok on a stump - fig. 7. This is convenient for playing and will protect the product from becoming limp in puddles of rain.
From a ball and twine
How to make a Kolobok from twine? Such a craft turns out to be original and creative. It doesn’t look much like Kolobok from a fairy tale, but it emphasizes the style and fits well into the country house ensemble, consisting of original wire parts. It is possible to supplement it with internal lighting and make it an element of decorative lighting.
The following master class will help with this:
The Kolobok layout is ready. Let's start decorating it. We make a cap, beret, bows or a hat from colored paper, fabric, cardboard or foam plastic (Fig. 13). We fasten with glue, preferably in several places.
We design his face, especially focusing on his kind features and expressive eyes (Fig. 14). And Kolobok, made from scrap materials, is ready to decorate any area. The twine can be any color, but a yellow tint will be more realistic, because this is exactly what a creation from dough can be.
From polyurethane foam
Another interesting way is to make a Kolobok from polyurethane foam, using a ball:
Making a kolobok for a summer house with your own hands from plaster is similar (Fig. 18-22). Working on it for the garden with our own hands, we give the figurine a piece of our soul, we try to make it kind and cheerful, as well as recognizable. We often surround ourselves with vegetation, heroes of the same or other fairy tales.
From papier-mâché
An interesting and unusual option for making a kolobok from papier-mâché (Fig. 6). The technique used here is to paste a round object with a mixture of moistened crushed egg trays and PVA glue. Applying such a layer will give the sculpture volume, heterogeneity, and visual naturalness. After the mold has dried, water-based paint, preferably white, is applied to it. As it dries, they begin to paint the Kolobok model with yellow paint (the final version).
To make facial features voluminous, the paper mixture is glued in a thicker layer at their locations. After complete drying with a knife, you can more expressively cut out dents and protrusions, fix the relief of the eyes, mouth (of course, in a smile), nose, and ears.
You can make a scarf or beret from the same material. Coloring will not be difficult.
In order for a figurine made of such material to be practical and stand intact until the end of the summer season, before painting it can be coated again with glue, drying oil or other composition to strengthen the structure during street work.
A DIY papier-mâché bun at the dacha looks original and interesting. Moreover, you can decorate it to your liking. Additional parts are made from:
Conclusion
Amateur craftsmen often resort to making figurines from plastic bottles. This is not the most suitable auxiliary material for Kolobok, but it can be used to decorate the external design of the lawn on which it stands, or the attributes with which it is decorated.
For people who want to add some originality to their plot, there is always an option to make a Kolobok for the garden. This cheerful and intelligent fairy-tale character will make children's games interesting and the surrounding area more well-groomed.
See similar master classes: How to make a Christmas tree from plastic bottles.
We recommend
Save to yourself
Options for making fairy-tale characters
An example of such entertainment would be the theater on the Kolobok table. A paper hero is quite easy to make. By cutting out templates from paper or cardboard according to the existing pattern, and then folding them along the indicated lines, we get cute and stable characters.
The second option is to make a bun and other characters from plasticine
The basis for the kolobok is a ball rolled from yellow plasticine; mouth, eyes, nose - from scrap materials. This option is advantageous in that you can similarly mold other dolls, as well as elements of the surrounding world (forest, house, etc.).
How to make a kolobok from fabric? To sew a kolobok, you need to select the material according to color and quality, and make patterns, as in the diagram.
Then connect the parts at the seams, fill the inside with compounds like foam rubber. The pattern contains triangular cutouts, which signify darts, to add volume to the figure so that the performance is real.
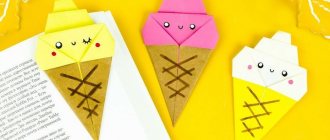
We sew finger toys. Fairy tale "Kolobok"
Every mother knows that the best toys for a baby are those that we made with our own hands with love. I want to show you how you can sew finger toys for your child.
Russian folk tale "Kolobok".
Materials for work:
- felt 20*30cm thickness 3 mm;
- green cotton fabric 22*32 cm;
- scissors, needle, thread, glue;
- felt 1 mm thick in different colors;
- decorative eyes;
- metal corners;
- elastic band 50 cm;
- yellow bead;
- interlining.
Let's draw a road for the kolobok on a piece of paper.
We cut it out of brown cotton fabric and glue it with non-woven fabric.
At the places where the road turns, we make cuts in order to tuck the fabric inward and get beautiful, neat edges. Iron and baste for convenience. Using a sewing machine, we attach the road to the green base (we don’t touch the felt backing yet).
.Cut out bushes and grass from felt. Sew to the base.
We draw character patterns (you can translate these or take any you like from the Internet).
We cut out a house from felt and sew it on, inserting an elastic band for the bun on the inside. We measure the length along the bends of the path (about 50 cm, it is better to take it with a reserve). On the places where the bun will run away from animals, we sew small circles for density (about 2 cm in diameter, so that your bun can easily fit into the slot).
We sew fairy tale characters using patterns. To make it easier to sew on the sides of the toys (if you sew on a machine and not by hand), cut out only the front part, and cut out the back after sewing, then the seams will definitely not slip. Before sewing, sew adhesive tape onto the back of each toy. Be sure to leave the bottom unstitched for the finger. Glue the eyes, nose, hair, edges of the animals.
We sew Velcro onto the places where the characters are attached. Sew a loop at the top. Glue the fence, stump, mushrooms. We sew the base with a backing made of thick felt. We cut out holes for moving the kolobok, thread an elastic band, put on the kolobok and sew it on the back of the work.
We fasten the metal corners. In order for the corners to hold better, first glue them with glue, and then clamp the fasteners on the back side with something hard (do not forget to place fabric on both sides of the corner so as not to wrinkle it). The work is ready!
This fairy tale can also be used as a picture for a child's room (there is a loop for a nail).
I hope my master class is useful to someone 
If you have any questions, I will be happy to answer them! And I will be very glad to see your works, sewn according to my master class!
From papier-mâché
An interesting and unusual option for making a kolobok from papier-mâché (Fig. 6). The technique used here is to paste a round object with a mixture of moistened crushed egg trays and PVA glue. Applying such a layer will give the sculpture volume, heterogeneity, and visual naturalness. After the mold has dried, water-based paint, preferably white, is applied to it. As it dries, they begin to paint the Kolobok model with yellow paint (the final version).
To make facial features voluminous, the paper mixture is glued in a thicker layer at their locations. After complete drying with a knife, you can more expressively cut out dents and protrusions, fix the relief of the eyes, mouth (of course, in a smile), nose, and ears.
You can make a scarf or beret from the same material. Coloring will not be difficult.
In order for a figurine made of such material to be practical and stand intact until the end of the summer season, before painting it can be coated again with glue, drying oil or other composition to strengthen the structure during street work.
A DIY papier-mâché bun at the dacha looks original and interesting. Moreover, you can decorate it to your liking. Additional parts are made from:
- fabrics;
- wires;
- foam rubber;
- wood and other materials.
INTERESTING: We make storage for toys with our own hands