Master class on making a model of the “Nizhny Novgorod Kremlin”
Kosonogova Daria Igorevna
Master class on making a model of the “Nizhny Novgorod Kremlin”
I bring to your attention a master class on the layout of the Nizhny Novgorod Kremlin, performed together with students for the Day of National Unity.
Master Class:
1. STAND:
Any surface with a dense base (cardboard box) with an area of 30x30 must be covered on one side with plasticine in green shades.
This is what the guys and I ended up with:
2. TOWERS: To make towers, you need to make blanks on a printer in the form of printed strips measuring 2x15 cm each. The sheet must be printed on both sides in 4-5 copies.
We cut each strip into two parts. We got 12 pieces, since there are 13 towers in the Nizhny Novgorod Kremlin, but the central one will be made differently. The remaining strips will go on the walls of the Kremlin.
We make round towers (9 pieces). Roll each strip into a cylinder.
We make roofs in the shape of a green cone: draw 9 even circles, draw two radii from the center of the circle to make a right triangle.
Cut out a circle and a triangle in it.
We coat the sides with glue and securely roll the cones.
We glue the bases of the towers with the roofs.
We make square towers (3 pieces) . We prepare cubes with sides 2x2 cm from plain paper.
We cover the paper cubes with blanks.
We make roofs in the shape of pyramids with a quadrangular base: To do this, I took a pattern from the Internet (a pyramid with sides of 2 cm, printed it on plain paper, and then transferred it to green cardboard.
This is how the roof turns out.
Next we glue the roofs with square towers.
Making the central tower: To do this, I took a template from the Internet in advance and printed it in 4 copies (height 4.5 cm, width 4 cm).
Next, we make a paper cube with sides 4x4 cm and glue each side with a blank.
Here are the parts you should get:
3. ASSEMBLY:
We place all the towers on the stand in the correct sequence, glue each tower to the wall, giving the desired shape to the structure.
This is what the guys and I came up with:
Master class on making a model "Village Estate" Master class on making a model "Village Estate" Description: Master class on making a model "Village Estate" maybe. Summary of a lesson on familiarization with the origins of Russian folk culture “Nizhny Novgorod Kremlin” in the preparatory group Synopsis of a lesson on familiarization with the origins of Russian folk culture in the preparatory group on the topic: “Nizhny Novgorod Kremlin”. Nizhny. Lapbook “Nizhny Novgorod Kremlin” We’ll walk around and remember all the towers of the Nizhny Novgorod Kremlin. And first, let’s lay down the truth, The number thirteen cannot be forgotten.. Master class on making the “Arctic” model Good evening, dear colleagues! In various environmental programs, prototyping is considered as an environmentally oriented form.
Source
There is no such thing as too much beauty
Women involved in needlework often create useful fabric crafts for the home. For example, some people like to make flowers from fabrics. Even whole bouquets. They sit like buds in a fabric basket.
Buds of different colors and shades, made of satin and velvet. And the basket is made of sea-green fabric, tied with a white ribbon, tied with a bow.
Or a must-have attribute for needlework: a pincushion. Some women have such a pillow made with patterns and edging at the corners. This gives the pillow an amazingly festive look.
Beauty lifts one's spirits as soon as a person sees such a creature. But an ordinary thing is a pincushion. And it turned out to be an important item in the meaning of the owner of the apartment.
Features of paper layouts
A DIY paper Kremlin helps parents develop their child’s imagination and fine motor skills, and teaches them how to work with cardboard, scissors and other tools. If you are just doing activities with children, it is enough to choose an easy-to-make craft in the form of a flashlight, flower or animal.
A do-it-yourself model of the Kremlin is made only in the following cases:
Regardless of where the Kremlin model will be used in the future, it must be assembled from paper according to the instructions.
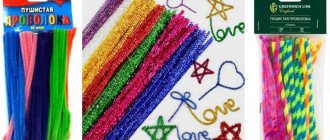
Chenille New Year
For New Year's crafts made from chenille wire, they often use one that has shiny tinsel instead of lint.
About 100 years ago, our ancestors made crafts from copper wire and thin foil. Now manufacturers have greatly simplified the task; they produce ready-made craft materials. All we have to do is tinker.
If you wish, you can completely complete the entire New Year's decor - make a Christmas tree, snowflakes, toys, garlands. It will be very unexpected and unique.
How to do
For production, you can use ready-made templates or make them yourself based on real photographs. Design of layouts occurs manually or through computer programs. The first is a simplified version, suitable for classes with children, and they themselves can draw a template for later cutting. The second option is complicated, but helps to obtain a design similar to the original.
Required materials and tools
To make an applique or voluminous paper kremlin, you need to prepare materials and tools for the work. Depending on the type of craft, you will need the following items:
Manufacturing will also require additional elements used as decoration. You may need felt-tip pens with which children can color the paper blank.
Step-by-step assembly of a three-dimensional craft with step-by-step photos
Before you start making the Kremlin, you need to study the instructions for action, as well as prepare the paper and other materials needed for the work.
Model of the Nizhny Novgorod Kremlin
First of all, you can adopt the Nizhny Novgorod Kremlin made of paper. It is simplified in implementation, but you can go the hard way and do everything efficiently and fully. You can recognize the reliable diagram - the one located on the wall of the building in Nizhny Novgorod.
The model of the Nizhny Novgorod Kremlin is presented in a simplified version. There is only a wall and towers, but the entire complex structure can be safely restored by analogy.
The presented layout is enough to print. This can be done on a black and white or color printer. Black and white print will require coloring. If you want to make a craft from cardboard, the cut-out template should be glued to it and cut out. Next, glue the parts in accordance with the existing instructions.
If you want to make the Kremlin larger, you can print out several sheets of the template provided. The blanks are cut out and connected to each other. It turns out that it is not quite an example of Nizhny Novgorod construction, but the dimensions of the craft are larger.
Moscow Kremlin
Schemes for the manufacture of Moscow buildings are proposed. There are many of them, but you should choose according to your own capabilities or according to your own and your child’s wishes.
Layouts vary. Masters in the manufacture of paper structures can make complex crafts that fully convey all the buildings.
But novice paper designers should take on the easy option. For example, making only the wall and the Spasskaya Tower.
The Moscow Kremlin made of paper is assembled from several parts. To do this, you need to print several templates at once. In the future, they are assembled into a building, which will consist of several structures in the layout. Which ones - the designer will decide on his own.
The Spasskaya Tower is assembled separately. There is also a separate template for it, which is cut and joined according to the sample.
The production of Moscow buildings always attracts craftsmen who prefer to work with paper and create the beauty of buildings. They are often made from cardboard, but thin, which bends and sticks better.
Tula Kremlin
Most craftsmen, after the Moscow Kremlin, take on the production of other similar structures. Thus, the Tula Kremlin made of paper is attracting more and more attention. Here you can also make only a wall and a tower. But it is possible to restore a full structure.
If there is a need to make a simplified version, you can take on the production of only a few structures. It is recommended to use a schematic representation of the building in Tula.
The lack of ready-made templates for assembling one of the many towers can be made up for with any similar layout.
Zaraisky Kremlin
The model in the city of Zaraysk is also popular, so there are many ready-made templates for its production. Each master should use only those examples that are within his power. For inspiration, it is recommended to use ready-made works of experienced craftsmen. Thanks to them, a novice needleworker will be able to create designs that are unrealistic for themselves.
Before you start making a model of the Zaraisk Kremlin, you need to familiarize yourself with the diagram of its structures located in reality.
To begin with, it is enough to take into work only the walls and one of the towers. Gradually they begin to manufacture the cathedrals and the Spasskaya Tower.
Applications
It is impossible to make an origami Kremlin, but you can make an applique with three-dimensional elements. These are simple templates that are easy to make yourself. It is enough just to decide on the choice in buildings. As a rule, first of all they pay attention to Moscow construction.
The application with the Moscow building is formed in the following varieties:
It is recommended to complete the crafts in accordance with the children’s imagination and their own wishes. You should not refuse the child’s opinion if he wants to do something, but cannot or does not know how to do it. He should be helped.
Cutting templates
Everyone, without exception, can create the layout of the Kremlin. It all comes down to the capabilities of the child or adult, as well as their wishes. In accordance with the presented factors, the complexity of the craft is determined.
Source
Training your hands
Kids are delighted with chenille. Crafts made from soft wire evoke pleasant tactile sensations. You can
- crush;
- twist several pieces;
- roll into balls;
- make rings;
- roll into spirals.
Attention: Before you start working on crafts made from fluffy wire, you need to bend the sharp ends so that the child does not injure his hands. Make sure that the ends are securely embedded inside the work.
The working material is easy to build up and change colors. Soft pom-poms made from threads, beads for noses and eyes, and glue may be useful. Now you can start creating animals from wire: bugs, caterpillars, bunnies and squirrels, snails, cats, dogs, Christmas trees, flowers - whatever your heart desires.
If something doesn’t work out or goes wrong, you can disband it and redo it again. The main thing is not to twist the fragile material too much, otherwise it may break.Note!
Wood burning for beginners: tips and secrets for burning pictures
- Plasticineography - interesting options for creating pictures from plasticine on cardboard for children
- DIY scrapbooking for beginners: what it is and how to do it. What you need to create a beautiful album or notebook (photo + video)
Fun Fact: Chenille is also known as a knitting yarn and patchwork technique. They have common qualities - softness, volume and fluffiness.
Model of the stone Nizhny Novgorod Kremlin for acquaintance with the Nizhny Novgorod Kremlin in the past
Marina Kuznetsova
Model of the stone Nizhny Novgorod Kremlin for acquaintance with the Nizhny Novgorod Kremlin in the past
More and more attention began to be paid to the patriotic education of children. Raising patriotism is not a simple and continuous process; much depends on the child’s environment, on what is ingrained in consciousness from childhood. Most parents do not pay enough attention to introducing their child to their hometown, traditions and cultural heritage. Therefore, the role of preschool education in instilling patriotism in children is very important, since it is at preschool age that a person’s moral qualities are formed. In our group, we are constantly adding various materials, manuals, and illustrations. We started exploring our city from the street where we live, the kindergarten and finally got to the main attraction of our city, the Nizhny Novgorod Kremlin . We looked at illustrations and pictures in books, but we wanted something that the children would always have in sight. So I decided to make a model of the towers of the Nizhny Novgorod Kremlin from the past , in stone form . After all, as we already know with the guys, the Kremlin went through three stages of construction : wooden, stone and finally brick . I took ordinary round glasses as a basis and crocheted them in a circle. Collecting it into a single “necklace” we got a model for a visual acquaintance with the Nizhny Novgorod Kremlin . Now the guys proudly answer all the guests in our group what it is!
“Without memory of the past, there is no future” On the eve of Victory Day celebrations last year, my youngest son asked me: “Mom, has anyone been in the war?” I replied that.
Lesson in the senior group “Towers of the Nizhny Novgorod Kremlin” Lesson summary Topic: “Towers of the Nizhny Novgorod Kremlin” Purpose: To generalize and clarify knowledge about the Nizhny Novgorod Kremlin. Objectives: 1. Consolidate knowledge.
Lesson on FCCM (Cuban studies) “My favorite city in the past and now” Objectives: to expand children’s ideas about the “small Motherland”. To give an idea of what the city of Anapa was like at the beginning of the 20th century and what it is like.
Notes for the lesson “Towers of the Moscow Kremlin” Notes for the lesson “Towers of the Moscow Kremlin”. Objectives of the lesson: will expand children’s understanding of the history of the Moscow Kremlin, the construction of the Kremlin;
Lesson summary “My city in the past, present, future” Lesson summary for students of the preparatory group “My city in the past, present, future.” Educational area: Social.
GCD construct “Counting and measurement in the past and today” Age group: 5–6 years. GCD form: “River of Time”. Purpose: To introduce counting and measurements in the past, to clarify knowledge about counting and measurements of the present. Track significant changes.
Literary and musical composition “With pride in the past, with care for the present, with faith in the future” Video The literary and musical composition “With pride in the past, with care for the present, with faith in the future” was presented at the regional competition.
Source
Creation sequence
A thrifty owner will not ignore such creativity - wooden crafts for the home. When you really need it, you can use simple tools to make all sorts of objects out of wood.
For example, at the dacha, dig a table under a canopy. Before you dig in, you need to build it. And before that, you need to figure out what the table will look like. And only then build and dig into the soil.
One idea leads to another. Having built a table for outdoor dining, you will need to think about benches. This also needs to be done. Later it will be the turn of the canopy from the sun and bad weather.
After all, it is also necessary. So imperceptibly, doing one thing after another, the zealous owner creates a kind of homemade gazebo. But it started from the table.
Master Class. Making the Kremlin from plasterboard.
Maria Shevchuk
Master Class. Making the Kremlin from plasterboard.
A new day has arrived and it's time to learn something new. Hello dear colleagues. Today I hasten to teach you how to make a model of the Moscow Kremlin .
To begin, select the size of the future layout and make a wooden frame.
Now cut out each wall separately (I worked with a stationery knife or chisel)
The material is quite fragile, so be careful.
Screw the plasterboard pieces to the wooden frame with self-tapping screws until you have sheathed the entire frame.
Color the Kremlin . (I painted it with regular brick-colored floor paint, white paint for the windows) Cover the corner joints with plastic corners, glue them with polymer glue, you can buy this at a hardware store. Cut three dials out of plywood, paint them, attach the hands, the numbers can be drawn with any gold outline. Attach a star from the Christmas tree to the top.
Choose a place in the kindergarten, install a layout, decorate the walls with a Kremlin wall (also made of plasterboard )
. Hang up a few photographs of the capital of our Motherland. A magnificent corner of Moscow is ready.
See you again! I wish you creative success!
Model of the Syzran Kremlin Syzran is a small city on the Volga. On September 8 we celebrate City Day. I held a series of conversations about the city, its attractions, it was organized. Design of kindergarten recreation areas part 4. Models of plasterboard buildings. Hello again! Want to see something new? I present to your attention my models of the Moscow Kremlin from plasterboard and ours.
Source
Simple options
The simplest thing is to make lead weights using a plaster or sand mold. This method has a number of undoubted advantages:
- accessibility and prevalence of material;
- lead melts at a relatively low temperature - 320°C;
- ease of manufacture.
The use of lead and gypsum when making sinkers yourself has several significant nuances:
- at a temperature of about 200°C, water begins to actively evaporate from gypsum , which leads to destruction of its structure and splitting of the product;
- Lead, when hardened, is pressed into plaster , which makes it almost impossible to remove the sinker without destroying the mold;
- a gypsum workpiece has a large number of micropores , which leads to the need to polish the finished product.
When using sand instead of gypsum, the process of preparing the mold is greatly simplified, however, the requirements for the material of the box in which the workpiece will be located when pouring lead are increased; it is advisable to use a metal support. The product itself will be somewhat less aesthetically pleasing and will require serious polishing.
Slide captions:
Old Russian cities Nizhny Novgorod Kremlin Gerasimenko Olga Borisovna MBOU Lyceum No. 87 named after. L. I. Novikova, teacher of fine arts, artistic work and drawing, higher education at the Gorky State Pedagogical Institute, 1982. specialty: teacher of general technical disciplines, drawing and labor. Work experience 29 years. highest category
Children's reports Independent work Technological maps for constructing parts of the Ivanovo Tower
Goal: Acquaintance with the towers of the Nizhny Novgorod Kremlin Make a model of the Ivanovo Tower Objectives: Formation of graphic skills. Develop design abilities. In the education of a creative, strong, viable personality.
TOPIC: “Construction of the towers of the Nizhny Novgorod Kremlin” 3 hours 5. Reading the drawing. The sequence of constructing the development of the base of the tower is 1 hour. Technological maps. Blueprints. Models of towers Combined 6. Development of the superstructure of the Ivanovo Tower (prism and pyramid) 1 hour. Educational demonstration Practical work 7. Assembling the Ivanovo Tower 1 hour. Educational demonstration Independent work
The Kremlin in children's drawings.
Making a model of the Ivanovo Tower of the Nizhny Novgorod Kremlin
4th grade students should know: 1. Geometric figures. 2. Geometric bodies. 3.Types of lines. 4. Designations of radius and diameter. 5.Names of the towers of the Nizhny Novgorod Kremlin. 6.History of the Nizhny Novgorod Kremlin. 7.Names of Nizhny Novgorod residents associated with the construction and reconstruction of the Kremlin.
Have concepts such as: 1. Sketch. 2.Drawing. 3.Linear drawing. 4.Technical drawing. 5.Sketch. 6. Product outline. 7. Development. 8.Drawing. 9.Model. 10.Layout.
There is no desire more natural than the desire for knowledge M. Montel
Drawings by fourth grade students Ivanovskaya Tower Nikolskaya Tower
Drawings by fourth grade students Ivanovskaya Tower Nikolskaya Tower
Drawings by fourth grade students Round towers
Drawings by fourth grade students Round towers
Comparison of the Moscow and Nizhny Novgorod Kremlins
4 Cut out the development of the base of the tower with scissors 5 Prepare a template for the arch using cardboard and a pencil 6 Cut out the arch template with scissors
7 Trace the template on the edges of the pyramid (one at a time) with a pencil 8 Cut out the “arches” with scissors 9 Bend the development of the base of the tower along the fold lines
Making a development (central part), calculating loopholes 1 Calculating material consumption Length - 7 cm. Height - 8 cm. ruler 2 Perform a development of the prism: mark points 7, 14, 21, 28 cm along the horizontal edge, lower the ruler and mark again points 7, 14, 21, 28 cm; connect them vertically to the 8 cm mark. 0 7 8 ruler, pencil 3 Calculation of loopholes. Retreat 2 cm vertically from the edge; move the ruler and mark another 2 cm. two points, connect a line along the entire length with a pencil, ruler
11 Cut the loopholes 0.5 cm wide with scissors 12 Bend along the fold of the marking 0.5 cm.
Development of a prism (superstructure) 1 Calculate the material consumption: the side of a regular quadrangular prism is 5 cm, height is 2 cm + 1 cm for gluing. Consumption - 21 cm by 4 cm ruler, cardboard, pencil 2 From the horizontal edge, mark points 5, 10,15, 20, 21 cm with a ruler. Lower the ruler lower and once again mark horizontal points 5, 10, 15, 20 , 21 cm. Connect the dots in pairs, draw lines 0 5 10 15 20 0 5 10 15 20 ruler, pencil
1 Make a circle with a compass 2 Place a compass needle on the line of the circle and take a “step” along the circle with the same radius, making a stroke. Move the needle of the compass to the point of intersection of the circle and the arc, making the next stroke (4 times) compass Technological map. Pyramid development.
3 Connect the resulting points with a broken line to each other and to the center of the circle (ruler, pencil) 4 Add “wings” of adhesive for the base and side of the ruler, pencil
When you like it
When a person learns to create useful crafts with his own hands, money is saved. In addition, a lot of useful items appear in the house that cannot be bought in a store or market.
Chic DIY crafts from branches: It’s difficult to surprise a modern person with anything. Millions of different stores offer billions of gift options. Very few people decide to make something with their own hands as a gift for a loved one. It's easier to buy than to waste time making a gift.
But such people still exist. Nowadays, the value of a gift made with your own hands, with love, is appreciated more and more. Not everyone is ready to do this. But still, if you are reading this article, then you are not at all against making something yourself. Whether it's a gift or a product for your own home, it's great either way.
After all, the creative process makes us forget about the bustle and everyday affairs. In addition, any creativity perfectly harmonizes the nervous system. And as everyone knows, all our ailments are caused by nervous tension.
Therefore, doing something with your own hands is not only about getting an exclusive item in your home decor, but also about acquiring excellent health. So, several options for crafts from branches to “seed” the creative spirit.
DIY crafts for the garden and vegetable garden. Wooden vase.
This craft is very easy to make; you can safely involve children who will happily take part in the project.
- empty coffee can
1. First, collect a few sticks on the street.
2. Prepare a coffee or poop can (you can use another container)
3. Trim all your sticks so they are roughly the same size. They should also be a couple of centimeters higher than the coffee can.
* Some sticks can simply be broken carefully, without the use of sharp objects.
4. Wrap the jar in dark paper and secure it with glue. This is done so that unnecessary drawings on the container are not visible.
5. Start gluing the sticks to the paper that wraps the jar. It will be easier if the sticks are more or less even. You can also make things easier for yourself by using thin sticks in places where there are large openings.
* make sure that the sticks are level on the bottom so that your vase stands firmly and does not wobble.
6. All that remains is to add decorative or real long branches and artificial flowers and the composition is ready. You can decorate your garden or home with crafts.
DIY crafts (diagrams). Garland of golden cones.
- gold spray paint
* It is advisable to clean all cones from dust and dirt before applying glue.
2. Let the glue dry a little, but don't wait too long.
3. While the glue is drying, prepare the hook screws.
*If desired, you can tint the screw with golden spray paint.
4. Take gold foil and crush it, then sprinkle small pieces of foil on the pine cones. They will stick in the place where you applied the glue.
* You can, of course, just screw in the screws with your hands, but it will be easier to use pliers if you have them. It is not necessary to try to screw the screw directly into the center of the pine cone.
After this, move from the center to the edges of the rope, gradually adding 1 cone at a time and securing it with a knot.
* It is advisable to measure the distance between the cones in advance, based on their number and the length of the thread.
DIY crafts. Decoration in a marine style.
The idea of a beach wedding sounds very romantic, and a cake decorated with a nautical theme would be perfect.
For this decoration you will need:
— 5 shells (preferably ones that can be easily tied to a string); This example used a flat shield hedgehog that was purchased from a craft store.
* It is worth noting that you can use various shells, corals and other marine-themed items that can be found in specialized stores or brought from the sea.
- suitable rope (thread)
- wooden stick (skewer)
1. Prepare wooden sticks. If necessary, treat them with a nail file or sandpaper.
2. Prepare several plastic tubes and cut them into several segments. These will serve as spaces between the shells hanging on the rope.
3. Prepare a rope. It is better to cut off a piece with a margin.
Start threading the rope through the first shell, then tie a simple knot.
Add a cut piece of straw. You can add these segments where you want to create a space. Choose the length yourself.
*You can add one more additional element if you have one. This example adds coral.
*Repeat the same pattern several times until you fill the rope.
4. Knots should be tied at the ends so that the decoration elements do not fall off.
5. Now you need to remove the tubes that you used to mark the distance between the decoration elements. Just carefully insert the scissors into the tubes and cut them.
*You can strengthen the knot by adding a little glue.
7. Insert the chopsticks into the cake at a slight angle (see picture) and you're done! Very simple and beautiful.
Progress.
• Cut and paste the layout of the chum (cone)
• draw and cut out patterns, stick (to decorate the chum)
• cut and glue poles from short strips
• you can draw or stick on a window or door
Master class “Flowers for mom made of corrugated paper” In November we celebrate one of the main and wonderful holidays - equally important for all people - Mother's Day. It is customary to give gifts on holiday. Master class for teachers “Magic flowers made of paper” Master class for teachers making three-dimensional flowers from colored paper “Magic flowers”. Prepared by: Muzalevskaya O. V. Purpose: To improve.
Master class for parents on making “Snowflakes of the 21st Century” out of paper Goal: Continue to put into practice various forms of working with parents. Event progress: Hello! Dear parents! Very nice.
Master class for parents on paper construction “Dove - Bird of Peace” In order to strengthen partnerships between parents and teachers, as well as to involve parents in creative preparatory work. Master class for parents “Paper Candles” Goal: to involve parents in joint co-creation with children, to introduce parents and children to one of the types of working with paper (origami). Master class “Postcard for Mom” made from colored paper Master class “Postcard for Mom” For children in the pre-school group Throughout the school year, the children and I implemented a project. Master class “Postcard for dad for February 23rd” made of paper On this day, all mothers, daughters, grandmothers, and indeed the entire female half of the population congratulate the male half on this celebration. That's it. Master class “Craft from colored paper “Bouquet for Mom” Master class “Craft from colored paper “Bouquet for Mom” Teacher: Gadaborsheva Elena Sergeevna. Purpose: the master class is intended. Master class “Snowdrops for Mom.” Gift made of corrugated paper Dear colleagues! With International Women's Day coming soon, I suggest making a gift from corrugated paper. I would like to invite you to the master. Master class “A paper medal for dad on February 23” Master class Topic: “Gift for dad. Medal for dad" One of the most favorite holidays of all men is February 23 - "Defender of the Fatherland Day".
Source
Below, the photo shows a simpler candlestick
It also requires thin branches, equal in length to the length of the glass. The branches can be painted or left in their original form.
But it’s still worth varnishing the pieces of wood. This will protect the branches from external influences and extend the life of your candlestick.
Carefully glue the branches to the glass using a glue gun, you can just use wood glue
Photo instructions can be seen below.
Here's what should come of it:
Let inspiration for creativity in one form or another always be with you.
After all, as Shakespeare said:
What is unrealistic for simple eyes, we will easily understand with an inspired eye in deep ecstasy...
Stationery and other materials that you may have on hand in the office are perfect for making interesting ones. You can even arrange an impromptu competition for the best homemade product between your colleagues. The main thing is that the boss does not take part in it.
Making a space shuttle from office supplies is a task that any office worker can do. The body of the future spacecraft can be an ordinary marker or a large highlighter. Two alligator clips are attached to the tail of the shuttle, which will act as wings. Now you need an engine that will propel your ship up the career ladder. Two turbines made from ballpoint pen caps, secured between the clamps and the body, are perfect for this. You can install additional devices on the ends of the wings using pieces of tape. You can modernize your starship ad infinitum, adding more and more new devices. In this case, there is no limit to perfection.
If you want to woo your colleague who has a normal sense of humor, you can make her an office decoration with your own hands. After all, a candy or a cup of tea as attention is so banal.
Keyboard buttons and paper clips make great crafts. First, you will need to find two buttons from the old keyboard (or remove them from the current one). You need to make two holes in the corner of each key. This can be done with an awl heated with matches or a lighter. Through the holes you need to pass paper clips that are curved in the form of an earring mount. Your DIY compliment is ready. Believe me, your efforts will definitely be appreciated.
Surely, at work you sometimes celebrate various events: birthdays, vacations or promotions. Champagne is one of the constant attributes of such events. The remaining metal fasteners from the corks can serve as good material for developing your own creative abilities.
You can make a beautiful chair using a champagne cork mount with your own hands without much effort. The most important thing in this matter is to imagine the end result that you want to see. The wire included in the fasteners is very flexible, so any elegant elements can be made from it. The chair must have at least three legs and a shaped back. If necessary, you can break a whole section of wire to make a fastener or pattern from the remains. This way you can make an entire furniture set for your office.
If clouds periodically gather in your office and there is a high probability of a work conflict, then it would not be a bad idea to acquire a real office weapon for self-defense.
In order to make an office crossbow you will need: two rubber bands, one clip, a pen and a CD box. The elastic bands are tied on the box, forming something like a slingshot. Then the mechanism for holding the projectile (clamp) is simply attached to them. The projectile handle is installed in the clamp - the weapon is ready. True, you shouldn’t use it for its intended purpose - you can get a real injury from getting the handle in your face. Therefore, do not aim the craft at people, but practice your accuracy at walls or a specially made target.
Now you know what you can do in your free time, which sometimes appears at work. Making crafts from office supplies will develop your creativity right in the workplace.
Sometimes you urgently need to decorate a written note with something. Schoolchildren know many ways to decorate cards using available materials. But adults who don’t really like hand-made things don’t always imagine how to quickly and beautifully transform, for example, a letter to a friend. It is this kind of elementary decor that will be discussed in this article. How to make a heart out of a paper clip without using other available materials? The answer to this question will be given below.