DIY crafts remain the most common form of creativity among children. It’s always nice to see what your child has made with his own hands, and this time we have prepared for you a wonderful selection of master classes from specialists from the site dnevnikmastera.ru.
As you already understand, today’s analysis will contain the most interesting and fascinating ideas on the penguin theme.
Penguins are quite cute and funny animals, they live in many parts of the world, but perhaps the most famous penguin lives at the South Pole - the handsome Emperor penguin.
But we’ll leave the questions of habitat to zoologists; now we’ll look at the most interesting fakes on the penguin theme.
What can you make a penguin from?
A craft or postcard with a picture of a penguin can be made from almost any materials:
- Colored paper;
- Cardboard;
- Plasticine;
- Plastic bottle;
- Clay;
- Empty cone cases
The easiest option is to find a penguin craft template, cut it out and glue it according to the instructions. You can complete the work with paints, felt-tip pens or colored paper.
Let's look at several options for beautiful crafts.
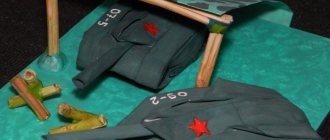
From plastic bottles
To make a toy, you need the following materials:
- Plastic bottles with a volume of 330 ml or 500 ml;
- Paints (white, black, yellow, red) and brushes;
- Primer;
- Glue, preferably rubber;
- Clear varnish.
Manufacturing procedure:
- Remove stickers from bottles.
- Cut the bottom off one bottle. On the other hand, you need to cut off the neck so that about 2/3 of the size remains.
- Lubricate the edge of one of the blanks with glue and connect them.
- Treat the workpiece with a primer mixture.
- After the primer has dried, apply white acrylic paint and wait until it dries completely.
- On one side of the blank, draw the outline of the penguin's abdomen. To make the line even, it is advisable to use a penguin craft template. It can be downloaded and printed, or cut out from children's magazines. It is better to draw the outline with a black marker.
- Paint the rest of the bottle black except for the belly. It is recommended to use black acrylic paint, but you can also use a marker.
- Draw the legs, beak and eyes of the penguin. For this work it is better to use a thin brush
At this point the craft is almost ready. To complete the look, you can add a red cap. It could even be a small piece of fabric or a cap from an air freshener can. If the color is not suitable, the part can be repainted.
Paper penguin
If you like paper penguin crafts, then check out several ways that are available for everyone who wants to have fun with their children or on their own.
You don’t need to spend a lot of money to spend your time like this. The work does not take much time, but it is captivating and promotes friendly communication.
Where to begin? From an idea!
To begin with, we’ll probably start from the simplest to the most interesting that our authors came up with.
Paper penguin
A paper penguin craft with a template will be a good start, and even an ordinary preschool child can do it. All you need are ready-made stencils that you can draw by hand or download and print from the Internet. All that remains for the child is to show his imagination.
The penguin can be painted, outlined with felt-tip pens or pencils, covered with beads on cardboard, or simply made into a three-dimensional piece of plasticine.
Tin foil penguin
Quite an interesting manufacturing option. Foil itself is quite plastic. The main thing is not to overdo it with clumping. Shape the foil and make a summer head from one solid piece. The shape will be similar to a bowling pin.
Then everything is simple, you can quietly “add” its legs and wings with its beak to our penguin. The thread will not be noticeable under the foil, and the structure will stick much better than any glue or tape.
After that, you just need to paint over the penguin. Gouache paint, acrylic, or better yet, nail polish are perfect for these purposes. This way, the work will have a pleasant shine when it dries.
You can add beads along with sparkles as eyes, then the penguin will be an excellent gift for mom or a fake for school/kindergarten.
In the same way, you can form a penguin from plasticine.
Fabric penguin
Oddly enough, you can use a black sock, preferably a new one, so that it has the appearance 
To get started, you need to “stuff” it like a plush toy, but don’t sew it up! First, work on sewing the parts. Give the penguin wings and a beak.
By the way, this idea will be an excellent hand toy for a puppet theater, and knitted penguin mittens will be an excellent warm decoration during winter. But let's return to our toy. Once you have finished arranging the patches, stuff the penguin with material and tie it at the base. Make sure the toy is tight and tuck the remaining “neck” of the sock like a stand.
That's it, the toy is ready!
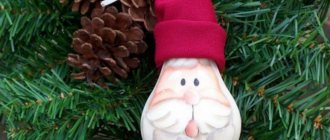
Penguins for Easter
Tired of standard eggs or want to make something original? A fake egg shell will be used. To do this, you can make a fake, both on a finished egg and on an empty one.
The white base can be colored over with a black permanent marker, but you don't need anything else! The egg itself seems to follow the shape of our penguin.
Such penguins can be strung on a string and made an interesting decoration for the kitchen, or displayed as an exhibition of the cold pole, where shell penguins will live.
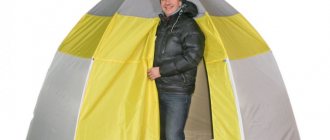
Penguin from a bottle
Crafting a penguin from a plastic bottle will be a rather interesting option for creativity. Ideally, we will need a black bottle. No need to cut anything! We will only color our bottle. Of course, you can still add wings to it, but adults will better help with this.
To do this, you need to make several holes with a needle in the place designated for the wing and sew on a piece of fabric with a skip stitch through one hole. The top of the neck of the bottle can serve as a hat, in the manner of the character from the cartoon “Chili-Willy”. Just draw or glue on the eyes and beak.
Agree, making a penguin from a plastic bottle with your own hands looks quite interesting and leaves a lot of room for creativity. Most crafters use bottles to make wonderful pencil cases in the shape of penguins.
To do this you need two bottles, a zipper with a working dog, a needle and thread, and nail polish.
To make such a penguin, cut off the top of the bottle, where the neck begins. Our blanks should look like a cylinder. After this, make holes in a row on each of the blanks with a hot needle, or punch holes with a needle manually. (Remember safety precautions!)
This must be done in advance in order to facilitate the “firmware” of the zipper. Next, separate the zipper strips and sew it into the workpiece. It is enough to paint the finished cylindrical pencil case. Make eyes for your penguin using good nail polish or stick on eye stickers. That's all! The original pencil case for kindergarten or school is ready!
Penguin case for Chupa Chups
Surely many children are madly in love with sweets on a stick, but it often happens that sometimes there is nowhere to put a half-eaten candy, but now this problem will bypass you, since you will always have a case for a candy on a stick with you. As you already understand, a Kinder case will be used. All you need to do is paint it and make a hole in the base for the stick.
By the way, this way you can draw not only penguins, but also other favorite cartoon characters or animals: Mickey Mouse, parrots, minions, cars, princesses.
We hope this short review was interesting. We suggest looking at the photo below for more interesting ideas.
Making a penguin
- Draw an even circle on a black sheet. You can use a compass or a regular plate, turning it upside down. Place the plate on the sheet and simply trace it in a circle.
- Cut out the resulting shape with scissors. Then we divide the circle in half and divide it into two semicircle figures.
- From white paper we cut out 2 even small circles for the eyes. The pupils can be drawn with a felt-tip pen.
- The penguin's chest is white, so we take another piece of white sheet and draw a template on it: a rectangle with a rounded shape on one side. The white “apron” should not be larger than the black circle and slightly smaller in height.
- Cut out a small triangle from orange paper. The beak can be yellow, red or pink - depending on the mood.
- Wings for the penguin can be cut out from the remaining semicircle or take another sheet.
Important: Because The prepared template turns out to be even - two identical halves of the circle. Then you can make two birds at once.
Assembling a penguin from a template.
- We roll the black semicircle into a bag - a cone, so that the cut flat side serves as a support for the future toy. Glue the paper together.
- On the resulting “cap” we glue the prepared template of the breast, eyes and beak. Glue the wings along the edges of the cone.
Now you know how to make a penguin with your own hands.
Bottle craft option
For those who like DIY crafts, bottle penguins will appeal.
Perhaps these wonderful birds will decorate a child's bedroom or dining area. Craft material:
- 2 identical plastic bottles;
- Scotch;
- Scissors;
- Glue;
- Paints;
- Doll clothes, woolen threads, pompoms (optional)
A fun penguin craft from a bottle can be organized even at a children's party.
We recommend reading:
Craft bullfinch: detailed description of how to make a bird with your own hands (115 photos)Crafts from vegetables: 100 photos of the best crafts for children and a review of recipes for adults
- Craft ship: 120 photos, templates, drawings and step-by-step instructions on how to make a boat
This activity develops imagination and lifts your spirits. The description gives instructions on how to make one little penguin.
From fabric
It is more difficult to make a fabric toy, so this idea is not suitable for the little ones. Although it will certainly be interesting for the child to create such a little penguin together with his mother.
A plastic bottle will again be used as the base of the toy.
Before making a penguin craft, you need to prepare the following materials:
- Small bottles;
- Glue;
- Marker;
- Fabric, it is better to use felt;
- Scissors;
- Decorative hat with a pompom (can be knitted or taken from another toy).
Manufacturing procedure:
- Cut off the bottom from one bottle and the neck from the other.
- Apply glue to the edges and insert the pieces one into the other.
- Trace the abdomen with a marker.
- Make blanks for all elements of the bird’s body. For convenience, you should draw or download ready-made templates.
- Glue two black felt semicircles to the bottles so that they do not extend beyond the outline of the abdomen, but completely cover the torso.
- It is best to attach with a glue gun; other glues can dissolve the fabric.
- Cut out the wings from black material and also glue them to the workpiece.
- Cut out a cap from red material and glue it on top of the base.
- Eyes can be made from suitable buttons.
At this point the craft is ready. Unlike all previous options, this toy is not only cute, but also pleasant to the touch due to the softness of the fabric.
For additional decoration, the craft can be sprinkled with glitter. But if you chose a fabric other than felt, it’s better not to use glitter, they won’t stick.
We sculpt from plasticine
Another masterpiece of a plasticine penguin craft will delight little artists with great possibilities.
First of all, these birds can be made in different sizes and colors. Secondly, plasticine penguins are bright and flexible. Thirdly, this is an excellent time for the whole family.
What do you need for sculpting?
You will need plasticine, a divider (plastic knife) and a craft board.
Don't forget to be in a good mood. Maybe you can invite your friends for this game and create a whole flock of funny penguins.
How to sculpt a penguin from plasticine
Prepare plasticine for modeling. You need 2 black buns of different diameters. More for the body and less for the head.
- Flatten the white plasticine and make a thin cake. It will be needed to indicate the breast.
- Orange triangle for beak
- The smallest “pancakes” are the eyes.
- Don't forget the wings. They will be 2 flattened sausages made of black plasticine.
- The hardest thing for a child is to make eyes for a penguin. It is best to press white plasticine directly into the black bun, rather than sculpting small buns separately. Glue black pupils on top of the white eyes - the eyes are ready.
- Between the eyes we designate a beak made of yellow, red or orange plasticine.
Now we have a head.
Take a larger bun and slightly stretch it to indicate the body.
Next we try on a white flattened “apron” on black plasticine.
Now you can connect the head and torso.
All that remains is to attach the wings. If you want to complement the picture, attach the penguin's paws to match the color of its beak.
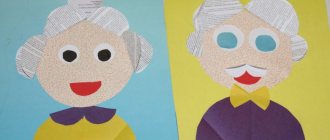
Plasticine applications with penguins
You can easily prepare such crafts for exhibitions at school or kindergarten, or you can simply organize creative activities with your child.
For work we will need:
- Plasticine.
- Knife for working with plasticine.
- Base board for applique.
- Several cardboard boxes of different sizes.
Step-by-step instruction:
- Prepare the body base. To do this, connect two boxes: the larger one will be the basis for the body. The smaller box will serve as the head. It is very convenient to put a layer of black plasticine on top of the boxes.
- Now let's take care of the breast of our bird. Roll up a rope of white material and then flatten it on the board. Now let's cut out the rectangle shape using a knife. Attach the apron to the body.
- Making the eyes: prepare circles of white material, on top of which we attach black circles for the pupils.
- We also cut off the beak using a knife and attach it to the face of our penguin.
- We do the same with the paws.
- The penguin is ready, but our goal is to create an application. Therefore, we add two or three more birds to the base-stand. We create funny hats for them from plasticine. You can make a picture for the applique on the site with figures of other animals or birds.
Photos of penguin crafts
0