I've been wanting to get into wood carving for a long time, using both hand tools and power tools. This DIY wooden piggy bank is made from layers of chipboard that have been cut, glued, processed and shaped into the little pig you see in the photo.
Approximate final size: 280 x 150 x 150 mm, with a roomy belly so that all the money can fit in!
Turtle
You can make a turtle like this - cut off the bottom part of the bottle. Make a slot in the bottom for money. From thick cardboard, you can use corrugated cardboard, cut out a turtle figurine with a head, legs and tail. Draw eyes, mouth, and paws on this basis.
Then glue the cut-off bottom part of a plastic bottle to this figure using a glue gun. If the bottle is green, then this may be enough - Tortilla, the keeper of money, is ready.
If the color of the base is white, then you can glue squares or diamonds made of colored paper onto it.
Additional work tips
The following factors must be taken into account during operation.
- Laser engraving can be used without creating printing forms, cliches and matrices. Accordingly, there is no need to purchase additional equipment or involve more people in processing.
Most operations can be easily performed at home. Just like the preparation of the drawings itself. Cutting them won't be difficult.
This saves time spent on pre-press processing. The production process is accelerated, the productivity of any installation becomes better.
- Laser technologies are known for not requiring the use of large quantities of materials.
Without the laser itself, engraving cannot be performed. The installation is powered by regular electricity. One laser should be enough for approximately 20 thousand hours of continuous operation. Intensive use of one device can last up to 7 years. Even if cutting is carried out constantly.
- One operator is quite capable of servicing the installation. The main requirement is the ability to work with graphics programs.
- Products can be manufactured in both small and single batches. For the design of drawings and their direct production, working files are created in a special program.
- The result of any work is obtaining durable images that are resistant to any external factors. The drawing can be saved for future use.
Knitted piggy banks
Piggy banks decorated with knitting look very unusual. For them, it’s easy to take a plastic jar and simply tie it around it like a stocking. Tie the ears, paws and attach them to the “body”.
To make the legs stable, they can be strengthened from the inside with cardboard or egg cells. Small buttons on a loop will serve as eyes. Here is a photo of such a homemade piggy bank.
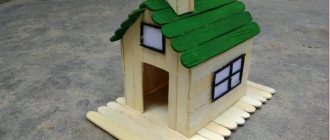
Tree
Making a piggy bank from wood is not so easy. This requires a special tool and the ability to handle it. For such a craft, you can take a piece of a thick branch with one or several small branches.
A disk about 1 centimeter thick is sawn off from the thick part. In the remaining part, the middle is drilled with a special tool, but not all the way through.
A hole is made at the opposite end for coins. A plug is screwed to the cut disk using a screw so that it fits tightly into the hole in the main part.
You can glue colored paper leaves onto the branches. Then coat all parts with acrylic varnish. The “Money Tree” is ready.
Tin
This piggy bank is very suitable for saving for something specific. Because you have to open it with a can opener to get the money. To make it, you will need a canning lid, a tin can that fits the lid, and a machine for sealing the lids.
A hole is made in the lid. It is better to process the edges of the hole with a file or sandpaper to avoid injury. Then we put the lid on the jar and roll it up with a machine, as is done when canning. Now the jar can be painted and wrapped in colored paper.
Cardboard pig
You can make a pig out of cardboard in just ten minutes. The method with a prefabricated template is ideal for those who do not have time left.
Making a pig out of cardboard:
- pink or brown cardboard;
- Printer;
- pencil;
- scissors;
- glue.
You can use any open source model. The template is printed on a printer on a plain piece of paper. After this, you should transfer it to the cardboard itself.
Next, all parts of the obstruction are carefully cut out and glued together.
If you don’t make a mistake in your calculations and number all the parts in advance, even a child can assemble the structure in a short time.
Piglet
To depict a pig, you need to cover the bottle with pink paper and glue on ears made of the same paper. It is fashionable to draw eyes or use small buttons.
The spot will be a traffic jam. You can make legs from the same corks. A woolen thread or a piece of rope painted pink is suitable as a ponytail.
Note!
DIY medical mask: TOP-140 photos of the best DIY options. Instructions for making a mask at home
Cold porcelain: features and methods of making it at home. Reviews of the best recipes + 120 photos
Cake decorating: TOP-170 photos of the best ideas for decorating a cake at home + instructions for beginners with simple patterns
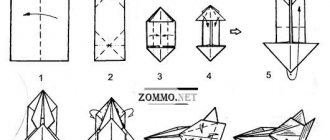
Paper piggy
By the way, using the origami technique you can make not only airplanes and cranes, but also funny pink pigs.
To do this, you only need thick paper and the desire of the master. How to make a paper pig:
- You can save time and use a ready-made proposed collection scheme.
- It is advisable to choose thick paper, but cardboard will not work.
- You can make it out of white, after the piggy is completely assembled - paint it and decorate it with beads.
Today, a huge number of techniques are used; you can even make a cute pig from a banknote. This symbol brought good wealth to the owner.