If you need a wooden mallet, but you only have a basic set of tools, this article is just for you. All you need is a saw, a clamp, some wood glue and sandpaper. If you have a miter saw, drill, and router, that's great because they can come in handy when finishing, but they're not absolutely necessary. Ready? Then go ahead!
Wooden mallet: necessary materials
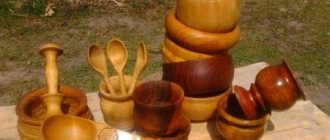
Mallets are usually made from hardwood, but you can use whatever you like. Wood of contrasting colors will look beautiful. We will use meranti and white oak.
Since our mallet will be made according to the “sandwich” principle, all wooden elements must be the same thickness. In our case it is 20 mm, but 25 or 30 mm will do if you prefer.
- handle: 320×35 mm (and 20 mm thick) made of oak;
- firing pin: 500×70×20 mm;
- dowels (optional): 2 elements with a diameter of 9 mm and a length of 70 mm.
ATTENTION!!!
If you want to learn more about wood crafts and the tools used for this, be sure to check out the material at this link.
How to make a mallet with your own hands - step-by-step diagram
Step 1: Prepare the handle
It is best to use hard wood for the handle, such as oak or beech. Birch or walnut will also work. If it is possible to turn it on a lathe, then do this to obtain a round shape that is comfortable for the hand. In addition, this way you can make a protrusion in the middle of the handle so that there is a stop for the layers of skin. If you don’t have a lathe, you can wind several layers of rope for support.
Step 2: Preparing the Skin
You need to cut many round pieces of the leather of the same size. To begin, make one layout and mark the required amount on a piece of material for it - depending on the size of the working part itself, you will need from 50 to 70 of these circles. In addition, the thickness of the skin plays a role - the thicker it is, the fewer layers will be needed.
Step 3: String the Layers
Make a hole in each layer so you can thread the leather onto the handle. We connect each layer with subsequent PVA wood glue, trying to press the layers together as tightly as possible. When all layers are strung and coated with glue, clamp the tool in a vice or clamps until the glue dries completely.
Step 4: Attach the washer
To prevent the leather layers from falling off in the future, you need to attach a large washer - metal or wood - to the upper end of the handle.
To do this, drill a hole in the handle itself, apply a washer and screw the bolt tightly. Of course, try to choose the optimal size for your handle so that it does not crack. That's all! The leather will not shatter into small chips during operation; impacts actually stick to this material and do not create as much noise as when working with a conventional wooden tool. Of course, it makes sense to tinker with such a tool when you constantly work with chisels and have already changed more than a dozen mallets, but for infrequent use, an ordinary wooden hammer mallet is quite suitable!
We connect the elements of the mallet together
Make sure that all elements have a smooth and even surface at the junction points. Place one of the wide pieces for the striker on a small piece of wood (this is necessary so that the clamp does not leave marks on the face of the striker). All other parts of the mallet will be attached to this element.
Place the handle on it strictly in the center and at a right angle using a ruler. Once you find the desired position, secure it with a clamp. Make notes with a pencil in case the clip comes off (but try not to let that happen).
Apply a thick layer of wood glue to the inner surface of the element on one side of the handle. Glue a short striker element to it, remembering to ensure that all corners are right. The edge will stick out, but that's okay - we'll cut it off later. Secure this part securely with a clamp. Remove excess glue with a rag.
Now detach the handle, apply glue to it and glue it in place. You can make the handle stick out from the firing pin. We'll make sure it's flush. Make sure that all angles are right and the handle is exactly in the middle.
Take the second short element of the striker and do the same with it as with the first. Make sure that all elements are at the same level at the top and bottom, and that the handle fits snugly against them.
Let the glue dry, leaving the product for 24 hours. Check that the inner surface is smooth and level. Use sandpaper if necessary. Glue the second long element of the striker and secure it with a clamp. Be sure to reuse a piece of scrap wood to avoid damaging the front surface.
Rubber mallet – both convenient and safe!
Even such a simple tool as a mallet has many different incarnations, of which the most popular are wooden and rubber products of various shapes. The main purpose of the mallet is to be the “engine” of chisels in the process of cutting parts. This happens as follows: in one hand the master holds a chisel, applying it to the point of the desired cut, and in the other hand he holds a mallet, with which he hits the end of the chisel handle, giving it the force necessary for cutting. The lightness of the material allows you to avoid severe hand injuries and is gentle on the instrument itself.
There are two types of mallet in shape - a lathe mallet, which is turned from a single piece of wood, resembling a pin or a small bat, and a hammer mallet, which is shaped like a sledgehammer, but is made entirely of wood. The advantage of the first is its convenience, because whatever point of the mallet you hit will be correct, which significantly reduces the load on the hand. A mallet-hammer allows you to deliver stronger, more concentrated blows, although you should be very confident in holding the tool in your hands and monitoring the position of the head in relation to the chisel.
Therefore, the former are still more popular, although it will not be possible to make such a tool without a special workbench.
Step you can skip
We will also cut the dowels into the head of our mallet. They do not perform any function other than decorative. When it comes to wood, glue provides a stronger connection than dowels, so they won’t make a difference. But they look beautiful! Drill holes through the striker, apply glue to the dowels and cut them into the striker. After the glue has dried, cut them flush.
Description and characteristics
The characteristics relate to the shape, weight of the instrument, and its individual qualities. For example, a mallet can be made with a wooden or steel handle. The first option is lighter, the second is stronger. As for the material used to make the striker itself, it can be made of wood, fluoroplastic and hard rubber.
When a tree is selected for production, hardwoods such as birch, oak and others must be taken into account. Hard rubber has elastic properties, which wood does not have. Upon impact, it deforms slightly, distributing excess energy and protecting the material from destruction.
Fluoroplastic has the same elastic properties, but is less susceptible to aggressive environments. This allows you to use the tool for work anywhere. In particular, such a rubber mallet will be stored in a garage or damp conditions without destruction for many years.
We figured out the firing pin material. Now let's talk about its shape. Often there is a tool with a round striker, with which it is convenient to perform straightening work, as well as lay paving stones and tiles. A product with a rectangular shape, on the contrary, is intended for rough work.
Rubber mallet
For example, roofers use it in their work, bending metal products. Square and rectangular shapes are often used where chiselling is needed, in conjunction with a chisel. The force is the same as with a sledgehammer or hammer, but you won’t break your hand on the soft striker.
The shape of the striker can be either solid or cone-shaped. This does not affect performance at all, it only makes the process more convenient, for example, when working in a hard-to-reach place. Another characteristic is weight. Weight implies the impact force with which the force will be transmitted during operation.
Mallets can be divided into light, medium and heavy, where the weight of the former ranges from 400 to 550 grams, for medium ones from 600 to 900, and everything that is larger is classified as heavy varieties. It is visually difficult to understand which weight grading tool we are dealing with.
This is due to the fact that the weight is determined by the density of the rubber used, the type of wood, and the type of handle. There are mallets on sale with a hollow striker, so they appear large in appearance, but weigh very little. The same goes for the handle, the wooden one weighs less, the steel one weighs more.
Plastic mallet
The length of the handle differs. The larger the handle, the more force you can perform the job. That is, the principle of working with a mallet is the same as with a hammer or sledgehammer. There are no universal tools, there are only those that are most often purchased and are suitable for most types of work. This is a plastic mallet with a weight of 450 grams and a handle length of about 300 mm.
We give the mallet striker the required angle
The angle of the striker should be such that its surface is approximately parallel to your hand when you hold the mallet in it. You can choose the angle that is convenient for you or simply make 4 degrees, as in our article. You can use a miter saw, but a hand saw will also work. The main thing is to make marks in advance and cut carefully. If you don't have a protractor, just find and print out any protractor online, then use it as a stencil.
Rules for selection and operation
The choice of the necessary tool is influenced not only by the type of planned work, but also by the properties of the working surface and the parameters of the desired result. The most popular is a wooden instrument, which has the following characteristics:
- different wood in the handle and striker;
- absence of mechanical damage and burrs on the wooden surface;
- the presence of a protective coating of drying oil.
When choosing a rubber tool, you must rely on the following characteristics:
- weight;
- handle size;
- material of manufacture;
- striker diameter.
A tool that is heavy and has a long handle is capable of striking with greater force, which requires greater physical effort from the master and contributes to fatigue.
Experienced craftsmen recommend paying attention to modern models of instruments that are made of fiberglass. This material is not only highly durable and not affected by solvents, but also has a long service life while maintaining its original shape and properties.
For thin and delicate types of work, you should opt for mallets with a small head, which has a small force and impact area.
To perform work on light-colored surfaces, craftsmen advise purchasing mallets with white rubber boots. The black rubber work surface leaves streaks that are difficult to remove and can ruin the appearance of the structure. The principle and technology of using a mallet is the same as when working with a simple hammer, but before applying the first blow, you must know the properties of the material and its strength. The first contact of the tool with the working surface should have a low amplitude, which can subsequently be increased.
Working with tiles involves using light blows with a rubber tool on the protruding areas
Particular attention should be paid to working in the corners of the product, where cracks and chips may appear. Experts recommend purchasing goods only in specialized stores that have quality certificates and all permitting documents
A quality product must comply with the established GOST 19645.
Bringing the surface of the mallet to perfection
Sand the mallet with sandpaper. Admire the work done. If you have a router, you can create smooth curves on the handle at the grip area. If you don't have a router, you can simply sand the edges. You can also make a curve at the end of the handle. Overall, give your piece the look you want.
How to make a mallet out of wood - as easy as shelling pears!
To do this, you don’t even need a drawing of a mallet - it’s very simple! Find three fairly large pieces of maple or birch that are the same thickness. It is not recommended to take harder types of wood, except for handles, since they split from constant impacts. Adjust all the scraps to the same thickness - 2-3 cm. Take one of the bars, attach a pen to it and trace its outline. Then cut the block with a band saw or bow saw so that the resulting two pieces fit tightly to the handle. It is important that the handle and these two trims have the same thickness, equal to the thickness of the two wide bars of the striker.
We glue all the bars and the handle with wood glue, clamp it with clamps and leave it for at least 12 hours. When everything is glued, mark the rounded profile of the striker and the bevels of the sidewalls and trim off the excess. Sand it thoroughly with sandpaper and coat the wood with drying oil. It will take you a total of two days to make such a tool, of which only a few hours will be devoted to direct labor.
- Author: Mikhail Malofeev
Rate this article:
- 5
- 4
- 3
- 2
- 1
(1 vote, average: 5 out of 5)
Share with your friends!
Treating the surface
Mix beeswax and mineral oil and treat the item. Our homemade mallet is ready! Now you have a convenient and beautiful handmade tool. Try it out at work!
The most interesting ideas are in your inbox! Subscribe to our newsletter so you don't miss the best solutions. Just enter your email in the form below)
Expensive hand tools
M 11045 Jonnesway 47814 (0.52 kg)
The homeland of the brand and the country of origin are the same - Taiwan. The series includes special hammers with a hollow head, which contains steel shot in a certain quantity inside. The shot continues to move forward even when the tool stops, and then it suddenly slows down due to the presence of an obstacle. In this case, the hammer does not bounce. The mallet itself is made of steel, covered with synthetic rubber of special density. Thanks to this coating, the surface is completely protected from damage. Product length – 28.6 cm, weight – 493 g, striker shape – round.
The average price is 1630 rubles.
M 11045 Jonnesway 47814 (0.52 kg) Advantages:
- reliability;
- indestructibility;
- functionality;
- practicality;
- ease of use;
- price-quality ratio.
Flaws:
not installed.
M 11055 Jonnesway 47815, 1.05 kg
A quality product from Taiwan. It is distinguished by a hollow striking part in which steel shot is filled. Used for a variety of manipulations where adjustment or alignment is necessary. The steel handle is covered with thick rubber, which makes the tool more comfortable to use. Head diameter (round) – 55mm.
The average cost is 2310 rubles.
M 11055 Jonnesway 47815, 1.05 kg Advantages:
- multifunctional;
- practical;
- solid;
- comfortable;
- durable;
- reliable.
Flaws:
significant cost.
Hans 5702 – 16, 470 g
Brand and country of origin: Taiwan. The product turned out to be reliable and of high quality. Professional builders have no complaints about it. The hammer is made of polyurethane. There is no recoil. Its light weight allows you to work with it for quite a long time. At the same time, a person does not feel tired, and his hands do not hurt. Round rubber striker.
Hans 5702 – 16, 470 g Advantages:
- multifunctional;
- practical;
- long service life;
- universal;
- positive reviews.
Flaws:
not identified.
Bison Expert, 700 g
Russian brand, but the country of origin is China. The hammer belongs to the category of multifunctional tools. Manufactured for professional use. Suitable for installing plastic windows. Meets all GOST requirements. Impact element - rubber, diameter 30 mm, weight - 0.315 kg, handle made of ash.
Retailers are asking 1,096 rubles for the product.
Bison Expert, 700 g Advantages:
- warranty period – one year;
- comfortable;
- functional;
- solid;
- qualitative;
- reliable.
Flaws:
none.
Rubber hammer, black and white, 450 g, 81968472
The impact head is rubber. Suitable for processing tiles, wood and laminate. Widely used in roofing and sheet metal work, laying both floor and paving tiles, and for car repairs. Operates in conjunction with a chisel and chisel. High-quality fits parts when assembling furniture, without damaging or deforming them. Leaves the paint layer intact. The weight of the structure is 450 g, the head is 6 cm wide. Handle length is 260 mm.
The average price is 888 rubles.
Rubber hammer, black and white, 450 g, 81968472 Advantages:
- long service life;
- versatility;
- quality factor;
- practicality;
- functionality;
- does not harm the material.
Flaws:
none.
Mallet with fiberglass handle 82356519, 225 g
The model is widely used during assembly and installation work, when laying curb, paving, wall and floor tiles, paving stones. It can be used to process sheet metal. The handle is ergonomic, two-component, 250 mm long. Made from red fiberglass. Has rubber inserts that prevent your hands from slipping. The ellipsoidal cross-section on the handle improves the comfort of holding, allows you to accurately strike while regulating the force. Equipped with a rubber head weighing 225 g and a diameter of 5.1 cm, a width of 7.9 cm. The striker is black. Despite being made in China, the product is quite reliable and durable.
The average cost is 1005 rubles.
Mallet with fiberglass handle 82356519, 225 g Advantages:
- used for processing painted material;
- quality factor;
- versatility;
- ease of use;
- ergonomic handle;
- functionality.
Flaws:
the black head may leave marks on a light background.
Which mallet should you choose?
For most carpentry work, you should use a mallet with a wooden head.
In this case, the dimensions and weight are selected individually. Particular attention should be paid to the wood itself.
As already mentioned, it should be a heavy and sticky breed.
It’s good if the striker and handle are made of different wood, which will reduce the impact on your hands.
An external inspection will help you avoid troubles in the form of poorly processed surfaces of both the handle and the head itself.
In addition, the drying oil coating will protect the instrument from drying out.
As for the rubber tool, it is considered more universal, and the selection criteria are as follows:
- Weight. Obviously, as this indicator increases, the impact force also increases. But there is one caveat: a fairly heavy tool requires more impact force from the worker, which will lead to rapid fatigue. Weight is determined by experience, personal feelings and depending on the work ahead.
- Length – selected based on the preferences of the person who will work with the tool. A long handle will provide a stronger blow.
- Handle. In addition to wooden and plastic options, attention should also be paid to fiberglass handles. They are highly durable, do not dry out and do not lose their original shape over time. In addition, fiberglass is resistant to organic solvents.
- Striker size. For rough work, a tool with a large impact head is selected, while delicate tasks require small strikers.
If the tool store does not have a mallet that can satisfy any special preferences of the master, you can assemble it with your own hands according to individual sizes.
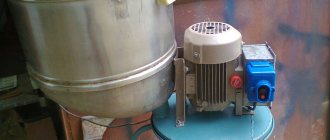
Hammer made from Gazelle rubber cushion
Large rubber hammers are actively used when laying paving slabs and compacting them into sand. A truly high-quality product is expensive, but you can also make it yourself. You need to prepare:
- bolt 7-10 cm with nut and washers;
- wooden handle;
- suspension for "Gazelle";
- drill with a thin and thick drill;
- screwdriver;
- key.
In the suspension, 2 through holes are drilled crosswise in the center (one for the handle, the second for the fastening bolt), and the first is made smaller than the second. Insert the handle so that its thin part protrudes 3 cm. Using a drill, make a hole in the wood for attaching to the hammer, using ready-made holes in the spring itself. The handle is connected to the main part of the tool with a bolt and nut, under which a washer is placed. A washer is also placed under the bolt head.
Hammers made from scrap materials last a long time and work no less well than their store-bought “brothers.” They do not crack or fall apart, especially when treated with care and used for their intended purpose.
Source
Website about DIY inventions
Buying tips
To choose the right quality wooden hammer, you should carefully read the following tips from experienced craftsmen:
- if you have a large amount of carpentry work to do, then choose a tool with a wooden striker;
- pay attention to what kind of wood the head is made of, since the striking surface must be made of dense viscous wood (birch, oak, beech, maple, pear);
- ideally, the hammer and the handle of the mallet should be made from different types of wood, which will significantly reduce the impact of the impact during operation;
- carefully inspect the appearance of the hammer, do not buy a wooden tool with a poorly processed surface;
- give preference to mallets with linseed oil coating.
Price
The price of a mallet depends on what type of product you choose. For example, a fiberglass mallet has proven itself in construction conditions. It can be supplied with a black or white striker, which does not affect the operating properties. For example, a FIT weighing 250 grams will cost 300 rubles. It is inexpensive, and the tool is suitable for straightening work.
A wooden or plastic mallet for paving stones should weigh more. At the same time, it will cost about 500 rubles and more. For example, the Matrix mallet, weighing 680 grams, has proven itself well. We are talking about the Matrix 11172 model, which costs about 600 rubles.
Mallet Bison price 550 rubles
A reliable metal handle, as well as a large and heavy buoy, provides the necessary impact force on the paving stones. It has the ability to absorb shock, which distributes excess force on the tool and maintains the integrity of the paving stones, preventing them from cracking. The bison mallet is represented by different modifications of the instrument. These are products made of wood, plastic, rubber, metal and other options.
Carpentry tool: mallet
A mallet is the same as a carpenter's hammer or sledgehammer. It is used in manual processing of wood or stone to advance chisels and chisels - in the so-called “percussion technique”. In one hand, the master holds the chisel suspended, moving it across the material, and with the other hand he holds the mallet, hitting the handle of the chisel with it. Mallets are used when working on hardwood or when large amounts of material need to be removed. The mallet consists of a handle and a striker - the part with which the chisel handle is struck.
Varieties
Mallets come in several types, depending on several parameters. It is difficult to say which mallet is better, since each master has his own criteria, and besides, the presence of different types of mallets allows the master to choose a mallet that is suitable for him in terms of physical parameters. — Material: mallets are made of hardwood, polyurethane, rubber.
— Size: mallets come in different sizes, small ones are used for more delicate work, large ones for rough work. — Weight: mallets come in different weights, from very light (hundreds of grams) to very heavy (kilograms). Moreover, a small mallet is not necessarily light - they are often made additionally heavier, for example, by pouring lead into the center of the striker.
— The shape of the striker can be round or rectangular, wide or narrow.
Origin of the term
The term comes from the word “cue” - stick, club. In dialects of the Russian language, as well as in Slavic languages, there are several words derived from the word “cue” and denoting a hammer. The word “mallet” is related to the words “cue”, “kiyak” (“weight” in Bulgarian)
Translation into English
Mallet - Mallet. Rubber mallet - Rubber Mallet. Wooden mallet - Wooden Mallet.
Features of use
Not all chisels can be hit with a mallet. Chisels, as a rule, should be large and preferably with a ferrule at the end, which protects the handle from cracking under the influence of the mallet. Chisels should be designed to work in the impact technique; the blade and blade of the chisel should not be thin (otherwise they will simply break under a strong blow). Typically, mallets are used when working on hardwood, when the wood is difficult to process and requires a lot of effort, in large sculptures, when you need to quickly get rid of a large amount of material. The advantage of polyurethane mallets is their heaviness (relative to ordinary, non-weighted wooden mallets), and there is no knocking or noise like from wooden ones, at the same time, when working with wooden mallets, the blow is more clear. The head of a wooden mallet should be made of hard wood to last longer, but be about the same hardness as a wooden chisel handle, since a mallet head that is too hard will destroy a softer handle.
Mallets in which the striker and handle are made from different pieces of wood, and the layers of wood in the striker itself are perpendicular to the handle, are much better than mallets made by turning from a single solid, since the striking surface of the striker of such a wooden hammer will be the end side of the block, and not the side, which significantly increases the durability of the tool. It is convenient if the shape of the mallet handle is not round, but ellipsoidal, almost rectangular in cross-section, with rounded corners, thanks to which the mallet fits comfortably in the hand; moreover, the carver feels and knows the plane of the impact directions, which increases the accuracy of the movement. It’s good if the striker and handle are made of different types of wood, then the impact on the hand is softer.
Mallets in the Tatyanka store catalog >>
Kinds
Simple types of mallets
- Wooden mallet (used for assembling, dismantling, molding various materials and structures)
- Rubber mallet with a wooden or metal handle (used for working with pressure-sensitive materials)
- Inertia-free hammer (used for assembling furniture)
Special mallets
A carpenter's mallet is a mallet used for chiselling work performed with a chisel and chisel, as well as for knocking out cutters when setting up planing tools.
The wide sides of the mallet striker are made flat and parallel to each other, one of the narrow side strikers is straight, the opposite one is somewhat rounded with a smooth arc, and the end sides are sawn in relation to the axis of the handle, not parallel to it, but at an angle of 6-7°.
A metalworker's mallet (or tinsmith's) is used for straightening sheet metal, as well as for folding various sheet metal products. It differs from a carpenter's mallet in the simpler shape of both the striker and the handle: the striker is made of a rectangular shape, and the handle is round, slightly narrowed on one side. A cut is made in the narrow part into which a wedge is inserted.
A turning mallet is used for the same purpose as a metalworking (tin) mallet, but differs from it in the manufacturing method: both the striker and the handle of the former are turned on a lathe.
Types and scope of their application
Most often, wooden hammers are used by those who engage in carpentry along with a chisel and a chisel, since their handles contain a crimp ring. Wooden mallets come in several types.
- Carpentry. They have flat, voluminous sides. The striker of these hammers is flat on one side with a smooth striking surface, and rounded on the other. The ends are cut at an angle of 6–7 degrees to the axis of the handle and are not parallel to it. The handle is attached in front of the striker, where the rounded edge is located. These tools are used for chisel or chisel work to knock out cutters.
- Metalworking or tinsmithing. These hammers have a rectangular head. The rounded handle has a slight taper on one side. In this part, a cut is made and a wedge is inserted. These mallets are used for processing metal sheets, for straightening and folding.
- Lathes. All parts of such a wooden hammer are made on a lathe. It is recommended for the same work as a plumber's mallet.
Secrets of proper use
The principle of working with a mallet is not much different from using a regular hammer. But this matter has its own secrets for its correct use, namely:
- if you have little experience with this tool, then start with simple tapping and carefully evaluate the result;
- an important condition for the high-quality use of a mallet is the contact of the tool’s striker along its entire length with the material being processed; if this rule is not followed, dents will remain on the metal;
- if you have to level sheet metal with a slight thickness, then be sure to use a wooden backing, because it will equalize the excess effort;
- when using a mallet with a chisel and a chisel together, strike with precisely calculated force, otherwise a lot of excess material will be cut off;
- When laying tiles, do not hit the corners with force; use only light taps to level the surface.