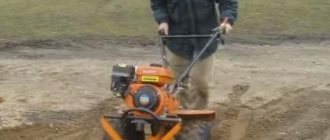
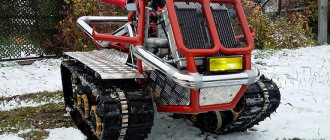
Transporting various construction materials, bags of potatoes and grain - all these are familiar and everyday tasks for a rural resident, with which a caterpillar mini tractor can help him.
However, purchasing a new mini tractor in a specialized store can cost quite a significant amount, which may put you off somewhat from such an idea. In this case, the optimal solution would be to construct a mini tractor on tracks with your own hands, using available tools and materials.
This will not only help you save your money, but will also become a fun activity for a real owner and man.
Application of a caterpillar mini tractor
The use of a caterpillar mini-tractor, as well as the mini-tractor Uralets, Kubota, Bulat 120, Yanmar, Belarus 132n, Scout on your farm significantly expands the owner’s capabilities in terms of carrying out a certain type of work.
In addition, if a fastening is provided on such a unit, then additional equipment can be attached to it, which will further expand this list of works. In general, the following types of work can be carried out using a caterpillar mini tractor:
- loosening land holdings, as well as digging beds;
- fertilizing the soil by spraying various additives into the soil;
- harvesting and lawn care;
- cleaning up various garbage;
- clearing the area of snow;
- transportation of various goods, etc.
As we can see, with the help of this unit it is possible to carry out almost all work typical for rural areas and beyond.
It would also be incorrect to say that this unit can only be used in agriculture - the use of a caterpillar mini tractor in construction completely refutes this.
For more information about a homemade caterpillar tractor, watch the video:
How to make it yourself
A homemade caterpillar mini tractor is a structure consisting of various working units. Each such unit is manufactured separately, therefore, consideration of the mini tractor will consist of a description of its components.
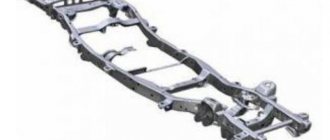
Frame
This part is decisive, because the stability of the entire structure will depend on its strength, since the rest of the components are attached to the frame. To make the frame we will need a welding machine, a pair of traverses and two spars.
The design of the homemade unit contains a spar consisting of several stages - the outer parts consist of a channel, and the inner parts are made of a square pipe.
Farm owners are increasingly resorting to purchasing special technical devices - grain crushers, with the help of which they can process raw materials, thus preparing feed for food on their own. By clicking on the link, you will learn how to make a grain crusher with your own hands from a washing machine.
To facilitate labor and increase productivity, various types of manual cultivators have been created for cultivating soil in the country. With a hand-held cultivator for your garden, your work will become quick and easy.
Recently, small-sized agricultural machinery has become very popular, allowing them to do the same work as their “big brothers”, but at the same time they cost an order of magnitude less. Here is all about the advantages of a mini grain harvester.
In this case, the front traverse will be smaller in size than the rear one, i.e. If a No. 12 channel is used for the front part, then a No. 16 channel is needed for the rear part.
Engine
Choosing the right engine is no less important than manufacturing the frame structure. In principle, almost any motor that meets the power and torque requirements is suitable for this purpose.
The optimal solution would be to use a diesel unit, the power of which should be at least 12 hp.
It is desirable that such an engine be water cooled. It is important to understand that this is an acceptable minimum at which the mini tractor will work, but not show good performance.
Therefore, it is best to use a more powerful engine.
The drawing clearly shows the specifics of the design of the motor gearbox, which is necessary for the independent production of a mini tractor.
Gearbox diagram
Engine gearbox diagram
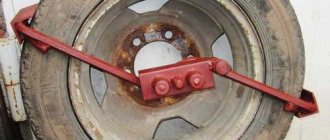
Bridge
For these purposes, a bridge taken from old domestic cars that have served their useful life may be perfect. For example, you can use the rear axle taken from the Volga GAZ-21. The only thing is that it will have to be adjusted a little, grinding down to a width of 80 cm.
In addition, you need to remove the rivets located on the fixation stockings.
Bridge shortening drawing
The shortening of the bridge can be seen in the drawing:
Drawing 1
As for the front axle, it can be made following the drawing:
Drawing 2
If you do not have ready-made caterpillars, you can make them yourself. To do this, we need four wheels and two tires from the wheels of a large vehicle.
The size of the wheels must be selected in such a way that they correspond to the dimensions of the entire structure, so it is difficult to give exact dimensions, because the dimensions of the frame are different for everyone.
The tire needs to be cut off from the sides and then put on the wheels located on the axles.
Related Mechanisms
It is clear that the functionality of the future mini tractor on tracks will depend on the gearbox, as well as the clutch unit. For these purposes, a gearbox taken from a GAZ-53 is perfect, and the clutch can be “borrowed” from a GAZ-52.
Clutch from GAZ 52
In general, the order of construction work will contain the following algorithm of sequential actions:
- Manufacturing a frame structure from channels by welding. Mounting the support rollers on it, as well as the wheels from the trolley, which will set the unit in motion.
- Installation of the engine and gearbox.
- Mounting the differential and on-board brakes, followed by connecting them to the gearbox.
- Attaching the driver's seat as well as the steering.
- Tensioning tracks onto wheels.
- At the end of the assembly, you need to check the reliability of all fasteners, as well as the functionality of the unit itself.
A homemade mini tracked tractor with your own hands, the drawings of which can be easily found on the Internet, is a rather inconspicuous and simple design.
However, beauty in this matter has absolutely no meaning, because the main task of such units is to perform a whole range of works that cannot be handled manually.
And a homemade mini tractor can handle this with a bang, if, of course, all the work is done correctly, in compliance with the dimensions and certain recommendations.
Build process
Principle of operation
Homemade units are usually combined according to a certain algorithm. It is important to follow this, since some spare parts will have to be adjusted to fit other parts. Without an established assembly order, this will be difficult to accomplish.
Components for minitraktoa Sprocket blank Drive sprockets are ready Frame with tracks assembled Bottom view - installation of tracks Engine installation Side view Front view
The design sequence in practice looks like this:
- Assembling frame elements into a single structure. Installation of drive wheels and road wheels.
- Installing the motor and connecting it to the gearbox.
- Placement of brake units and differential element. Mechanical connection of these elements with the gearbox.
- Design of the control unit and equipment of the driver's seat.
- Assembly and installation of tracks, as well as additional auxiliary elements.
- Checking the operating condition of units and systems of the unit. If necessary, modify them.
- Running in the tractor.
If we consider the operating principle of a homemade mechanism, we can easily establish that it is not much different from its mass-produced counterparts. In a word, all the main functions are performed as in conventional tractors on tracks. There is only one difference - a simplified deployment system.
The operating principle of the homemade mechanism looks like this:
- The motor transmits torque to the gearbox.
- The torque is supplied to the differential system, where it is distributed to the axle shaft.
- The wheels begin the propulsion process, which is transmitted to the tracks. The tractor starts moving in the given direction.
- The turning function is that one axle shaft is braked, and all the torque is transferred to the other axle shaft. Due to braking, one track begins to move around the other braked chassis. This is how the unit rotates.
Assembly Tips
- Before you begin assembling the tracked unit, you must first create drawings of the main and additional components, containing accurate calculations.
- Before starting work, you need to make sure that the welding machine, electric drill with all attachments and grinder are in working order.
- Assembly must be done with great care. All bolts and nuts must be tightened with reliable sensitivity. Each weld seam must be carefully cleaned.
When assembling, you should remember that the tractor you are creating will become a reliable and indispensable assistant in solving many household issues.
Please rate the article!
[Total: 0 Average rating: 0]
Advantages and disadvantages
In general, a home-made tracked mini tractor is, in essence, a smaller copy of its “big brother” - a tracked tractor. Accordingly, it will have similar advantages and disadvantages as its larger counterpart.
Main advantages:
- higher traction rates than wheeled counterparts;
- sufficient smoothness even in the most difficult areas of the territory;
- caterpillar analogues do not deform the soil so much during their movement;
- high cross-country ability, many times greater than that of the same wheeled mini tractors.
- Manufacturing a homemade unit can significantly save money.
The disadvantages include the following:
- relatively low speed compared to wheeled mini tractors;
- high fuel consumption;
- inability to move on asphalt;
- tracked mini tractors are quite noisy when performing work.
Additional Tips
Making a homemade caterpillar mini tractor is a rather complex process, so it is a good idea to follow certain tips that will help with assembly.
Among the main recommendations are:
- At the initial stage, even before assembling the unit, it is best to reflect the future mini tractor on paper by making a detailed drawing indicating the exact parameters and dimensions.
- You need to make sure that you have the necessary tools - an angle grinder, a welding machine, a drill, etc.
- When assembling a caterpillar mini tractor, you need to carefully tighten all fastening connections. Although the design looks rather cumbersome, it requires a certain amount of frugality, because assembling it yourself is a rather specific process.
DIY mini tractor assembly
Step-by-step production
The process of making a homemade mini tractor on caterpillar tracks is not complicated. Often craftsmen make it based on an old walk-behind tractor by installing a special adapter. There are also designs whose components are completely assembled with your own hands.
Before starting work, you should prepare the necessary materials and tools, calculate the traction force, dimensions, use them to draw up a kinematic diagram of the unit and design drawings.
To improve theoretical skills and knowledge in engineering mechanics, experts recommend reading technical literature, using the Internet, and reading the operating manual for welding equipment.
The performance indicators of a homemade caterpillar mini tractor differ little from factory models, the costs of their creation are minimal, especially in cases of using ready-made components, hydraulic connectors and adapters from faulty equipment.
The set of mechanisms, materials and necessary tools is as follows:
- welding machine;
- consumables - electrodes, wire, gas, oxygen;
- electric drill with drills;
- wrenches and screwdriver;
- Bulgarian;
- discs for cutting metal;
- fasteners;
- rolled metal for the frame;
- lubricants;
- primer and paint.
Working units are made separately and assembled. When assembling, the drawings of each part must be checked against the manufactured mechanisms.
Frame and cab
The stability of the entire structure depends on the strength and rigidity of the frame, because All mechanisms and components are installed on the base.
The frame is a welded base consisting of transverse cross members and longitudinal spars. Professionals make 3-stage spars and weld them from sections of lightweight steel channel No. 10. The front traverses are made from channels No. 12, the rear ones - No. 16.
To increase stability, 5 mm gussets made of “troika” steel are installed at the inner corners of the front axle brackets. 8 mm steel plates are attached to the side members at the front, securing the structure to the rear axle and the hitch bracket, and steel running boards are welded to the sides. 15 M12 mounting holes are drilled on the frame at the location where parts and assemblies are installed according to the drawings, and the possibility of mounting the engine and seat is provided.
2 welded bushings made of 20 mm St3 are mounted in the front traverse, and a steering column bracket made of steel strip with a cross-section of 8x70 mm is installed in the rear cross-beam.
Then the road wheels and wheelsets are attached to the base.
If desired, a homemade tracked vehicle can be made with a stainless steel body, which will protect the driver and machine mechanisms from dirt and external mechanical factors.
Engine and electrical equipment
For a mini tractor, an engine is selected that meets the requirements for power and torque. A diesel 4-cylinder power unit of at least 12 liters is most suitable. With. with water cooling. To increase technical performance, you can use a more powerful motor.
Electrical equipment is connected according to the electrical diagram. The battery is built under the seat of the car in a special box. Headlights, side lights, and brake lights are optional and are installed to the extent possible and if desired by the technician.
Chassis and brakes
The movers are installed on both sides of the frame. The tractor frame is connected to the road wheels using a suspension that transmits gravity and ensures a smooth ride when turning and driving on uneven surfaces. The role of rollers is played by wheels that can be removed from a garden cart; tires with deep tread are suitable instead of tracks.
The module can be equipped with disc brakes, while the car is equipped with 2 axles; the presence of clutches and planetary gears is optional. Experts also install band brakes on tractors. They are distinguished by their simplicity and excellent compatibility with all mechanisms.