5/5 — (1 vote)
Good day!
I think that it is customary for everyone to give flowers. It’s both convenient and beautiful, and what a magical aroma they give off. Many people prefer to make such gifts for every holiday, and some for any occasion. There is nothing wrong. Our children in schools and kindergartens make them from scrap materials. They decorate postcards or other souvenirs. The most popular today are roses, second place... Guess for yourself? Tulips, so, I propose to make them from paper today.
And if you have the time and desire, then of course you can grow them in your garden. But, since this process is labor-intensive, and you won’t be able to cut them at any time of the year, so let’s look at the crafts with me.
This is a fun activity, especially if you have children, they will be absolutely delighted and will help you create such colorful flowers. Or they will bring you such gifts on March 8, or your birthday. Tulips are often made for veterans on May 9 or February 23.
In any case, such masterpieces do not leave anyone unnoticed, because such paper flowers are stored for a very long time and can please the eye for many years.
Tree of happiness
The idea of artificial dwarf trees with a spherical crown - topiaries - came to us from Europe. "Topiary" translated from Greek means "tree of happiness." Therefore, roses will be very appropriate in the decor of this installation.
Read also: Field of Mars in St. Petersburg
For the craft you will need a foam ball (it can be replaced with a newspaper blank), pink or red, white or lemon-colored napkins, a paper towel roll for the barrel, a flower pot, and plaster for pouring. Satin ribbons and beads - to decorate the composition.
Varieties of artificial tulips
Schemes for making tulips with your own hands vary depending on what material is supposed to be used. Artificial flowers in needlework can be created from:
- paper (from regular sheet to corrugated);
- fabrics (including tapes and foamiran);
- plastic;
- beads
The last two types of materials are somewhat more expensive in terms of spending time and money on purchasing the necessary components.
In addition, to make a tulip using such techniques, you will first need to “train your hand” by creating smaller products.
Master class Making tulips from napkins and plastic spoons
The master class will be of interest to teachers and parents in working with children (with the help of an adult).
the craft can become an elegant interior decoration or a wonderful holiday gift.
colored paper napkins, plastic spoons, green corrugated paper, PVA glue, superglue, scissors, thread.
Take a red napkin and cut it in half. Next, place a spoon into the resulting square of the napkin so that all the corners of the square meet at the base of the spoon.
Plastic tulips
Tulips made from plastic spoons are perfect for decorating flower beds at dachas.
You will need:
- Five red plastic spoons;
- Green cocktail straw;
- "Nippers";
- Glue gun;
- Plastic bottle (green);
- Yellow disposable plate;
- Soldering iron.
Having prepared all the materials, you can proceed directly to work:
- The handles of red spoons are cut off;
- The remaining parts of the spoons are soldered one by one into a tulip bud;
- A leaf is cut out of a green bottle. It is then attached to the cocktail tube with a soldering iron;
- The stem and leaf are connected to the bud;
- Thin short strips of stamens, about five pieces, are cut out of yellow plastic plates and glued to the middle of the bud.
Carnation
Another beautiful option for making a flower from a napkin is a bright carnation, for which a rich red color is suitable. Additionally, stock up on wire or thin tape, which will be useful during the work process.
The process of creating crafts from a napkin is also simple:
1. Make a paper accordion, fold the paper in layers;
2. We pull the accordion in the center with our own hands using a rope or wire, forming a bow;
3. Carefully lift each edge of the accordion, forming a semicircular bud, the structure of which will be similar to a carnation;
Yellow roses
Such lush flowers made from paper napkins can be made with your own hands without much difficulty. To simplify the work, you can watch a special training video or study a detailed diagram with the step-by-step production of lush roses.
In this case, you will need thread and napkins: yellow and green for the stem. We unfold the yellow napkin and carefully divide it into 2 parts, each of which we wrap around a pen or pencil.
Leave 2 cm in reserve and compress it towards the center. We remove the roll and form a bud from it. We twist the remaining sheets, pressing them tightly with our fingers. We wrap the bud in a green napkin and tie it with thread so that it does not fall apart.
Simple tulip made from paper napkin
Making a flower from a napkin is very easy. It is best to use red or pink material.
Take a napkin, unfold it completely and tear it in half into two rectangles. We twist the upper part of one of them into a thin tube. Turn the rectangle over to the other side and roll it into another tube. This time its diameter should be approximately 2 cm.
We pinch a place with our fingers about three centimeters from the top edge of the resulting part and begin to twist the tight tube down. In the middle of the part we form a sheet, and under it we continue to twist the tube to the very bottom.
Applique Tulips
Make a beautiful bouquet of tulips; they can be glued to cardboard or an openwork napkin.
You need:
- Fold the rectangular sheet in half and cut out the tulip, use the templates to do this.
- Four pieces are fastened with a stapler.
- An openwork napkin will be useful to us; we need to cut out a triangle, fold it in half and smooth it along the bend lines.
- At the end, the finished flowers are glued to an openwork napkin, another card is made out and decorated with ribbon.
Magic topiary for the interior
To make an original decorative element you will need:
Napkins of the desired color. By the way, if necessary, the tree crown can be painted. Plastic ball for the base. If you don't have a ball, use a round piece of foam or make one out of papier-mâché. Another method is shown in the photo - we cut out 3 hearts from the box, glue them together and get a ready-made base for a heart-shaped topiary!
Corrugated paper, which I often use to pack bouquets, or burlap.
Plaster, glue, scissors, stapler.
There are no difficulties or catches in the process itself.
From spoons
It's no secret that plastic is stronger than paper. It is used to create crafts. Below you will find out what you will need and how to make such a craft.
You will need:
- Disposable spoons, why use these because they resemble the shape of petals,
- Wire,
- Paint and glue.
Process of creation:
- Decorate the spoons
- Using yellow felt, cut out rectangles from it, make a cut at the edge
- Roll into a roll and secure with tape
- Glue to spoon
- Fold the flowers and wrap them with threads
- Cut leaves out of paper and tape them around a spoon.
You can make them into a bouquet, or arrange them into a vase, as you wish, the main thing is not the place of decoration, but the pastime itself in the creative process.
This article does not cover all options. Handmade gifts will always be appreciated; what is important is the desire to make such a gift and the creative process itself, which gives a good mood and a positive attitude for the next days.
How to make tulips from napkins
- Gift for May 9 - DIY carnations A wonderful craft in the form of beautiful carnations can be made from an old disk and paper napkins. Many people will like this gift for Victory Day.
- Panel “Flowers of Summer” We paint all the parts prepared for the panel separately in a golden color and randomly glue them with “Titanium” onto a frame painted to match. We fasten it on the back side around the perimeter using self-tapping screws.
- DIY metal roses The technology for making metal jewelry is not complicated. You just need to master the skills of a carver, riveter, chaser, solderer, tinker and other, other skills. But don't be alarmed. Main
Crafts from napkins for interior decoration (photo)
Crafts made from napkins can also serve as an excellent decor for any festive event. Decorating a wall with ordinary paper napkins and creating a cheerful atmosphere is not difficult even for beginners in this matter. For this we need:
- Napkins;
- Scissors;
- Stapler;
- PVA glue;
- Fishing line or thread.
Popular articles How to learn to save electricity?
Making decor from napkins
- We take napkins in the desired color scheme. It is better to combine several colors, so the festive decor will turn out more elegant.
- We unfold the folded napkin completely and from this position we begin to fold it into an accordion. You need to fold it so that each new bend coincides with the previous one; the width of the folded bend (strip) should be approximately 2-3 cm.
- After the entire napkin has been folded, it needs to be thoroughly ironed with your hand on both sides so that each wrinkle is clearly defined.
- Carefully fold the napkin in half along the marked center. In total we will need three such accordions, so we are making two more.
- Next, take scissors and round the edge of the folded napkin. We try to do this so that the edges of the accordion do not move and the cut is even. You can cut napkins in different variations so that the finished products differ from each other.
- Taking the edges of the napkin, we bring the upper and lower parts together to form a semicircle, fix it with a stapler or PVA glue. We proceed in a similar way with each accordion.
- All that remains is to glue all our blanks together. As a result, we should get a corrugated circle resembling a flower.
- Finished products are hung on a thread or glued to the wall with double-sided tape.
You can make crafts from napkins with your own hands in various ways, but we have brought you the most popular and simple ones that anyone can handle.
Probably, many parents had to take part in the design of children's parties. Anyone who has set a children's table knows that this does not require expensive cutlery and dishes. The main thing is to do it original and beautiful. The more colors, the better. Therefore, candy flowers can be offered as bright elements in setting a children's table. How to make a candy bowl out of a napkin?
They are made using the origami technique, but don’t be alarmed, it’s simple and doesn’t require much patience or perseverance!
The step-by-step process of creating such a table decor is shown in this master class.
To make a bright flower we will prepare:
- serving napkin measuring 33x33 cm;
- glass (to give shape to our craft).
The first step is to completely unfold the paper napkin.
After this, bend one of the corners to the center.
We need to do this with all the corners of our napkin.
Now again you need to bend the corners of the resulting square workpiece.
We repeat this action with all four corners.
Finally, you need to perform the same action again.
Once again we have turned all the corners. Our workpiece was noticeably smaller, but remained square in shape.
Let's turn it over to the other side.
At the final stage you need to bend the corners.
As a result, the preparation of the future flower took on the following form.
For further work we will need a glass. Let's place it upside down.
Place the blank of our candy bowl at the bottom of the glass.
Let's begin to carefully bend the corners down.
After this we will bend the other corners.
So gradually you need to bend down all the existing corners.
Remove the blank from the glass. Our flower-shaped candy bowl made from a serving napkin is ready.
All that remains is to fill it with sweets.
We think that children will be delighted with such a bright and tasty festive table setting.
A bouquet of sweets is a wonderful gift; it is a real surprise that will always be unique. It can be given as a gift for a birthday, March 8, or any other holiday. Today I want to suggest making a bouquet of candies using colored paper napkins. This method is very fast and requires minimal costs. To create one flower we will need: - 2 or more paper napkins (the more napkins, the more magnificent the flower); - candies (it is better to use small candies); - one wooden skewer; - corrugated paper green; - scissors; - tape or thread; - file or wrapping paper; - stapler; - pen or pencil; - glue (pencil glue or PVA).
Nothing is impossible for a creative person. He is able to make a craft with his own hands from just about anything. There are enough ideas for such needlework. The main thing is to choose a material that you like. Models made from napkins turn out to be very original. What can be done, how to work with napkins, where to use such a craft - this will be discussed in the article.
Working with a flower stem and assembling a tulip
It is best to take small, oblong-shaped candies for tulips in quantities equal to the number of future flowers. It will be easier to make a flower with them. But if you don’t have others, you can try making it with a round shape and from truffle. So, step No. 2 of our master class is to create a flower stem. Let's get started?
Do you want to give your mom a bouquet of flowers that will never wither? Then try making them from corrugated paper. You can make beautiful tulips in a short time, thanks to the step-by-step instructions with photos from this article. With your own hands you can create real masterpieces from the simplest materials.
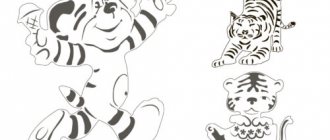
Flower templates for paper cutting
And in this part of our conversation we will present you flower templates for cutting out of paper. Shapes and sizes of flowers for every taste - from the most delicate color of an apple tree to bright blue cornflower and fiery red poppy.
A few more templates will diversify your flower gallery. Large paper flowers for decorating a room with your own hands: templates and diagrams
Paper flowers are a win-win option when decorating any room.
Pay attention to a short but very detailed master class on making voluminous paper flowers. An applique of such a “pink heart” will decorate gift wrapping or a greeting card
Crepe paper flowers are the most beautiful trend this season. These giant paper roses can be formed into a chic bouquet, or you can decorate the hall of a restaurant, cafe or your own apartment with them.
It’s not difficult to make a flower with your own hands from paper, especially if you have instructions and a manufacturing diagram. Beautiful roses can be made from simple paper templates.
Popular flowers such as carnations can be easily made from a regular napkin. These delicate flowers will certainly not wither soon.
Scrapbooking is another popular form of creativity for both children and adults. From special colored paper you need to cut out simple flowers for cute bouquets or decoration.
Easy ideas for scrapbooking - try cutting roses, leaves and petals from special sheets of paper. And then glue everything onto the card along with bows and decorative embellishments.
Making flowers can captivate you so much that you won’t notice how you transfer your hobbies to other materials, for example, fabric. Such cute flowers can make an extraordinary garland or a delicate flower basket.
Unique full size flowers will decorate your holiday.
The workshop for making life-size flowers will greatly diversify your creative life. Purchase a special frame from the store on which a flower of extraordinary beauty will be attached.
Sakura made of paper, like other spring flowers, will give you a gentle and warm mood.
Try making this flower using the origami technique.
Or cut from a template.
Volumetric paper tulip - collecting materials
Any instruction on how to make a paper tulip with your own hands step by step begins with recommendations on materials that will be useful in your work. The list is simple and very short:
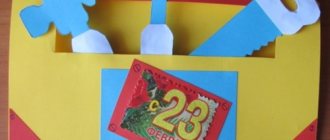
DIY Tulip postcard
This card will be a wonderful original gift for example on Teacher's Day.
Necessary materials:
- paper
- scissors
- pencil
- wire
- glue
- stationery knife
- ribbon
- tulip pattern
First you need to print or draw a paper tulip template
Transfer the template onto colored paper
Fold the template along the dotted lines
You can write a congratulation inside the flower. Apply glue to the back of the tulip and glue the wire pre-wrapped with colored paper.
We cut out the petals from the remaining paper and glue them together so that the stem runs through the middle.
Make holes on the top of the tulip that will open.
Thread a ribbon through them to tie it.
A schoolchild can do this simple craft even without the help of adults, but the result is very interesting and not expensive.
You learned how to make a tulip from colored paper, but there are also many options for appliquing tulips from colored paper.
Templates:
Then it's just up to your imagination. Cut out templates from colored paper and glue them onto beautiful sheets of postcards. There are no rules in creating tulip appliqués from colored paper, only creative skills and the desire to make a bright and beautiful craft.
Beautiful peony rose made from napkins
For work, choose thicker napkins; they hold their shape better, and the folds at the folds remain clearer. You will need five napkins for one rose. If you want to increase its volume, use cuttings of different sizes, and not five, but, say, 7-10. You can also alternate material of different shades. For example, white as the main one and any other as the accent color.
Trim the edges as shown in the photo. Fold each napkin into an accordion and tie it in the middle using regular strong thread. Trim the ends slightly to make them textured and uneven, imitating the torn petals of a peony.
After this, straighten the inflorescence-petals, just do not smooth it, let the lines at the folds remain clear.
Also, at your discretion, you can glue a ring made of the same material into which a table napkin or cutlery is threaded onto the back side of the finished peony. In addition, a finished decoration of this kind will perfectly complement the appearance of candlesticks, decorate the stems of glasses, and so on.
How to fold it beautifully?
When working with thin paper napkins, it is important not only to choose the ideal material, but also to learn how to work with it as carefully as possible
Animal figures
Elegant crafts in the form of animals will decorate any table. And if you make them together with your child, you can get not only a beautiful decorative item, but also a pleasant evening with your family.
The Japanese art of origami teaches how to create complex compositions from paper. You can roll the fabric in the form of a dog or crane figurine, or you can make a frog that will even be able to jump. But such crafts are far from the simplest, so you need to start with something easier.
For example, by creating your own origami from napkins in the shape of a swan. This table decoration looks very graceful, but is not as difficult to do as it seems at first glance.
First of all, you need to carefully fold the napkin diagonally and run your hand along the fold line, smoothing it. The edges of the napkin need to be lifted and pulled towards this fold in the same way as they do when folding an airplane. Then you need to turn the craft over and repeat the same thing, only on the other side.
The resulting workpiece is folded across. The corners should touch. Now you need to bend the narrow part upward, making a swan's head out of it. The neck will turn out if you fold the figure lengthwise. The last stage is the formation of the wings, which need to be pulled out and carefully straightened.
Flower and fruit compositions
Flower arrangements look no less beautiful. You can create amazing plants and flowers from paper.
At the same time, creating such a miracle takes much less time than creating an exquisite swan:
Rose. One of the simplest flowers is a pink bud. It is made from a napkin folded in half. It is then bent into a neat triangle, which is then rolled into a neat roll. This must be repeated several times until the pink bud becomes very small. Then you need to take out small leaves, while trying to act so as not to damage the rose bud.
New Year decorations
The most obvious option for decorating a New Year's table is a Christmas tree made from napkins. To create such a craft, you only need green napkins and a step-by-step explanation.
There are several ways to make a Christmas tree out of paper. For beginners, the simplest of them is suitable.
To create a simple Christmas tree, you first need to fold the square in half twice. The edges need to be carefully folded so that there is some free space between the layers. After this, the napkin must be turned over and its edges folded into the center to again form a neat triangle. The result is a neat Christmas tree, which in itself will serve as an excellent table decoration.
Volumetric flower
We will need:
- napkins for the colors themselves, choose the colors yourself + green;
- green corrugated paper;
- glue;
- straws or skewers;
- scissors;
- tourniquet or thread.
We lay out one napkin and wind it onto a tube or skewer from one edge, not reaching the end about five centimeters.
Squeeze it from both sides into the middle and remove it from the tube.
We twist the two sides into a petal, using the remaining five centimeters of free edge.
One rose requires 5-7 petals. We lay them in a spiral and secure them with threads at the end. We insert skewers wrapped in a green napkin or corrugated paper into the base of the bud, and also fasten it with thread.
The lower part of the rose must also be covered with a piece of green paper. Use glue.
We cut out the leaves from a napkin or corrugated paper and attach them to the stem with glue.
You can just leave a few flowers and put them in a vase. Or you can leave a more lush bouquet of more flowers, wrap it in wrapping paper and tie it with ribbon.
You need to prepare:
- napkins;
- wooden skewers;
- glue stick;
- scissors;
- glue gun.
Fold the napkin in half. Unfold and fold two sides to the fold line.
Then fold the strip in half. At one end we fold the napkin into a triangle at a right angle, then begin to twist it.
After a few turns, fold it again at a right angle. In this case, the joint must be coated with glue. And so on until the end of the strip. Don't forget to slightly bend the edges of the petals outward.
Insert a skewer into the base of the flower and drop hot glue onto its tip. Then you need to wrap a strip of green napkin around the base of the bud and the skewer. Use a glue stick to join.
Cut out a 4 by 6 cm rectangle from a green napkin. Using a skewer, twist it from the edges diagonally to the center.
We collect and curl the wide edge, giving a natural leaf look.
We attach 2-3 leaves to the stem.
The bouquet is ready!
DIY poinsettia flower from napkins
- The poinsettia flower can be made in several ways. Let's look at the simplest one. To make a flower you will need corrugated paper that matches the color, a little free time and inspiration.
- Take corrugated paper in red, yellow, white or any other color that you like best (3 sheets of the main color). You will also need green paper (3 sheets). Cut out squares of paper with sides 10x10 cm.
- To decorate the poinsettia you will need a golden ribbon. We will knit the parts of the workpiece with rain. We fold the squares like an accordion. We begin to fold the side diagonally from the central part of the sheet.
- We collect three blanks of the same color and tie them into a bundle with a golden ribbon. We cut off the ends of the tape. Twist with scissors. This will be the core of the poinsettia. We straighten the petals and give the flower the desired shape. Glue small beads into the middle of the flower.
Sequence of making a poinsettia from a napkin
Poinsettia from seedworts
Necessary materials to create a delicious bouquet
What do we need to make tulips from candies and corrugated paper? To create a sweet composition you don’t need to have a lot of materials. The most necessary and indispensable item will be corrugated paper, and almost every housewife can find everything else in the house.
- Wicker basket. It can be replaced with something else: a flower pot or vase.
- Candies in wrapper/foil.
- Corrugated floral paper in yellow, white and green colors.
- Wooden long skewers.
- Styrofoam. If the container for the bouquet is an ordinary vase, then polystyrene foam will not be needed.
- Double sided tape.
- Regular tape.
- Scissors.
- Translucent fabric (such as organza or mesh).
- Floral tape. If it is not there, then you will need glue.
- Toothpicks.
Why is corrugated paper necessary?
To create such bouquets, it is advisable to take not just any paper, but corrugated paper. The fact is that it combines all those properties that are so well suited for creating such masterpieces. It is rough, it can be stretched and given the desired shape. That is why tulips made from candies and corrugated paper will look as natural as possible, and with the right level of skill, everyone around you will be amazed by your bouquet.
If there is such an opportunity, it is better to purchase not ordinary, but special floral corrugated paper. It is denser than the first and holds its shape perfectly. You can find it in florist stores. Corrugated paper is sold in all sorts of colors and shades (even gold and silver).
If you are a beginner, you can buy just a couple of colors, for example, red for the buds and green for the legs and leaves. Advanced craftsmen can be advised to experiment with shades: purchase several rolls of paper of the same color, but of different pigmentation, for example, from hot pink to pastel. With their help you can create gradient bouquets of extraordinary beauty.
Simple DIY cardboard flowers. Photo
Now you need to make cuts on each piece towards the center. You should not make too large cuts so that the petals do not fall off your bud. The number of such cuts depends on the number of your petals.
Take one blank and glue it tightly so that you get the core of the flower.
Glue the remaining flowers on top of each other. As a result, you should have a beautiful rose. The smaller the blank flowers are, the more elegant your flowers will look.
Now you know how to quickly make a paper flower
. With the help of step-by-step photos, even a child can repeat making small roses or a beautiful tulip with a stem. Paper crafts require minimal time and money.
Both master classes are not quite complicated, but proven and effective. Such bouquets will be able to please loved ones for a very long time. So let's get started:
Dandelion from napkins, step by step photo
Dandelions are one of the most unpretentious flowers that delight the eye from early spring to summer. To make them you will need yellow multi-layer napkins. First you will have to cut the napkin into identical squares, the size of which depends on the desired size of the future dandelions.
Carefully stack the squares on top of each other and secure them in the central part with a stapler. It is advisable to fasten with two brackets so that you get a right angle in the center of the square. You can arrange the brackets crosswise. Now you need to give the square a round shape, and then make cuts at the edges.
Topiary made from napkins
Carefully lift the edges of the napkins towards the central part, and you will get a voluminous dandelion. It can also be fixed to the stem or used for spring application.
Using the same principle, but using napkins of a different color, you can make a bouquet of peonies or roses.
Step-by-step photo of roses made from napkins
Rose is the favorite flower of many girls and women. Making it from a regular napkin is quite simple, but if you use colored napkins, the craft will look more like the real thing.
Unfold the multi-layer square napkin completely and trim about 3-5 cm from one edge to form a rectangle. Fold the workpiece lengthwise so that one part does not completely cover the other. Now start wrapping the napkin around your finger and forming a bud.
It is important to roll the rose so that a tight, tapered edge remains, because you will need to attach the bud to the stem, which is also made from napkins. Spread the bud and leaves on the stem and the rose is ready
Often this flower is made from an ordinary white paper napkin.
If you want to make an original rose, then use lace napkins that are already round in shape. You will need to make a small cut and also form a beautiful bud.
Twist the bottom part well so that you can continue making a stem from another napkin.
Another way to make a rose from napkins is to wrap it around a pencil. Any napkins are suitable for this; first you need to twist them a little around the pencil, then move the edges to the center and remove the pencil. The result was a voluminous workpiece. From it you need to form a rosebud.
DIY napkin carnations
Don't think that you can make only the most ordinary flowers from napkins. If you show your imagination, ordinary paper will turn into an original flower. We suggest you try making carnations from white napkins. You will need markers or even paints.
Before lifting the edges of the napkins, outline them with some color. The result will be a beautiful border.
Lush carnations will decorate the interior or can be used as a blank for topiary.
Together with your children or on your own, you can make beautiful bouquets from ordinary napkins. To do this, just follow the instructions from the step-by-step photos. Flower mood to you from svoimi-rukamy.com!
Option . How to make tulips from corrugated paper
1. Take corrugated colored paper and cut a rectangular strip, approximate size 5 by 26 centimeters.
2. Carefully fold the strip we have in half, iron it with our own hands, then in half again - we should get a rectangle of 5 by 7 centimeters.
3. From the resulting rectangle we cut out the shape of a petal, draw the shape in advance and cut along the contour. At the bottom of the petal there should be two corners for fastening (look at the photo).
4. Now, let’s arrange the petals separately, and curl the tip and corners of each one.
5. Then we give a realistic shape to the petals. To do this, stretch the edges of the petals with your fingers. We do this very carefully and give them cup shapes, as in the photo.
6. Placing it in a circle, with the concave side up, we begin to form the tulip bud itself. Holding the petals by the bottom, where they are curled, we fix them with a glue gun for needlework.
7. Now we will make the tulip stem. Take the wire and attach the bud to the end of the wire.
8. Then we take the green corrugated paper again, cut off a strip 1 - 2 centimeters wide and a leaf for the stem. Next, carefully and carefully from the base of the bud, we wrap the wire with our own hands to the middle. At the end of the stem we glue the paper using a glue gun. Then we take a leaf, fold it in the middle and glue it to the stem.
9. Congratulations! Your excellent bouquet is ready! Thank you for your attention! Delight your family and friends with delicate and sweet bouquets created by yourself. Such gifts are especially pleasant!
The ability to transform the simplest things that surround us into original handmade crafts is a pleasant surprise. And handmade results have won their place on the list of sought-after gifts. Literally everything is used: bottles, coffee beans, ribbons with ropes, and even ordinary paper napkins. Craftswomen give them shape and create products that you can admire for hours. Agree that you would hardly pay attention to the relief patterns, soft texture and delicate colors of paper napkins if they were just in a pile on one of the kitchen shelves. Although even if you were given such a gift, you would not immediately guess what was hidden under the mask of an unusual decorative tree. Let's try to make it together!
DIY flowers from sweets and napkins: master class on creating bouquets
Do you want to create an original gift yourself and please not only the hero of the occasion, but also the guests? Then we will tell you how to make flowers from napkins and sweets, which will create an unusual, creative bouquet.
For the master class you will need:
- Chocolates 5 pieces. It’s better, of course, to choose expensive ones
- Paper napkins in green and pink (other colors are possible)
- Toothpicks
- Glue, tape
- Cling film
- Scissors
- Satin ribbon
- A plastic cup
And now the creative process:
- Wrap each candy with a piece of cling film to make it look like a ball. When folding, there should be a small “tail” of the film left.
- Place a toothpick on each “tail” and secure it with tape
- Fold the napkin in half 4 times and cut into 6 pieces. The end result should be rectangles
- Twist each rectangle twice in the middle and fold it in half. This will be a petal
- Make several of these petals and attach them to the candy using tape. It will turn out to be a kind of “chupa chups”
- Now take a green napkin and fold it 4 times, cut it in half and take one of the halves and make long cuts from the “blind” edge
- Twist the resulting ends
- Wrap around Chupa Chups
- Make 4 more flowers
- Cover a plastic cup with napkins of any color
- Place foam or crumpled paper inside. Place flowers inside the glass, securing with toothpicks
- To prevent the inside of the glass from showing through, cover it with a green napkin.
- The bouquet is ready
Paper tulip
To make the craft more colorful, it is better to use colored paper (red, yellow, or pink for the bud and green for the stem):
- First, take a square sheet of paper and bend it diagonally so that the opposite corners are next to each other;
- We unbend the sheet and repeat the same procedure again, combining other opposite corners;
- Unfold the paper again and fold it in half;
- Next, inside the resulting rectangle, we move the upper corners along the folds, and bend the side corners to the very top;
- We turn the figure over to the other side and repeat the same manipulations;
- We open the craft in such a way that the tips bent upward move from the sides inward; to do this, you just need to bring the side corners together;
- We bend the side tip so that it goes slightly beyond the axis located in the center. Having done the same with the second corner, we set it into the first. We repeat the same procedure on the opposite side;
- Inflate the tulip through the hole located at the bottom of the craft (this will give the flower natural volume);
- We bend the corners to obtain petals;
- We twist the stem from a sheet of paper and insert it into the hole located at the bottom of the bud. Carefully fix the structure with glue.
If desired, you can decorate the flower with patterns using a pen or paints. Drops of glue on the bud will help recreate the dew and make the flower more realistic.
If your room looks dull and monotonous, you can add a little freshness and beauty with tulips made from napkins. You can create a whole bouquet of bright paper flowers.
To create tulips you will need: green electrical tape, a stack of thick colored napkins, paper sticks, scissors and glue.
First, prepare the basic elements for your craft. Carefully cut out petals in the shape of hearts from pink napkins, and leaves from green napkins. Each flower will need 6 - 8 petals.
Now you can move on to the petals. Take the blanks under the petals and bend them slightly along the edges. This can be done by twisting them onto a pen or pencil.
Then, place the wavy petal on the surface and place a stick in the center. Wrap the ends of the petal around the stem and tape in one turn. We attach the remaining petals to the stem in the same way.
Take another stick and glue a petal to it. Attach the resulting shoot to the main stem with petals. Pass green paper under the bud, covering the junction of the petals.
All that remains is to fluff up the bud and start creating the next masterpiece.
- DIY quilling tulips Today we will learn how to make quilling flowers, or rather, tulips. They will be made from ordinary colored paper.
- An original flower from a plastic bottle Sometimes, when we have free time, we want to make something original and beautiful. Then a little thing will appear in the house that will decorate the room and please the eye.
Easy tulips using origami technique for children (step-by-step diagrams)
And for those who like to fold paper and make airplanes and boats out of it, or other funny things, these diagrams will definitely come in handy. After all, tulips can also be folded easily and quickly using the origami technique. Step by step and the souvenir is ready. And in order for the flower to open, you will need to blow into it).
I hope the whole sequence of actions is clear to you, but here’s how it looks more clearly if you look at it live from colored double-sided paper.
All that remains is to attach the stem and leaf to the bud.
And then collect a whole composition of multi-colored flowers.
There is a slightly simpler way of folding, I also show it:
Or use this instruction, here the stem is also folded using origami.
And then the bud and stem are glued together with glue.
As a result, these wonderful tulips come out that can stand on their own on the desktop; use only thick paper.
There is a folding method in which the tulip turns out to be opening, you can even hide something in it, for example a wish.
Step by step we make a three-dimensional applique from colored paper
Volumetric applications are always somewhat more difficult to make than flat ones. But they look more impressive and interesting. Today I’ll show you an interesting option for quickly creating a voluminous tulip bud with your own hands. Based on this technique, you can make a lot of interesting crafts that will not even be similar to each other.
Manufacturing process:
1. So, for this envelope you need to cut out five identical parts. Remember, we have already cut out these above in the article.
2. Find the middle of each part and run your finger along it well.
3. Now we fasten the two edges of two different parts with a stapler. And we will repeat this for the remaining three blanks. We have one bud ready.
4. Take a baking napkin, fold its edges and glue it to the base sheet.
5. We fix the leaves on it, which have an elongated shape and are also folded lengthwise in the middle.
6. And attach the bud to the leaves.
You can use the same technology to make a very simple application.
Or a bud like this with a twist. Due to its structure, it can easily fit into any fold. It can also curl up if you decide to close the applique.
Or it can become a self-sufficient element in a Valentine card or.
You can even create several buds of different sizes and colors.
For all voluminous crafts, it is better to take double-sided paper. This way the white edge won’t be visible if your edges suddenly don’t match.
This paper is available in all office supply stores and creative departments.
My daughter will love this low-growing tulip. I think it won't be difficult to make it.
By the way, it is subtly noted here that from below, most of the leaves of these flowers, regardless of color, have a pale yellow base.
We make a beautiful bouquet of napkins with our own hands for table decor
To create flowers, you can use absolutely any napkins, either one-, two- or three-layer. For delicate buds, single-layer napkins are most often used, and if a more magnificent flower is needed, then multi-layer ones are used.
Flowers made from white napkins, colored along the edges with ordinary felt-tip pens, look very delicate, and the thinner the coloring line, the more delicate the flower looks.
We bring to your attention a detailed master class with step-by-step photos on how to create a beautiful bouquet of napkins.
This interesting bouquet can be a wonderful table decoration at a festive event or an original addition to a gift for a loved one.
Required materials and tools:
- A wicker basket or a regular flower pot;
- Balloon;
- Napkins in white, yellow and green (you can take any other colors if you wish);
- PVA glue;
- Stapler and scissors.
Before you start making a bouquet, you need to first dilute the PVA glue with water - about 1 tsp in half a glass of water. glue. Inflate the balloon to the required size (so that it fits in a basket or flower pot), dip white napkins in glue and glue them onto the balloon in several layers, leaving a small hole near the tail so that you can then remove the balloon. Leave to dry completely for several hours.
While our ball is drying, we cut out leaves and flowers from colored napkins; to do this, fold a four-layer napkin in half twice, cut out a circle and make many cuts along the edge. Moreover, the more magnificent the flower is needed, the thinner the cut strips should be. We cut out leaves from green napkins in the same way, but make a circle of a larger diameter than for flowers.
After this, the circles for flowers and leaves are straightened, folded together with the green napkin facing down and snapped with a stapler.
Now we begin to form the inflorescence; to do this, all layers one by one, starting from the top one, are carefully pressed to the center so as not to tear. The leaves can be left as they are, or they can also be raised, like flowers.
Popular articles Donkey Nyasha
Now we glue the finished flowers to the completely dried balloon until about halfway up. If it seems to you that there are too many flowers, then simply glue them to each other more tightly; if, on the contrary, there are too few, cut new ones or glue them less often. Leave the ball with napkins until completely dry.
When our balloon with napkins is completely dry, you need to carefully burst it and remove it. If you want, you can cover the hole that was initially left near the tail of the ball with napkins and flowers. If it is small, then leave it as is.
Using superglue, glue the ball to a basket or flower pot and continue gluing the remaining flowers to make the bouquet more natural and realistic. This should be done very carefully so as not to leave dents, because we have already removed the ball and now it is empty inside.
The bouquet of napkins is ready. If desired, it can be additionally decorated with beads, bows, ribbons or sparkles.
This version of the bouquet serves specifically to decorate the table, but you cannot use the napkins from which it consists for its intended purpose. If you need to fold napkins in such a way that they can be used, then we suggest making such a cute bud individually for each person or forming small bouquets of them around the table.
As you can see, it is very easy to decorate a table with your own hands in an unusual and original way; you only need free time, accuracy and imagination. And if you have children, then you can involve them in activities of this kind; as a rule, children really love this kind of creative work.
Option 1: Chrysanthemums from napkins
Beautiful and delicate chrysanthemums from napkins are made quickly and easily even for beginners.
Tools:
- Scissors.
- White tape.
- Thin single-layer napkins.
- Floral wire.
Manufacturing process:
- Cut two strips of the same size, 10 centimeters wide, from napkins and glue them together.
- Fold the workpiece four times along the long part.
- Round the top edge of the napkin strip with scissors.
- Unfold the napkin and fold it into a strip with a slight shift to the side.
- Round off the edges of the strip from the second folded edge.
- Fold the workpiece in half lengthwise.
- Make a loop at the end of the wire and wrap the edge of the napkin around it.
- Start winding the napkin around the wire, forming a flower bud.
- Secure the bottom of the napkin to the wire with white tape.
- Unfold the petals of the bud and give them a realistic look by twisting the napkin.
Helpful advice:
- To make the center of the bud look beautiful, you need to drop a little glue into it and glue a few beads.
Top