You want to literally dive headfirst into the warm, soft and cozy fleece fabric - it’s not for nothing that this material is so popular when sewing children’s clothing. However, its possibilities are not limited to children's fashion, so you can always please yourself with a comfortable sweatshirt or cardigan, and your husband with a practical anorak.
What to sew from wool fabrics: 50 patterns for every taste
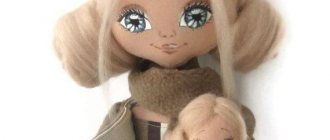
Creation of an octopus
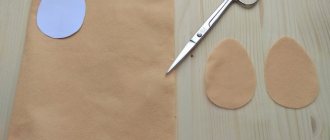
First, we make the body of the toy by placing the ball in the center of the blue piece of fabric and wrapping it tightly with thread. After this, the threads should be unwound, the ball should be removed, and the fabric should be straightened. You'll want to leave a thread mark so you don't overdo the cuts.
Now from each corner of the straightened fabric you need to cut a square measuring 12 x 12 cm. You should get a cross-shaped part, on each side of which you need to make 6 more cuts. Try to ensure that the cuts do not reach the contours left by the thread by 2-2.2 cm.
Place the tennis ball again in the center of the part and tie it with thread. We braid the cut strips into braids, forming the legs of the fleece craft. We tie ribbons to them from below.
All that remains is to make the octopus's face. Cut out two circles from white, gray and black fleece. White should be the largest and black should be the smallest. We glue the circles to the toy’s head one by one: first a white circle, then a gray and black one.
We embroider a smile on the craft with red threads and tie a polka dot fleece scarf on her head.
Piggy
A homemade fleece pig will definitely delight your child. And to make it you will need the following materials:
- fleece (pink, yellow, crimson);
- white flannel fabric with a colorful pattern;
- holofiber or synthetic winterizer;
- threads (white, black, pink and yellow);
- pig pattern;
- sewing needle and scissors;
- small black beads.
First you need to draw or print a toy template and cut out the necessary parts from paper. Then the pig pattern needs to be cut out of fleece, making small allowances.
We make the head, ears and paws pink, the body yellow, and the snout crimson. We cut out the skirt for the toy from flannel.
In total, you need to cut in two parts for the head, skirt and body, and four for the ears, front and hind legs. Only one piece is needed per patch.
Take the two head pieces, place them right sides together and sew them together, leaving a small hole for the stuffing. In the same way we fasten all the other parts of the fleece craft, except for the skirt.
We turn out the prepared pig elements and fill them with holofiber or padding polyester. There is no need to stuff the ears, just tuck the edges left at the bottom inward and sew them up.
The skirt pieces need to be folded right side inward and sewn along the edges with white threads. Then we fold the skirt at the top and bottom and stitch it. Then we turn the part inside out and sew it on one edge so that it can be pulled together and put on the toy.
Now you need to assemble the fleece craft. First we connect the head and torso, then attach the legs and ears. Sew a snout to the pig's face and black beads in place of the eyes. We embroider the nostrils and mouth with black thread, and put a skirt on the finished toy.
Required materials and tools
Before starting work on creating soft toys, a novice craftsman needs to prepare all the necessary materials and tools for work. The sewing process and the final result depend on their correct selection.
Fabric selection
Fleece is the most common material used for sewing toys. This is due to the large number of positive qualities of this material:
- low price;
- brightness and variety of color palette;
- unpretentiousness at work;
- ease of fabric care.
It should be noted that for the manufacture of toys it is necessary to choose high-quality material with a density of at least 200 mg/m2. The downside of some fleece fabrics is their tendency to pill.
Filler material
An important component of a handmade soft toy is its filling. The main criteria when choosing it are its safety and suitability for the baby’s age.
The most common types of filling for toys and crafts intended for children of all ages are padding polyester and holofiber. For beginning craftsmen and on a limited budget, it is acceptable to use cotton wool for stuffing small crafts. It should be taken into account that this type of filler can form into dense clumps during use and after washing.
In educational toys, calcined cereals are often used as a filler. They act as a weighting agent and help develop tactile sensations in babies. When playing with such crafts, it is important to strictly monitor the integrity of the toy and prevent small parts from accidentally getting into the respiratory tract of small children.
Decorative elements
Toys should be bright, interesting and attract the attention of children from the first minutes of playing with them. For this purpose, finished products are decorated with ribbons, lace, and appliqué. They dress them in clothes made from remnants of fabric used in other works. To give the craft a finished look, buttons, beads, and seed beads are often used.
Tools needed
If we sew toys from fleece with our own hands for personal use, then we can do without a sewing machine. You should consider purchasing it if you are making crafts for commercial purposes.
Before you start working on soft toys, you should prepare:
- needles;
- scissors (large and small);
- threads of various colors and shades;
- sewing pins;
- measuring tape;
- a piece of soap or marker.
Creating a pattern
Creating designer patterns is a rather complex and time-consuming process that is not always quickly mastered by novice craftsmen. When starting to create toys from fleece, you can look for patterns for them in several sources
.
- The Internet, where you can find not only patterns, but also recommendations for choosing fabric, filling and decor.
- Specialized printed publications on needlework and sewing, which contain patterns and instructions for them.
- Kits for sewing soft toys, which are sold in art and craft stores.
- The source of the pattern can be an old toy. It can be ripped open and disassembled into parts, the silhouettes of which are transferred to new fabric.
Separately, it is worth paying attention to the material for making templates for patterns. The most suitable material for them is cardboard. The silhouette from such blanks is easy to transfer to fabric. They do not require additional fastening and are more durable compared to templates made from paper or tracing paper.
Fleece tilde: materials
Tilda is a rag doll created by Norwegian Tone Finnanger. Tilda's most recognizable features are her tiny dot-shaped eyes and rosy cheeks. Often Tildas are female dolls, but there are other variations. For example, you can sew Tilda, a fleece bunny.
To do this you will need:
- fleece (white and blue polka dots);
- pattern;
- scissors;
- baking paper;
- holofiber;
- sewing machine;
- black beads for eyes.
Master classes on sewing fleece products
We bring to your attention some ideas that can be implemented using this material.
A cap
Step 1
We measure the circumference of the head.
Step 2
Cut out two rectangles:
The width is equal to the head circumference + 1 cm should be left for the seam. Divide the resulting result by 2.
The height is equal to the width + 3 cm (for the “ears”).
Step 3
We put the parts together in pairs (linings and tops with their front parts facing each other) and stitch them. We sew in the same way on the side of the ears.
By the way! Before sewing the resulting parts together, they must first be swept away or pinned together. Due to its elasticity, its top layer can stretch or move under the presser foot. When stitching, use needles of the appropriate gauge for knit fabric and increase the stitch width to 3mm to avoid chewing. It is not necessary to process fabric sections, since they do not fray.
Step 4
From the remaining pieces, cut out interesting shapes, for example, flowers.
Step 5
Sew the elements onto the hat.
Step 6
Use a strip of fleece to tie the top of the hat and sew it by hand with a couple of stitches.
Step 7
The upper part of the product can be made in the form of petals, first cutting them into strips. That's it, you can wear it!
Fleece cockerel for the New Year
To create a cockerel you will need:
- fleece in four colors - white and gray for the carcass, red for the beak, orange for the scallop;
- wire for paws;
- red yarn and masking tape for wrapping the legs;
- 2 small buttons;
- glue gun for attaching small parts.
Sequencing:
- To begin, print on A4 sheet and cut out the pattern.
- Transfer the pattern pieces onto the fabric, stitch them and cut them out.
- Turn out the parts. On the carcass, draw the fold lines of the legs with a felt-tip pen. When you stuff the carcass, make a line along them. You need to stuff the butt through the trouser leg, since the neck is initially sewn up.
- To give the tail its shape, insert a piece of wire into it.
- Stuff all the parts with cotton wool or padding polyester. Sew on the head, sew up all the holes.
- To highlight the toes on the paws and wings, sew them with a needle and thread.
- Twist the paws out of wire and wrap them with masking tape, then with yarn.
- Stuff the “pants legs” a little and gather them with a thread. Insert the feet, pull the thread and sew.
- Sew on the cockerel's wings using small buttons.
- Stuff the comb, beak, beard (optional) and sew or glue to the carcass.
- Glue on the eyes and the cockerel is ready.
Cat and hare
They are cut and sewn according to the cockerel principle.
For this you need a pattern.
And here are the finished parts.
Cat pillow
This is another great craft idea.
The pillow can be made in any color (from plain fleece) and any size according to the pattern.
Important! Fleece tends to stretch. This is important if you need to sew trousers, a jacket or something similar. During active wear, the fabric may sag at the elbows and knees. Therefore, it is worth choosing loose-fitting models.
Tilda Bunny: master class
Follow these steps:
- Trace the pattern and cut out the necessary parts of the toy from fleece with allowances of 0.5 cm.
- We fold the ears and paws with the right sides inward and sew them on a machine, leaving holes for the filling.
- We sew two parts of the body along the middle seam. Also don't forget to sew the darts. Turn the prepared part right side out.
- Cut out 6 ear parts from baking paper and sew them to the ear blanks in three layers. After this, carefully turn the pieces out.
- We sew the inverted ears again on the machine.
- Now turn out all the paw blanks and fill them with holofiber, but not completely.
- On the front part of the body you need to pin and sew the ears, departing from the middle seam by 1.5 cm.
- Immediately below the neck we sew the upper legs to the body, and sew the lower legs from below, at a distance of 0.5 cm from the middle seam.
- We take the second part of the body, place it right side to the first part so that the ears and paws are inside, and sew the parts together. You need to leave a hole at the bottom so that the soft fleece toy can be turned out.
- After you have sewn and turned the craft, fill it with holofiber and sew up the hole by hand.
- Glue the eyes to the muzzle and embroider the nose.
Multi-piece fleece toys
Having mastered the technique of sewing simple fleece toys consisting of 1-2 parts, you can move on to the next level - sewing multi-part toys from fleece with your own hands. Master classes describe in detail the necessary materials, decorative elements and work progress.
Ladybug
All children like bright toys. And if your mother sews it with her own hands, then she will remain loved for many years. The soft ladybug is quite easy to sew. For it you will need:
Work begins with decorating one of the red parts. A black stripe is pinned in the middle of the front side of the red circle. Small black circles are placed on both sides of it, fixing their location with pins. Then all the overlay parts are sewn to the base using an overlock stitch.
Large black circles are applied to both red parts. The parts must be folded with their front sides facing each other. The touching parts of the figures are sewn together with a loop stitch. The color of the threads at this stage of work does not matter, since they will be inside the craft.
The black parts are turned away. Both blanks are folded with their right sides inward and the black elements are sewn together.
The legs for the bug are made from satin ribbon. A piece of tape is cut into 6 small strips. They are folded in half and sewn together with a few stitches. After that, they are placed between two red parts, three pieces on each side.
The red parts with the paws inserted between them are sewn together. The resulting workpiece is turned right side out through the filling hole. The figure is stuffed with padding polyester and the hole is sewn up with a hidden seam. Eyes are attached to the ladybug's head using glue.
A bright toy is ready to delight kids.
Soft doll
A small soft doll made of fleece fabric will become a faithful friend in daytime games for the little princess and will protect the baby’s night sleep. For a beautiful baby in a sundress you will need the following materials:
Making a soft stuffed doll begins with making a pattern, which can be downloaded from the Internet or drawn by hand on cardboard. The product consists of 3 parts: body and legs, head, arm.
The fleece material is folded in half with the right side inward, the part templates are distributed on it and outlined, leaving the necessary seam allowances. The hand template is traced twice, marking two mirror parts.
Having fastened the fabric with pins, the parts are cut out along the marked lines.
Eyelashes are embroidered onto one of the blanks for the head and eyes are glued on. The two pieces are then placed right sides together and stitched together, leaving an opening for stuffing. Having filled the part with padding polyester, the hole is sewn up with a hidden seam.
The hands of the future doll are sewn and stuffed. The stuffing hole is sutured. The packing should not be very dense.
The finished parts of the arms are inserted between two blanks for the body and secured with pins. The body is stitched and carefully turned right side out. The part is filled with padding polyester, evenly distributing it inside the figure, and the hole is sewn up.
The next step is to fasten the head and body blanks. The doll's head is fixed with pins and sewn to the main part with a hidden seam.
Beautiful pigtails for the doll are made from yarn. Bundles of yarn of the same length are sewn onto the head of the craft, starting from the forehead and ending approximately in the middle of the back of the head. You need to sew the curls of thread as close to each other as possible using small stitches. The finished hair is collected into two ponytails or braids and tied with small elastic bands.
You can dress the doll in a bright sundress with ties. It is easy to sew from two rectangular pieces of fabric. Having folded them facing each other and secured them with pins, we cut out two trapezoids according to the size of the doll. We sew all sides of both parts and sew the side seams. We fold the bottom of the dress and sew it with a hemming stitch. Sew four pieces of ribbon to the top. We put the dress on the doll and tie the ribbons with bows. The front of the dress can be decorated with a satin bow or beads.
Sewing soft toys from fleece with your own hands is an interesting and exciting activity in which even small children can be involved. A craft made together with mom will become a baby’s favorite toy for a long time.
Attention, TODAY only!
Fleece is a synthetic fabric that is widely used to make warm clothing. Due to the fact that this material is easy to care for, it weighs little and does not cause allergies, clothes and blankets made from it are popular in children's everyday life. This fabric also makes amazing toys and other crafts.
How to sew a snowman?
The pattern consists of two circles of different diameters and a rectangle for the hat. You can draw such a snowman template yourself and cut it out of paper. Then, using a pattern, cut out a smaller circle from white fleece, and a rectangle from blue fleece - and a second circle. We also cut a small strip of blue fleece to make a scarf.
We make long stitches along the edges of both circles, put padding polyester in them and tighten the thread. As a result, you should have two balls.
We cut small strips along the edges of the scarf, making a fringe.
Fold the part for the hat in half and sew it together. We tuck the cap at the bottom and rewind it at the top with thread or lace.
Sew the white ball to the blue one and decorate the bottom one with two buttons.
We put a hat on the snowman and tie a scarf, and sew beads on the face.
Felt violet
For the craft we will need:
- felt fabric in 2 shades (lilac for flowers and green for leaves);
- threads of the same color as the fabric;
- scissors and needle.
Let's look at how to make felt flowers correctly:
- We make 5 circles with a diameter of 4 cm from lilac felt. We make the edges wavy for the future violet.
- Fold 1 petal in half 2 times to create a lilac corner.
- We make 2-3 stitches to secure the corner.
- We fix the corner on 1 lilac circle.
- We secure 4 corners with threads in the center of the base circle. We straighten the petals well.
- Then cut out the green leaves. We take a couple of leaves and sew their bases with a small overlay.
- Sew 2 leaves to the lilac base.
You can make 2 orange (yellow or lilac) flowers with leaves and attach them to the headband.
New Year hat
Fleece is perfect for making a fun New Year's hat. You will need red and white fleece, matching thread colors and a pompom.
First you need to measure your head circumference to determine the amount of fleece you need. For example, the circumference of the head will be 58 cm, and the height of the cap will be 50 cm. Draw on paper a pattern in the shape of a triangle standing on a rectangle. The total height of the figure should be 50 cm, the height of the rectangle should be 8 cm, and its width should be 29 cm (half the circumference of the head).
Using the pattern, we cut out two such parts from red fleece, and from white fleece we make only two rectangles 29 x 8.
Place the pieces right sides together and sew along the edges. We sew a white stripe to the bottom part of the red cap so that it can then be turned right side up. We turn over the white stripe and sew it on top to the hat. At the end we sew on a pompom, which can be made from tinsel.
Fleece applique
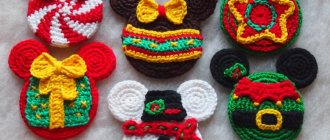
Making such an application is quite simple. All you need is a pattern and colorful fleece. For example, if you want to embroider a beautiful owl on a pillow using the pattern below, then first you need to cut out all the parts separately, and then assemble the future applique step by step.
You will need to cut out 6 circles for the eyes (2 large, 2 medium and 2 small), one body, a beak, 2 legs, 2 wings, two branch parts and several leaves.
First you need to assemble the owl's eyes, taking turns sewing the circles on top of each other, starting from the largest and ending with the smallest. Then you need to sew the eyes to the head. After this we sew on the beak, wings and legs. Then we sew a twig and leaves to the pillow, and attach an owl on top of them.
cat pillow
To make such a craft from fleece, you will need bright fabric, scissors, threads, small pieces of red and white material, padding polyester or holofiber and a pattern.
We apply the pattern cut out of paper to the fabric and cut out two parts of the body. Place the pieces together with right sides facing in and sew, leaving a small section. We turn the craft inside out and stuff it with padding polyester. The amount of filling for the pillow depends on your preferences. The main thing is that it is filled evenly.
We cut out a nose and a heart from red fabric, and two eyes from white fabric. We sew the eyes and nose to the cat’s face, and the heart from below to the body. Using thread we embroider the mouth, pupils, mustache and eyelashes.
Jewelry or other crafts
After children and animals are gifted with new toys, you should think about decorating the interior.
Pillow
Fleece makes wonderful pillows that can be placed under your head, used as a decorative element, carried as decoration in the car, or even given as a nice souvenir to family and friends.
One of the most interesting options for fleece crafts is the character of the popular cartoon Simon the Cat. To make cute Simon, you will need very few materials.
- Fleece;
- stuffing material;
- threads, needles;
- white and pink fabric (small scraps);
- beads - 2 pcs.
The pattern is printed, the elements are cut out and applied to the fabric. The body parts are cut out of the fleece and folded together (face inward). The parts are sewn together, leaving a small area unsewn through which the product can be turned out.
Important! It is best to use a needle-forward stitch for stitching.
After the parts are securely connected to each other, the workpiece is turned out and evenly stuffed with padding polyester or cotton wool.
Important! The density of the pillow depends on the amount of material spent on padding.
Two eyes are cut out of white fabric, and a nose is cut out of pink fabric, which are then sewn to the muzzle. The mustache, mouth and pupils are embroidered with black threads using the backstitch technique (back stitch).
Important! You can decorate a decorative “cat pillow” with satin ribbons, beads and even shiny rhinestones.
Other craft ideas
In addition to interior decorations and toys, you can make a lot of interesting things out of fleece fabric.
- Brooches . To create beautiful and fashionable brooches, thick fleece is used, from which the brooch details are cut out. Flowers with voluminous petals, embroidered with multi-colored threads and decorated with rhinestones, look especially interesting.
- Necklaces . Any girl can make a spectacular and stylish felt necklace. Circles, hearts or squares of different sizes cut from fleece of different colors are glued to each other. And then they are attached to a ribbon or soft cord.
- Hair ornaments . With your own hands you can make beautiful elastic bands and hair clips for children and adults that can complement both everyday and festive looks.
By learning to work with fleece, you can save a lot of money on purchasing toys, jewelry and interior decorations. Children's crafts can be done together with kids, which will help develop their creativity, perseverance and imagination.
Dog toy
To make a wicker dog toy, you will only need three strips of fabric in different colors measuring 7 x 30 cm.
The strips need to be folded together and tied in the middle with thread or cord. On both sides of this place we weave the fabric into a tight braid to the middle length. For convenience, it is worth fixing the second half of the braid with something heavy.
Fold the braided braid in half and braid the remaining edges into one braid. At the end, tie the edges of the braid into a tight knot, and your toy is ready.
Fleece flowers
From this material you can make a cute decoration for a hairpin, headband or doll. All you need is a strip of fleece fabric 56 x 2.5 cm and a needle and thread.
Roll up the strip of fabric and secure it at the bottom with pins. Using red thread, sew the flower from the bottom as shown in the image, passing the needle through all layers of the rose.
Cut a leaf from green fabric and attach it under the flower. The first one should be large enough to completely cover the bottom of the flower. If desired, you can embroider veins on it.
If you make several of these flowers, you can attach them to a hoop. Or you can glue a fleece rose to a pin or hair clip.
Fabric flowers are also easy to make in another way: just cut out a few flower pieces and sew them in the middle. You can decorate the craft with beads or ribbons, as you like.
We sew a flower from fabric (fleece)
I offer a master class on making a flower from fabric. In a specific case, it is an accessory for a toy, but it can also serve as interior decor or an accessory for photo shoots (the principle of creating a large flower will be the same, only it will be necessary to enlarge the pattern to the required size).
We will need:
1. Fleece (green - for leaves and stem; red - for petals; pink - for the middle of the flower).
2. White thread.
3. Needles: small and large.
4. Floss threads (pink - for petals; green - for leaf veins).
5. Bamboo stick (for the base of the stem).
6. Filler for stuffing.
7. Printed pattern.
- Pin the patterns to the fabric, trace, remove the patterns.
- Sew all the parts, not forgetting to leave holes (on the pattern - _ _ _).
- Cut off the excess, retreating from the edge 3-5 mm, and where the holes are (_ _ _) - 5-8 mm.
- Using a stick, turn all the parts right side out, straighten and iron the seams.
- Fill the parts with filler (except for the stem) and sew them up with a hidden seam (except for the stem and leaves).
Petals (red fleece):
6. Insert the needle into the middle (middle No. 1) and bring the part out on the other side (also in the middle (middle No. 2)).
7. Mark with needles the location of the threads that will form the flower petals.
8. Make petals: *pierce the “middle No. 1” of the part again, pierce through and bring it out in the “middle No. 2”, pulling the thread.* Do the same (*) with the rest of the threads of the petals (it’s better to do it diagonally to stretch the thread equally). At the end, secure with a knot.
Stem (green fleece):
9. Take a stick and wrap it with filler. To fix the filler, you need to wrap it with thread (fasten the thread with knots on both sides).
10. Attach a white thread to the tip of the wrapped stick. Pass the needle inside the stem and bring it out through the sewn end of the stem. Pull the thread to the end, thereby pulling the wrapped stick inside the green fleece. Cut the thread and sew up the hole in the stem with a blind stitch.
Leaf veins (green fleece) see diagram!:
11. Insert the needle through the hole left for stuffing, withdraw the needle on the front side at point No. 1 (“point 1”).
- pierce the leaf in “t.2” and bring it out to “t.2a” (pierce through the parts);
- pierce in “t.1” and output to “t.3” (inside the part);
- pierce in “t.4” and bring it out to “t.4a” (through and through);
- pierce in “t.3a” and bring it out to “t.3” (through and through);
- pierce in “t.5” and bring it out to “t.5a” (through and through);
- pierce in “t.3a” and bring it out to “t.1” (inside).
- secure with a small knot.
12. Make the veins of the second leaf in the same way.
13. Sew up the holes in the leaves with a blind stitch.
14. Sew the leaves to the stem using a blind stitch.
15. Sew the core (pink fleece) with a few stitches to the middle of the petals (red fleece).
16. Sew the stem to the middle of the petals using a blind stitch.
Thank you for your attention!