Share this article:
Modeling various dough figures is an art that anyone can master. Experienced craftswomen have secrets that they do not reveal, but the basic techniques have been known for a long time.
First of all, you need to decide what exactly you want to sculpt. You can make little animals, fish hairpins, small figures of people. You can come up with an interesting shape for the animals, for example, make a huge head and a small body. Children really like these figures.
Experienced craftswomen sculpt gnomes, Little Red Riding Hoods, butterflies with large, detailed wings, and realistic figures of people. Some people like to make male and female figurines dressed in classic Russian folk costumes or in stylized costumes borrowed from illustrations of Russian folk tales. The so-called character dolls and genre everyday sketches are very popular. For example, a girl is braiding her hair or combing her hair, or heading somewhere - in a simple shirt and with a knapsack.
It is especially interesting to sculpt dolls in folk costumes. It would seem that you have to make the same Russian costume every time, but in fact there is such variety in it. There are more than twenty types of Ryazan costumes alone, each village has its own special one. And Moscow, Penza and other provinces also have their own costumes. Do you know what Western fashion designers sometimes do? They buy our dolls, study the costumes, take parts from them and use them in their designs. Right in its entirety, without changing anything. That's how rich our Russian costume is.
How to make play dough
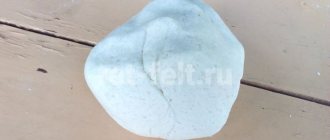
You need to take the same amount of rice flour and salt. Then add water, enough so that the dough does not spread. Don't be afraid, the dough won't take up too much. You will also need diligence, skill and imagination.
The easiest way to start is with miniature dolls. You can safely make a small doll – up to 4 centimeters in height. But it's better to start with even smaller figures.
The main trick when sculpting dolls is that you need to do everything quickly and under no circumstances overmold the dough, otherwise the doll will look forced and gray. And if you tune in and quickly mold the doll, then its skin will look like real skin: warm and lively in appearance.
Recipe for salted play dough
First of all, we need to understand the manufacturing process of our safe material. In fact, there are not so many recipes, but I will introduce you to a method that has been proven over the years.
We will need:
- Medium-sized salt - 1 tbsp;
- Flour - 1 tbsp;
- Water -125 ml;
- Vegetable oil - 5 tablespoons.
Manufacturing process:
Take a deep container and mix salt and flour in it. Next, pour in a small amount of water and vegetable oil. Mix well and refrigerate for 2 hours. The play dough is ready. You can leave it this color, and after completing the work, paint it in the desired color. Or you can immediately add natural or synthetic dyes: choose gouache or vegetable juice (carrots, beets), you can also use cocoa.
On a note!! To sculpt thin figures, add glue to the dough. And remember that when drying our mass loses color, so add more dye.
Some tips from experienced craftswomen
If your doll is wearing a suit, you need to put it on sequentially: first the underskirt, then the shirt, then the outer skirt, and then the warmer or apron.
If you plan to hang this doll, you need to insert a wire loop inside when sculpting. But it’s worth twisting it inside the doll so it doesn’t fly out.
Important! Start sculpting if you don’t have any wounds or abrasions on your hands. When finished, wash your hands and use cream, otherwise your skin will dry out.
Now you have made a doll. Now it needs to be baked in a well-heated oven at a temperature of 100-150 degrees. Bake until cooked through and noisy. Now the doll needs to be cooled and painted with any paints you have in the house: watercolor, gouache, fluorescent. Then coat with any colorless nitro varnish.
Salt gives the dough a wonderful twist. The texture of fabric made from salt dough looks completely different from clay. Brocade is made from dough and is brocade. And the doll’s skin seems to be alive. This is why craftswomen love dough.
How to make a souvenir from salt dough with your own hands
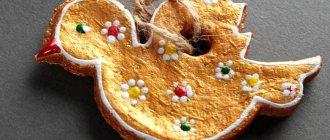
As you understand, this process is very exciting, and not only children, but also adults enjoy making crafts. Therefore, if you try and use your imagination, you can make an excellent gift or decoration element.
And for the coming New Year, I suggest you make a craft in the shape of a dachshund dog, it will be very symbolic.
We will need:
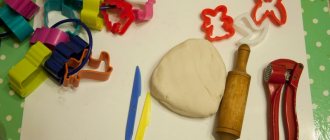
- Salt dough is universal;
- Cardboard, pencil, scissors;
- Paints and brush;
- A piece of rope;
- Clear nail polish;
- Toothpick;
- Foam sponge;
- Glue.
Manufacturing process:
1. Print out a drawing of a dachshund or draw it yourself. Transfer to cardboard and cut out the image along the outline.
2. Roll out the dough to a thickness of 5 mm and attach a pattern, cut out the outline of a dachshund along it. Remove the trimmings.
3. Now make two balls and form them into oblong dog eyes. Glue them on a drop of water to the head. To remove unevenness in the workpiece, wet all your fingers with water and smooth them along the contour.
4. Next, make eyelids and glue them above the eyes. And use a toothpick to outline the ear, paws, mouth and nose.
5. To add volume, roll the dough into an oval, glue it onto the ear and smooth the joint with a wet finger.
6. Also add volume to the back and ponytail.
7. Use a toothpick to make dents around the perimeter of the figure.
8. Dry the workpiece in a warm oven. The dry product must be painted with black paint, where the dents are.
9. When the black paint has dried, take yellow paint on a foam sponge and paint the entire body, leaving the dents black.
10. Draw eyes on the dried dachshund and make any inscription.
11. Glue a string to the glue on the back side.
12. Cover the product with clear varnish and let it dry.
Here are some other cool gifts you can make from this budget material:
- Angel girls
- Magnetic cats
- Puppy with a bouquet
Drying salt dough products
The dough crafts you made need to be dried. This can be done in several ways.
You can simply place the figures in the room and leave them for a while. However, it is best to bake crafts in the oven. It should be noted that sculpting must be done in the same place where the figure will dry. It's ideal to use foil for this.
After finishing work on the craft, place it in a cold oven, first set the temperature to fifty degrees to avoid cracks. After thirty minutes, increase the temperature to one hundred degrees. Dry for an average of one to two hours.
After drying, sand the craft using sandpaper.
Foam letters: production, methods of decoration, 69 photo ideas
How to make a stencil with your own hands - master class, photo ideas
Christmas toys made of cotton wool
I would also like to share an interesting master class with “Handicraft Formulas” (photo on a phone, sorry for the quality), and the works of our readers.
And this is the master class that interested me. I saw a Christmas tree decorated with toys from the times of our grandmothers , these were made from cotton wool until the 60s (maybe someone remembers). Now such toys are literally experiencing a second youth! And they sell well
