Most preschool, school and teenage boys play war games. Either they save the world from alien invaders, or they free hostages from malicious lawbreakers. True, modern children are increasingly becoming players of practical games a la “Counter-Strike”. And for greater clarity, they make intergalactic and standard weapons of their favorite computer characters with their own hands. Therefore, in today’s article we will talk about how to make a sniper rifle from wood.
General characteristics of a sniper rifle
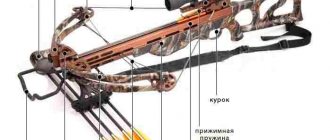
Before you get to work and make a kind of mock-up of a real weapon, it is worth considering the details of the rifle. So, what does it consist of? Depending on its variety and model, the rifle may contain various parts. For example, the SVD (Dragunov rifle) consists of the following components:
- sniper optical sight;
- store;
- barrel with an open butt and sight, as well as with a receiver;
- receiver covers;
- mechanism with a return principle of operation;
- frames for the shutter and the shutter itself;
- trigger and impact mechanism;
- barrel linings;
- pusher and tubes with regulators and clamps;
- safety guard and butt cheeks.
Next, we will explain to you how to make a sniper rifle out of wood on your own. Let's say right away: there are a lot of options that allow you to make a model of a weapon from wood. However, we decided to take as a basis the simplest one that even a child can handle.
Preparing the workplace and materials
If you decide to make a model of a weapon yourself, you need to prepare a workplace, tools and materials in advance. Moreover, if you are under 12 years old, it is better to leave all the main types of woodwork on the shoulders of your dad or grandfather.
For work, we will need a rectangular piece of wood, the size of which depends on what dimensions, in your opinion, the model you made should be. For example, the dimensions of the finished rifle are 1220 mm in length, 230 mm in height (including the sniper scope), and 88 mm in width.
As a material for the layout, you can use not wood, but a large piece of broken furniture. This could be, for example, a door from a wardrobe, the lower part of an old front door, etc. In a word, a do-it-yourself wooden sniper rifle is made from any wood or furniture that is at hand. You will also need a metal tube.
Next, prepare your wood carving tools, sander or plane, router, plane, saw, glue, nails, hammer, vice, drill, chalk and varnish. You can choose a garage or a work office as a workplace.
How to make a paper weapon that shoots
Of course, a pistol can be made simply as a model. But if the gun is shooting, it will become much more interesting.
To make such a weapon, you must first prepare several sheets of A4 paper, scissors, PVA glue or a pencil, tape and an elastic band.
Are you ready? Now you can start making a pistol. We start by making blanks for the gun in the form of tubes of different thicknesses and lengths.
First of all, we make long thin tubes. For this purpose, take a sheet of A4 paper and place it on the table at one angle towards you. Then we begin to twist the corner. To make it easier to tighten, you can use the rod from the handle.
Twist it tightly, then take the glue and lubricate it with the free tip of the sheet that we glue. This way the tube will not unfold. We roll up the second tube in the same way.
Now you need to roll short and wide tubes. To do this, take a sheet of the same A4 format and arrange it in landscape form, i.e. wide side towards you. After this we roll up the tube. For convenience, you can use the previous blank and roll a sheet of paper along it.
In the photo, I started folding from the narrow side of the sheet. In principle, this is possible, however, as we will see later, the length of such a tube will not be enough and you will have to roll up another one. And in this version we will also need two wide and short tubes. This way we will have four blanks.
And finally, the last blank, which we make from a square sheet of paper. To do this, fold a rectangular sheet of A4 paper, bending the upper corner to the opposite side of the sheet and cut off the remaining wide strip along the fold line.
The result is a square, which we place at an angle towards us and, using the tube made in the early stages, we fold a sheet of paper.
We glue the edge. As a result, we get five blanks - paper tubes.
The blanks are ready, now you can proceed directly to assembling the pistol. To begin with, we take a thick and short tube and cut three pieces of it measuring 15, 7 and 5 cm. From the second tube we make five pieces of 5 cm each. As a result, we get 8 pieces.
From them we assemble the shape of a pistol. On the table we first place a large tube of 15 cm, under it we place a tube of 7 cm, and then the remaining 5 cm. We place them, creating the shape of the handle and barrel of the weapon.
The next step is to take a long thin tube and insert it into the fourth segment or the second five-centimeter segment.
Then, a little further from the middle of the tube, we make a double fold and glue the end of the tube to the trunk. We cut off the excess part protruding behind the trunk.
By the way, when connecting parts of the gun, you can also use tape. This is exactly what I did.
As a result, we have a bracket where the finger is threaded. Now let's make the trigger. We will use the cut part from the tube for the staple for the trigger. We insert this tube into the second part or 7 cm segment, insert it to the end and bend it.
We insert the bent part into the lower segment.
That's how we got the trigger. This part does not carry any functional load, rather just a design that brings the layout closer to the real one.
Now let's create something like a pistol body. To do this, take the remaining tube and bend it along the contour of our craft.
Then we glue it or attach it with tape.
Basically, the gun is ready. You can leave it like that. But we are interested in its shooting version.
To do this, take a cut piece of tube. If there is none left, roll a new tube. You don't need a big one, you can use a quarter of an A4 sheet. The twisting order was given above.
We insert this tube into the barrel from the back of the gun.
Then we bend the back end of this tube, and put the prepared elastic band in the fold.
We either glue the bent end or secure it with tape. It's better to do it with tape.
Now we throw the elastic band forward and secure it under the barrel of the gun. We have weapons in a combat platoon. This is how it will be located. The remaining cut pieces from the tubes can be used as bullets. The main thing is that they fit freely into the trunk. If they do not fit, then you can roll a new tube out of paper of a thickness suitable for the barrel of a pistol and cut small pieces of bullets from it.
Pull back the tube with the rubber band (shown by the arrow in the picture) and put the bullet in the barrel.
Then we release it and the bullet will fly out of the barrel.
We draw and model the model
When all the parts and workspace are ready, you can begin to solve the problem: “How to make a rifle yourself.” To do this, take a prepared piece of wood and draw the outline of the future rifle on it. It is more advisable to do this with regular white chalk, but if you don’t have one, a marker or even a pen will do. Don't forget to draw the sniper scope. Moreover, you should draw not in a three-dimensional, but in a flat variation, that is, as if your model is lying on one side.
We process irregularities with a plane
In order for your model to save you from such an unpleasant phenomenon as splinters, it is recommended to treat the product with a plane. This must also be done in order to give the resulting weapon a softer and more rounded shape.
It is better to process hard-to-reach places using a grinding machine or a metal file. You can round off and polish rough areas of the rifle using “sandpaper” or sandpaper. After such processing, you should have a model part that is smooth to the touch and, as a result, a beautiful sniper rifle with your own hands.
Making metal plates for the hard drive
At the next stage, decide how to make a sniper rifle out of wood: with or without plates on the hard drive. In this case, metal plates will add realism to the model, so it’s still better to make them. To do this, take two small flat rectangles of thin metal sheet, make holes in them for nails with a drill and secure them on both sides of the rifle with fasteners.
How to make a tank out of paper, on video from YouTube
From paper in the origami style you can make not only hand weapons, but also equipment. For example, tanks. Everyone knows such a computer game as World of Tanks. Some people stayed behind her even for days.
But imagine that you can make simple “tanks” out of paper yourself and play them with friends, breaking away from virtual reality. But here you can make not only tanks, but also various obstacles - what a field for creativity. This is hardly possible in computer games.
The video below shows how to make these tanks out of paper.
By the way, here you can also find many other interesting crafts, both military equipment and weapons. All this will help turn the fun into an exciting activity.
Making a barrel for a rifle
To make a rifle barrel, use a thin aluminum tube. Next, you should saw off the excess with a hacksaw and leave the length that you need. After this, make three identical holes in the resulting barrel, two of which will serve as a support for the mount, and the third for the front sight.
If you still haven’t decided to make a model of a weapon and don’t know how to make a sniper rifle out of wood, quickly join us. It will be more interesting later.
At the next stage, we attach the finished barrel to the rifle model and securely fix it. At the final stage, it is recommended to cover the weapon model with a protective wood varnish. The rifle is ready.
Making paper ninja weapons
Many people know who ninjas were and what weapons they had. The first thing is, of course, the sword. However, in most cases, when we talk about ninjas, we imagine a throwing weapon, which we call “star”, and for ninjas, it is shuriken.
Star
This is the kind of shuriken we will try to make. Of course, it will be made of paper and looks like this:
As you can see from the picture, it consists of two parts - they are multi-colored. However, you can also use plain white paper. The general assembly diagram is shown in the figure below.
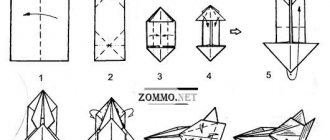
We start by taking a square sheet of paper. How to make it from A4 format was discussed in the previous section. Then we divide the square in half and cut it so that we get two identical halves. We also fold these halves in half along the wide side. Then you need to bend the corners on both sides of each half:
How to make working with wood easier?
If you are just thinking about how to make a rifle yourself, and our step-by-step instructions seem complicated to you, you can always simplify it. How to do it? For example, you can take a wooden element, draw an outline on it, cut it, sand it and varnish it without using additional metal elements. So you, on the one hand. simplify your work, and on the other hand, you will make the long-awaited layout with minimal time spent.
As for the remaining elements of the rifle, they can always be completed. By the way, other types of weapons can be made using a similar principle.
How to make a paper machine gun AK-47
Using the origami technique, you can make not only a pistol, but even a machine gun. For example, such a legendary one as the AK-47.
Of course, this is not a perfect layout, but it looks impressive.
The manufacturing process of the machine is shown in the video below.
However, if you need a more realistic model of the machine. You can download a ready-made template and use it to glue your own machine gun.
However, an origami-style machine, and even if you paint it, will look much more interesting.
What safety rules must be followed when working?
Before making a sniper rifle, take the time to study basic safety rules. For example, it is best to start woodworking in a special apron (it should cover the upper part of your body down to the knees) and gloves. These could be ordinary gloves, which we often buy when we do repairs or paint something.
It is better to hide your hair under a cap or bandana so that it does not interfere. This will protect you from hair getting into the blades of the milling machine and other equipment. For the same reason, before work, it is better to take off long chains and other jewelry, neck scarves and scarves. It is also better not to wear clothes that contain decorative elements, such as ruffles or fringes, while working.
Before making a rifle out of wood, make sure to purchase special safety glasses. You will need them at the moment when you grind and comb wooden models. And they are the ones who will help protect your eyes from small parts of wood, dust and shavings getting into them.
When working with an electric drill, check the serviceability and working condition of all tees and sockets.
