This toy came to us from the Soviet Union. When, apparently, it was not easy for children to buy something special somewhere, but they still wanted entertainment. This thing is really imbued with some special spirit of that time, when they did a lot of things with their own hands and, in fact, not only did they not worry about it, but they even felt a certain superiority over those who could not do it. Although we think there were much fewer armless people than in our century, when a Chinese trinket can be bought for a couple of kopecks. However, we will not look for the truth about when it was better and what are the features of each of the times, but we will tell you about a toy - a tractor made from a spool of thread on a rubber motor.
Reel tractor with rubber motor, toy for children
For the toy we need the following. A reel with protruding edges. This could be a spool of thread or something else. You will need a rubber band, a match, a rod, a soap or a candle, or maybe just a plastic washer.
How can all this be applied to get a self-propelled vehicle? Initially, we make notches on the reel. They will help the edges of the reel to cling to the surface on which our tractor will ride.
Especially if it is embossed and soft. Next, we break the match so that it is no larger than the diameter of the end of the coil. We also make a washer from soap or a candle. You can use a plastic washer. In fact, such a washer will act as a sliding bearing. If you lubricate it with lithol, at least with a thin layer, it will be absolutely fine. To prevent the match from turning at the end, we make a recess. You can then glue the match there using glue.
Now we assemble our tractor. Since the actual production work had ended, assembly work began. To help you better imagine how to assemble everything, look at the picture.
The rubber band is threaded through the hole in the spool and placed on the match.
On the other hand, the hole of the washer and the rod are threaded into the elastic band. That's it, the toy is ready.
Now it is enough to twist the rod several times, in any direction, and place the structure on the surface. The rod will begin to rotate until it hits the surface. Then the coil will begin to scroll. Since, after all, something must spin... releasing the energy of the twisted rubber band. The rotation of the coil will ensure that the entire structure moves along the surface, so it will move. Here's a do-it-yourself tractor toy. There are many advantages to making it. If you do it with children, you can thus develop their motor skills, study the world around them, and teach them to work with their hands. Of course, it will also be a plus that they will have a new toy to play with.
It is difficult to imagine agriculture without the use of special equipment. But most private farmers cannot afford to buy a mini-tractor. On small plots of land you can get by with hand tools, but on an area of more than 1 hectare this will not be enough. A homemade tractor is not inferior in efficiency to most factory models.
Step-by-step assembly of a three-dimensional model of the MTZ-80 Belarus tractor with step-by-step photos
MTZ-80 Belarus is a brand of universal row-crop wheeled tractors produced by the Minsk Tractor Plant from 1974 to the present. Creating MTZ from paper is a painstaking and time-consuming process, but the result - an exact copy of the legendary agricultural machinery on a scale of 1:43 is worth the effort.
Printable templates
Patterns are printed on paper with a density of 140-160 g/cm, cut out and assembled as the diagram suggests. Immediately after cutting out the elements, they are numbered on the wrong side so as not to be confused.
It is better to cut out parts as needed and immediately glue the elements together so as not to lose or crush the workpieces.
Assembly diagrams
Assemble the model according to the diagram, observing the numbering of parts and the order of actions. The folds are pre-pressed along the ruler. To get an accurate result, wait for each of them to dry before connecting the finished elements.
The resulting model will be a worthy piece in the collection of paper transport lovers or a gift for a child who is interested in various techniques. Middle school children can make a paper tractor together with their parents or older brothers.
The main types of homemade tractors
Due to high fuel consumption, weight and dimensions, using large and powerful tractors on a small area is inconvenient and irrational. Their manufacture requires precise calculations, which are difficult to perform at home without engineering skills.
A mini-tractor is considered a multifunctional piece of equipment and is capable of cultivating up to 10 hectares of area. This is enough for private farming. It should be suitable not only for caring for the garden, but also for clearing snow, transporting goods and removing garbage. When designing your structure, you should take these features into account.
There are 2 approaches to creating your own tractor:
- Re-equipment of finished agricultural machinery. In the vast majority, the base is a walk-behind tractor, to which is attached a frame with an additional pair of wheels and a driver’s seat. This method allows you to quickly and with minimal effort build a simple and functional tractor.
- Full production. It is used in the absence of a base or for specific requirements for equipment. In this case, the chassis is designed and manufactured independently, and components are selected based on financial capabilities and design features.
Some enthusiasts build steam tractors. A separate boiler allows you to use almost any type of combustible fuel. This type of energy conversion was common in the 1900s. Due to low efficiency, bulky design and short power reserve, steam engines cannot compete with internal combustion engines. The use of outdated technologies in agriculture is a costly endeavor and is used for entertainment.
Features of paper technology
Creating automobiles out of paper is a fascinating and educational hobby that develops engineering thinking, precision and accuracy of movements, and broadens one’s horizons. Models of paper tractors can be collectibles for paper modelers, an educational children's toy, or an original gift for Agricultural Worker's Day.
The process of assembling a model with your child can be unobtrusively turned into a lesson in physics or auto mechanics.
Examples of paper and cardboard layouts
The good thing about paper is that, essentially, from the same flat sheet you can create completely different three-dimensional layouts depending on the skills, age and desires of their creator. Experienced modelers create detailed samples of agricultural machinery that are absolutely identical to the real thing, and simple crafts for children can be the first step on the path of a design engineer.
T 40-A and MTZ-80 Belarus.
Crawler tractor DT-75.
Armored steam tractor Flowler B-5 1899
Mercedes-Benz MB TRAC.
Blue tractor from an educational cartoon.
Field worker using modular origami technique.
Tractor manufacturing features
Homemade equipment has the most simplified design, and its production uses components and assemblies from other equipment. The goal is to obtain a cheap and reliable design. Assembly requires basic tool handling and minimal technical knowledge.
When designing your own design, you should use parts with minimal modifications. Spare parts should be readily available and inexpensive. A large number of homemade elements in the design will increase the cost and duration of repairs.
Carrying out accurate calculations of strength and loads is practically impossible at home, so the frame and other load-bearing components of the structure are manufactured with a large margin of safety.
If you have the drawings and necessary equipment, you can make a tractor yourself in 3 months.
Preparation of drawings
Before purchasing and preparing components, it is necessary to draw up a project for the future tractor. You can take drawings of finished models as a basis. The spare parts you have may differ from those declared, and changing the finished design will not be difficult. There are ready-made solutions for any modifications.
If it is not possible to use a ready-made project, then you need to prepare rough sketches yourself. During the assembly process, the arrangement of elements may change, but you must understand how the individual components will be located.
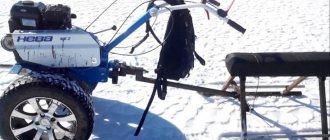
A mini tractor is an indispensable agricultural equipment for cultivating land, planting seeds and harvesting crops. This technique is especially in demand in the countryside, among owners of large personal plots. The cost of factory-made mini tractors is quite high. Even the latest Chinese-made technology is sometimes not affordable for everyone. Therefore, more and more home craftsmen are trying to make a mini tractor themselves, using available materials.
If you decide to assemble a mini tractor with your own hands, then first of all you need to select a power unit for it. The ZID engine is often used as the latter
. This is a four-stroke unit with a volume of 0.52 liters. and a power of 4.5 l/s, which is quite suitable for cultivating 2-3 hectares of land. The engine is easy to maintain, so it is often installed on various home-made equipment; moreover, it is easy to buy on the Internet.
Another option for homemade is. This is a two-cylinder unit with a power of about 12 l/s and a volume of 0.42 l. Although this type of motor has long been discontinued, there are a large number of offers on the Internet for the sale of this unit. It can be bought for approximately 5,000 – 8,000 rubles.
Often, when making homemade tractors, craftsmen use motors from cars. For example, you can find mini tractors with an Oka engine.
This engine has a power of 29.3 l/s and a volume of 0.649 l. In fact, this is a VAZ engine (VAZ 21083), only in a lightweight version, since it weighs 2 times less. A distinctive feature of the Oka engine is its low gasoline consumption and high efficiency.
A more expensive option is a Zhiguli engine.
. The engines of the VAZ car line have an engine power of 59 l/s (VAZ 2101) and higher. A tractor with a VAZ engine is a fairly powerful unit that can cope with almost any agricultural work.
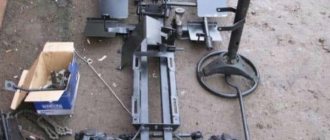
It is easiest for owners of walk-behind tractors to make a mini tractor for the household, since this unit already has all the necessary control units. All that remains is to make a suitable frame, and the tractor is ready.
What to make a frame from
Assembling a mini tractor always begins with making the frame. The frame of the mini tractor acts as a base on which all components and parts of this unit are fixed. The frame should be strong enough and at the same time not very heavy. It is usually made from a metal angle, a profile pipe or a channel
. The parts are connected by welding. The frame can be solid or consist of two parts.
One-piece frame
easiest to make. It is enough to weld a rectangle from a channel or corner. Frame dimensions are calculated based on the dimensions of the engine, gearbox and other components.
Also among owners of personal plots, 4x4 mini tractors are very popular. These are all-wheel drive mini tractors with a breakable frame
. The word “all-wheel drive” means that the unit has both drive axles, front and rear. An example of such a frame, made from channel No. 10, is shown in the following photo.
Frame fracture unit
most often made from the driveshaft of a car, for example, from a GAZ-52.
The main advantage of a homemade tractor with a breakable frame is the small turning radius of the unit.
Thanks to its high maneuverability, the fracture minitractor is successfully used in small areas where turning a minitractor with a solid frame would be difficult.
Below are drawings of a frame connected by a hinge.
Drawings for assembling realistic tractors of medium complexity
The developments presented below are suitable for self-assembly for middle-aged children, or adults who have just begun their journey as a paper modeler. The diagrams are not particularly detailed, but will require less time to assemble than accurate collectible models.
What to make a chassis from
To assemble a mini tractor, you need to prepare its chassis. It includes wheels, front and rear axles, and transmission elements.
When choosing wheels for a mini tractor
the purpose of using the latter should be taken into account. If the unit is being built for transporting and pulling loads, then a disc diameter of 16 inches will be sufficient. When using a tractor in field conditions, it is better to use more massive wheels with discs with a diameter of 18 to 24 inches.
If your tractor has only a rear drive axle, then the front beam is made
simple enough.
To make a homemade front axle, as well as its rear analogue for an all-wheel drive unit
, you will need to take 2 identical chassis units, for example, from a VAZ or Moskvich car, and shorten them. You can learn how to shorten the bridge from a VAZ car from this video.
Important! Axles must have the same gearboxes, with the same gear ratio. Otherwise, the front and rear wheels will rotate at different speeds when the tractor moves.
Since the bridges already have a built-in mechanism for transmitting rotational motion to the wheel axle, there is no need to make a homemade gearbox.
Build the back of the tractor first
Note. Once you've cut the pieces into their final shape, sand them down with 220-grit sandpaper before starting assembly.
1. Cut chassis A and platform B from a 19 mm walnut board (Fig. 1 and 1a). Install a 45° chamfer cutter into the milling table and make chamfers along the ends of the chassis (Fig. 1a), then drill two holes with a diameter of 9 mm in the indicated places.
2. Mark the bevels at the front end of platform B (Fig. 1), file them with a band saw and sand them smooth. On the bottom side, drill and countersink two mounting holes with a diameter of 4 mm at the indicated locations.
H. For hood C, glue a block blank from three pieces of 19mm maple board. Cut out the hood from it according to those shown in Fig. Using 1 dimensions and a band saw, make a bevel on the back (Fig. 1b). Mill roundings with a radius of 3 mm on all edges, except the bottom ones. Then mill or chamfer along the lower longitudinal ribs without going to the ends. Drill a 6mm hole 10mm deep (Fig. 1b) and glue the exhaust pipe into it.
4. Glue chassis A to platform B, aligning the edges and rear ends. Let the glue set for a few minutes, then glue hood C to this assembly (Photo A).
5. Using four pieces of 19mm walnut board, glue a block blank for cabin D and plan it to the specified thickness (Fig. 1). Make a copy of the cabin template and attach it to the side of the blank with spray adhesive. Drill a through hole with a diameter of 25 mm in the indicated location (photo B), then mill 2 mm chamfers around the hole on both sides of the fly. File the taper with a bandsaw, leaving a slight allowance, then sand to the line.
Quick tip!
To remove the paper template from the part, moisten it with white spirit. The glue will soften and you can easily scrape off the paper.
6. Plane a maple board measuring 102x330 mm to a thickness of 6 mm. Saw it off
strip 76 mm wide and save the remainder from which the levers O, P, Q will be made. Cut out the roof of the cabin K of the indicated dimensions from a 76 mm strip (Fig. 1) and save the remainder for the inner layer of the beam G.
Make a chamfer on the lower front edge of the roof and glue the piece to the cab D, aligning it in the center. Once the glue is dry, glue the cab and roof D/E to the chassis assembly A/B/C flush with the hood C.
Pros of installing hydraulics
Hydraulics are installed on a minitractor in order to ensure the operation of some of its mechanisms and facilitate the control of this unit. A unit with installed hydraulics has its advantages.
- The car becomes easy to control. The steering wheel can be turned with virtually no effort, with one hand.
- Hydraulics makes it possible to use various attachments.
- The use of hydraulics allows you to modernize the brake system. Thanks to the hydraulic cylinders installed on the unit, the unit brakes instantly.
You can make hydraulics on a mini tractor if you purchase a ready-made system in advance in a store or use parts from old agricultural machinery.
Important! When installing hydraulics on a mini tractor, it should be taken into account that some of the engine power will be spent on servicing this unit. Therefore, for tractors with low-power engines, installing hydraulics will not bring any benefit.
Let's start assembly
1. Note. Do not apply adhesive sealant to incisal joints until final assembly has begun after the finish has been applied. Prepare a piece of M5 threaded rod 67 mm long and use it to glue the front arms O, the rotary plate L and the rotary block N (photo G). Once the glue has dried, connect the pivot plates with a 22mm piece of threaded rod to the cap nuts (Figure 2).
2. To attach the upper arms Q to the clamp J, take an M5*76 threaded rod, washers and cap nuts (Fig. 1). Place a 67mm length of threaded rod on the I.-O blade assembly through the holes in the upper arms to position the blade under the F/G beam.
Attach the front arms O to the beam, then connect the vertical arms P with the front and upper arms using pieces of threaded rods, securing the assembly with nuts and washers (Fig. 2, photo H). Check how the assembled unit rises and falls.
H. Make 9 mm axle holes in four wheels with a diameter of 32 mm (photo I). Try on wheels with a diameter of 32 and 64 mm to the chassis A and the front axle H, inserting the axles and washers (Fig. 1). Remove the wheels and all fasteners. Cover the ends of the axles that will be glued into the holes with masking tape and apply a finishing coat to all parts. (We applied three coats of semi-matte polyurethane spray varnish with a 320-grit sanding pad in between.)
4. Once completely dry, apply a little glue to the sides of the holes before inserting the axles into them. Reassemble the lift and turn parts by applying red locking compound to the ends of the threaded rods. Tighten the nuts so that the blade turns and lifts without much effort and remains stationary in any position.
Why do you need a PTO?
The power take-off shaft (PTO) is designed to drive various agricultural machinery connected to a mini tractor, for example, various tillers for tillage, potato diggers, mowers, snow blowers, etc.
PTO can be either dependent or independent
. In the first case, the shaft is driven by a transmission that transmits rotational motion to the wheels. As soon as the wheels stop, the PTO stops rotating. The independent PTO receives rotation from the engine crankshaft. Therefore, the higher the engine speed, the faster the shaft rotates.
In addition, there are tractors with a synchronous PTO
. The rotation speed of the synchronous shaft directly depends on the transmission ratio of the moving tractor. Synchronization of movement and rotation is required when the unit operates with sowing equipment.
Manufacturing a three-point hitch
The hitch is used to connect additional equipment to the tractor
, for example, a plow.
The hitch must be movable both in the horizontal plane and in the vertical
. In the first case, mobility helps to reduce the overhang of the nozzle when taxiing. Vertical movement of the suspension is required to lower the equipment into a working position or raise it into a transport position.
The hitch on a mini tractor is made from various parts removed from old agricultural machinery. It is quite difficult to describe how to make a three-point hitch at home. Therefore, it would be more correct to use the following video, which shows the dimensions of all parts of the device.
The blade will rise and rotate
1. Take a blank for rotary plates L, attach it with double-sided tape to a flat carrier sheet with a length of at least 305 mm, and process it on a surface planer to a thickness of 6 mm. Make two copies of the turntable template and attach to the workpiece. Cut out the parts along the contour with a band saw and sand the edges. Note. One slab has rounded back corners, the other has straight corners (Fig. 2). Place both pieces together, aligning the ends and edges,
Drill a 5mm hole in the indicated location, then remove the template.
2. Cut out a blade M of the specified dimensions (Fig. 2a). Make a cutout at the top edge corresponding to the width of the rotary plate L. Glue the rotary plate with right angles to the blade (photo F).
3. Take the walnut strip previously set aside for the N turning block, saw off the block to the specified length and drill a 5mm hole in the center (Fig. 2). Glue the piece to the turntable L with rounded corners.
4. Make two copies of the templates for each lever O, P, Q, attach them with spray glue to the maple blank made earlier, cut out the parts along the contour and sand them. Drill holes in the indicated locations and mill the chamfers, then remove the templates.
Selection and installation of brakes and clutch
Brakes must be installed on the rear wheelset. The easiest way is to take ready-made blocks from a UAZ car
. The brake pads must be installed on the wheel disks, and the control must be placed on a pedal or lever installed inside the cabin.
To install a clutch on a homemade mini tractor, you can also use a ready-made version from a car. For example, you can use a belt clutch from a Moskvich or UAZ.
The clutch unit is attached to the gearbox, also taken from a car. You can see how the clutch is installed in this video.
Paper origami machines (diagrams)
Origami racing car
Such cars were popular in the USSR. We also post a video:
Origami tank
Origami machine
How to make a cabin for a mini tractor
If in the summer you can work on a mini tractor without a cab, then with the onset of the autumn-winter period, using the unit becomes quite uncomfortable or even impossible. Therefore, craftsmen are trying to assemble tractors with cabins in order to use this equipment all year round.
The cabin for homemade equipment is made of sheet steel
according to a pre-prepared drawing. You can take the cabin from the MTZ tractor as the basis for the calculations. The following photo shows a drawing, based on which you can make a cabin yourself.
Advice! If the cabin dimensions shown in the drawing do not fit the dimensions of your mini tractor, then they must be changed. But the main thing that needs to be taken into account when adjusting the dimensions is the size of the windshield and the height of the cabin. Its ceiling should be 25 cm higher than the head of the person sitting in the cabin.
The cabin is manufactured as follows.
In general, to better understand how to make a mini tractor with your own hands, you can watch this video, a kind of guide for beginners.
Developments of simple tractor models for children's creativity
Children who are not yet able to assemble a tractor out of paper using complex patterns with a large number of parts can make a toy with their own hands from a ready-made development.
The process of creating a craft consists of several simple steps:
- print out the picture you like;
- carefully cut out all the details along the contours;
- press all the folds along the ruler to obtain neat angles;
- coat the valves with glue and assemble a model of the tractor, checking the image of the finished model.
Blue paper tractor
In order for a cheerful educational cartoon character, a blue tractor, to “settle” in the house, the layout must be printed on a color printer on thick paper and assembled according to the step-by-step plan given above.
The toy will turn out more beautiful and more durable if you print the blank on glossy photo paper.
A simple tractor layout with a step-by-step assembly master class
It’s not difficult to make a model of a tractor with a trailer and rotating wheels if you carefully look at the photo and consistently carry out all stages of the work.
The nuances of making a caterpillar tractor
Homemade tracked mini tractors are a technique whose main feature is high maneuverability and good cross-country ability.
. Also, a tractor on tracks creates minimal pressure on the soil, which cannot be said about its wheeled counterpart.
To make a mini tractor on caterpillar tracks, you will need the following structural elements.
- Frame. It is made from a profile pipe or channel.
- Engine. For a caterpillar mini tractor, it is better to use a diesel engine.
- Main bridge. As in the manufacture of a wheeled tractor, for a tracked unit you can also use a ready-made axle from an old car, which should be shortened.
- Transmission. The ideal option would be a box from GAZ-53.
- Clutch. A clutch block from a GAZ-52 will do.
- Caterpillars. They are made from tires from the wheels of large equipment, for example, from a tractor.
For making caterpillars
you need to take 2 tires from a tractor and cut off the side parts of them. These tires are then put on the wheels mounted on the frame, as shown in the following photo.
So that the tractor can turn
, on the rear axle you need to install a differential that will disconnect the right or left wheel from the drive. Also, each wheel must be equipped with a brake that can be controlled separately. When you press the brake pedal and shift the differential, one wheel of the drive axle stops, while the opposite wheel continues to rotate. Due to this, the tractor turns in the desired direction.
Rainy day at the dacha. I'm tired of all the toys. I want something new. “Mom, make me a tractor,” my son asked. All I had at hand were scissors and a box...
How to quickly and easily make a tractor for a small child. We take a box approximately 250*180*90mm. Draw a line dividing the box in half. The right side will be the cabin, the left will be the hood.
From the middle of the upper long end “1” of the box we make slits along the 3rd edges (“a”, “b” and “c”). We bend part of the end along the “y” line and lower it down - this will be the front window “2”. We make a rectangular hole in it and cover it with thin transparent plastic, securing it with tape - this will be glass (“3”).
Now at the front end of “4” from the middle we make slits along the side edges “d” and “d” and bend this part of the “x” line. We are left with 2 side walls, which we bend and, gluing them together, form the hood “6”. Having made 2 slits (“e” and “g”), bend part “7” upward and get the hood cover.
Let's get to the cockpit. On side “8” we will cut an opening door “9” and a window “10”. Now we will make headlights from the packaging of large vitamin tablets. Decorate the tractor with colored paper, and cut out and glue wheels from black paper. We will attach a “flashing light” on top, for example, from a piece of a large mosaic.
If you make a hole in the rear wall of the tractor and thread a string, you can also tie a trailer from a box without a lid and transport “loads.” And if you tie a rope in front, the tractor can be towed to the nearest gas station.
What you can do outside with your child in winter.
Ideas for inspiration:
Ride on sleds, ice skates, snow scooters, etc. - sculpt fortresses, snowballs, Easter cakes, snowmen and various other figures from snow; - roll around in the snow (but not for long and in warm clothes); — make prints of feet, hands, the whole body, you can make “angels”: lie on your back and wave your arms; - draw in the snow with a stick, with your feet, draw large letters or figures in a large clearing; — throw snow from branches and stand under the “snowfall”; - throw snow with a shovel, enjoying the snowfall or fireworks; - make paths or labyrinths with your feet or a spatula; - look for traces of different birds and animals; - climb snowdrifts - kick ice along the path; — play with snowballs: who will hit the target (for example, a tree trunk), who will throw it further, etc.; - drill holes in snowdrifts with a stick or the handle of a shovel, dig deep holes and wells; - you can take bottles with paint diluted in water and paint the snowdrifts in different colors, or draw patterns; - “plant” trees: “plant” all the branches that fell from the tree into a snowdrift; - you can build houses for different characters, for example, for a mouse, a bear, a bunny, from snow, ice, from snowballs, adding branches, bunches of dry grass; - feed the birds; - Bigfoot footprints. You can make Bigfoot paws out of cardboard and rope, then tie them to winter boots and set out to leave Bigfoot footprints; - winter picnic. When going for a walk in the winter forest, don’t forget to take a thermos with hot tea and cookies. Be sure to have an outdoor picnic on a fine winter day. To do this, fashion a table out of snow and drink hot tea and cookies at it; - carry snow in a truck, clear snow from paths with a toy tractor with a bucket; - skis and skates. If the child has grown up to skis and skates, then you can have a wonderful time; - make colored ice figures and play with them, build something, figures made using molds from a sorter are especially good for this; - bubble. When they freeze, they become very beautiful) A soap bubble freezes at a temperature of about -7 0C. In order to freeze a soap miracle, just put a snowflake on it, and right before your eyes the bubble will turn into ice. For this purpose, you can also carefully lower the bubble onto the snow; - make a magical snow lantern. In the evening you can make a lantern out of snow and snowballs and put a candle inside, it’s very beautiful! - look at snowflakes through a magnifying glass; - draw with snow on the walls of houses, fences, tree trunks.
Tags: How to make a toy tractor from wood
DIY wooden toys
The world of art is very diverse and has many great directions. People admire beautiful paintings, majestic sculptures and handicrafts of incredible beauty. You can join art not only by creating unique, expensive jewelry and other things. Every hobby deserves people's attention, and even ordinary wooden crafts can attract the joyful smiles of others. You can start developing with the favorite topic of all boys - cars. When you create such wooden toys yourself, with diligence and labor, you can get good results. To do this, you must listen to the advice of more experienced comrades who have achieved positive results in this matter.
DIY wooden tractor
You will need imagination and simple tools. Building a simple tractor will teach you how to cut wheels of different sizes and design other parts. The tractor cabin can have the following dimensions: 65x75x80 mm, and the chassis 155x75x25 mm.
Keeping the proportions, you should end up with an engine measuring 100x50x45 mm and a cabin hood measuring 25x75x25 mm. The front wheels should be slightly smaller - 50 mm in diameter and 9 mm in thickness, and the rear wheels are traditionally slightly larger and wider - 90 mm in diameter and 25 mm in width.
Sketch
To begin, you will need a rough sketch of the future product. Determine the sequence of actions, the main elements of the tractor and prepare the materials and tools from which you will make a children's wooden toy.
Sawing parts
Start cutting. You need to be very careful when working with a sharp tool. When all the parts take the proper form, they should be sanded, removing all burrs and irregularities that could make your craft look unpresentable and unfinished.
Assembly
Once all the parts are ready, begin assembling them. First, you need to connect the engine to the cabin with nails - this will be the basis for attaching the front wheels. This way the messy toy will take on its general outline and all you have to do is secure the wheels with pins. After installing the wheels, try to spin them - if everything is fine, you can start painting the product. After painting the parts of the product, allow the paint to dry and you can varnish the tractor. For the exhaust pipe, use a small metal rod, slightly curved at one end.
Wooden truck
If you can make a tractor, you can use the same principle to make a truck for a child. The proportions of the parts must coincide with the overall design of the product. You can choose the following sizes:
- frame 240x80x15 mm;
- cabin 50x60x40 mm;
- engine 60x40x40 mm;
- body 140x80x40 mm;
- wheels 8 mm thick and 36 mm in diameter.
The process, as in the previous case, involves first drawing a sketch on paper. When you determine the sequence of work, you will need to select the appropriate material in the form of a bar of the required size and shape.
Creating parts
When cutting out wheels, try not to deviate from the original dimensions. Self-made wooden toys must correspond to the overall proportions, and all parts must have a harmonious appearance. Carefully polish individual parts - this will demonstrate your perseverance and diligence.
Assembly
After manufacturing all the parts, you can begin to assemble them sequentially. Do everything as carefully as possible. After connecting the engine to the chassis, secure the cab and body by driving nails into the correct places. The wheels need to turn, so use the studs. For the front wheels, fasten the mounts two centimeters from the edge of the frame, and the rear wheels should be further away - 6.5 centimeters from the edge.
Painting and varnishing
Paint and varnish your homemade wooden truck. A glued-on license plate or some kind of flag looks quite original.
Wooden helicopter
This task is more time-consuming, but if you complete it, you will add a worthy representative to your collection.
Main details
First, as usual, you need to prepare the main elements, following the size grid. The cabin must have the sides cut down to the centerline at an angle of 22 degrees. The dimensions of the parts should be as follows:
- gearbox responsible for the operation of the motor – 20x20x10 mm;
- motor – 80x50x40 mm;
- the main large propeller consists of four symmetrical blades of 180 mm each with a width of 15 mm (it is made of thick cardboard);
- tail boom – 160x30x15 mm;
- tail rotor platform – 80x15x15 mm;
- three symmetrical tail rotor blades made of cardboard, 50 mm long and 5 mm wide;
- four wheels with a diameter of 30 mm and a thickness of 10 mm;
- bars for fastening wheels 90x20x30 mm.
Fairy tales for boys - about cars and other equipment) | Topic author:
A TALE ABOUT A CAR THAT GOT LOST IN THE FOREST.
In one city there lived a machine. And her name was Bi-bi. She lived in a large garage under a large house. Every day she drove her uncle to work, and on weekends they went on vacation together. But BB really wanted to take a walk in the forest. And so, one evening, parked in the garage after work, my uncle said: “Tomorrow I don’t want to go anywhere, and you are completely free. You can go wherever you want." BB was very happy. The next morning, the machine woke up very early. The sun had just appeared over the horizon, and Bi-bi joyfully set off towards adventure. At first she drove through the streets of the city, past large houses, beautiful shop windows, past parks and squares. And then I drove out of town onto a wide highway. BB drove and sang her favorite song. We are driving, driving, driving To distant lands Cheerful neighbors Happy friends... The car drove further and further from the city. So she drove past a large field where a combine was working. Then past a village with small wooden houses and loudly barking dogs, and finally reached the forest…. The trees were tall, tall, and the grass next to them seemed so small, small... And the voices of birds were heard from the forest... BB saw the turn and turned towards the forest. How great it was in the forest! The sun had already risen high, but it was not hot at all in the forest, the leaves of the trees cast shadows and sheltered the car from the rays of the sun. Birds sang their songs around and Bee-Bi quietly sang along with them... The car drove just a little bit and saw a lot of small red mushrooms near the stump. “Chanterelles,” she remembered, and began collecting them. Then she saw russula, and a little further under a birch tree she found a boletus, and a little further on in the clearing honey mushrooms grew. And then BB found more boletuses, moss mushrooms and even a large porcini mushroom. When there were already a lot of mushrooms in the trunk, the car decided to rest. She ate blueberries straight from the bush and went back. BB drove and drove, but could not find her way home. She drove so deep into the forest that she got lost. The car beeped once, then again and again, but no one heard it. "What to do? “- thought BBC. "Already evening. It will be dark soon. Apparently we'll have to spend the night in the forest..."
SHAKE! (Giana) PART 2
The car found a small clearing nearby, saw a good place on it under the Christmas tree and began to make itself comfortable. But then it seemed to her that someone was crying. BB listened... yes, sure enough, somewhere nearby someone was crying. BB went to look and in a neighboring clearing she saw a girl sitting on a stump and crying. “Hello,” the machine greeted. - "What's happened? Why are you crying? “I was picking mushrooms and got lost...” the girl answered and began to cry again. “And I got lost too,” said Bee-Bi. "What is your name? “My name is Masha,” answered the girl, “And I’m Bi-bi.... Oh, it looks like it’s starting to rain... Let’s go to the neighboring clearing, there is a wonderful place under the Christmas tree. There we can hide from the rain and sleep, and in the morning we will definitely find our way home! “Masha got into the car, and together they hid under the Christmas tree. Drops of rain rustled on the leaves of the trees, but under the tree it was almost dry. Masha and Bibi were so tired during the day that they quickly fell asleep to the soothing sound of the rain. The next morning, they woke up to the sound of a motor somewhere nearby. “Hurry up, hurry up,” Bee-Bi hurried. – “It looks like a tractor is working somewhere nearby. He will show us the way to the highway.” The friends followed the sound... And sure enough, an old tractor was working very close by. “Hello,” the friends greeted. “Hello,” answered the surprised tractor. “You see, we got lost yesterday...” BBC began her story, “could you show us the way home?” "Of course, I will help you! First you will need to drive along this clearing. Then you will see a large oak tree, you will need to turn right near it, and then...then always drive straight and you will go straight onto the highway...” the old tractor told them. "Hooray! “- Masha shouted joyfully. "Thank you! Goodbye! “- answered BB and she and Masha drove towards the house. " Good luck! “- the old tractor shouted after them. The car and the girl quickly reached the highway. BB took Masha to her grandparents, and she also went home! Just like yesterday, the sun was shining, snow-white clouds were floating across the blue sky. The car drove along the road and smiled... She remembered the forest, the clearing, mushrooms, Masha, the night rain, the old tractor and felt very, very happy - after all, how great it is to have a day off!