With the holidays approaching, it's time to think about how to present your chosen gift in an original way. After all, the best will be the one that is chosen and decorated with soul and great love. For this reason, a huge number of needlewomen are already interested in the question of how to make a cardboard basket with their own hands. Because they can be used to beautifully present sweets, flowers and gifts. And also decorate celebrations, holidays and even weddings. Therefore, in the material presented below, we will explore the technology for making this particular amazing item.
What is needed for work
The embodiment of a cardboard basket begins with the preparation of materials and tools with which we will realize the idea. There is no need to cook something inaccessible or very expensive. A simple list of office supplies is almost always available in every home. So, to make the craft you are studying, you should prepare:
- a set of colored or white cardboard;
- scissors;
- a simple pencil;
- ruler;
- paper adhesive tape;
- PVA glue.
However, this is only a basic set of tools and materials. Each instruction on how to make a basket out of cardboard requires its own components. We will definitely tell the reader about them.
Bottom of the box
To make the bottom of the box, you first need to decide on its size. Prepare any product in the shape you want your basket to be. It can be any cardboard box, the main thing is that you like its shape and it matches the required dimensions. Measure its bottom. Place the dimensions on cardboard and cut them out (in duplicate). Then take paper straws. On one side, lubricate their edges with glue and glue along the contour of one cut out cardboard at a distance of 1 cm. It is enough to glue only 1 tube at the corners.
To ensure that the product sticks well, place a second piece of cardboard of the same size on top and press it down with something heavy. It could be a book, weights or something else.
Leave for a while for the glue to dry. Then remove the top layer so that only the bottom and tubes remain. Do this carefully, without sudden movements. Otherwise, you can tear off the tubes.
Square basket frame
The simplest is the model we will study in this section. In essence, it is an ordinary box, only without the top wall. To do this, you need to draw a square of the desired size on cardboard. Draw another square near each side. Just four. Then we cut out the resulting cross, carefully press through the joints and lift the side walls of the basket. Now all that remains is to glue them with paper tape on the inside. Add a handle to the finished frame and decorate it as you wish. This is how easy it is to make a cardboard basket with your own hands.
Children's craft from paper plates
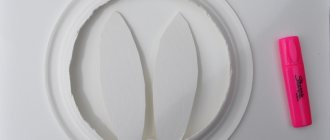
To create a paper basket with your own hands, a step-by-step photo is given in the article. For work, buy three plates with ribbed edges. The first remains intact for the front part of the craft in the shape of a bunny's head, a semicircle is cut from the second, which serves as a pocket for sweets or other filling of the basket. From the third plate, two narrow, rounded edges are cut to attach to the top. These will be the bunny ears.
All connections are made with a stationery stapler using paper clips. For the handle of the paper basket, select a satin ribbon and punch two holes with an awl on opposite sides.
All that remains is to decorate the craft with small details. Ears are cut out of pink paper and glued in the center of the half-arcs from the plate. You can draw the eyes, like the two front teeth, or attach store-bought toy ones. The fluffy nose is made from cotton wool. A cheerful basket in the shape of a bunny is ready!
Round faceted basket bottom
Another version of the product being studied is more interesting. It is a little more difficult to perform than the previous one. However, the technology is quite accessible to novice craftsmen. The main thing is to make the calculations correctly. We'll talk about this later. So, how to make a round-shaped basket from cardboard:
- First of all, it is important to note that to construct an idea, you need to prepare a compass.
- Then we draw a circle on a sheet of cardboard.
- We draw a vertical and horizontal line, drawing a cross in the center.
- We divide the four resulting zones with two additional lines.
- The result is a circle divided into 8 sectors.
- Now you need to draw the edges on it, connecting the points marked in green on the diagram.
- Cut out the bottom of the future basket.
How to make the sides of a basket
Next you need to draw the side edge. If you want to make a cylindrical basket, draw a rectangle of the required length from the edge marked on the bottom (1). For a trapezoidal basket, prepare a face of the appropriate shape (2). Both options are shown in the diagram proposed above.
Assemble the basket and carefully tape the seams with paper tape. We start with the side edges, and then connect them to the bottom. We complement the finished base with a pen and decorate it at our own discretion. Moreover, it is important to note that according to these instructions you can even make a mini-basket. You just need to reduce the initial circle.
Heart shaped basket
The following original craft is very interesting. However, you should first prepare a sewing needle with a large eye, knitting threads of your favorite color and a piece of felt of a suitable shade. After this, we print out the template shown above on the computer, carefully cut it out and transfer it to cardboard. We add three additional parts to the base and attach them with paper adhesive tape. We fix it on both sides. We cut out a heart from felt, equal in size to the bottom. Raise the sides up and place a felt heart on the bottom. Then we get to the fun part. We take the prepared yarn, grease the tip with glue and hide it under a felt heart. Next, we wrap each vertical edge once with thread, moving in a circle. Our task is to wrap the product so as to completely hide the template. Finally, all we have to do is decorate the top edge of the basket using thread and cardboard. To do this, we thread a knitting thread into a needle and carefully run a seam “over the edge” along the entire perimeter. It is important to get into the holes of the cardboard.
Making a vintage basket (MK)
For experienced needlewomen, making a basket in a vintage style would be a good option. This will allow you to create an original gift for your loved ones for the holiday.
You will need some materials:
- thick paper and pages from an unnecessary book;
- ground coffee;
- brushes and glue;
- ropes for making handles;
- ornaments for decorating the basket.
1. Paper is being prepared , it is better to take old children's publications. They used fairly thick paper, which will make it possible to make a fairly stable and reliable basket.
Preparing the sheets
2. Paper ages . To do this, you just need to paint the sheets with brewed coffee. Even a child can easily cope with such a task. Once the paper is covered in coffee, it should be allowed to dry. At the end the sheets will turn a coffee brown color. The coloring will be uneven, which will give the feeling that the paper for the basket is old. If the blanks are not as dense as you would like, then you need to glue several sheets together. The basket must be able to support the egg without collapsing.
This is interesting: Interesting Facts About Pets
Sheets are colored with brewed coffee
3. When the paper is ready, you can start cutting . The work can be easily done with your own hands. Of course, if you want to create a large basket, then the development must be applied to certain dimensions. This will allow you to make a more even and beautiful basket. On small products, deviations and irregularities will not be so visible.
Pattern
4. You also need to prepare two identical circles , which will hide these irregularities.
Final blanks
5. Undercuts and bends of the workpiece are made along the marked lines. The elements are glued to the base of the basket.
Elements are glued together
6. A circle is glued to the top of the mount, which is first folded in half. Thus, the base of the basket can be considered ready. All that remains is to make small holes and secure the handles.
Glue the circles on the sides
7. It is better to use old rope as handles. It is inserted into the hole and tied in a knot.
Making a handle from a rope
Fabric and paper products are used as decoration. The most popular decoration in vintage style are flowers. This idea is worth using especially when really beautiful and unique baskets for Easter eggs are created with your own hands from paper.
Ready basket
Easter baskets made from bags and felt (2 videos)
Colored cardboard basket
If you don’t want to bother with pasting and decorating the craft, you can make a simpler, but equally original and effective option. We will study its implementation technology further:
- First of all, prepare a sheet of cardboard of your favorite color, a simple pencil, a ruler, scissors and glue.
- After this, place the cardboard face down in front of you.
- We measure the side and set this distance vertically.
- Cut out the resulting square.
- We divide it into nine identical smaller squares.
- On the upper and lower middle we mark the middle and draw triangles.
- Cut out the shape shown in the photo.
- We divide the two upper and two lower squares into three parts.
- Cut out the shape shown in the photo above.
- Now all we have to do is assemble the original craft from colored cardboard as shown in the instructions. Finally, glue a triangle and a small circle on top of it, masking all the imperfections. Then we add a handle to our basket.
Basket made of plastic and thread
This version of the basket is even cheaper, because you don’t need to buy either felt or thick rope. Any knitting thread will do. The result looks like you knitted a cover and put it on a basket, but in fact you don't need any knitting skills to create it. This basket can also be used as a pot for house plants.
Necessary materials:
- Large plastic bottle (6 liters) or plastic bucket
- Wool yarn in different colors and thicknesses
- Sharp scissors or knife
Step-by-step instruction:
Step 1: Preparing the Plastic Mold
- Using scissors or a sharp knife, cut off the top of the bottle or bucket so that the sides are smooth all the way to the top.
- Wash and dry the mold thoroughly. Then make vertical cuts around the entire circumference of the bottle or bucket, not reaching a few centimeters to the bottom.
- It is better to initially mark the lines with a thin marker and cut along them so that they turn out even.
- You choose the width of the strips yourself, the main thing is that they are all the same, and it is better that there is an odd number of them.
Step 2: Wrap the walls
Tie the thread around one of the strips, leaving a knot on the inside, and begin wrapping the strips in a circle in a checkerboard pattern (top, bottom, etc.).
TIP: Use threads of different colors and thicknesses to create a vibrant pattern.
Continue winding until you reach the top of the walls, securing the last rows with glue. If you are going to make an inner case (as in the first photo), then you don’t have to wrap it all the way to the top.
a storage box in the same way . Any cardboard box without a lid will do (if the lid is attached to the box, cut it off).
ATTENTION: Here weaving starts from the very bottom, so cut the strips to the bottom of the box. The weaving is done in exactly the same way, in a checkerboard pattern, as was done in the previous version with plastic.
Wicker basket
The following craft looks no less original and unusual. It can be made from colored cardboard, old magazines or newspapers, wrapping or colored paper. The technology is quite simple:
- The first step is to prepare at least fifty strips. Each is thirty centimeters long and four wide. Fold everything in half and get creative.
- We lay out the first six strips in front of us.
- We lay out the same amount perpendicular to them.
- We intertwine the strips as shown in the photo above.
- This way it is possible to form the bottom of the basket. Now we bend 16 strips, raising the walls of our colored cardboard craft. And between them we also pass new ones, making out the sides. Then we bend the vertical strips inward and glue them well. An interesting and original basket is ready!
Selection of schemes
For convenience, you can use patterns for knitting round, square and rectangular baskets. Also given are crocheting patterns for a post without capes and an amigurumi ring.
The photo shows a simple pattern for a round basket made of knitted yarn.
8 single crochets are highlighted in red. According to the square pattern, the bottom is knitted, and the sides are knitted with “checkmarks” located one above the other.
Parchment paper basket
Another great idea offers a fun way to decorate. Moreover, you can decorate absolutely any base with it. The main thing is to purchase parchment or baking paper at the store. After this, we form the frame we like and add a pen. Then we cut the paper into strips about four centimeters wide. Lightly knead each one, and then twist it into a flagellum. Lubricate the sides of the frame with glue. And we begin to carefully lay out the prepared bundles, trying to position them as close to each other as possible. In this way we decorate the lower part of the basket and then decorate the handle. We design the interior of the original product at our own discretion. If desired, the craft can be made from white cardboard and then you will not bother yourself with additional work.
Paper straws
The first thing we need to prepare is the paper tubes from which we will weave our basket. Cut out several strips of paper. You won't be able to count how many of these pieces you will need in total. Therefore, in order not to do too much, spending your free time on this, first prepare one part of the paper tubes. Once you start work, you can roughly figure out how many paper parts you still need, and then finish it.
To make a straw, take a culinary skewer (they are used for snacks). Wrap a paper ruler around it, gradually moving the stick forward to make a long tube along the entire length of the paper.
Apply glue to the edge of the sheet and glue the last piece to the tube so that it does not fall apart.
Take out a piece of wood. One tube is ready. Do the next ones using the same technology.
Baskets in one piece
Very interesting are the models that require a minimum of effort from the needlewoman. Therefore, we also could not ignore them. And we offer readers two templates that make it easy to make an original craft. Moreover, experienced craftswomen note that you can make a basket from colored or white cardboard. And then leave it in its original form, that is, do without registration. Or prepare a frame, and then decorate it with fabric drapery, colored paper, beads, beads, ribbons and other decorative elements. In addition, readers who have a color printer at home can simply print out an interesting template with a bunny. Cut it out, assemble it and glue it together into an interesting mini-basket. You can give a small souvenir in it.
Flower basket
The products under study are notable for the fact that needlewomen use cheap improvised materials to make them. However, the baskets still turn out very cute and are in no way inferior to store-bought options. In this section, we invite readers to study the instructions for making a children's basket:
- First of all, we should draw a circle - the bottom of the craft.
- Then divide it into eight sectors as we did when making the faceted basket.
- Round each resulting detail, turning the entire template into a flower.
- Now all we have to do is cut out the resulting figure and paint it according to our own wishes.
- And then glue the corners of the sides and decorate the cardboard basket made according to the template as you please.
Ribbon basket
And another interesting craft is also very easy to do. You just need to prepare a strip of cardboard. Its length is equal to the circumference of the desired basket, and its width is equal to its height. After this, using a ruler, draw a line, stepping back one centimeter from the bottom edge. We make cuts on it without going beyond the limiter. Then we twist the strip and glue the two edges. We carefully bend the lower parts and also glue them together. We leave the base of our future basket made of cardboard and ribbons for several hours so that it dries well. At this time, you can prepare the bottom and handle of the desired size. When the specified time has passed, take a satin ribbon of the color you like and glue the tip on the inside. And then we begin to wrap the sides of our basket. Having formed the entire base in this way, cut off the excess part of the tape and glue the tip on the inside. Next, we wrap the prepared handle, also attach it from the inside and place the bottom in the basket.
We hope that our tips for making cardboard baskets will help the reader create truly spectacular and original crafts with their own hands. Good luck!
DIY twine basket. Master class with photos
Master Class. Twine weaving “Baskets”
Wicker decorative baskets.
Master class with step-by-step photos. Author: Galina Viktorovna Kretsu, teacher at MBDOU kindergarten No. 17 “Ivushka”, Krasny village, Rostov region, Bagaevsky district.
Today, everything original and handmade is in fashion. I propose to make decorative baskets with your own hands, which you can give to mothers on March 8, to friends for their birthdays, or to decorate the interior of a home or group room. Baskets can also be used as a case for various small items. Make them with your children with your own hands, then such a gift will be much more valuable. I am sure that you too will be able to weave more than one original and beautiful basket. Good luck, friends!
My head is spinning from thoughts - I can’t find the words. More eloquent than many words is a basket full of flowers. What I wanted to say is a secret. Note: there are no daisies between them! The basket should be taken care of - a useful thing in the household. But I believe you won’t forget: I gave you flowers in it! The master class is intended for teachers and children of senior preschool age. Can be used in classes on making gifts for loved ones and friends. Purpose: making a decorative basket. Objectives: • to form a sustainable interest in creativity; • develop imagination, aesthetic taste; • cultivate patience, accuracy and perseverance; • teach practical manual skills and their use in life. For work we need: • Toothpicks; • Skewers; • Ceiling tiles; • Glue "Titan"; • A plastic cup; • Gypsum; • Construction knife; • Beads; • Leg-split; • Packing tape.
To make a small basket we will need: • Titan glue; • Toothpicks; • Ceiling tiles; • Construction knife; • Leg-split; • Beads. Draw a circle of any shape on the ceiling tile and cut it out:
We make markings and glue in toothpicks like this. Let's give it shape. There should be an odd number of toothpicks: Place a bead on each toothpick and glue it on. Let it dry:
Glue the beginning of the twine to the toothpick:
We begin to weave a basket in waves. You perform this stage with children: Having finished weaving, cut the thread and fasten:
To make the bottom of the basket stronger, you can take this plastic bottom, put the basket in it, and glue it:
Next, cut a piece of twine 50-60 centimeters long, secure one edge, and twist the other clockwise. Fold it in half and roll it up. The result is a handle for the basket:
Using a needle or toothpick, glue in:
Here's what happened:
You can also use woolen threads to weave baskets:
Using the same technique you can make a flower vase. Take a plastic glass, skewers, and plaster. To make the vase stable, you need to make the bottom of plaster. We dilute the plaster so that we can place the skewers before it completely hardens. Pour to the bottom. Place an odd number of skewers around the edge of the glass like this:
Let the plaster harden. Place a bead on each skewer and glue:
We cut the glass and remove it:
We fasten the ribbon and begin wavy weaving:
We cut the ribbon and fasten it. Don’t forget to paint the bottoms of the vases:
Here's what happened: Thank you for your attention.
We recommend watching:
DIY vintage watch DIY gift for March 8th with children 4-7 years old. Master class with step-by-step photos Do-it-yourself twine napkins Do-it-yourself stork with a baby stork. Master class with step-by-step photos
Similar articles:
Original gifts for March 8
Volume application for children for March 8
What to give on March 8
DIY yarn tree. Master Class
Children's crafts for March 8th. Heart for mom

