Paper caterpillar
The simplest and most original way to make a caterpillar is to create it from paper rings. Such a craft will be movable, you can play with it or use it in decoration.
For work you will need materials:
- Thick paper of different colors and textures. It can be velvet, designer or corrugated paper.
- Scissors
- Glue
- Colored pencils and paints.
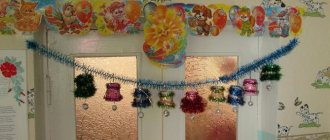
The rings can be used to create a giant caterpillar that can be used as a garland. These giant figures: caterpillars, butterflies, flowers and birds can be used to decorate a kindergarten hall for a holiday or a matinee.
Instructions for creating a caterpillar:
- Decide on the size of the caterpillar. Cut strips out of paper; they should be three times longer than the thickness of the insect. Half of the stripes should be the same color and texture, the other half should be another.
- Cut out a circle with antennae from paper according to the drawing - this will be the head. Also make a small strip that will become a tail. Decorate your face.
- Glue half of the strips into circles.
- Glue the face onto one ring, and the tail onto the other.
- Using other strips, assemble the caterpillar into a chain or ribbon. Glue each strip into a ring that will connect the other two.
Caterpillars made of plasticine - modeling from plasticine with children from three years old
Plasticine caterpillars are a simple craft to do with kids. Funny caterpillars can become one of your baby's first sculptural masterpieces. We present two different models. Both of them are created using the simplest modeling techniques from plasticine. Even if the balls for the first or the “sausage” for the second caterpillar turn out to be uneven, the work will still be successful and will be decorative. And for kids this will serve as an excellent exercise in working with plasticine. You can make small details – eyes, antennae – yourself or use ready-made options. For example, plastic eyes for soft toys and wires - regular or chenille - for antennae. All caterpillar decorations can be made from plasticine, but this is difficult for small children. Therefore, we recommend using ready-made beads and seed beads.
Master class “Caterpillar made of paper on a piece of paper”
Using a simple method of creating a caterpillar from paper rings, you can make a whole three-dimensional composition. Such a craft can decorate a holiday table or simply become a good exhibit at an exhibition in a kindergarten or other preschool institution.
To work you will need:
- Cardboard for the base;
- Natural material for decoration: dried leaves, hay, grass, dried flowers or sisal;
- Colored paper of different textures: velvet, corrugated or designer;
- Glue, ruler, pencil, colored pencils and paints;
- Leaf template.
Step by step procedure:
- Using the template, cut out a leaf from green paper. Use pencils or paints to draw the veins. Use the blunt end of the scissors to bend the edge of the leaf. Glue the sheet to the base.
- Cut 7-11 strips from colored paper. You can also create it from corrugated paper by rolling sausages and flattening them. Such a craft will be more voluminous and lively.
- Using the template, cut out the caterpillar's face and decorate it.
- Create rings from the strips and glue them to the leaf. The rings must be glued along the edges first, leaving an empty space in the middle.
- Use the rings to form a caterpillar bend above the leaf.
- Decorate the outline of the craft with natural material.
The sculptural composition is ready.
How to make a duck from plasticine
Step 1. Now we will prepare the mass for sculpting the bird. Roll two large balls of brown and burgundy and two small balls of orange and green.
We form a streamlined body from a brown ball. Flatten it slightly to make the craft more stable.
Step 2. Pinch off a piece of burgundy plasticine and use it to create a tight, short neck with a small head at the end.
Step 3. Place the neck on the rounded side of the body. We smear the edges of the workpiece with our fingers and draw the outline of the feathers with a stack or knife. Give the neck a curved shape.
Step 4. From flat drop-shaped blanks in green and burgundy tones we create a pair of small wings.
On top we stick details of the same shape in a brown shade. We cut through the texture of the feathers on the wings.
We stick them on the sides of the body. After attaching the wings, draw the feathers at the tip of the tail.
Step 5. Next we make two shallow holes for the eyes. We stick green and black cakes onto the white balls and glue the eye blanks into the recesses.
Step 6. We form a flat wide beak from orange plasticine. We fix it in the center of the face. We bend its tip slightly upward.
Step 7. Create a small tuft on the top of the head.
Using a skewer, draw several eyelashes and eyebrows above the duck’s eyes. We also draw the feathers on the neck and base of the wings.
The plasticine duck is ready.
Step 8. Now it can be supplemented with several details to create a beautiful composition. Ducks are very fond of various bodies of water, which are one of the main conditions for the existence of these birds. So let's create a small lake in which she will swim with her tiny duckling. We create a little duckling from yellow plasticine.
Municipal institution "Department of Preschool Education" of the executive committee of the Nizhnekamsk municipal district of the Republic of Tatarstan
"Kindergarten No. 38 Podsolnushek"
Lesson notes for the middle group
Nigmatzyanova Elvira Tagirovna
Target:
teach children to sculpt an object consisting of several parts, showing some characteristic features (elongated beak, tail).
Tasks:
— Reinforce sculpting techniques: rolling plasticine between the palms; — Practice using the technique of pinching and pulling; - Strengthen the ability to connect parts, pressing them tightly against each other, and smoothing the seams; — Cause a positive emotional response to the overall result.
Vocabulary work:
beak, tail.
Materials and equipment:
plasticine; boards; napkins; duck toys for each child); lake is a mirror; duck mask hats for each child; house layout; wattle fence; toys – pet birds; hostess costume for the teacher; musical accompaniment; a huge toy egg to encourage children and “Worms” marmalade.
4. Organization of children
during the lesson in subgroups.
5. Preliminary work.
Conversation with children about poultry (geese, ducks, chickens); looking at illustrations of ducklings, chickens, geese, goslings; game “How are they similar? What is the difference?" (comparison of chicks and ducklings); guessing riddles about birds.
Educator: children, today we will feed the poultry. Now you can guess which birds. She walks in the rain and loves to cut grass! "Quack!" screams, This is all a joke, Well, of course it is... Children: Duck! Educator: Well done, guys, here's another riddle. Amazing child! Just out of diapers He can swim and dive, like his own mother. Children: Duckling!
Educator: Well done! So you guessed it. This is a duck and ducklings. They are not in the yard, they probably went to the lake. Let's go look for them. (Children pass a strip with physical education equipment: a bridge; hummocks. The teacher and the children approach the table on which the lake is decorated. They surround it on all sides. One duck swims on the lake). Educator: Look, guys, the duck is swimming alone, you can see the kids are hiding in the grass. The mother duck felt lonely and began to call them. “Quack-quack-quack!”, but the ducklings don’t respond. Mother duck asks you to help find her ducklings. Let's help her! How can we help her, guys? Children (answer options): ... you can blind...
Educator: of course, you can make ducklings! But first, let's play with you a little. The ducks came out into the meadow, (we walk like ducklings) - Quack-Quack-Quack! A cheerful beetle flew by - Zhzhzhzhzh! (we wave our arms - wings). Geese arch their necks - Ga-Ga-Ga (circular rotation of the neck). The feathers are straightened with the beak (the body turns left and right). The wind swayed the branches (we swing our arms up), Sharik also growled - Rrrrr... (hands on the belt, bending forward, looking in front of us). The reeds whispered in the water - Shhhhhhhh... (raise your arms up and stretch), And again there was silence - Shhhhhhh... (crouched down). Educator: Well done! Now sit down at the tables, we must help the mother duck. Look, guys, what wonderful colored plasticine we have on our plates. Feel what it is like. Children: Soft.. Educator: Look, children, what parts does a duck consist of? Children: Head, torso. The head is smaller, the body is larger. Educator: What do you think, what is this? Children: Beak, tail.
Educator: Well done! First you need to divide the plasticine into two parts. One piece of plasticine, which is larger, will be the body; a smaller piece is the head. To sculpt the body of a duck, we need to take a larger piece of plasticine and roll it into an oval with our palms. Then we also sculpt the head, only with a ball. Next, we connect these two parts, pressing them tightly against each other. But be very careful so that the shape does not break. Then we guys pinched the beak on the duckling’s head and pulled it back a little, and on the body, where the tail should be, we pulled it out. Look how I do it. Our duckling is almost ready. Is he missing some eyes or something else? Children: Wings. Educator: look, you have buckwheat in your plate, make eyes out of it for the duckling. Carefully! Where the eyes should be, press the grain. If everything is clear, start the lesson. Educator: Our duck in the pond is really looking forward to her ducklings! (The children finished their work).
Educator: Now, guys, let’s go and put all the ducklings on the lake. Our duck is one, but there are many ducklings! Let's count them guys! Well done, you did a great job today! Look how happy the mother duck is! And the ducklings are happy too, they have returned to their mother! Everyone has fun, and so do we! After all, we did a good deed. Is it true? Children: Yes!!
Educator: So that our guests also have a good mood, let's dance for them together with our duck and ducklings. Please, everyone stand in a circle around the lake, and I will put on duckling hats and masks for you. Now listen to the music and repeat all the movements after me.
(Music sounds. Children dance the dance of little ducklings). Educator: What great fellows you are! Me and the duck thank you for the wonderful dance. And the duck also wants to thank you for returning the babies to her! She passed on treats.
Summary of GCD for modeling in the middle group
1. Goal: to teach children to sculpt an object consisting of several parts, showing some characteristic features (an elongated beak, a tail).
Tasks: - Reinforce modeling techniques: rolling the dough between the palms; - Practice using pinching and pulling techniques; - Strengthen the ability to connect parts, pressing them tightly against each other, and smoothing the seams; — Cause a positive emotional response to the overall result.
Vocabulary work: beak, tail.
2. Methodological techniques: verbal (guessing riddles about a duck), visual (examining a toy duck with children), explanation (what is the shape of the body, what is the head, beak, tail).
3. Materials and equipment: salted colored dough; boards; napkins; for each child there are toys - a diagram for sculpting a duck); toys – pet birds; musical accompaniment (dance of little ducklings).
4. Organize children in classes into subgroups.
5. Preliminary work. Conversation with children about poultry (geese, ducks, chickens); looking at illustrations of ducklings, chickens, geese, goslings; game “How are they similar? What is the difference?" (comparison of chicks and ducklings); guessing riddles about birds.
(Getting a riddle) She walks in the rain, loves to cut grass! "Quack!" shouts, This is all a joke, Well, of course, it’s... (Duck!) - Well done, guys, but here’s another riddle. Amazing child! Just came out of diapers Can swim and dive, Like his own mother (Duckling!)
Well done! So you guessed it. This is a duck and ducklings.
Guys, the ducklings were playing, swimming and lost their mother and they began to call their mother “Quack-quack-quack!”, but mother did not respond. The ducklings ask you to help find their mother duck. Let's help them! How can we help them, guys? (answer options): ... you can blind...
Of course you can make a duck! But first, let's play with you a little. The ducks came out into the meadow, (we walk like ducklings) - Quack-Quack-Quack! A cheerful beetle flew by - Zhzhzhzhzh! (we wave our arms - wings). Geese arch their necks - Ga-Ga-Ga (circular rotation of the neck). The feathers are straightened with the beak (the body turns left and right). The wind swayed the branches (we swing our arms up), Sharik also growled - Rrrrr... (hands on the belt, bending forward, looking in front of us). The reeds whispered in the water - Shhhhhhhh... (raise your arms up and stretch), And again there was silence - Shhhhhhh... (crouched down). - Well done! Now sit down at the tables, we must help the ducklings. Look, guys, what wonderful colored dough is on our plates. Feel what it is like. (Soft, yellow...). - Look, children, what parts does a duck consist of? (Head, torso. Head is smaller, torso is larger). -What do you think this is? (Beak, tail).
Well done! First you need to divide the dough into two parts. One piece of dough, which is larger, will be the body; a smaller piece is the head. To sculpt the body of a duck, we need to take a larger piece of dough and roll it into an oval with our palms. Then we also sculpt the head, only with a ball. Next, we connect these two parts, pressing them tightly against each other. But be very careful so that the shape does not break. Then we guys, by pinching, make a beak on the duck’s head and pull it back a little, and on the body, where the tail should be, we pull it out. Look how I do it. Our mother duck is almost ready. Is she missing some eyes or something else? (Wings!) - Look, you have buckwheat cereal on your plate, make eyes out of it for the duck. Carefully! Where the eyes should be, press the grain. If everything is clear, get to work. (Music sounds, children get to work). - Our ducklings in the pond are really waiting for their mothers - ducks! (The children finished their work).
Educator: Now, guys, let’s go and put all the mother ducks on the lake. There is a fish in the pond, and ducklings love to eat this fish in the mornings, in the mornings and evenings. And of course at lunch too! The fish will help them grow!
How many ducks! Let's count them guys! Well done, you did a great job today! Look how happy the ducklings are! And the duck is happy too! Everyone has fun, and so do we! After all, we did a good deed. Is it true? (Yes)
Guys, let's dance the “little ducklings” dance. Please everyone stand in a circle. Now listen to the music and repeat all the movements after me.
(Music sounds. Children dance the dance of little ducklings). - What great fellows you are! I and the ducklings thank you for the wonderful dance.
Blog of Ekaterina Bogdanova
Good afternoon, readers and guests of the “Family and Childhood” website. Today is another modeling lesson and we will sculpt a duckling. To create a little plasticine duckling, you don’t need much. You need to buy plasticine and set aside some time to work. The box with plasticine must have a plastic stack; if this tool is not there, you will have to use a toothpick and divide the blocks into parts by hand.
If in kindergarten or primary school a child was asked to sculpt some representative of a farm, then you may well choose to work on sculpting poultry or ducklings from plasticine. Modeling poultry involves the simplest steps, so it will not cause difficulties even for the smallest children. This master class will help children and adults implement an interesting idea.
From toilet paper rolls
A caterpillar for children can be made from toilet paper rolls. Such a craft will be strong, which means you can play with it.
For the product you will need:
- 2-3 toilet paper rolls;
- Thin cardboard or thick paper;
- Corrugated paper;
- Pencils, paints, glue and scissors, a stationery knife.
Operating procedure:
- Cut the bushings into rings with a knife. The width of the rings is 2-2.5 cm.
- Cut strips of the same width from thick paper. The length is equal to the circumference of the sleeve.
- Cut wide squares from corrugated paper. The side of one square should be slightly larger than the circumference of the sleeve.
- Wrap the rings in corrugated paper and secure it with a stapler.
- Also create rings from thick paper to connect the bushings. Glue the rings together and wrap them in corrugated paper.
- Cut out a face using the template and glue it to the chain. The insect is ready.
Using crepe paper will make the caterpillar fluffy and pleasant to your hands.
From a caterpillar to a butterfly: a master class on plasticine modeling with step-by-step instructions
Once upon a time there lived a green caterpillar. And she dreamed of becoming a butterfly. After all, every caterpillar dreams of turning into a beautiful butterfly. Try playing wizards with your child or composing a fairy tale, and at the same time stretch your fingers.
First we will sculpt a caterpillar from plasticine. And then, with the help of small manipulations, we will transform it into a butterfly!
We also sculpted insects in a more realistic manner, look how we did it in the master class “How to sculpt a butterfly and a dragonfly from plasticine.”
How to do:
- plasticine;
- stack;
- toothpicks;
- modeling board.
How to do:
1. Knead the plasticine well. Roll green balls, gradually reducing their size. The more balls, the longer the caterpillar. You can roll out the yellow balls in advance or roll them out as you go. Cut or break several toothpicks for your child to connect the pieces.
2. Connect the balls together using toothpicks. First select the center part, then attach the balls towards the tail. But remember that the balls must be pressed tightly against each other, otherwise they may fall apart.
3. Now attach the balls towards the head. Decorate the belly with flattened yellow balls.
4. Design a head for the caterpillar. Secure it with a toothpick. If you want to make horns, then do not forget to make a recess in the head and then secure the horns. Attach the flagella legs. Attach thicker flagella to the balls resting on the table.
5. And now our caterpillar will turn into a butterfly. Carefully remove the head. We make the new body from two parts - an oval, closer to a ball in shape, and an elongated oval or thick carrot. In this case, a transition was made from green to brown by combining two types of plasticine. The body can be decorated with patterns.
6. From the diagram of the butterfly’s structure, it can be seen that the legs are attached to the central part of the body, so if you want to make the butterfly anatomically correct, then all the legs need to be attached there.
If the butterfly is large, then it is better to attach the legs to the bottom, so the butterfly will be more stable. The paws are made from toothpicks.
7. Now we cut out the wings and insert them into the body. In order to open the wings, you can attach a small flagellum between them. You can make a design on the wings or stick on several plasticine parts. You can also make an applique. The main thing is not to make the wings too heavy.
Ready!
Check out our other crafts:
- Make with us the “Butterfly-Cabbage” applique. Looks like a real butterfly!
- Learn a new drawing technique in the master class “Butterfly using the grattage technique.”
- You will learn how to mold fruits from plasticine from a detailed master class on modeling. We will sculpt an apple, kiwi, orange and other fruits.
- It's simple: vegetables made from plasticine with step-by-step instructions.
- The application “Strawberries in a clearing” made of plasticine is easy to make and pleases the eye with a summer landscape! Great idea for a summer craft!
- Make a cardboard treehouse and let your dolls live in the new house! It's made for fun games!
Plasticine caterpillar
Plasticine can make a funny insect. Homemade caterpillars from this material will be excellent crafts for children of primary preschool age. You can begin your first sculptural work with these figures.
For products you will need:
- Multi-colored plasticine;
- Knife for plasticine;
- Cardboard for the base;
- Natural material for decorating crafts.
Operating procedure:
- Roll into balls of different sizes from plasticine. Form legs from one edge of the balls.
- Line up the balls to form a caterpillar. Make a bend in the center of its body, or, conversely, raise the front edge.
- Roll into a larger ball from a different material. Form a face on it using plasticine parts of different colors. Attach the face to the body.
- Make antennae from plasticine and attach them to your head.
- Decorate the craft with natural materials.
Little cheerful caterpillar made of plasticine
Therefore, we come to the conclusion that a craft should not only give something, but also have an entertaining character. The same applies to lessons in primary school. For example, in different countries I practice my own approach to acquiring knowledge in younger groups. Somewhere, children can independently sit around the office, choosing a place that is convenient for them. In some countries you don’t have to sit at your desk at all; you don’t need to ask the teacher if you need to get up for something. All this is aimed at making the children feel some kind of play in the learning process. Creative activities in this case serve as a way to unload the head, which is filled with knowledge from previous lessons.
That is why we invite you to complete a simple craft that will appeal not only to children, but also to adults. Although it is not difficult, the combination of elements makes it extremely entertaining. We are making a caterpillar from plasticine - a familiar character to children from numerous references in books and fairy tales. You will need regular plasticine. If you are a parent or teacher, review the lesson and required materials in advance.
Caterpillar applique
A garden caterpillar in the form of an applique will be an easy project for novice creators. To do this you will need:
- Velvet paper of different colors;
- White thick paper;
- Glue, pencils, paints, scissors;
- Fluff or cotton wool.
The procedure for creating a caterpillar:
- Cut circles of the same size from velvet paper of different colors. Using the pattern, cut out a head with antennae from white paper. Decorate the head with pencils and paints, drawing a face.
- Place the circles on a velvet base, forming a caterpillar. Place fluff or cotton wool under the mugs so that the material sticks out from under the mugs, creating fluff. Check the entire composition.
- Glue the cotton wool or fluff to the paper using drops of glue. Place the mugs overlapping on top. Secure the head.
The volumetric and textured applique is ready.
Instead of circles of paper and fluff, you can also use corrugated paper from which to roll into balls.
How to make a duckling from plasticine
Consider a picture of a duck or a toy, if available. Choose colors. To sculpt this pet you will need yellow, a little orange and red shades. Decide on the details. The duck figurine should consist of a body, head, tail, wings, beak and legs.
Divide the yellow block into two equal parts. Mash one of them in your palms and form an oval part, pulling out a small tail.
Knead the second half of the plasticine and roll it into a small ball. Attach the round piece as the head.
Spend another 2 yellow portions on sculpting flat duck wings, their shape should resemble a drop. The stack will help make the wings fluffy.
Attach the wings to the body, press firmly on the plasticine so that the parts are fastened together.
Also treat the tip of the ponytail with the stack to make it fluffy.
To decorate the front part, pinch off tiny drops from white and black plasticine and make eyes out of them. Make a beak from an orange piece, make a cut on it with the same stack.
The last detail is the red paws. If you make them disproportionately large and attach them to the body, the duck will take on a funny cartoon look.
The plasticine duckling is ready. After such a detailed lesson, the child will be able to independently repeat the work and make friends for his pet.
In this master class we will tell you in detail how to make a duck from plasticine. These birds are mostly small in size and are found both in the wild and in domestic life. To sculpt a duck, you can use any shade of plasticine, because the color of duck plumage is very diverse.
To create a duck you will need:
- a set of children's plasticine;
- stack;
- brush;
- wooden skewer.
From the lids
Plastic caps make a fun and active toy. To work you need to prepare:
- 7-15 plastic caps;
- Beads are the same size;
- Fishing line;
- Awl;
- Scissors, paper, pencils.
Operating procedure:
- Make holes in the lids. Attach 3 beads to the fishing line - this will be the tail.
- Draw a face and glue it to one lid. Also attach the antennae here.
- Using a needle and fishing line, assemble the caterpillar, stringing in order: the lid, 4-5 beads, the lid again.
- Lastly thread the lid with the face. Use a knot of fishing line to secure the structure and at the same time form a spout.
The funny rattle toy is ready.
How to make a caterpillar from plasticine step by step:
1. Although the list of materials indicates green plasticine, which is more suitable for sculpting an insect, you can replace it with a different color. If you wish, combine balls of different shades and sizes to get a rainbow craft. To begin, knead the prepared block in your hands.
2. Next, use a stack to divide the soft plasticine into pieces. Make links that will make up the long body of the wriggling insect, as well as one larger piece that will become the head. Divide the green block into the required portions and knead each of them separately in your hands.
3. You can form a ball from each small piece as a link to the caterpillar’s body. Or give each ball an almond shape. A craft consisting of oval fragments will be more interesting. Glue a beige cake onto a large ball intended for the head, smooth out the edges. Then use your fingertips to give the workpiece a triangular shape.
4. Make a funny face on the beige field. Use a large pink bead to simulate a nose. Glue small black dots-eyes above the nose, and under it - a small red dot-mouth. Make two long orange tendrils. Curl and glue to the head. You can also decorate the caterpillar with a red bow.
See also: How to make a paper caterpillar
5. Assemble the body from oval green blanks, securing the parts in random order. Glue the head on one side. This funny figure is made using the simplest method; sculpting a caterpillar is very exciting for children.
6. Use beige dots to make link decorations. This is also a way to explore numbers with young children. It is not forbidden to glue a different number of dots onto each link and then count them together. Plant the finished caterpillar in a flowering meadow. The craft is ready.
From a cocktail tube
You can make a paper caterpillar with your own hands using a cocktail straw.
To create a product you need to prepare materials:
- Napkins or corrugated paper
- Cocktail straw
- Glue, scissors, markers
- A piece of colored paper
- Wooden skewer
Operating procedure:
- Wrap the cocktail tube in paper. Squeeze the paper with an accordion to create a compressed body of the caterpillar.
- Form a caterpillar bend from the tube. You can also pull out the tube. Cut off a piece - this will be the cutting of a leaf. Secure the stalk with glue on a skewer, and glue one end of the caterpillar to it.
- Also fasten the other end to a skewer. Glue the skewer to the leaf. Paint the caterpillar with dots and paint its face black.
Plasticine caterpillar for children: step-by-step modeling of crafts
Children begin to play with plasticine from an early age, since all mothers know that they need to develop fine motor skills. Kids are interested in creating some objects or animals with their own hands. One of the simplest topics for working with plasticine can be called a caterpillar craft.
Materials:
- Plasticine: green, red, yellow
- Toothpick
- Two black beads
First you need to make several balls of different sizes from green plasticine.
Connect all the balls together, with the largest one being the head. Make antennas with red plasticine balls at the ends from pieces of toothpick.
Attach beads for the eyes to the caterpillar's head, and a red ball of plasticine will make a nose.
Use yellow plasticine to make spots on the caterpillar's body.
Colored balls will make the caterpillar even brighter and funnier
From a sock
An old sock or golf ball will make a wonderful toy. To do this you will need any 2 socks or long socks, thread, scissors, a needle and filler.
Operating procedure:
- Stuff filler into the end of the sock. Tie it with threads to make a ball.
- Stuff foam or cotton wool into the next compartment again and tie another ball again. In this way, create several balls until the golf runs out.
- If you use two socks, you need to make them into balls separately. Then the socks need to be sewn in the middle.
- Using beads, black thick threads and colored fabric or leather, make a face. You can form a tongue from leather or fabric, and eyes from beads.
- The funny toy is ready. You can also put old baby rattles inside one or three balls, then the toy will also become musical.
How to make a deer from plasticine
Step 1. Prepare several brown bars. Cut a piece of the mass and roll it into a ball.
Next, stretch out the workpiece and bend it a little to get this shape.
The deer's head is ready, then we complement it with eyes and a nose.
Step 2. Use the rounded end of the stack to press the place for the eyes. Form eyes from white, blue and black cakes and glue them into the recesses.
Step 3. Then attach a red nose to the convex part of the muzzle.
Using a spatula, draw eyebrows, eyelashes, a mouth and a few folds on the face.
Step 4. Now you need to sculpt an elongated body. Insert a toothpick into the top of the piece and attach the head to it.
Step 5. Next create the front and hind limbs of the animal.
Stick black cakes to the blanks. After attaching the limbs to the body, cut through the hooves with a stack and make small cuts around the hooves.
Step 6. From brown and beige plasticine, mold a couple of teardrop-shaped flat ears. Glue them to the animal's head.
Step 7. Then we decorate the deer’s head with small branched antlers. They must be created from contrasting shades of mass, for example from white, beige or dark brown plasticine. Attach the horns to the crown.
Attach the horns to the crown.
If you decide to create larger horns, you will need a frame to fix them. You can use a toothpick, a piece of thin and strong wire, or an ordinary match.
Step 8. There are still a few simple steps left before completing the sculpting of the deer - creating highlights, a tail and drawing the texture. Decorate not only the eyes, but also the nose of the animal with highlights.
Attach a mini ponytail to the back.
A toothbrush is perfect for creating texture. Apply it to the brown surface of the craft. Its hard pile will create a wonderful velvet texture.
That's it, the funny plasticine deer is ready.
DIY plasticine deer
Materials for sculpting a deer:
- a lot of brown plasticine;
- small portions of beige, red, white, blue, black plasticine;
- toothpick fasteners.
How to make a deer from plasticine step by step
Take a dark brown block to work with. It will allow you to reproduce the color of the selected animal. From this block you will need to make the torso, head, neck, tail, legs and even the ears and antlers of a deer. If you are planning to make a small craft from plasticine, then one block will be enough for you. You can also take 2 pieces for work or save plasticine by masking some other mass inside.
Make the body - a fairly large part. It will be oblong, bullet-shaped, gradually it needs to be narrowed in the back, to make a kind of pear, but brown. Roll the ball, then press it with your palm and pull it out. Then press down in the center with two fingers and make a notch. Also prepare 4 large balls for the legs and one small ball for the tail. Plasticine should be very soft and pliable. Immediately make a tail in the form of a small comma from a small brown ball. Pull out the 4 prepared pieces for the legs as if you were making cones, but do not sharpen these parts at the upper ends. Press the tops of your legs towards your body and attach a small ponytail at the back. Glue a black cake to the bottom of each leg. This will be an imitation of hooves, but you don’t have to sculpt the legs in more detail. This is a very easy way. To make the head, take a small brown ball, but its shape should be somewhat flattened, pressed in at the top. Glue a beige bump in front. Make the eyes. The larger they are, the larger the pupils, the more interesting it will be. Also, if you use light highlights, the look will be cute, and overall the fawn will be small and adorable. Attach the nose to the tip of the beige tubercle, and also add eyelashes and eyebrows to the eyes. Attach ears in the form of brown flat diamonds to the sides of the head, make a mouth, form branched horns from brown plasticine. Attach the horns to the head. Smooth out the mass and admire the charming northern animals. Finally, attach the head to the body using the prepared fasteners. You can decorate your cute craft with a bow by making it from any bright plasticine. The plasticine deer is ready.
Plasticine deer
In today's master class, we will mold the messenger of a winter fairy tale - a deer from plasticine. This animal transports a sleigh with gifts, and Santa Claus himself controls the sled (for example, this or that). A plasticine deer can rightfully be considered a New Year’s craft.
Such horses are often depicted in cartoons and children's books, in illustrations that show Santa Claus traveling around the world on New Year's Eve.
It only takes a few steps to turn simple blocks of plasticine from the kit into a deer craft. The creation process is as follows.
Choose for work:
- brown plasticine of one or several different shades;
- additional blocks - orange, yellow or black, which when mixed with traditional brown give other shades;
- plastic scalpel;
- 2 pieces of thin wire;
- 5 matches.
Modeling a deer from plasticine step by step:
Take suitable shades of plasticine for work. In this tutorial we will show a believable brown deer. But you can make it completely cartoonish and funny, something bright, or even combine different bars.
A brown mass the size of a walnut or a little larger will be used to sculpt the animal's body. This is the largest part, distribute the plasticine so that there is enough for the remaining parts of the figure: the head, four legs and tail.
Pressing the ball from all sides, pull it into an oblong body. You can squeeze the torso on both sides with your palms. Gently sharpen the neck area.
The base of the deer's head will also be a brown ball, but its size should be 3-4 times smaller than the body.
With three fingers, grab the plasticine on the sphere-head and pull it out with a tubercle. This way you will sharpen the nose. Attach a black nose to the most protruding point and cut out the mouth. Insert the sharp ends of the scalpel into the soft plasticine where the eyes should be. Fill the resulting gaps with white plasticine and attach black pupil dots. Glue the eyebrows on top in semi-arches to make the deer’s look more serious and majestic.
To make the ears, prepare brown and darker diamonds and combine them. Glue the ears to the head. Cut 2 pieces of thin wire and prepare dark plates to create the horns. Make branched horns.
Insert the horns into the top of the head. Place a yellow patch on the front of the body and show that it is a fur covering using a plastic scalpel. Insert a match into the neck. To sculpt thin and stable legs of a horse, prepare 4 matches and pieces of brown plasticine.
Place a thin layer of plasticine on the matches, make the hind legs wider, and flatten the plasticine at the top with your fingers. Start assembling the figure. Attach the legs to the body. Place your head on the match. Glue a small tail to the back, and hooves to the lower ends of the legs.
A plasticine deer is ready to take everyone to a fairy tale or bring the kind Father Frost with a cartload of long-awaited gifts.
Plasticine crafts will last until the New Year holidays if they are placed in the refrigerator where they freeze, after which the mass will not deform.
You can also make a sleigh for our deer and assemble a carriage for Santa Claus.
A simple figurine of a deer for children and beginners made of plasticine
Modeling a deer from plasticine can be difficult for children. For little creators, it’s worth choosing simplified options.
“Cartoon” model without complex legs:
- roll two plasticine balls - a larger one for the body, a smaller one for the head;
- the body blank is given a slightly oval shape, light plasticine circles are molded onto the back, and the legs in the form of balls are fixed at the bottom;
- At the head blank, the muzzle is drawn out, the eyes and nose are decorated, and simple horns are added;
- the torso and head are fastened together.
The last thing to fix is the tail. This craft is perfect for little ones.
Application
The application is completed in stages:
- transfer the deer template onto a sheet of colored paper;
- carefully spread plasticine along the contours;
- decorate the face.
They add elements of the composition - draw snow, a Christmas tree, glue glitter.
Examples of applications
Description of Christmas crafts
In American culture, Santa Claus' constant companion is reindeer. The Russian Father Frost travels around the country with the help of horses harnessed to a sleigh. Although reindeer are not uncommon in the polar snows, they are not used for transport. Today, in times of globalization, when cultures are borrowed, everything gradually gets mixed up. That is why you can find deer on the shelves of our stores as a children's toy, gift or decorative element with which you can decorate your own home.
We invite you to make a craft from plasticine that both adults and children will enjoy. Those who are older will be able to make it from more expensive material and play it up, or even add some of their own elements. Then put it on a shelf or give it to someone. Children will be able to enjoy a pleasant time together with their parents or under the guidance of a teacher. In the latter case, you don’t have to worry, since we have prepared for you a large number of photographs that are present in each action.
List of materials for creating a deer craft
List of materials for sculpting a deer from plasticine
- Plasticine brown, yellow, white, red and black;
- Tools for working with plasticine;
- Toothpick.
Step by step instructions on how to make a Christmas reindeer
- 1. A distinctive feature of this work is that we use colors that are present in almost every set of school boxes. For the next steps, we need to take brown plasticine and put it in front of us for further manipulations.
- 2. Cut a small piece from it and roll it into an even ball. The size of the entire craft will depend on the size of this part. Subsequently, we will focus on it in order to maintain all proportions.
- 3. We begin to form the body of the deer, which should resemble a small pear. Do this with your fingers or by rolling one side with the palm of your hand and applying pressure.
- 4. From two small pieces of the same color, we sculpt the legs with our fingers, or roll out the balls to the state of sausages. Their size should be equal to approximately half the body. Please note that both ends are the same shape.
- 5. When everything is ready, take the legs and attach them to the body, pressing them tightly at the bottom.
- 6. Similar to how we made the hind limbs, we need to sculpt the hands of the deer. The only difference here is that one of the sides needs to be slightly flattened. Look at how everything is done with us so that you can have an example before your eyes. This part of the craft should be equal to no more than half the body.
- 7. Take the arms and stick them to the main structure, giving them a slightly curved shape.
- 8. Tear off four equal pieces from the yellow plasticine, roll them into balls, and then flatten them. Next, we need to use a plastic knife to make an incision approximately in the middle. When everything is ready, attach the hooves to the limbs.
- 9. From the same brown plasticine we sculpt a head, the top of which should be narrower than the bottom. Also, don’t forget to form a protrusion for the nose.
- 10. Insert a toothpick into the body and place the head on it. If the wooden stick is too big, break it.
- 11. We sculpt horns from white plasticine, if necessary, helping ourselves with a plastic knife. The latter can be useful if we cut them out from a ready-made flat shape. When finished, attach them to your head.
- 12. Quite conditionally, we need to make eyes, eyebrows and a mouth. The convention is that we need to identify them, but not emphasize them. Use black plasticine for this.
- 13. Tear off a little bit of red plasticine and mold a nose, then place it on the head.
Deer made of cones and plasticine
A New Year's deer made of plasticine and pine cones looks very interesting. Even kids can handle the job:
- two elongated pine cones are held together with plasticine - this is the body with the neck;
- horns are assembled from sticks, twigs or matches, fastened with glue or plasticine;
- the muzzle is created from plasticine, small cones or acorns;
- connect the muzzle with the horns, fix it on the neck;
- the legs are made from twigs, coated with a thin layer of plasticine, and glued to the body; plasticine hooves are formed from below.
Add a tail and create a muzzle.
Spectacular antlers can be made from wire, pasted over with velvet paper. Such horns will indicate the age of the fawn. If the antlers are covered with smooth skin, then they will “report” that the deer is an adult, “seasoned”.
Video master classes on sculpting deer on a New Year theme
The action plan will be more clear if you first watch the video material, especially for children. The work should be done in stages, and the deer made from air plasticine will definitely come out beautiful and exclusive.
It is better to create a deer from plasticine with the whole family or with friends. The time spent creating will fly by unnoticed and you will be in a cheerful mood. In addition to the deer, you can sculpt other “obligatory” New Year’s Eve heroes and make a wonderful composition out of them. Children will certainly use plasticine figures in their games.
From felt
A DIY craft made from felt can become a wonderful sofa cushion or soft toy. To do this, you will need several multi-colored pieces of felt, thread, scissors and filler: foam rubber, padding polyester or just an old rag.
The procedure for creating a toy caterpillar pillow:
- Cut circles from felt.
- Use a needle to thread the thread around the perimeter of each circle. Pull the thread. Fill the ball with foam rubber or padding polyester and sew it up.
- Using this principle, make several circles.
- Sew felt eyes and a tongue on one of the circles.
- Sew the balls together or connect them with Velcro.
The pillow is ready. To decorate, you can make a tassel or pom-pom from yarn and sew it in the form of a tail on the last ball.
DIY felt caterpillar: master class
Felt is a suitable material for making a caterpillar educational toy with your own hands. Made from felt, it will be soft and easy to use. Thanks to the bright colors of this material, the caterpillar will turn out colorful.
Materials:
- Felt
- Sintepon
- Velcro
In order to get a caterpillar, 2 circles for each part of the caterpillar - that's 9 parts. The front and back will be the same color.
You also need to cut out flowers, eyes, legs - 18 legs and horns.
You need to make 18 paws - smaller circles. The legs will be inserted into the middle of the circle, the circle needs to be folded and the edges sewn.
Small parts need to be sewn to the workpiece
This is how we make caterpillar legs
Glue two large circles of the same color together. Between them there will be a round padding polyester.
Fasten all the parts with a pin, and put the legs inside.
Attach each leg with a pin
Attach Velcro to each part of the caterpillar with hot glue.
Every child will want to spend time with such a funny caterpillar.
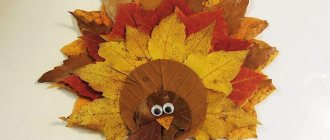
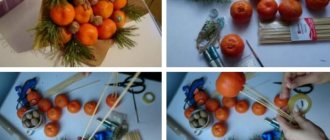
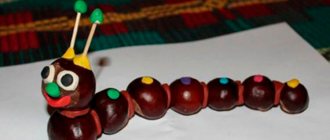
From apples
A caterpillar made from apples and vegetables will be a fun table decoration. It will look especially good on the table in the fall, during the harvest season.
To make this craft you will need:
- 5-7 apples;
- 1 grape;
- Raisins for eyes;
- Toothpicks;
- 1 carrot.
The procedure for creating an edible sculpture:
- Cut the carrots into slices.
- Insert toothpicks into the bottoms of the apples to create stems.
- Connect the apples together with toothpicks, which need to be inserted in the middle of the fruit.
- Thread carrots onto the stems.
- Make a face on one apple: use a toothpick to secure a grape in the shape of a nose and raisins.
All that remains is to place the caterpillar on a plate and eat it.
Master class on making caterpillars from plasticine
Publications on the topic:
Master class on the application “House for a Caterpillar” for older preschoolers This master class will be interesting for older preschool children and parents for joint creativity with their children. Goals: execution.
Master class on making a Dymkovo turkey from plasticine. The Dymkovo toy has long been made from clay, but this is a very labor-intensive and long process, for us it is all very difficult and problematic.
Master class on making a painting from plasticine and buttons “Alien Planet” for Ufologist Day at MAAM Good afternoon, dear colleagues! For a very long time, people have become interested in the appearance of alien creatures, or as they are also called, on our planet.
Master class on making a tabletop theater based on the fairy tale “Kolobok” from pine cones and plasticine for joint creativity. Everyone knows the sad fairy tale about Kolobok very well from childhood. How the cunning Kolobok left his grandparents, the bear, the wolf, the hare, and here.
Master class on making three-dimensional work from plasticine using natural material “Swans on the Pond” Good afternoon, dear colleagues and guests of my page! Today I want to present to your attention our voluminous work made of plasticine using...
Master class on making crafts “Raspberry Berry” from plasticine for preschool children Good day, colleagues, guests of my page. I bring to your attention a master class on making crafts “Raspberry Berry” from plasticine.
Master class on making a souvenir “Gift for Mommy” from plasticine and waste material Natalya Syrova Master class on making a souvenir “Gift for Mommy” from plasticine and waste material. Autumn is the time for holidays.
Master class on three-dimensional appliqué with drawing elements “A House for a Caterpillar” for older preschoolers With the onset of autumn, store shelves are filled with fruits from the new harvest. Among all this abundance of nature's gifts, pears stand out.
Master class on making crafts from plasticine “Lion” Purpose: Development of cognitive and creative activity of children. Children making crafts from plasticine - “Lion”. Objectives: 1. Teach children to divide.
Master class on making crafts from plasticine “Tree with a birdhouse” for parents and children 4–5 years old Let’s stay at home with benefit! Dear parents! Today I am offering a master class on making plasticine crafts “Tree with Birdhouse”.
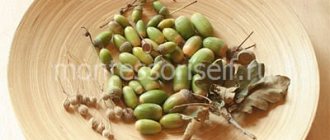
From chestnuts
You can make an original craft from chestnut fruits. To do this you will need:
- Ripe chestnuts 5-8 pieces;
- Plasticine;
- Cardboard for the base;
- Natural material for decoration.
The procedure for creating crafts:
- Roll plasticine into balls according to the number of chestnuts. Flatten the balls.
- Use plasticine to create the face of a caterpillar on one chestnut tree.
- Use plasticine pancakes to connect the chestnuts together. Attach the caterpillar to the base and decorate it with leaves and dry grass.
- Another option for creating a caterpillar is to pierce each chestnut with an awl and use a large needle to collect the fruit on a string. Then you will get a movable craft.
Using the same methods, you can create crafts from acorns, small apples or other fruits. You can even create a whole family of caterpillars. Children in kindergarten or elementary school will be interested in working with different materials during the lesson.
Modeling from plasticine: getting started
If a child encounters this material for the first time, first the child needs to be introduced to the properties of plasticine, shown how to interact with it, and what can come of it. Depending on age, a child can maintain attention on the same thing for a different amount of time. For the first time, the optimal time for sculpting or getting to know the material will be 10-20 minutes.
To arouse and maintain interest, it is better to end the process a little earlier, when the child experiences positive emotions and passion for the activity, rather than later, when he is no longer interested and is tired. Indeed, in this case, the child will be left with an unpleasant aftertaste, and the very process of this creative, enjoyable activity will be associated with fatigue and boredom.
Show your child the following manipulations with plasticine, and then offer to repeat them independently under your supervision and willingness to help if necessary:
- Heat the plasticine in your hands, demonstrate that it then becomes softer and more pliable, making it easier to work with.
- Remember it in your hands, roll it into a ball, flatten it, connect different colors together, tear parts of the same color into different components, put together different shapes consisting of one or several colors.
- Show that the plasticine sticks to your hands and that it needs to be washed off after work with water or at least a damp cloth. Demonstrate that if you grasp, for example, a dry napkin or piece of paper with such a hand, they will stick. Explain that to prevent this from happening, it is necessary to wash off the remaining plasticine from the skin.
- Invite your child to do the same manipulations under your supervision.
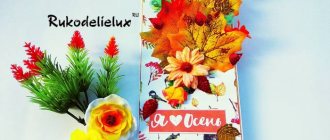
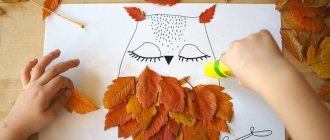
From leaves
Autumn leaves will make an unusual, fluffy caterpillar. When deciding how to make a paper caterpillar with your own hands, you can also use this principle. Corrugated paper is best suited for this, from which you can cut many leaves with fringes or jagged ends. But such a craft made from paper or leaves will require perseverance and accuracy from the child.
To create a caterpillar from leaves you will need:
- A large number of leaves from one type of tree. You can use any options: birch, oak, maple, cherry.
- Thread
- Needle
- Scissors
- Paper, pencils
Creating a masterpiece step by step:
- Attach a bead or knot to the end of the thread. Alternatively, you can create a tassel from threads. This will be the ponytail.
- Thread the thread through a needle and collect the leaves on it, piercing them in the middle.
- Collect a stack of leaves 40-70 cm long, depending on the width of the foliage.
- Cut out a face from paper and paint it. There should be a spout in the middle. In the place of the spout, thread the thread and secure it with a bead or knot.
- Distribute the leaves so that their cuttings face in different directions, creating fluffiness.
You can create such a caterpillar simply by walking with your child through the forest. You can bring the craft home, your child will be able to play with it and be proud of his trophy. You can also arrange a competition among children to see who will collect the most leaves and who will have the longest caterpillar.
DIY children's craft caterpillar made from cotton pads
A variety of applications can be made from cotton pads. First of all, a snowman comes to mind, but this is far from the most interesting thing that can be made from cotton pads. A cute caterpillar may be missing from your spring craft project.
You don’t even need to tell me how to make a caterpillar from cotton pads, because it’s so simple. The discs can be pre-painted in any colors you wish. On one circle we depict the face of a caterpillar - we draw eyes and a mouth.
You can leave the cotton pads undyed.
The application made from cotton pads can be diversified with decorative elements - cut out the sun from paper, or grass.
From tires
You can create an original caterpillar from old tires, which will be a great addition to the playground in a kindergarten. Children will find it interesting to play on such an object; it can be used for various competitions, relay races and just outdoor games.
Materials needed:
- Tires of different sizes;
- Colored oil paints;
- Plywood for the caterpillar face.
The procedure for creating a rubber sculpture:
- Paint the tires with paint of different colors.
- Dig them halfway into the ground, forming a long snake. Tires can be dug into the ground to different depths. Then a bend in the track will form. It will be interesting to climb or walk on it later.
- Cut a circle out of plywood and install it inside the tire. Draw a face on it.
- Place the face tire across the last wheel. Just dig a little into the ground.
From such caterpillars you can create a whole family, which will form a labyrinth. It will be fun to play.
Step-by-step photo lesson:
1. According to the above list, prepare the bars and plate for work. Think through all the components of the bird. This is the head, body, tail and wings, and also, if we are talking about goose poultry, it is also necessary to add a long neck. We will sculpt all these details from a combination of white and gray plasticine. We make the beak and paws from red or orange.
Create two balls, their parameters should be proportional to the head and body of the goose. And also pull one piece into an oblong sausage-neck.
To avoid attaching the tail separately, simply pull out a little of the white mass with your fingers, you should get a pointed tail. Connect all the parts together. You can disguise a flexible wire inside the neck, then the finished goose can actually bow.
Attach a wide red beak to the front of the muzzle.
Glue two black dots for eyes.
To sculpt the wings, draw out the gray pieces in semi-arcs and make them flat. The stack will allow you to show the feathers on the wings.
Attach the wings to the body.
To make flipper-like legs, make notches with the flat side of the stack.
Attach the legs to the body.
The plasticine goose is ready. Now is the time to once again sing the song about two cheerful geese with your child.
Training, education and development are the three pillars on which the pedagogical process is based. Any activity with children should have a threefold goal. If we are talking about the youngest children of preschool age, then classes with them are carried out in a playful way. One of these types is modeling. In the course of such work, a child can be taught to recognize colors, shapes and sizes of objects, develop his spatial imagination and finger dexterity, and instill in him determination and perseverance.
This article provides a master class on sculpting a duckling from plasticine. In the process of creating a miniature copy of poultry, teachers or parents can talk about their benefits for humans and foster a humane attitude towards animals. After the lesson, children will develop the skill of creating standard parts from plasticine, for example, cakes, balls and sausages, and they will learn to combine them into a single product.