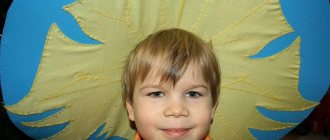
Master class on making squirrels from yarn
Necessary materials:
- cardboard for blanks;
- straight yarn orange or red;
- yarn with orange or red curls;
- beads or small black beads;
- black bead;
- black thread;
- red or orange threads;
- needles;
- scissors.
For pompoms, cut out two circles of cardboard measuring 6 and 4 cm. Inside, cut out circles with a diameter of 2 cm. Wrap threads around the cardboard. The internal space must be completely filled.
Cut the threads along the edge, thread the thread, remove the pom pom from the cardboard and tighten the thread. Spread the threads to create a fluffy ball. Make a second pom pom.
For curly yarn, make a circle of cardboard with a diameter of 10 cm, the inner circle is 2 cm. Make a pompom from curly yarn using the method described above.
To create squirrel ears, use a thread 10 cm long. Fold it in half and in half again. Tie it in a knot close to the edge. Sew the ear to the head. Repeat and sew on the second ear.
Make eyes from beads or small beads, sewing them to the “muzzle”. Under the eyes, secure the nose with a thread and a needle. Connect the head, body and tail using the threads left over from creating the pompoms.
Using the technology for creating ears (step 7), make paws. Take threads 20 cm long for them. Attach the paws to the squirrel. Use scissors to trim the threads on the pompoms. Now you can play with this craft!
Recommendations from experienced professionals
When planning to create something special from natural materials, you should always prepare the raw materials first. If the craft needs to be completed for a competition in a kindergarten or school, then it is advisable to wash the pine cones in a vinegar solution and dry them. This procedure is also required in any case if a child is going to make crafts.
The amount of natural material will directly depend on the chosen craft idea. For example, if you want to make a large squirrel from cones, then you need to prepare at least 2 of them. But to create a small figurine, it is enough to use one.
For the base of the squirrel (body), pine cones are most suitable, but for the tail it is best to give preference to elongated specimens - spruce ones.
To ensure that the elements are securely fastened (not counting those works where plasticine is used), it is better to fix them with hot-melt adhesive.
Cardboard squirrel
Cute red animals can be made from other materials, such as toilet paper rolls, cardboard or thick paper. You will also need colored paper, paints or markers, scissors and glue.
If there are no ready-made cylinders, glue them together from scrap materials: paper or cardboard. From one edge, bend the top of the cylinder inward and make sharp squirrel ears. The photo of the squirrel shows how to do this.
Cut a strip of orange paper 1.5-2 cm wide. Roll it up and glue it to the finished body - this is the tail. Cut out 4 paws and an oval for the muzzle from an orange sheet. Glue all the parts in the appropriate places.
Draw the squirrel's eyes, nose and mouth. These parts can also be cut out of colored paper. The squirrel is ready!
Those who are lucky enough to have housing in close proximity to a forest or city park will be interested to know that often harmless forest inhabitants, such as squirrels, can come out to meet people in search of food.
If you have free time and a desire to help our little brothers, make a feeder or a house for a squirrel. The animals will be grateful, and the children will be glad to have the opportunity to get to know each other closely.
New Year's garland
A quick and easy craft to make.
Material you will need:
- bumps
- glue gun
- rope
- dye
- glitter
Step-by-step instructions for the craft:
- We prepare the cones in advance and paint them with paint. The paint can be chosen in different colors. Or make it in one color that matches your interior design. You can also use glitter to make the product more elegant.
- We take a rope and mark the distance between the cones.
- We leave 10-15 cm from the edges so that there is room to attach the garland.
- Using a glue gun, attach the pine cones to the rope. Glue along the entire length.
- We are waiting for the glue to dry. And Voila! The New Year's garland is ready.
Note!
For kids and schoolchildren it will be easy to make crafts from pine cones and plasticine of funny animals: Teddy Bear, Hedgehog, Squirrel, Owl, etc.
Squirrel house
You will have to tinker a little with this product. It is unlikely that small children will be able to do it, but with the help of a parent or other caring adult, one or more squirrels will acquire comfortable housing.
Required materials and tools:
- log with a diameter of at least 40 cm;
- pencil;
- roulette;
- wood hacksaw;
- screws or nails;
- screwdriver or hammer;
- sandpaper;
- saw.
Manufacturing process:
Saw off a part of the log 5 cm thick and the main shape 40 cm long. Hollow out the inner part of the workpiece, leaving the walls and floor at least 3 cm thick.
- Legal and accounting assistance for your business
- The magic of photographs.
- Unusual and successful table setting using a table setting
Using sandpaper, sand the inside of the house. Make an "entrance" for the squirrels. Nail or drill into the roof with screws.
The squirrel house is ready. Take it to the forest and attach it to a tree you like. Squirrels will appreciate your efforts. If you visit your friends regularly, they will soon get used to visitors and will approach you without fear.
Instructions for preparing natural materials for crafts
Selecting cones for making a squirrel is a simple process, but requires careful attention. It would seem that it couldn’t be simpler: walk through the forest, enjoy communication with nature and, in the meantime, collect materials for handicrafts.
However, it should be remembered that not all pine cones are equally suitable for creativity. Rotten and damaged ones, for example, are unlikely to produce anything good.
You should not discard cones with an irregular shape, for example, curved, too short, fused. On the contrary, such “freaks” can be very useful! Curved cones successfully turn into the back of the animal and its tail. Such material is ideally suited for work. In general, you should collect cones of different sizes and shapes. And how you can use them, your imagination will tell you.
DIY squirrel photo
- Cold steel weapons of Germany for connoisseurs and collectors
- The journey through Crimea continues. And so far no accidents.
- Finding inspiration by the sea in a minibus
To make a toy squirrel we will need:
- orange and white fabric (fleece is best);
- padding polyester;
- three black beads (one larger for the nose and two smaller for the eyes);
- scissors.
The procedure for making a toy squirrel
1. Let's draw a squirrel pattern. We will need the following parts: head, front part of the body, tail, paw, back part of the body and ear. In addition, on the front part of the body you need to draw a tummy in the form of an oval of a slightly irregular shape.
2. Cut out from orange fabric:
- - front part of the body (1 piece);
- - back of the body (2 pieces);
- - tail (2 pieces);
- — ears (2 pieces);
- — paws (4 pieces);
- - head (2 pieces).
Popular articles Poems for Forgiveness Sunday
All these parts need to be cut with seam allowances.
3. From white fabric we cut out:
- - ears with seam allowances (2 pieces);
- - tummy without seam allowance (1 piece).
4. Sew darts on the details of the head.
5. Fold the tail pieces with the wrong sides facing out and stitch, leaving an unstitched area at the base of the tail.
6. Sew a white tummy to the front part of the body. It is best to sew with a zigzag seam.
7. Sew off the details of the legs completely, leaving no holes. (Photo 9)
8. We will fold each ear from two parts - white and orange and sew them, leaving the unsewn side at the bottom of each ear.
9. Sew a squirrel’s head from two parts. In the neck area we will leave the edges unsewn.
10. Place the front part of the body face up, and attach the back parts of the body to it. Sew them in the area of the paws and on the sides.
11. Now let’s sew the back parts of the body together, leaving a hole at the bottom.
12. Let's turn out all the parts. There should be seven parts in total - head, torso, tail, ears, paws. To turn the paws out, you will have to cut small holes in them with sharp nail scissors.
13. Now you need to tightly stuff the parts with padding polyester. We will fill in all the details, even to the ears.
14. After this, sew up the holes on the back of the body and on each paw.
15. We will not sew up the hole on the head, but will sew it directly to the body. When sewing, we will use a blind seam, while we need to slightly tuck the free edge of the fabric on the squirrel’s neck.
16. Sew the paws tightly to the body, trying to position them symmetrically.
17. We won’t sew up the hole in the tail either, but sew it to the body just like this.
18. Carefully sew small ears on our squirrel, placing them with the white sides forward.
19. The last stage remains - sewing on the nose and eyes. We will make the nose from a large black bead, sewing it tightly with black threads, and we will make the eyes from smaller beads, also using black threads for sewing.
Our toy squirrel is ready. The child can play with this squirrel as with an ordinary toy. Or you can use the squirrel to decorate the baby’s room, for example, put it on a windowsill or shelf, and place the squirrel’s favorite delicacies – pine cones or nuts – next to it.
The squirrel, an incredibly beautiful jumping animal from the order of rodents, has been known to absolutely everyone since early childhood. Squirrels are the main characters of numerous Russian folk tales and children's animated films; they write poems and come up with riddles about her, learn songs and proverbs.
It is difficult to answer the question of why squirrels are so loved and adored by everyone. Perhaps because of his cute appearance and luxurious tail, or perhaps due to his active behavior and interesting habits.
In any case, it is important to introduce your child to this charming animal. And the news portal “site” in this article has prepared for you several simple photos of master classes on making children’s crafts squirrels
The following materials will be used in crafts: plasticine, cones, paper, cardboard rolls of toilet paper, etc.
To create the “Squirrels” toy you will need:
- Felting wool 100%. For the base you need orange wool, a little brown for the nose and white for the tail.
- Sponge
- Felting needle
- Two black beads. They will be necessary for the eyes
First, you need to pinch off a couple of strands from a skein of orange wool and tear them thoroughly. The wool you receive will need to be wound into one round ball.
Form a ball from the resulting hairball. This is easy to do with a felting needle.
Put the resulting ball aside for now, we’ll come back to it a little later. Pinch off a couple more strands from the orange skein and make a similar ball. Set it aside for the first one.
Popular articles Do-it-yourself standard rose
Tear off a few more strands of wool and use them to shape the balls into the shape of a squirrel's body as shown in the photo below. Use extra wool for more careful finishing of seams and strong connection of parts.
From it we make the belly and breast of the future squirrel. The size should correspond to the size of the torso.
The belly and chest should be shaped like a flat pear. Connect this structure to the body.
Then take some more white wool, after dividing it into two equal parts. This will be the area of the squirrel's nose and cheek.
Attach the nose area to the corresponding place on the muzzle. Like the picture below.
Make the nose itself from previously prepared brown wool.
Tear two even strands from the orange skein. We will make ears from them.
When they are ready, simply roll them to your head.
The result should look like this
Form paws from a few more orange strands.
Use a needle to form fingers.
Place the paws on the already prepared body of the squirrel.
Form heels and toes on the lower paws.
Next step
make eyes. To do this, use a needle to form the contours of the eye sockets and place black beads inside. They need to be glued securely. It is best to use instant glue for this.
Finishing touch. We attach the tail using the same method as all previous steps.
That's all the “squirrel” toy for your child
ready.
To add a slight touch of mystery, you can additionally attach black eyelashes to your squirrel.
Thus, in just one evening you have created a unique “squirrel” toy
.
And they did it completely free of charge
with their own hands. In addition, in the process of work, you subconsciously “charged” your craft with love and positive energy, which, of course, will be passed on to your child. Now you can be sure that your child is in good hands, because you know absolutely all the materials that you used in the process of creating the craft and you understand that they cannot harm. In addition, this toy is very pleasant to the touch and looks great. Therefore, you can rest assured that your creation will become your child’s favorite fairy-tale character and his “real fictional” friend, with whom he will easily go through life and for whom he will be grateful to you for many years. Therefore, do not stop and continue to fill your home with things made using the felting technique that is relevant in 2014, and let those around you not only admire your skill, but also feel reverent gratitude for the gift of useful and entertaining things made with your own hands.
Now in stores you can see a lot of toys in the form of exotic overseas animals, but you don’t always find toys in the form of animals common to our area. But I want the child to become acquainted not only with the overseas fauna, but also to know well what the animals of our latitudes look like. To solve this problem, you can make some toys yourself. For example, a small toy squirrel is quite easy to sew. To make it, you can use a pattern in the tilde style.