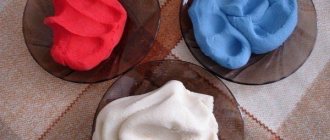
How to make salt dough?
You will need: a glass of wheat flour, a glass of extra salt, half a glass of cold water, a bowl.
Recipe
- Take a bowl.
- Pour in a glass of flour.
- Add a glass of extra salt.
- Fill with cold water.
- Knead the dough.
The finished salted dough should not stick to your hands or crumble. It should be cool and easy to sculpt. I recommend watching the video master class!
SALT DOUGH | How to make your own salted play dough | A simple salt dough recipe.
Salt dough recipes for flowers
There are a large number of recipes for this material. They differ in composition, manufacturing technology and purpose.
For the simplest recipe you will need the following materials:
- premium flour – 200 g;
- “Extra” salt - 200 g;
- water – ¼ cup;
- food coloring.
Important! You should not use coarse salt - such a craft may fall apart when dried.
Salt dough recipe for making flowers:
- Salt is mixed with flour.
- Dissolve food coloring in water and slowly pour it into the flour and salt mixture. Mix everything well.
- The dough should be elastic and soft. If the consistency of the material turns out to be too liquid, add a little more dry ingredients to it.
Important! The second recipe is suitable for crafts with small or delicate parts. Thanks to its composition, this material is especially delicate.
Ingredients:
- premium flour – 200 g;
- fine salt – 200 g;
- potato starch – 10 g;
- vegetable oil – 20 ml;
- water – 50 ml;
- food coloring.
Step-by-step description of the recipe:
- Flour, salt and starch are mixed with each other.
- Vegetable oil and food coloring are added to the water.
- The liquid is poured into the dry mixture and mixed thoroughly.
How to dry salt dough?
There are two most common ways to dry salt dough. The first method: the finished craft will dry on its own. The main thing is that it should not be exposed to direct sunlight, otherwise it will crack. The craft can be placed on a flat surface and wait a few days. Second method: dry the finished craft in the oven for 3 to 6 hours (depending on the size of the craft). Drying occurs in batches with breaks. One approach is 1-2 hours. For quick drying in one go, set the oven to 75-100 degrees, and then the craft will dry in an hour. At a temperature of 120 degrees, the craft will dry in 30 minutes, but it is better to dry it naturally.
Preparing the dough
The material is so easy to use that even a small child can work with it. In order to make a craft from the dough, you need to strictly follow certain rules when preparing the dough, working with it and subsequent drying. And even when applying paint, technology must be followed. Only with proper kneading of the dough can you obtain a mass suitable for creating a product. The material will be plastic and soft if the proportions of its components are not violated. Below are the two most common ones, which are suitable even for beginners.
Recipe No. 1
We have to:
- premium wheat flour – 0.5 kg;
- cold water – 0.2 kg;
- salt - 0.2 kg.
The mass prepared according to the recipe turns out to be convenient for modeling, elastic and even edible. The fact that such dough is edible is very important when used by small children. Even if it happens that the baby eats a craft or a small piece, then nothing bad will happen.
Recipe No. 2
This dough can also be used by children, but it is definitely not worth eating, since it contains glue. But such dough turns out to be even more plastic and flexible.
We will need:
- premium wheat flour – 0.5 kg;
- cold water – 0.2 kg;
- PVA glue - 2 tbsp. l.
The resulting mass can be painted. The main advantage of this recipe is that it hardens for quite a long time. This allows you to correct small defects in the composition before it completely hardens.
Related article: Knitting a beautiful warm skirt for women: pattern with description
Before the master class, you should also familiarize yourself with the features of drying and coloring products made from such dough.
Any dough product must be dried, otherwise it will not have strength and may crumble. Drying at room temperature will not impart quality characteristics to the finished composition.
To do this you need to use the oven. It is recommended to place the product in the oven for 30 minutes at a temperature of 120–150 degrees. Large crafts should be left to dry longer, while small ones may dry faster than the specified time.
In order to prevent the dough from sticking to the baking dish, its bottom should be covered with baking paper or foil.
To dry very small parts, the temperature in the oven should be no more than 120 degrees. During the drying process, it is recommended to rotate the parts of the composition for more even drying on all sides. You should not dry it in a microwave or on a radiator, as this can lead to deformation and cracking of the product.
After the figure has completely dried, you can begin painting. It is best to opt for acrylic paint or gouache. To fix the paint and give the composition an attractive appearance, it is recommended to use a clear varnish. It is also possible to add food coloring to the dough. This is convenient when many elements need to be done in one color.
How to color salt dough?
There are two most common ways to color salt dough. The first method: after drying, paint the finished craft with acrylic paints or gouache using a brush. Second method: food coloring is diluted in water, then added while preparing the dough. When the craft is completely painted and dried, it must be coated with transparent manicure or furniture varnish in 2-3 layers. Each layer must dry before applying the next. This way the craft will last for a long time.
Salt dough star
You will need: colored salt dough, glass, clear manicure polish, toothpick.
Master Class
- Roll into a ball.
- Make a flatbread out of it.
- Cut out a star using a stack.
- Brush the corners of the sprocket with a wet finger to make them smooth.
- Make dots with a toothpick.
- Make a smile with your eyes.
- Attach small flat balls of a different color using water to decorate the star.
- Dry the craft.
- Apply varnish and wait until completely dry.
The salt dough star is ready!
Dough flowers
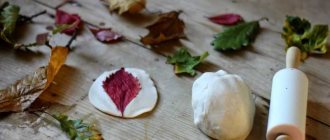
Having learned how to make salt dough, you can quickly master the basic techniques of modeling with your own hands and then perform more complex compositions. Pliable, soft mass will help the child develop his creativity and concentration. The salted mass allows you to create not only beautiful, but also quite realistic flowers. One of the simplest flowers for sculpting is a rose. The finished dough must first be rolled out to a thickness of about one centimeter. Next, use a round cutter to cut out five pieces of the same size, which will be the petals of the flower.
Related article: Openwork knitted dresses for girls with patterns, descriptions and photos
Place the future petals horizontally on the board, so that they lie on top of each other, with a protrusion of about a centimeter. Next, twist all the layers together and place one side on the surface of the board. Now all that remains is to straighten all the petals, from the center to the sides, to give them a resemblance to a real rose.
A bouquet of roses will be a wonderful spring gift on March 8th.
Salt dough caterpillar
You will need: colored dough, knife, PVA glue, toothpick, pendant, clear manicure polish.
Master Class
- Roll out the sausage.
- Cut it into 6 equal parts.
- Roll into balls.
- Glue 5 balls together.
- Glue the head.
- Make a nose and eyes, then glue them on.
- Poke a toothpick into the hanging area.
- Dry the craft.
- Apply varnish and wait until completely dry.
- Attach the pendant.
The salt dough caterpillar is ready!
DIY roses from cotton pads step by step
Getting creative with children is not difficult, because you can use a variety of materials. Think about how you can congratulate your grandmother in an original way with a homemade gift. This could be a bouquet of roses made from cotton pads. You can also make a whole topiary with your own hands.
But first, consider making a simple rose from cotton pads with your own hands.
Materials:
- Cotton pads
- Corrugated green paper
- Scissors
- Threads
- Wooden skewers
- Glue
Apply glue to the edge of the skewer and wrap a cotton pad around it. Hold for a few seconds for good fixation. This will be a rose petal. At the base, apply glue again and wrap it with another disk. The middle of the second disk should be at the junction of the edges of the first.
We will also make another 5-6 cotton pads, which need to be glued in a checkerboard pattern.
Now the bud is ready and you can start creating greenery. For this you need green paper. Cut a rectangle out of it and cut out cloves from one edge. Glue it to the base of the bud. Wrap the skewer in green paper. It should not unfold, so secure it well. We will also attach a green leaf to the stem.
Salt dough apple
You will need: colored salt dough, PVA glue, clear manicure polish.
Master Class
- Make half an apple, make the inside flat, pressing it onto a flat surface.
- Make a thin flat center and glue it to the main part.
- Roll 6 seeds and a stick, then glue to the apple.
- Blind the leaves, then glue them.
- Dry the craft.
- Apply varnish and wait until completely dry.
The salted dough apple is ready!
DIY roses from socks step by step
It is no longer possible to surprise anyone with a gift in the form of socks; on the contrary, it has become quite banal. But making a bouquet out of socks and presenting it for a holiday can be an original idea. This bouquet can be a great surprise for a baby’s birthday, or a gift for your husband on February 23rd. But, to be honest, even a woman will not refuse such a gift, since there can never be too many socks.
Let's look at how to make a bouquet of socks with your own hands using children's socks as an example.
Materials:
- Socks
- Wire
- Tape
- Decor
Each sock needs to be twisted as shown in the pictures. Insert a wire into the base of the sock flower
Wrap the base with tape
You can also wrap artificial leaves.
You can use a basket to create a bouquet. Insert a piece of foam into which you can stick rose stems from socks.
You can also collect the socks in a bouquet and wrap them in wrapping paper.
Salt dough elephant
You will need: colored salt dough, PVA glue, clear manicure polish.
Master Class
- Make the elephant's body by rolling an elongated ball.
- Make 4 legs in the shape of plump sausages.
- Make a proboscis.
- Make the elephant's ears in this way: roll out 2 flat cakes, glue flat cakes of the same shape of a smaller size and a different color to them.
- Make a small ponytail.
- Blind your eyes.
- Assemble the elephant in the following sequence: glue the legs to the body, then glue the proboscis, then the ears, eyes and tail.
- Dry the craft.
- Apply varnish and wait until completely dry.
The salt dough elephant is ready!
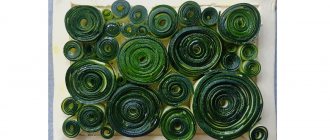
Pictures of flowers made from salt dough
Just like the background, some elements of the painting are hand-painted with gouache or acrylic
A picture made from salt dough is a good way to preserve a child’s craft for many years. Such a product will be durable and very beautiful.
Algorithm for creating a picture:
- Preparation - paint the background for the composition on a cardboard or other base using any type of paint.
- Making three-dimensional parts - flowers and other elements are sculpted from salt dough. Before this stage, you can create a sketch of the future painting.
- Connecting the elements - the parts are glued to the base with PVA glue. For heavy and bulky elements it is better to use a glue gun.
- Painting flowers - three-dimensional parts are painted with paints. If the flowers were sculpted from already painted material, this step is skipped.
Many artists use this material for their creativity instead of plaster or clay
One of the simplest options is a composition with daisies. These flowers are loved by many and look very impressive, and making them is so easy that even a child can do it.
To create a picture you will need:
- salty dough;
- film;
- cardboard for the base;
- knife and stack;
- paint and brushes.
Step-by-step production:
- The dough is used to form a flat silhouette of a semicircular vase. A handle made from a piece of dough rolled into a “sausage” is attached to the side. Any pattern is applied to the surface of the vase using the sharp end of a stack.
- Next you need to make the required number of flowers. To do this, a small piece of dough is rolled into a ball, flattened, and cut into petals with a knife. A core is added to the center of the chamomile - another smaller ball.
- The basis for the picture is painted or pasted over with colored paper.
- After all the elements have dried, they are glued to the base and painted.
- At the last stage, the flowers and vase are coated with colorless varnish.
Salt dough roses
You will need: salt dough, foil, a candy vase or similar plastic container, gouache, a brush, clear manicure polish, a modeling board, a knife or a stack.
Master Class
- Fill the vase with foil.
- Roll into balls. For one rose you will need 5 balls, for a leaf - 1 ball.
- Make leaves and draw stripes in a stack.
- Make cakes from the balls and form a rose. Roll one cake into a tube, then attach it to different sides of the cake, forming petals.
- Attach roses and leaves to the foil.
- Dry the craft.
- Paint the craft and wait until it dries completely.
- Cover the craft with varnish and wait until it dries completely.
Salt dough roses are ready! I recommend watching the video master class on how to make a rose!
Master class: Modeling a rose with thin petals from salt dough. Master class for modeling rose.
How to make flowers for a panel from salt dough
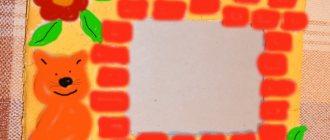
An interesting decor option for a room - a panel with flowers
A craft in the form of a panel made of salt dough with flowers is a good handmade gift for grandmothers or mothers. A child can make such a product independently under the supervision of parents.
Necessary materials:
- pre-colored salt dough in different colors;
- modeling board;
- stack with a sharp end;
- base for panels made of hard cardboard;
- self-adhesive decorative paper;
- cord;
- PVA glue;
- glue gun;
- clear nail polish.
Step-by-step description of making flowers from salt dough:
- The salt dough is divided into small coin-sized balls. For a flower you will need four or more balls, for leaves - only one.
- To make a leaf, the ball is slightly flattened into a drop shape. The sharp side of the stack presses out the veins on it.
- Next you can start creating flowers. There will be 2 types of them: roses and daisies. To create a bud, one ball is rolled out and wrapped in a tube - this will be the core. A few more balls of dough are rolled out like a pancake and glued at the base to the core of the bud.
- To create a daisy you will need six pieces of material in two colors: 5 balls for the petals and 1 for the pistil. They are rolled out into a pancake and glued in the center.
- Flowers are sent for drying.
- For the base of the panel, an oval is cut out of hard cardboard. Its front side is covered with decorative paper.
- A thick cord is glued to the edges of the panel blank. The easiest way to do this is with a glue gun. At the top you can form a loop from a cord - this is how the craft is often hung on the wall.
- Next, all the parts are assembled together. Completely dried dough elements are glued to the panel. The surface is coated with transparent varnish.
Hedgehog made from salt dough
You will need: salt dough, nail scissors, PVA glue, acrylic paints or gouache, brush, manicure polish.
Master Class
- Make an oval-shaped hedgehog body.
- Make an elongated tip.
- Make 2 small balls and glue them in place of the eyes.
- Roll the ball a little larger and glue it as a nose.
- Make needles by cutting the dough. The cuts should be made in rows, the needles should be placed in a checkerboard pattern.
- Dry the craft.
- Paint and wait until completely dry.
- Apply varnish and wait until completely dry.
Salt dough hedgehog is ready!
Craft materials
If you have never worked with salt dough and think that it is a short-lived and frivolous material, get to know this type of modeling better in our other publication. If the technology is followed, the products will last for several years without losing their decorative properties.
For the salt dough you will need:
- flour 1 tbsp;
- extra salt 1 tbsp;
- cold water 0.3-0.5 tbsp.
The decor made of flour and salt looks like ceramics. But working with the material is much easier than working with clay.
Also prepare:
- ceramic plate;
- toothpicks, stacks;
- nail scissors;
- sponge;
- tassels;
- acrylic paints;
- gouache;
- aerosol acrylic varnish.
Owl (eagle owl) made from salt dough
You will need: salt dough, pva glue, nail file, manicure scissors, acrylic paints or gouache, brush, wooden board with a pendant, transparent manicure varnish.
Master Class
- Make an oval shaped body of the owl.
- Blind the eye in this way: make a round cake and glue it on, then take a piece of dough, form a small strip, wrap it in a tube and glue it as a pupil.
- Blind the second eye in the same way.
- Using a nail file, make small stripes from the pupil to the outer shell.
- Make rays around the eye by pressing the nail file onto the dough.
- Take scissors and make cuts to form the owl's feathers. This process is painstaking, the main thing is not to rush.
- Place the cuts in rows. The feathers should be staggered.
- Glue the craft to the board.
- Make the owl's paws and glue them on.
- Make the owl's wings, use scissors to make feathers and glue them on.
- Using the same principle, attach the “hairstyle”.
- Dry the craft.
- Paint the owl and wait until it dries completely.
- Cover the craft with varnish and wait until it dries completely.
The salt dough owl is ready!
DIY dough flowers
Handmade decorative edible flowers will be a wonderful decoration for baked goods. Flowers made from yeast or puff pastry, made using the technique suggested below, will help highlight your favorite pastries against the background of other dishes and diversify the festive table.
We will show you how to make dough flowers with your own hands in the photo master class below.
Edible flowers made from dough
You should start preparing by preparing the dough. For baking, you can use either ready-made dough or homemade dough according to the following recipe. We warn you right away: the flowers are edible! And don’t be put off by unusual ingredients like petroleum jelly or glycerin – they are registered food additives that we regularly eat without noticing.
Ingredients:
- corn flour – 1 tbsp;
- water – ½ cup;
- glycerin – 1 tbsp. spoon;
- lemon juice – 1 tbsp. spoon;
- Vaseline – ½ tbsp. spoons.
Preparation
Combine water, glycerin and petroleum jelly with lemon juice and beat well. Slowly add flour to the mixture. The finished dough will be dense, but sticky and not elastic.
Place the saucepan with the dough over medium heat and stir until the lump of dough begins to thicken. As soon as this happens, increase the heat and keep the mixture on the fire for another 2-3 minutes. We check the readiness with our finger; if the dough does not stick to it, it’s time to remove it from the stove.
At the next stage, in addition to food coloring, we will also need a small rolling pin, a knife, a needle and molds to give shape and texture to future plants (the latter is not necessary).
Roll out the colored piece of dough into a spindle-shaped cake. And we roll it into a bud.
The inner bud is ready and now all that remains is to glue the petals to it. To do this, the dough ball is rolled into a cone, the wide part of which is flattened with a knife, or by hand.
The petals are easily attached to the bud...
... and all that remains is to increase the number of petals by layering them in a spiral until the appearance of the flower satisfies you.
The last detail is the leaves, we cut them out using a special mold, and then roll them on a corrugated board. As a result, we get the shape and texture of a natural leaf. If you don't have a grooved board, just use a needle to trace the veins on the leaves.
In addition to roses, other flowers can be made using a similar technology. For example, narrower petals can be attached not to the inner bud, but to a small ball. Cut the edges of the bud with scissors, and the end result is this beauty.
Well, if you think that this is not enough to decorate a dessert, then you should learn how to make cake mastic and chocolate cream.
Salted dough fruit basket
You will need: salted dough, a base on which the craft will be attached, such as a board or plate, a glass or a knife, a sheet of paper, a simple pencil, a garlic press, a rolling pin, PVA glue, acrylic paints or gouache, a brush, clear manicure polish, cloves.
Master Class
- Draw a basket on a piece of paper or print out a template.
- Roll out the dough into a thin layer.
- Glue the central part of the layer onto the board.
- Attach a paper template.
- Cut out the basket with the tip of a knife.
- Pass the dough through a garlic press to create stripes, then twist into ribbons.
- Lubricate the handle of the basket with glue and place the flagella on it.
- Glue the flagella onto the rim.
- Using the tip of a knife, draw a mesh on the basket, making it look wicker.
- Roll out the layer and cut out 9 leaves with a knife.
- Using the tip of a knife, draw stripes on the leaves.
- Glue 3 leaves on the sides and top center of the basket.
- Make 4 large circles and glue them on as apples.
- Make a small indentation with a stack in the center of each apple and glue a clove.
- Make 3 small circles and glue them on as plums.
- Make about 20 small balls and glue them like a bunch of grapes.
- Dry the craft.
- Paint and wait until completely dry.
- Apply varnish and wait until completely dry.
Salted dough fruit basket is ready! I recommend watching the video master class!
#Salt dough/ Basket with vegetables.
Panel with sunflower
A plate no more than 0.7 cm thick is rolled out from the finished dough. We cut a circle out of it, the edges can be patterned, as in the photo, and a hole can be made at the top for a ribbon. It is better to put the workpiece on a napkin.
Roll out a small piece of dough thinly and form it into a sunflower. To glue the parts of the composition, lightly moisten the base with water. When working with dough, water is used instead of glue.
From thin strips we form a sunflower trunk and a fence fence. Small pieces of rolled out mass are needed for cutting out leaves and flowers. Now all that remains is to make the pot and the corn. When all the elements are ready, glue them onto the panel using water.
After complete drying, we proceed to painting and applying a protective layer of varnish.
Using the same principle, you can make a basket of flowers, as in the photo below:
Salt dough cat
You will need: salt dough, a knife, a rolling pin, a simple pencil, a sheet of paper, sandpaper, acrylic paints or gouache, a brush, transparent manicure varnish, a glue gun or pva, a base for crafts, for example: a board with a frame, transparent manicure varnish.
Master Class
- Draw a cat or print a template.
- Roll out the dough into a thin layer.
- Attach the template and cut out the cat.
- Dry the craft.
- Sand the craft with sandpaper, removing any unevenness.
- Using a simple pencil, transfer the desired design onto the cat’s body.
- Paint with paints and wait until completely dry.
- Cover the craft with varnish and wait until it dries completely.
- Glue the cat onto the base with the frame.
The salt dough cat is ready! I recommend watching the video master class!
Cat souvenir (Laskutok) | Salt dough modeling part 1
Paintings with flowers made from salt dough - master classes
Girls, hello to everyone who stopped by. I haven’t written or sculpted anything for a long time; I’ve had a lot of basic work and handicraft training. I decided to make a useful post, I really like to organize everything.
I want to share with you the best master classes on sculpting flowers from salt dough. I, like a true craft hamster, collected them in my piggy bank for 2 years.
Paintings with flowers made from salt dough look very beautiful due to their volume and play of light, outperforming ordinary painting. Making them is not as difficult as it seems, it is a matter of painstaking, many hours of work in sculpting and painting and thoughtful composition.
Want to try? Then this selection is for you!
Pictures with flowers made from salt dough
Chamomiles made from salt dough Many people love chamomiles. A simple but very beautiful flower. It is associated with summer, field bouquets and, of course, fortune telling. Watch the master class of Larisa Ivanova, one of the famous masters of testoplasty. A very clear lesson, suitable even for beginners in modeling.
You don’t need any molds or stacks, just take a simple toothpick and create a “chamomile” positive.
Link: https://stranamasterov.ru/node/75516
Flowering branch made from salt dough
Do you want to create a sunny mood at home? Multi-colored butterflies fluttering among flowers in the warm rays of sunlight. An eternal piece of summer that will lift your spirits in winter and please your eyes...
Then this lesson is for you. The author is again Larisa Ivanova. The master class is again very simple. You can make a picture together with your children and give it to your grandmothers.
Link: https://stranamasterov.ru/node/85356
Calendula
I am glad to introduce you to another amazing salt dough master from the Country of Masters - Luna Llena (Elena). She makes simply fabulous paintings with flowers from dough.
Her flowers turn out very light and airy. Elena shares her modeling secrets in a master class on creating calendula sprigs for a photo frame.
Link: https://stranamasterov.ru/node/420704
Sunflowers
The sunflower is not an ordinary flower, but a flower that symbolizes the sun and vital energy.
A picture with these flowers will fill your soul with warmth and will charge you with a summer mood.
Another talented master, Marina Arkhipova, will tell you how to make sunflowers from salt dough.
Link: https://stranamasterov.ru/node/219775
Peonies
Peonies are very beautiful flowers. Among the Chinese, they represent wealth and nobility, and people give peonies to wish their friends well-being. The ancient Greeks believed that peonies protected against evil spirits. In Japan, the peony symbolizes fertility, wealth and joy.
Make yourself a piece of joy based on Tatyana Ryaskova’s lesson.
Link: https://stranamasterov.ru/node/568115
Calla lilies
This master class is already 5 years old, but it still does not lose its popularity. Author Marysabelka (Maria) from the Country of Masters.
Callas are very sophisticated, elegant flowers with a unique unique flower shape. White callas symbolize purity, admiration and worship. They are often used in bridal bouquets and wedding decorations.
Link: https://stranamasterov.ru/node/236898
poppies
Poppies are very colorful in color. They look especially good in bouquets in contrast with simpler flowers, such as daisies.
Poppies are so popular that they can be found in various handicraft techniques. Their beauty and brightness pleases the eye and lifts your spirits. There is also a sign that poppies protect the home.
A very simple lesson in sculpting poppies was done by the author Sveta@Svetlyachok from the Country of Masters. All stages are described and photographed in great detail.
Link: https://stranamasterov.ru/node/503990
Roses
Rose is the queen of flowers, and my selection would be incomplete without her.
A very detailed lesson on sculpting a rose from Olya and Co. from the Country of Masters.
The rose in this master class turns out to be very airy and voluminous, as if alive. Make a rose like this, and no one will believe you that it is made from salt dough.
Link: https://stranamasterov.ru/node/146055
Gladioli
Victory, friendship, nobility means gladiolus these days, despite the masculine name of the flower, it is customary to give it to representatives of both sexes. In addition, in Japan and China, gladiolus is considered a symbol of care and constancy.
A very simple lesson in sculpting gladioli from Tanya Cherry will help you create beautiful paintings with these flowers as a gift.
Link: https://stranamasterov.ru/node/65060
Lilac
Lilac is a memory of spring, blooming May and romance.
Simply extraordinary beauty and very painstaking work awaits you in a master class from Tatyana Ryaskova, whom you already know.
Link: https://stranamasterov.ru/node/567732
Pansies
The British give pansies to women as a sign of devotion and declaration of love; they are a symbol of fidelity and purity.
A very simple and cute composition “Pansies in a cart” - a modeling lesson from Marina Alexandrova from the Country of Masters.
Link: https://stranamasterov.ru/node/333496
Dahlias
Everyone admires dahlias; they are a very beautiful flower of various shapes and colors. It is very popular among gardeners due to its ease of care.
In this lesson from Tanya Cherry, you will not only learn how to sculpt dahlias, but also see how salt dough baskets are made for bouquets.
Link: https://stranamasterov.ru/node/152219
Tulips
Tulips are a symbol of pure love, it means a declaration of love. The tulip looks great in spring bouquets, baskets and compositions. You can give these flowers to anyone who loves this elegant flower.
A short lesson in sculpting tulips from Sveta@Firefly from the Country of Masters.
Link: https://stranamasterov.ru/node/401271
Chamomiles and forget-me-nots
Again a lesson on sculpting daisies and forget-me-nots, but this time more complex and painstaking compared to the first lesson from this collection.
Watch the master class “Meadow Flowers” from the talented master of testoplasty Marina Arkhipova.
Link: https://stranamasterov.ru/node/88825
I would like to say a huge thank you to all the craftswomen who share their experience and teach others, and, of course, give inspiration. Wouldn't you like to try to make such a picture with flowers?
Salt dough pencil
You will need: water, flour, extra salt, a cardboard jar for the frame, PVA glue, scissors, a piece of decorative rope or corrugated paper, gouache, a brush, a button, stacks, acrylic varnish for crafts, a toothbrush.
Master Class
- Knead the salted dough in this way: add a glass of flour, a glass of salt, add water, then knead until the desired consistency of the dough. Separate part of the dough, add beige gouache, then knead.
- Roll out the cake to a thickness of 10-15 mm.
- Apply PVA glue to the outer rim of the jar and wrap it with dough. Cut off the excess with a stack and smooth the joints with a damp brush.
- Create a small dotted texture with a toothbrush on the surface of the dough.
- Knead the brown dough, roll it into a flat cake 10-15mm thick.
- Cut a 5cm wide strip of brown pastry and glue it to the bottom of the jar.
- Make 2 large owl eye bases from white dough, then glue them on.
- Make a beak out of brown dough and glue it on.
- Make eyes from turquoise dough and glue them on.
- Roll out 8 strips of pink dough, twist them into 4 flagella and make a bow, then leave it to dry for 2 hours.
- Make droplet-shaped owl wings using brown dough, then glue them on.
- Weave ropes of beige dough and glue them onto the neck of the jar.
- Roll out a sausage from white dough, draw the texture of the lace with a stack and glue it as a collar under the beak.
- Place the craft in a warm place for a day.
- Paint the bottom and wings with brown gouache and decorate with white dots.
- Draw the pupils and eyelashes with black gouache, wait until the paint dries, then paint white highlights on the eyes.
- Glue a pink bow above the wing.
- Glue a button with a bow from a corrugated strip onto the lace.
- Cover the craft with varnish and wait until it dries completely.
The salt dough pencil is ready!
Beautiful pastries made from dough
Apples in a grid
To create such a dessert you will need a regular knife and a round die cutter. Part of the rolled out dough must be turned into an elegant mesh and covered with the filling, laid out on a smooth layer of dough. The final stage is cutting out the circles using a sharp die.
Openwork spirals from dough
To decorate a cake beautifully, you don’t have to have a lot of expensive plungers and cutters. It is enough to cut several strips of dough with a knife and wrap them in the form of openwork spirals.
Elegant ruffles
The rim of the pie will look very elegant if you decorate it with an elegant frill made of dough.
Lush braids
This decoration option is suitable for pliable, elastic dough.
Caesar's wreath
You can decorate the rim of the pie using scissors. To do this, you need to make several small cuts at an angle of 45 degrees and carefully straighten each segment.
Juicy eights
This option is suitable for both meat and sweet fillings. First you need to cut out two long strips of dough. In one of them you need to make vertical cuts at intervals of 3–5 centimeters. Next, you can start braiding.
Puff sun
To implement this idea, just cut out two even circles of puff pastry, spread one of them with filling and cover with the second. Then all that remains is to make a few cuts from the center of the circle and wrap the petals.
Quick puff pastries
For this baking option, you need to roll out two sheets of thin puff pastry the size of a baking sheet. Place the filling on one of them in portions, then cover with a second layer and cut into even squares or rectangles.
Open Pie
Cut out an even square or rectangle from the dough. Draw a border in the center, stepping back a few centimeters from the edge. Place the filling inside and sprinkle with hard cheese. It is necessary to bake the cake for 30 minutes at a temperature of 180 degrees.
Stuffed flowers
The appearance of this pastry will tempt anyone! Children will devour these buns on both cheeks, even with vegetable or curd filling.
Day and night
This version of shortbread cookies will not leave anyone indifferent!
Mushrooms with cream filling
Agree, this is a very unusual form of baking!
Salt dough dachshund
You will need: salt dough, a simple pencil, scissors, cardboard, paints, a brush, rope, toothpick, foam sponge, clear varnish, PVA glue.
Master Class
- Draw a dachshund on the cardboard as shown in the image.
- Cut out the template.
- Roll out the dough to a thickness of 5 mm and cut out the dachshund according to the template.
- Roll out the oblong eyes, then glue them on.
- Blind the eyelids and glue them onto the eyes.
- Use a toothpick to outline the paws, nose, mouth, ear and body contours.
- Roll out an oval, then glue it onto the ear and smooth the seam with a wet finger. Use the same method to add volume to the dachshund's back and tail.
- Mark stripes in different directions around the entire perimeter of the dachshund, so that the stripes resemble wool.
- Dry the figurine.
- Paint the figurine, then leave to dry.
- Glue a piece of rope to the back of the craft for further hanging.
- Cover the craft with varnish and wait until it dries.
The salt dough dachshund is ready!
How to decorate a pie beautifully
Pie in the shape of a flower
The idea seems impossible only at first glance. In fact, even a beginner can prepare such baked goods. First you need to roll out a small circle so that it fits in the baking dish. The next step is to roll 8 balls and arrange them in a circle, as shown in the photo. Then make 4 cuts in the middle and bend the triangles (petals). There will be a round empty space in the center.
After baking, the chamomile can be sprinkled with powdered sugar or coated with icing.
Leaves
It is not necessary to decorate only with leaves; it would be nice to combine them with small flowers.
Asterisks
They always look great on pastries. A little starry “sky” in a plate will definitely delight the whole family.
Hearts
Not just baking - but a real declaration of love. There is nothing difficult in preparation, but the effect is amazing!
Spiral
Another very simple method for decorating baked goods. Perfect if you need to cook something tasty and definitely attractive in appearance urgently. The first step is to roll out the dough mixture into an even thin layer and cut a large layer into strips 1 - 1.5 cm wide.
You should try to make sure that the stripes are long without connections. Now all that remains is to lay them out on the product. This should be done from the center and with each turn you twist the ribbon, turning it with your fingers.
Envelope Pie
This version of homemade baking will come in handy for welcoming guests. It turns out incredibly tasty, juicy and attractive. To make a “miracle loaf” you need to roll out a large layer of dough (not thinly) and cut out circles with a glass, as for dumplings or dumplings. The filling should now be wrapped in each piece. The contents of the bags can be anything: jam, minced meat, cheese with herbs.
The only thing left to do is to carefully place the stuffed envelopes in a baking dish from the edge to the center.
Boletus mushroom made from salt dough
You will need: salt dough, light bulb, paints, brush, foil, cardboard, masking tape, superglue, PVA glue, paper napkins, clear varnish, stack.
Master Class
- Cover the light bulb with tape, then cover it with dough and dry the workpiece.
- Cut a ring out of cardboard and place it on the light bulb as a base for the hat.
- Form a hat from crumpled napkins, then secure with tape.
- Wrap the hat with foil.
- Roll out the dough to a thickness of 5 mm and stick around the cap.
- Remove the cap from the stem, cover the bottom with dough and make stripes in a stack.
- Glue the hat onto the leg.
- Mold the mushroom's arms, legs and nose, then glue them on PVA.
- Make a caterpillar and glue it to the hat.
- Dry the figurine.
- Paint the figurine, then leave to dry.
- Cover the craft with varnish and wait until it dries.
Boletus mushroom made from salt dough is ready! I recommend watching this video!
Modeling from salt dough: Basket with mushrooms. Master class for adults and children.
Beautiful flowers made from salt dough
If you make holes in the craft in advance, it can be hung directly on the wall
Modeling promotes the development of fine motor skills, develops imagination and artistic taste. A popular option for crafts with children are flowers made from salt dough, which are easy to make using a step-by-step master class.
Roses
Rose buds made in this master class look very natural and natural, thanks to the thin and slightly torn edges of the petals.
To create beautiful roses you will need:
- salted dough of any color;
- multifora;
- modeling stack with balls at both ends;
- glue;
- brush.
Step-by-step description of sculpting flowers from salt dough:
- The pre-colored dough is divided into even pieces. It should be soft and elastic. Each piece is rolled out into a small ball shape.
- The ball is flattened with your fingers to form a pancake of medium thickness.
- The edge of the future petal is made a little thinner. This is necessary so that the roses look like real ones. To do this, a rolled piece of material is placed between a multifora folded in half. One of the edges is made thinner by lightly rolling it with your finger through the transparent material.
- Using a special tool with a ball at the end, the petal is thinned even more, creating an edge with a “ragged” effect. In this case, the base is left untouched. Do not make the petal too thin - it may tear. This is how the required number of petals are made, from which a rose flower is later formed.
- The core of the flower is collected from the prepared components. Each petal is glued at the base to the bud using glue.
- The flower is formed to the required size depending on the idea - you can make both small young buds and large, fully blossomed inflorescences.
Calla lilies
Flowers made from this environmentally friendly and inexpensive material look just like real ones.
Calla is a delicate and beautiful African flower. You can make the craft yourself or together with your child - the manufacturing process is very simple.
Craft materials:
- salted dough of three colors - white, yellow and green;
- colored sand or yellow semolina;
- rolling pin;
- knife;
- multifora;
- stack;
- glue;
- wire.
Step-by-step master class of flowers made from salt dough:
- First of all, the stem of the plant is prepared. To do this, cut a small piece of wire and moisten it with glue. The green dough is rolled into a sausage shape and wrapped around a wire base for the stem, leaving one end free.
- Next, they begin to create the pestle. The yellow dough is rolled into a sausage and placed on the free end of a wire coated with glue. Then the future pestle is coated and sprinkled with colored sand. Instead, you can use semolina, previously painted yellow.
- A calla flower consists of one petal. To make it, take a white mass, place it between two sheets of plastic or multifora and roll it out with a rolling pin. A calla lily petal is cut out of the cake using a knife. It should be pointed and teardrop-shaped.
- Now you need to connect the parts together. The base of the petal is smeared with glue and wrapped around the stem. Its edges are slightly turned outward.
- The craft is ready. Now it needs to be dried in any suitable way - in the oven or at room temperature.
Daisies
It’s easy to make flowers from salt dough yourself using a step-by-step master class. One of the simplest options is chamomile.
Required materials and tools:
- salted dough of two colors - white and yellow;
- glue;
- sieve or any fine mesh.
Step-by-step description of the work:
- The white material is divided into equal parts and rolled out into a sausage shape. Then each of them is slightly flattened, forming teardrop-shaped chamomile petals.
- The finished petals are laid out in the shape of a circle, gluing them in the center.
- A small ball is rolled out of the yellow material and pressed through a sieve or mesh. The center of the rosette is smeared with glue and the yellow core is placed there.
- The flower is ready. After drying, it can be used for decorative panels or other purposes.
Funny salt dough pigs
You will need: salt dough, paints, brush, foam sponge, stack, thin rope, toothpick, black helium pen, PVA glue.
Master Class
- Roll 2 balls for the snout and use a toothpick to make the nostrils.
- Make a muzzle, glue a snout and eyes above it.
- Make triangular ears, glue them, then mark stripes with a stack at the junction of the ears and head.
- Make a heart and glue it to the bottom side.
- Make indentations along the edge of the entire circle.
- Using a toothpick, make 2 holes on the top for attaching the rope and 2 holes on the bottom for the legs.
- Roll up the arms and glue them in such a way that they hold the heart.
- Make the hooves and make holes in them for the rope.
- Dry the workpieces.
- Paint the blanks with black paint and let them dry.
- Wash off the paint from the convex parts of the workpiece under running water with a sponge and wait until it dries.
- Prime the figures with a sponge and white paint.
- Color the piglets.
- Draw small details with a black gel pen.
- Cover the craft with varnish and wait until it dries.
- Glue wool threads as hair.
- Make a pendant out of rope.
Funny salt dough pigs are ready! I recommend watching this video!
Salt dough cat
DIY salt dough roses
Crafts made from dough have long become a real art. They can come up with all sorts of things - Christmas tree decorations, decorations, and decorative elements. The first to do this, of course, were pastry chefs to decorate their work. But nothing stops us from creating a great mood for ourselves.
There are several recipes for salt dough for crafts. This option is perfect for making roses.
Ingredients:
- 200 g flour
- 200 g extra salt
- ¼ glass of water
- Food coloring
Do not use coarse salt so that the craft does not disintegrate during drying.
Mix the salt with the flour, and mix the dye in the water. Mix everything together well. The dough should be elastic, but not liquid. If you feel that the dough is not thick enough, add a dry ingredient to it.
A rose can be made in many ways. The simplest one is to roll a few balls of dough and then make flat cakes out of them. These cakes will be our petals, which need to be wound one on top of the other.
If you need to make a small rose, use a slightly different method.
Make a thin strip of dough that needs to be rolled. Glue the petals on top of it.
We make leaves from green dough and attach them to the base of the bud.
You can make roses from circles.
If you lay the circles one on top of the other and cut them in half, you can twist two roses at once. They turn out to be the same size
Salt dough makes very beautiful decorative things. You can paint such elements with paints after drying them first.
Salt dough fish
You will need: salt dough, baking sheet, rolling pin, knife, sheet of paper, acrylic paints, brush, ribbon, water, shoehorn, pencil, sandpaper, clear manicure polish.
Master Class
- Draw a fish or print a template.
- Sprinkle a baking sheet with flour.
- Roll out a sheet of dough on a baking sheet.
- Place the paper fish template on the rolled out dough.
- Cut the fish along the contour with a knife, remove the excess dough to the side.
- Make a thin strip and attach it with water in a semicircle, separating the face and body.
- Make a heart and attach it with water as the lips of the fish.
- Blind the eyes and attach with water.
- Form the pupils by pressing the back of a pencil into the dough.
- Make 2 holes using a suitable round object on the fin of the fish.
- Shape the scales of the fish using a shoe spoon.
- Make eyelashes and stripes on the fins with the tip of a knife.
- Dry the craft.
- Smooth out any imperfections in the craft using sandpaper.
- Paint the craft and wait until it dries completely (about a day).
- Cover the craft with varnish and wait until it dries completely.
- Attach ribbon for further hanging.
Salt dough fish is ready! I recommend watching the video master class!
Dough fish.wmv
I recommend viewing a photo gallery of ideas for creating crafts from salt dough!
Crafts made from salt dough are perfect as a gift for any occasion. Think about what your relatives and friends love most, then make it and make a pleasant surprise for your loved ones with your own hands.
Bouquets of flowers made from salt dough
Salt dough is a very plastic material, suitable for creating crafts with small details.
A vase with flowers made from salt dough will become a decoration for your home. The main thing is to remember that this material is very fragile. At the base of each flower there must be a wire that can withstand the weight of the bud. In order for the craft to stand vertically, the ends of the stems are stuck into a thick sponge. The bouquet itself is placed in a vase or basket - you can also make them yourself from salt dough.