Step-by-step instructions on how to make a crossbow
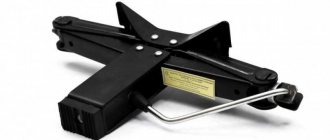
Between the firearm and the throwing one, between the slingshot and the sniper, there is an inverted bow - an elegant weapon for long-range combat within 250 meters. Penetration ability is within the limits permitted by the Constitution of the Russian Federation (Figure 1).
The law does not consider this type of hunting tool as a bladed weapon or a firearm. The only restriction is as follows: a crossbow made from improvised materials should not have a shoulder tension force of more than 43 kilograms. After overcoming this mark, the master will most likely meet with a squad of law enforcement officers. Consider this point before making a crossbow with your own hands.
In general, this is a relatively accurate, reliable, cheap to manufacture and, due to the specific design, an absolutely quiet weapon. An excellent tool for quiet hunting or defending land rights. Historically, the roots of this invention go back to the 5th century BC. Contrary to popular belief, it did not replace the bow, but complemented existing tactical solutions. It’s easy to learn how to shoot with the device: all you need to do is pick it up at least once. It's like a gun with a trigger - cock and shoot. True, then you should tighten the rope again and put the bolt in the stock, but this is purely practice.
Making a crossbow that shoots corks with your own hands
In addition, you will need a small piece of board twenty millimeters thick. From this board we will cut a crossbow stock.
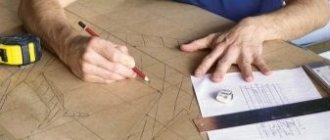
You will choose the length of the board yourself, but since our crossbow that shoots plugs will be a pistol type, do not make it too long. Draw the outline of the crossbow on a piece of thick paper. Then, transfer it to the board and cut it out with a hacksaw.
Now take a drill and drill a through hole, which is intended for the pusher to move. Using a knife, cut a groove at the top for hooking the bowstring.
The bow can be made from a wooden strip. The width of the slats is two centimeters, the length is thirty centimeters and the thickness is five millimeters. We need to make the rail arched. To achieve this, immerse the lath in water and leave it to soak for 24 hours.
Then fix it in a slightly bent state and wait another day. Once dry, the lath will remain in this arched state forever. After you have prepared the rail, glue it to the end of the crossbow stock using any wood glue.
For reliability, you can screw a self-tapping screw into the end.
We will also need a pistol grip for which you will hold your crossbow. Cut it out of the board and also glue it to the crossbow stock. Wait for the glue to dry and then continue working.
Now we will need a clamp that will hold our metal charge in the cocked state, and a trigger with a bowstring pusher.
To make the lock and trigger, you can use ice cream sticks.
For the trigger, glue two whole sticks together. For the retainer, cut half a stick and three quarters. Glue them together. Now all that remains is to glue the lock and trigger onto the crossbow stock, securing them with self-tapping screws.
The bowstring pusher can be made from a tree branch, selecting it approximately according to the diameter of the hole. Clean the branch from the bark, cut the stick to the required length, and adjust it to the diameter of the hole, trimming it with a knife.
The pusher must be inserted into the hole before you attach the retainer.
Now all that remains is to make the bowstring. You can use any rubber band as a bowstring, tying it to the ends of the crossbow bow (first, along the edges of the rail, before gluing it to the end of the stock, you will need to drill holes for attaching the bowstring). That's it, our plug-shooting crossbow is ready for use.
Its operating principle is simple. Pull the string and hook it onto the ledge. Take the cork and insert it between the stock and the latch. You take aim and pull the trigger, which raises the pusher up. The pusher pushes the bowstring and it slips off the ledge and sends the projectile to the target.
You can shoot at targets such as empty cans or plastic soda bottles.
Photos of the crossbow were found on the Internet. Source unknown.
Source: https://partnerkis.ru/arbalet-strelyayushhiy/
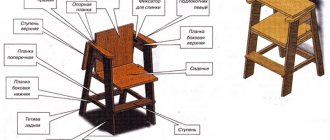
Device features and main details
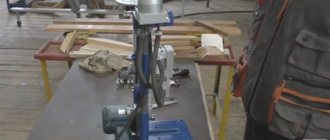
What does this rifle apparatus consist of? In the classic variation there are three main components, followed by solutions with increasing complexity (stocks, handles, components, Picatinny rails, etc.). Our instructions on how to make a crossbow do not involve installing optical sights or other technical bells and whistles (Figure 2).
The main part that concentrates the energy for shooting is the arc. By pulling the rope along it, it can transfer kinetic energy into the projectile. The whole structure revolves around this “capricious lady”. The main materials for its manufacture are metal and wood, but there are also more exotic solutions, such as glass fittings or butter knife blades. The requirements for the arc are flexibility, rigidity and ductility. So, for example, a solid steel frame will not work as a bow, while a car spring or a piece of saw will do.
To make a crossbow frame from wood, pay attention to species such as hazel, birch bark, acacia, ash, yew or bean. Before cutting the frame, you should keep the log in a dry, dust-free place for about a month or two. Fresh logs do not have the required qualities to undergo the processing procedure.
How to make a crossbow stock? Choose a durable type of wood, such as yew, beech, ash or oak. Hazel and conifers will perform well. The further process depends only on the flight of fancy and your skill.
Figure 2. Main design elements
The main controller of the mechanism is the trigger block. It is he who holds the bowstring until the lever is pressed. The cocking mechanism of a crossbow is made of a solid block of metal, less often it is a recess inside the stock with a cylindrical pusher rod.
The listed methods are not the final solution. Despite the fact that the crossbow is a single-shot design, there are bypass methods. The most common way is to make a repeating crossbow by making a special magazine for storing and feeding projectiles.
Crossbow assembly diagram
A homemade crossbow is made and assembled in a certain sequence:
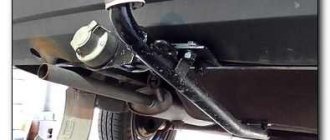
- Making shoulders. For this purpose, both serial shoulders and those made independently can be used. The optimal material for them is a car spring with a length of 60 cm to one meter. It is cut to size, polished, and three holes are made in it for mounting to the stock and for the bowstring.
- stock with seats for the lock is cut out of wood, solid or glued
- Connection of shoulders and stock. If you are planning a fairly powerful crossbow, then a separate block made of metal plates and bolt fastening can be used for mounting.
- Installation of the trigger mechanism.
- Attaching the guide . To do this, a metal tube cut lengthwise is placed into the groove made in the stock and fixed with glue.
- Loops are made at the ends of the bowstring using winding , and the bowstring is secured at the ends of the arms.
- The tension of the bowstring and the reliability of the lock are checked
- Arrows are being made . For the shaft, you can use a wooden dowel, cut to 40 cm. The plumage is cut out of plastic and attached. The simplest tip can be made of tin and fixed to the shaft with tape.
- A test shot is carried out .
Selection and preparation of material
Before moving on to the instructions on how to make a crossbow from wood, prepare your materials in advance. Look around the area and try to remember which of the required tree species grow in the area (Figure 4).
Let us repeat that at home, a wood crossbow can be made from the following species: birch bark, acacia, oak, ash, yew, hazel, bean or acacia. Most often, the listed species are found in local forests and forest plantations. If there is a nearby coniferous forest, we recommend looking for spruce and pine forests. Particular attention should be paid to maple groves. Having found the central maple daddy, look for straightened young trees and select one with a thickness of 5 to 15 cm. The search radius around the main tree is from 40 to 50 meters.
Learn the ax factor, or better yet, the chainsaw factor. Try not to harass the forest area too much. Having cut yourself a log, do not rush to carve a crossbow out of it. First, it will need to be dried and then processed. Drying time in a warm, dry room is from two weeks to two months. Cover all cracks, pores and other irregularities with oil paint and place it on the mezzanine.
Figure 4. Weapons can be made from wood and metal
If it is impossible to obtain wood directly from the forest, order a block of the species you are interested in via the Internet. A variable advantage will be saving time on wood processing; operators can often clarify the dryness of the beams and the method of processing them. But this negates all the romance of traveling and finding the right snag.
Working on the shoulders will take the same amount of time as creating the stock. Both processes require basic woodworking tools - a plane, knife, ax, files. The bed can be decorated with carved patterns or adjusted to fit your own hand, whatever you like. There are no restrictions on the use of materials; both components can be made from the same rock. It is recommended to coat the timber with special solutions to avoid corrosion and rotting, as well as with wood varnish. The shoulder blank should also be treated with protective solutions, but not varnished.
The next point is what to make a crossbow bowstring from:
- You can make a bowstring from scratch from Dacron or Kevlar fibers, but to do this you will need to knit the rope yourself (Figure 5).
- Of the ready-made models, attention should be paid to durable varieties of ropes: cord, polypropylene, nylon, hemp, hair. Of these, only the last two are vulnerable to moisture.
- The golden rule is to focus on stretchability: it should be minimal.
- The edges of the rope attached to the shoulders should be treated in a special way, but not tied. To do this, the cord is wrapped around the workpiece to obtain a shape, then the end is applied to the base and tightly wrapped with a thread of smaller diameter.
- The recommended indentation is 5 cm. Along the way, each layer of the winding is covered with heavy-duty glue (anaerobic, epoxy resin, hot melt glue), and at the end the entire structure is tightly wrapped with a piece of felt. Any knots fray the rope, worsening its quality and increasing the chance of breaking under load.
The final stage before shooting is to make arrows for the crossbow, or as they are also called, bolts. Making consumables requires blanks from solid wood or straight branches. If you have woodworking equipment, cut out several bolts from the beams. They can also be printed on a 3D printer, but such shells will not last long. Get two sets of bolts - with and without soft ends.
Figure 5. The string should be strong, but elastic enough
The former are perfect for re-enactment and role-playing battles; the pointed tip should only be used for hunting. A hunting point is made of wire, tin or aluminum. Keep it light! For the plumage you will need separate blanks made of wood and plastic.
Drawing of block assembly parts:
Pay special attention to the processing of the arrow guides and bowstring. The clarity of their finish greatly influences shooting accuracy. The guide lines must be perfectly straight and smooth. The best choice would be grinding on a milling machine and subsequent processing with fine-grain sandpaper. Next comes polishing the guides. You can see the dimensions of the boom guide groove in the drawings. The crosspiece, with the shoulders attached to it, is installed at the end of the stock. It is usually made from an aluminum billet. Wood can also serve as a suitable material.
Making shoulders and stock
Let's say you have everything you need on hand. How to make a crossbow with your own hands, at home, step one - carve the shoulders. They are made from a single piece of wood, not separately. The workpiece must not have defects, knots, etc. The inner part of the arc should have a semicircular relief, similar to the letter D, the outer part should be flat.
Figure 6. Crossbow arms are usually hewn from wood
Initially, the shoulders are carved like a slightly curved board, after which they can be processed and bent during assembly. The shape is diamond-shaped, beveled towards the ends of the arc, the bevel angle is small. Take a closer look at the growth rings on the log: it is desirable that the entire structure of the shoulders be on the same layer. To make a powerful crossbow for hunting, use more resilient wood. In general, the safety margin and performance characteristics should be sufficient for medium-sized game (Figure 6).
The shoulders are secured in two ways:
- The first is the winding.
It is performed both by drilling the stock and making a carving in it, followed by winding the rope around a fixed piece of wood. The main point is that the shoulders are not drilled, maintaining their structure. But this is a labor-intensive process that requires time-consuming winding. For reliable fixation, it is recommended to thread the rope through a ring that presses the frame in the middle. - The second is fixation.
For wooden ones, it is implemented in a cunning way: a conical groove is made at the end of the block with an angle of inclination of the walls in the region of 80-85 degrees, as wide as the shoulders. The frame is squeezed into this recess and then pressed with winding. The implementation of the winding is as follows: another groove, rectangular, is made in the lower part of the log. A piece of wood 5-10 cm thick is taken, a rope for winding is fixed on it, after which this anchor should be pulled to the groove and driven in there. The beam should be wound 5 cm before the groove itself in order to be able to fix the shoulders with its tension.
The steel arms are easily fixed using both the listed methods and ordinary bolts (Figure 7). How to make a crossbow arrow at home?
There are three options:
- The simplest one
is to have a circular saw, a drill with a wide nozzle, and a vice. Using a circular saw, unravel the timber into small bars, no more than 2 cm thick. After this, process it with a plane until the initial roundness is achieved. Next, fix the workpiece in the drill nozzle and, starting the rotation process, pass it through the cutter fixed in a vice. An alternative to this obscenity is a wood lathe. - Medium,
relying on luck and straight pieces of wood. You will need a knife for turning round shapes. An alternative is the processing of small beams sawn on a circular saw. - Difficult
- sharpening a straight branch.
Figure 7. The arrows must be perfectly straight.
For the fletching, use a hacksaw to make a thin, even slit in the back of the bolt. Find a wide plastic lid (a plastic paint bucket, a flat sheet of plastic from the store) and cut out blades for the bolt. You can also secure them by making holes instead of sawing the entire part. The dimensions of the trigger for a crossbow are different; you should mainly rely on monolithic types of levers. They can be made either from metal or from hard and thick wire.
Model manufacturing technology
You can buy ready-made wooden bows in specialized stores. But made with your own hands according to specific requests, it becomes an exclusive weapon. It's also cheaper.
Parts drawing
Detailed drawing of a bow.
To facilitate the manufacture of the device and speed up the process, a drawing is needed. The simpler the weapon, the easier it is to shape it.
To do this, draw a model of the desired bow on paper and apply the required dimensions.
If you are planning a more complex option, it is worth making several drawings on which to draw the details, their size and location. This will make it easier to select materials and make workpieces.
Material selection
The best material for crafts is wood. Wood is easy to work with, it has the necessary flexibility and strength. A bow and a stock are made from it. You can also use spring metal or special composite materials.
Suitable wood:
- poplar;
- acacia;
- oak;
- maple tree;
- Beach Tree;
- ash.
The trigger mechanism must be made of more durable and wear-resistant materials. Most often it is iron. For example, make a bow out of a spring.
Preparation of material
Before starting work, you should prepare the material:
- Untreated wood is collected. The branch for the shoulders for the bow is at least 1.8 meters, the branch for the garden bed is at least 1 meter. The cross-sectional diameter of the pieces is at least 10 cm. Empty onion
- .
- To ensure uniform drying, branch sections are treated with varnish, varnish or any glue.
- The pieces are left to dry for a year in a dry and dark place.
- The pieces are cleared of bark and dried for another week.
- The branch is sawn and rested for another week.
Making shoulders
To make the arch (shoulders), the denser side of the wood is used. This is the northern side with narrow growth rings.
Sequencing:
- From the center of the part, measure 2 cm in both directions. The stock will be installed in this place, so it has maximum thickness. Project for bow shoulders.
- Excess wood is gradually removed from the center to the edges. Both sides of the part must be processed in this way.
- During processing, it is necessary to check the uniformity of the bending of the arches. This is done using a strong looped string - a bow test string. By pulling the string, you can find out which parts of the part require further processing. The arches should fold evenly on both sides.
- The shoulders can be reinforced with metal pads, which are fixed from the inside at the points of greatest stress.
How to handle knots
Knots weaken the structure, so when harvesting it is better to select branches with a minimum number of them. It is necessary to remove the knots already in the process of creating the shoulders with a sharp knife. When cutting, leave an overhang of about 1mm, and then sand with sandpaper. Do not remove knots from raw materials. This will cause cracks to appear.
Making a stock
Sequencing:
- The shape of the future bow has been chosen. If size allows, you can design a stand or a slot for the hand. The product is cut out according to the sketch.
- The rough workpiece is placed in a vice and processed with a file and sandpaper.
- A slide about 30 cm long cuts into the part, which should not have the slightest unevenness.
- Using fine-grain paper, the grooves are smoothed out to achieve a perfect smoothness.
- There is a seat embedded into which the trigger will be fixed.
- Grooves are cut on the front of the workpiece for installing shoulders.
Before you start making a bow, you need to familiarize yourself with several drawings, choose the appropriate option, and then independently prepare a diagram that you will need to rely on during assembly. Factory models are not recommended to be reproduced at home, as they have a complex design. In addition, for work you will need many tools that are not always available on the farm.
All designs are very different from each other, so it is necessary to study the most popular designs. It is important to understand that you should not completely copy the presented options. You can make changes to create a custom design for a specific person.
Classic weapons
To make a real classic bow model, you need a minimum set of components. Before starting assembly, it is advisable to familiarize yourself with the existing database. The main components are the stock, the trigger module and the guides on which the arrow is mounted. Additionally, you will need to create a high quality bowstring retainer that functions as a trigger. In the image you can see a simple drawing of a bow with your own hands.
Assembling a classic version of the bow with your own hands is not difficult. To do this, you can use the following scheme:
- First of all, you need to make a high-quality and durable bed. The structure must be as durable as possible. For an amateur model, it is enough to make a simple rectangular base from any piece of thick wood. For more professional models, it is advisable to pay more attention to detail and create a comfortable seat. The wood must be free of chips and defects so that it does not break during the shot.
- The next step is to select the material for making the shoulder block. It is recommended to use spring steel or any other similar metal. It is important to ensure that the shoulder does not deform under tension. Its length should be about 50 cm or less. It is not recommended to increase the size as the power will increase significantly. To be able to adjust the degree of tension, experts recommend using it with blocks, but this will require additional components. Making a compound bow with your own hands is extremely difficult.
- Release mechanism. This is the most problematic module of the manufactured design. To make a mechanism, it is necessary to carefully study and recreate the drawing, and after installation, test it to secure the bowstring.
For a homemade bow, the manual drawing method is used. If the option is more complex in design, you can use the mechanical method. Suitable for hunting. Beginners are not recommended to assemble weapons using complex structures. Having made the first sample, you can already think about complicating the design.
Spring sample
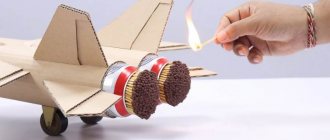
If you plan to hunt in water, it is advisable to use a spring bow design. But it should be borne in mind that hunting on the territory of the Russian Federation using this model of hunting weapon is prohibited. The picture shows how you can make a bow according to the drawing.
The pattern looks very much like a pistol rather than a homemade bow. Instead of a shoulder lock, it is necessary to use powerful springs. They are located at the edges of the bed to reduce the size of the entire structure. This type of small arms has a number of advantages:
- ease of assembly;
- compactness;
- high reliability;
- voltage regulation.
But not without a drawback. The bow assembled according to the plans will have a short charge range, so the weapon can only be used at close ranges. Installation features:
- The springs are inserted into steel tubes to reduce the risk of clogging the mechanism. In addition, a person will not be injured when using a weapon. The springs have a high degree of tension. If you are not wearing protection, you may pinch the skin of your hand too much.
- When a bow is used for spearfishing, the number of wooden parts must be minimized. It is recommended to use metal, hard plastic or plexiglass.
- A lever block must be used to assemble the link. If the spring is very tight, assembly with the pin will be problematic.
The main advantage of the model is the ability to independently assemble a bow from scrap parts. There is no detailed description of the assembly of such weapons, since in most cases the drawing has to be adapted to your needs and capabilities.
Installation of the trigger mechanism
The last part remains: the trigger mechanism (Figure 8).
There are three variations in total on how to make a crossbow trigger at home:
- Old-fashioned, wooden:
a certain number of centimeters are measured from the end of the stock (depending on the capabilities of the bowstring) and, having placed a notch, they make a rectangular depression of half a millimeter. It is recommended to take a distance of 15-20 cm from the tension arms. Next, drill a hole in the center of the recess. After this, at the base of the bed from the side of the arc, you should fasten a flat board, exactly adjacent to the previously drilled hole, but from below. A cylinder with a diameter similar to the hole is fixed in the board. Then it’s a matter of technique: the bowstring is lowered into the groove, it is pushed by the rod from below, after which it sends the bolt flying. This crossbow cocking mechanism is well suited for home making during your free time on the weekend. - Sophisticated, aluminum:
sold only if you have metal working tools at hand: grinder, cutters, lathe, files. Requires the creation of a special part. The crossbow trigger mechanism looks like this: a small aluminum disk with a hole in the center and two recesses. Its shape is modified; a sawtooth with a smooth groove in the middle is made on the upper part at an angle of 90 degrees. Parallel to it, in the lower part there is a cutout for a similar tooth, but without a groove. The mechanism takes the load, preventing the bowstring from spilling, resting against the trigger. One press is enough to fire, after which the lever of the locking part will jump out of the groove, the blocker will rotate along its axis and release the bowstring. - Skillful, mechanical:
more than one part at a time. Complex structures with force transmission. In a simplified version, they represent the following trick: an intermediary part rests against the crossbow’s trigger, which in turn blocks the advances of the part holding the bowstring. We advise you to think through the drawing in advance before implementing this option.
Figure 8. The trigger mechanism is the basis for the successful use of a weapon
If you have taken a swing at power, then you have probably thought about springs. A spring crossbow requires a well-functioning cocking mechanism that can withstand greater loads than a wooden one. It will require assembling a starting block made of metal with a lever transmission of force.
Safety precautions
Making a crossbow involves the use of various tools, when handling which you must follow safety rules:
- Power tools must be in good working order and connected to the proper outlet.
- Wood processing waste must be removed from the workplace.
- It is mandatory to use protective glasses and gloves, and have fire extinguishing equipment.
After the crossbow is ready to work, it must be tested, and during subsequent operation, the following rules must be adhered to:
- Check for compliance with the regulatory framework: the tension force of the bowstring should not exceed 43 kgf.
DIY trigger mechanism. - Shooting should be carried out at targets that prevent the occurrence of a ricochet.
- During any actions, do not point the crossbow towards people or animals.
- Control the situation around and behind the target.
- Use eye and hand protection.
- The holding hand should not cross the path of the bowstring.
What kind of arrows should there be?
There are no universal arrows. Their choice depends on the purpose of shooting, the type of crossbow, the shooter’s preferences and economic feasibility.
What you need to pay attention to when choosing (making) arrows:
- strength and reliability;
- convenience and comfort;
- length and weight appropriate for the crossbow design (the most common length is 16 inches or 40.64 cm);
- correct geometry (must be level, equally centered);
- possibility of replacing components;
- reasonable cost;
- suitability for shooting purposes (arrows for hunting will be different from arrows for target shooting);
- material.
Materials for arrows (bolts):
- Tree. Hard wood species are used: oak, beech, pine. Wooden bolts are the most advantageous in terms of aesthetics and environmental friendliness. This is the most popular and affordable material if you make arrows with your own hands. Disadvantages: require special storage conditions, fragile.
- Carbon . They are used mainly for hunting large game. Disadvantage: they crack when hitting a hard target due to poor flexibility.
- Aluminum. They are inexpensive and have proven themselves well in hunting, but they are more deformed than others due to the softness of the metal.
- Fiberglass. Plastic arrows are the most budget option. Good for recreational shooting and training, sometimes they are also used for hunting game. The disadvantage is that they are short-lived.
Difference in shooting targets when choosing bolts:
- For hunting. Hunting arrows are heavier (up to 50 g), have higher destructive power and longer fletching.
- For sport shooting. Lungs, usually have hollow tubes. The main characteristics when choosing are accuracy and flight range. The plumage is shorter than on hunting ones, and the length of the shaft is usually 10-15 cm longer.
Metal bolt.
Wooden arrows.
Hunting arrows for crossbow.
Tips
When selecting material for making tips, it is recommended to give preference to sheet metal with a thickness of about 0.7 mm.
This base is easily divided into the required sections using ordinary scissors. When finalizing the material, you can use a grinding stone or file. If you have access to a lathe, when making crossbow arrow tips it is much more convenient to resort to its use than to process metal manually. As a result, you can get heavier and sharper products that have increased penetration ability.
As soon as the tips are ready, you should begin installing them on the shaft. To do this, it is enough to cut grooves of the appropriate thickness at the end of the rods. The prepared openings must be generously coated with glue, the tips must be inserted, and then the connection must be secured with a tight winding of thread.
Plumage
The fletching stabilizes the flight of the arrow.
For plumage use:
- Bird flight feathers. You can use feathers from geese, turkeys, black grouse, wood grouse, etc.
Crossbow bolt fletching.
Crows are not suitable due to their fragility. The feathers are cut into two halves along the shaft. The cut is processed with a file or on a grinding machine. Use scissors to give the feather the desired length and width. Grooves are cut into the shaft and the plumage is glued on. - Plastic. You can buy a sheet of plastic or use what you have on hand: unnecessary plastic packaging, pallets, etc. The main condition is a flat surface.
- Paper. You must first glue the paper with aluminum foil for strength.
Plastic and paper blanks are cut out according to the pattern and glued in the same way as feather ones.
A long and wide fletch stabilizes the arrow well, but reduces speed. Therefore, hunting crossbow bolts will not have such a wide and long fletch as arrows for sporting crossbows.