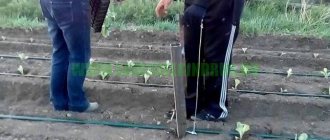
The straight lines of potato bushes look very beautiful, showing order and creating comfort for self-hilling or using a cultivator. An unpleasant routine activity with the help of certain devices for self-planting can become a fun, unpretentious and enjoyable activity, and designing your own necessary manual equipment is a process of technical creativity.
Today there are special devices - marker, scriber, hedgehogs, plow for planting and weeding potatoes. They will greatly facilitate the work of the gardener. The work, when using these simple devices, happens much faster, and the result is the same effective and high-quality if it was done by hand.
Marker for planting potatoes
A marker is a device that is necessary to facilitate manual activities when planting, as well as to ensure that the beds are level, with evenly distributed holes for potatoes. Subsequently, such beds are not difficult to process using mechanized or manual devices.
Marker for planting potatoes
Today you can buy ready-made markers, but it is better to make a homemade device, then the distance between adjacent plows, for organizing holes for planting, will fully correspond to the distance between the wheels of a motor cultivator or tractor.
Markers can be basic or very complex. You can make them from any material you have at hand:
- Wooden stakes;
- Durable board;
- Special or round metal pipes.
It doesn’t matter what the device’s handle or frame is made of, the main thing is the distance between the components that make the holes.
Elementary marker
This is a wooden stake approximately 90 centimeters high and about 60-70 millimeters in diameter . A horizontal rod, which is fixed at a height of about 150 millimeters from the base, will serve as a support that limits the depth of the hole. Before you start working with this device, you need to mark out future holes using twine. It is stretched along the length of the rows at a distance of approximately 40, 50, 60, 70 or 80 centimeters between the beds.
The distance between the beds depends on the subsequent method of tillage, manual or mechanized. The gap between the holes in the row is about 30 centimeters , depending on the size and variety of potatoes that will be planted.
Mittlider Marker
This is a more complex version of the marker, which is made from a pipe with an external diameter of 21 millimeters. The distance between the holes will be 29 centimeters. The cone with which the holes are made is made from a pipe Ø 55-65 millimeters. It must be welded to the frame.
Mittlider marker blueprint
On the initial row, the frame is placed parallel to the twine and, applying the necessary force, is immersed in the soil. Then we place a cone in the hole that we have marked, and continue like this. In another row, holes are made like on a chessboard. A marker made using this method allows you to plant potatoes in small areas while obtaining a high yield.
Three holes at once
This model consists of metal pipes and 3 cones.
Marker drawing for planting potatoes in 3 holes
The welded frame of the marker is made from a special light and strong pipe measuring 25x25x2 millimeters. To do this, you can take an ordinary steel pipe Ø 32 millimeters, which is used for water supply or gas pipelines. Cones are made of aluminum or acacia wood, oak .
A hole is made in the cylindrical part and an M8 thread is cut. Three such through holes Ø 9 millimeters are made in the pipe. Through these holes the cones are attached to the frame with M8 bolts. Using bolts measuring 40-80 millimeters, you can adjust the depth of the hole. The distance between the cones is 45 centimeters . To avoid injury, plugs must be placed on the open ends of the supporting pipe. The height of the bolts may vary. This will depend on the depth of the hole required. The larger the bolt, the wider the possibilities.
Marker for planting potatoes in 3 holes
Wooden cones must be sanded, varnished or drying oil applied so that soil does not stick to them when working. All metal components must be treated against corrosion. The height of the frame must be adjusted to your height. The values indicated in the drawing are suitable for a summer resident with a height of 175 centimeters.
Tips and warnings
Fastening the footrest, handles and valve is best done by welding. Fastening structural elements with bolts or self-tapping screws may be no less strong, but in those places where their ends stick out inside the body, obstacles will form for the passage of potato tubers.
Assembly of the structure
Before assembling the entire structure, make sure that the total weight of all elements will not pose a problem for you during operation.
The device should not be too heavy, otherwise you risk not making your work easier by slightly mechanizing and speeding up the process of planting potatoes, but on the contrary, complicating your life by moving a non-lifting device.
At the same time, the pipe body must be strong enough to withstand many cycles of inserting and removing the device from the ground. Depending on the preferences of a particular designer, individual design elements of a manual potato planter can be made in different ways.
Some equip the valve mechanism with an additional hook so that you can reliably control the process of opening and closing with your foot. This is, of course, the simplest and most primitive agricultural tool. However, this is where its beauty lies.
Anyone can make a potato planter; the material for this will probably be found in any household, and the efficiency of the device is very impressive.
Potato planter made from two-wheeled trolley
Separately, I would like to talk about another design of a homemade apparatus for planting potatoes. This is a two-wheeled cart, on top of which there is a box for tubers prepared for planting.
In the lower part, between two running wheels, there is a device for uniform feeding of potatoes into a pre-prepared furrow. Such a cart rides over the furrow and, while moving, lays out potato tubers at regular intervals.
A shield covering the furrow can be located behind such a device, but in this case, moving the cart will require more effort, or the help of a second person.
Such a device can hardly be called a manual potato planter, but it is also a simple home-made unit that can collect any old and unnecessary items.
When moving the wheelbarrow, potato tubers fall into the recesses on the wheel and with the movement of the wheel they move down into the prepared furrow. To prevent the tubers from falling out along the way, there is a protective wing in front of the wheel.
Shovel-harvester
Another design used for planting potatoes is called a harvester shovel. These are two handles that can move closer and further away from each other, opening and closing a cone-shaped container into which potatoes are placed for planting.
When closed, the container is stuck into the ground, after which the handles are brought together, the container opens and the potato tuber ends up in the ground. It’s convenient, but you have to bend down and put one potato into the cone each time.
As you can see, people have come up with many convenient and practical devices that make life easier for gardeners. Some of them can be called successful, some not so much, but they all help and, with varying degrees of success, replace the classic shovel.
It’s almost as easy to construct a feed cutter with your own hands.
Scribbler for planting potatoes
Planting potatoes using a scriber will shorten this process several times. Everything is done easily and without straining. It is not difficult to make; any man can do it and it will take no more than 2 hours.
Drawing of a scriber for planting potatoes
To make it you will need two stakes Ø 10 centimeters and two boards one and a half meters long . The stakes are made from dried bars or thin spruce trunks. They need to be processed, edges sharpened and handles made. Then nail wooden crossbars to them.
It is necessary to make the required distance between the stakes. If subsequently the potatoes are processed with a mini-tractor, then the distance should be approximately 65-70 centimeters; if with a cultivator, then a distance of 60 centimeters would be rational. When processing manually, the stakes must be placed at intervals of 45-55 centimeters.
The board from below must be nailed with a margin on which you need to install a note from a narrow strip. It is done at the same distance as the stakes. With its help, the beginning of the pits is determined.
You need to make handles for yourself so that there are no problems when working later. The board from below must be installed so that, when pressing on it, a hole is formed, approximately 10-15 centimeters deep .
Scribbler for planting potatoes
The idea of working with a scriber is the following: when placing it on the edge of the area, you need to hold it with your hands by the handles in front of you. Then press on the board from below, while the stakes sink into the soil, and the mark leaves a mark. Then they move it with their hands, making movements back and forth, in order to enlarge the pits. There should be two ridges of holes, and the third ridge will be a mark from which you need to follow, but in the other direction, placing a stake on the mark.
At the same time, a person follows the marker and plants the potatoes. The whole process is quick and easy. Use this technique and make your work on the site easier.
DIY device for planting potatoes. Homemade potato planter: drawings
Planting potatoes is a labor-intensive task. To make work easier, craftsmen are constantly coming up with new devices that can be used to cope with sowing in a short time and without extra effort.
A marker for planting potatoes is a device designed to facilitate manual labor and make the beds straight, with evenly distributed holes for tubers.
Potatoes planted under the marker can subsequently be easily processed using attachments for mini tractors, walk-behind tractors, hand and mechanized cultivators.
There are ready-made products on sale, but the advantage of a homemade marker is that the distance between the nearest stakes (cones or plows) to form holes or grooves for planting material will exactly coincide with the distance between the wheels of your walk-behind tractor or mini tractor.
Preparing for work
Before you start making devices for planting potatoes with your own hands, you need to familiarize yourself with the theory. There are two main tasks that are set for the unit:
- Plant potato tubers at the same distance from each other. It is convenient if this interval can be adjusted, as in most factory planters.
- The depth of the holes in which the tubers are placed should also be the same. This will allow you to expect the same period of plant germination.
All designs are created taking these requirements into account. It is worth understanding that devices for planting potatoes (manually or using machinery) only facilitate the planting process. But they still require human participation.
There are several design options. A homemade potato planter can be single-row, double-row or three-row. This will depend on the type of frame used to make the frame. A container is attached to the frame into which root vegetables are poured. It can hold up to 20-30 kg. An elevator with bowls is installed in this bunker, which lower the tubers into the prepared holes.
Choosing containers for root vegetables
The key to the safety of the harvest is a properly selected box for storing potatoes. Fortunately, today there are no problems with choice. Because in almost every specialized store you can purchase containers made from different materials.
However, if until recently plastic containers were practically not used by gardeners for safety reasons, today they are being used more and more often. And the whole point is that with the help of modern materials, durable, reliable and safe containers are created from polymers.
When planning to purchase containers, you need to pay attention to the following points:
- check how durable the structure is;
- pay attention to the specification of the polymer used for the production of containers;
- choose containers weighing 30 kg;
- The bottom of such containers must be perforated for air circulation. This will prevent the development of putrefactive processes in vegetables.
Important! Experienced summer residents recommend purchasing wooden boxes. Moreover, it is desirable that they be made of coniferous wood. This material protects the crop well from rotting.
The only drawback of polymer packaging is its high price. For this reason, most summer residents have adapted to making containers from scrap materials. At the same time, wooden portable storage facilities, characterized by durability and environmental friendliness, remain very popular today.
Bookmarking in urban conditions
Summer residents who permanently live in urban areas are forced to store the harvested crops in apartment conditions. As a rule, glazed apartment extensions are suitable for these purposes. Moreover, in some cases it is possible to adapt even a porch for storing vegetables. True, in this case you need to take care of additional protection, such as good insulation.
If you plan to make a bookmark on the balcony, you will need to purchase a heat-insulated container in advance or make it yourself. Such containers will protect the crop from cold weather and excessive destructive heat.
It is advisable to purchase a box for storing potatoes on the balcony in winter with dimensions of 1 m3. On average, about 300 kg of culture will fit in such a container. It can be installed both horizontally and vertically.
Containers for root vegetables without heating
If your loggia is glazed, you can install a vegetable storage unit without heating. To do this, you will need to purchase 2 containers to install them side by side. At the same time, make sure that the gap between the walls of the containers is 8 cm. The resulting hole must then be insulated with any heat-insulating material available, for example, the following will do:
- wood sawdust;
- folgoizol;
- Styrofoam;
- old blankets and any warm clothes.
Before installing the second smaller container, a special wooden grid is placed on the bottom of the larger one. With its help, the air will circulate fully, which will prevent the development of rot.
Another important point is that it is desirable that the outer part of the future thermos for vegetables be made like a frame structure made of wood. But it is better to choose walls and bottom made of plywood. And also, it is important to take into account that if the storage will be installed in non-glazed apartment conditions, you should take care of moisture-resistant protection in advance.
For these purposes, galvanized sheet metal is used, which is mounted on top of the chest. Or, you can use any non-toxic paint that carefully paints the surface.
Important: If the structure is covered with clapboard, it will turn into furniture. A similar result can be achieved by installing soft upholstery on the lid.
It is advisable to purchase the interior from pure wood. This is very important, since the use of non-target materials can cause the release of hazardous substances. In turn, this will lead to spoilage of the collected vegetables.
Designs with built-in heating
If you plan to store potatoes outdoors in winter, it is important to consider that the temperature can drop below 10C. Accordingly, for a container for vegetables, you need to think about heating. Otherwise, the potato crop may freeze.
Experienced summer residents have come up with three options for dealing with frost, namely:
- in the first case, a 15-watt lamp is mounted in the center of the installed storage, which is covered with a tin container so that the light does not damage the crop;
- in the second case, the harvested crop is heated with a hairdryer through a plastic tube specially mounted in the bottom, on top of which a grate is installed. Such heating is resorted to based on temperature indicators;
- and the third method when installing the container, it is advisable to insulate it in advance with a thick layer of polystyrene foam. This design will serve as a thermos where you can store root vegetables at any temperature. It is important to note that foam insulation must be thorough.
It is worth noting that the methods described above allow you to easily regulate the temperature when the crop is stored in an apartment or even if it is a cellar.
Preparation of drawings
A self-made potato planter is assembled on the basis of pre-prepared drawings and diagrams. You can develop them yourself if you have certain skills.
You can find a large number of drawings of potato planters of various designs and designs. You can choose a ready-made option. Or you can take the diagram and modify it according to your own discretion and understanding. In any case, before starting work, you must check all specified dimensions and data. Only after this can you start working.
Manual hiller for potatoes: purpose
A potato hiller is an indispensable household assistant for anyone who has a vegetable garden. With its help, you can hill up a large plot of several hundred square meters in a short time. Its main advantage is that you can do it yourself.
Important! In regions with low temperatures and high humidity, frequent hilling of potatoes is required. This is necessary so that excess water is removed, the soil is heated and the vegetables are saturated with air.
In regions with high temperatures and low humidity, this procedure, on the contrary, is carried out much less frequently. After all, this removes all the moisture from the soil, which may already be insufficient.
Handheld devices
First, let's look at several design options that make planting potatoes easier, but at the same time require physical effort. They are not connected to equipment, but allow you to do the work manually. Devices for planting potatoes in this way are easy to implement. But they can also be made in different variations.
The simplest option is a cone-shaped punch. It is driven into the soil to the required depth. True, this requires some physical effort. This creates a hole in the soil where the potatoes fall. After removing the punch, the hole is filled up.
Homemade hand plow
When the time comes to plant potatoes, summer residents act according to the following scheme: they make markings for planting, dig holes with a shovel, put potatoes in them and then fill them with their hands. While the potatoes are growing, they need to be hilled, most often this is done with a hoe. This takes a lot of time and effort. Today this process can be simplified as much as possible.
A hand plow is a very simple device that can be operated by 2 people at the same time. It consists of:
- 2 dump bodies for work , with a knife for trimming;
- Front pull , for one person to pull it forward;
- Handles at the back for control by a second person.
It also performs work on cutting rows for planting, helps with hilling potatoes, and also loosens the ground.
Manual plow-hiller for planting potatoes
In order to make such a device you will need:
- Hollow pipe for a vertical stand Ø2.5 centimeters, about 1 meter long.
- A piece of hollow pipe Ø3/4 inches for making rods at the front and rear;
- A piece of sheet rod 2 millimeters thick, for making dumps;
- To connect the front rod to the vertical post, you will need a lanyard, which can be replaced with a metal plate with holes to adjust the angle of attack;
- Blowtorch or gas torch for heating metal on bends;
- Welding equipment;
- To process the joints you will need a grinder .
The long pipe must be bent at a distance of about 30 centimeters from the beginning, the angle should be 10-15°. A pipe bender will help to make bends. If it is missing, you can make a bend using the following technique:
- Fill the pipe with sand ;
- plugs on the edges of the pipe ;
We heat the intended bending area with a blowtorch and begin bending.
The smaller pipe, like the perpendicular stand, must be bent. To adjust the height, we make holes on the top edge and the same holes on the vertical section of the proposed fork.
By changing the location of the bolt in the holes, you can change the height of the stand for the comfort of the summer resident.
Manual plow with traction and handles
The pull rod at the front looks the same as the one at the back, but is different in size. The height of the handle should be such that the person walking in front can easily stand between the handles, grasping them.
The height of the vertical part should be 60 centimeters, it must be made flat at the ends and holes must be drilled to connect to the vertical section.
To adjust the angle of attack, a lanyard is used, which should be located between the rod and the stand.
At a distance of 30 centimeters from below, a front traction angle is attached to the vertical post . Then, at a distance of 25 centimeters from this hole, the same corner measuring 25x25 is welded to the fork. A hole is also made in it, and it is welded to the stand above the first corner.
2 moldboard plow
You will need 2 identical plates 2 millimeters thick. We round the bends on them. Using welding, with even seams, we attach the 2 halves of the plow to the perpendicular stand. We sand them with a grinder so that they are sharp.
Pruning knife
Knife for hilling potatoes
We take the strongest carbon steel. We cut the knife in the shape of an arrowhead and sharpen it at an angle of 45°. This angle will keep the knife sharp for a long time. Using welding, we attach it to the vertical post from below and sand it.
The manual plow is ready for work on the site!
How to use the devices
The devices described above make the planting process easier and faster, but you need to get the hang of using the tools. To keep things moving, it is recommended to do the work with a partner.
How to manage markers
It doesn’t matter what type of device will be used, the principle of operation is the same. To begin with, mark the first row with twine and make indentations in the ground parallel to it with a marker, applying some force to this. Moving along the twine, one worker forms holes, followed by placing sprouted tubers in them.
Using a 3-cone marker, planting can be completed in a short time. The next rows are designed based on the nearest planted one. If the area is small, then the holes are marked in a checkerboard pattern for ease of subsequent processing.
Planting with a scriber
How simple the design of this device is, so simple are the actions of the farmer when using it. Even a large potato plot can be easily planted within a couple of hours, following these instructions:
- holding the tool with both hands, set a reference point (side rail) at the beginning of the section;
- press with your foot on the lower crossbar so that the stakes penetrate the soil to the required depth;
- After moving the instrument back and forth for a few seconds, expand the hole to the required size.
Having passed through the site in one direction in this way, you get 3 ridges of holes: 2 from stakes and another from a vertical rail. Turning in the opposite direction, the scriber is placed as a guide in the hole of the last ridge. While the sower fills the first 2 rows with potatoes, his partner continues marking the rows with a scriber, walking towards him.
Planting under the plow
Despite the fact that the manufacture of this structure will take some time, the planting of tuber crops itself will be easier compared to a situation where you would have to work with a shovel. True, in this embodiment, a trench is formed into which the potatoes are placed by a third person (two people operate the plow).
It will be difficult to maintain an even distance, but the row will turn out even if you focus on the stretched twine. Before you start plowing, the tool must be configured:
- by rotating the lanyard nut in one direction or the other, set the desired angle of attack of the knife;
- use a bolt to adjust the height of the control column handle to suit your height;
- The neck-axillary belt is adjusted to the figure of the partner walking in front.
The traction force in the process is provided by the actions of the person pulling the plow. It is on him that the belt is worn. Its main task is to maintain a constant angle of attack. The person walking behind, controlling the stand, pushes the device forward.
As a result, the knife easily cuts into the ground, the dumps throw the soil to the sides, creating a neat trench for planting. If the wings are adjusted correctly, the shifted soil will partially fill the previous groove in which the tubers are already laid.
Preparing the site for planting
The design of this device is so convenient to use that it can be operated by 2 people with different builds and different heights. Using a plow throughout the season will ensure convenient cultivation of potatoes on a large plantation.
But even the simpler devices described above significantly increase the productivity of planting potato tubers, allowing seeders to work harmoniously.
Hedgehog cultivator for weeding
They remove grass with roots, unlike flat cutters, which only cut the stems. Hedgehogs rake the soil between the rows, which creates distinct rows and beautiful beds. Loose soil allows oxygen and liquid to pass through well, which increases the growth of potato roots, and this is a guarantee of an excellent harvest.
Hedgehogs for weeding potatoes
Weeding with a walk-behind tractor is done using certain paws or a rotating cutter . The cutter is rotated by the power take-off shaft. The advantage of the paws is ease of installation and thoroughness in loosening the soil. They loosen the soil at a depth of 4-7 centimeters, depending on its condition.
To operate, the presser feet need to be secured in certain fasteners at a distance equal to the width of the row. The fastener should have a slight overlap that will cover both legs. Devices can be either single-sided or double-sided. If the device is one-sided, then the legs must be attached so that the blades are located towards the row spacing.
The paws, which have one-sided blades, can be installed in another way, which makes it possible to process the bed on both sides simultaneously.
There is another device for manual weeding called a weeder. This is a frame, with a knife and a drum. Its wheels are placed between the rows, the knife chops the grass, and the spinning drum catches it and throws it back.
There are manual and electric cultivators with a gasoline engine. For weeding, devices with 2 knives are used, which are attached at an angle of 45°. It is best to carry out weeding with a cultivator, which has three-pronged mini forks installed instead of knives.
For comfort, these devices are installed on wheels: the summer resident pushes it, pressing it as close to the garden bed as possible.
Weeding cultivator on wheels with two blades
Using a device with a hedgehog attachment, they immediately weed and hill up the potatoes. The hedgehog consists of 2 cones mounted on a frame. The cone is made of 3 steel wheels of different diameters. Pointed spikes are welded onto the wheels. 2 hedgehogs are attached to the frame, spinning, they hook the grass in parallel and rake the soil from row to row.
Cultivator with hedgehog attachment
Electric cultivators are more dynamic and are used for small gardens. Their main drawback is the need to pull the cable from the outlet, which is not always comfortable. It is more rational to use cultivators with a gasoline engine. But such cultivators are less dynamic than manual ones, but the most productive. All types of cultivators are equipped with hedgehog attachments. The strength of the engine is selected depending on the condition of the earth; the heavier it is, the stronger the device.
Preparing tubers for planting
It is impossible to correctly explain how to preserve potatoes in the cellar without explaining the specifics of preparing root vegetables:
- First, you need to thoroughly dry the crop - solar ultraviolet radiation kills most pathogens in tubers, and they are stored much better.
- After drying, a bulkhead is required; all damaged root crops are removed. It is also necessary to sort the potatoes by size; the middle fraction is best stored, and this is what should be stored until spring.
- You can put beets, bags of sawdust, or rowan leaves on top to draw out moisture.
We hope this article helped you figure out how to store potatoes in the cellar correctly. Many people are interested in how to store potatoes without a cellar; this is more difficult to do, but it can also be done; this will require two boxes - a smaller one and a larger one; a heat insulator is placed between the walls and the structure is placed, if possible, in a dark, cool place.
Weeding attachments using a trimmer
For weeding, use a trimmer with an electric motor located on top. Between the rows they are often weeded with a trimmer head and fishing line.
It happens that a knife with 3 blades is used to remove grass. Steel knives are mounted on a trimmer with a level stand. If the stand is crooked, then plastic attachments are attached. If the knife hits any obstacle, the device will be thrown back or broken.
3 blade blade for electric trimmer
On the market or in a store you can buy trimmer attachments with earth cutters, which are shaped like disks with curved blades and are attached to a single axis. More often there are 4 cutters in one attachment.
Earth cutters for trimmer
The size, diameter and number of cutters depend on the power of the brush cutter engine. The instructions for use for the attachment indicate which lawn mowers it is suitable for.
You cannot make the attachment yourself, because... it is difficult to choose the width and diameter so that it does not break the device. You cannot weed with a trimmer on difficult, clayey soils.
Before using the trimmer, professional summer residents treat all rubbing elements with silicone lubricant.
Rules for processing potatoes using a trimmer:
- Before processing, you need to protect your eyes and ears , since during weeding the cutters rotate at high speed, raising dust and dirt into the air.
- You need to treat the area for weeds when the grass is still small. Treatment should be done once every two weeks .
- It is better to weed in the morning , then during the day the grass will dry out and turn into straw.
- There is no need to immerse the cutters to a depth of more than one and a half centimeters . With this technique, the land is cultivated, and the soil receives oxygen and nitrogen, which has a great effect on potatoes.
- You should also not immerse the cutters because this can lead to damage to the device .
- If the engine on the device is not very powerful, then you need to take a break every quarter of an hour .
- At the end of the summer season, the nozzles must be treated with a disinfectant to remove all germs.
Weeding potatoes with a brush cutter.
A broken cutter can be replaced with a cutter made by yourself. To do this, you need to carve a circle from a steel sheet and bend the cavities. The diameter cannot be larger than that of the cutters used. It is prohibited to put additional cutters on the trimmer axis.
Conditions for successful winter storage of vegetables
On glazed balconies it is easy to create almost ideal conditions for storing bags of potatoes. Although you should always remember the important rules for “wintering” a starchy vegetable.
- Potatoes should be stored at a temperature of 2-6 degrees above zero. If the vegetable freezes, the process of rotting will quickly begin. If the room is too warm, the tubers will begin to dry out, lose their beautiful appearance, and the taste will deteriorate.
- Vegetables should be protected from direct sunlight or electric light. Often, to maintain the optimal temperature, containers with potatoes are heated using electric light bulbs. In such cases, the lamps should be covered with a metal sheet, a lampshade, or the potatoes should be wrapped in a dark cloth. Otherwise, under the influence of light, the vegetable turns green, produces a harmful substance, and such potatoes are not suitable for food.
- An important part of successful storage is regular ventilation. Lack of proper air circulation will cause vegetable savings to begin to rot very quickly.
- Air humidity is about 40%.

