Making your own bicycle fenders
Although a bicycle is not as complex a form of transport as a car, its design still consists of a number of required elements. Their absence, improper operation or poor condition can cause a number of inconveniences to the user and even cause damage to transport. One of these elements is wings, which you don’t have to buy; you can make them yourself. As a result, you will not only be able to save money, but also make your bike original, with an element of exclusivity.
Homemade fenders make the bike original and exclusive
Options for creating bicycle fenders
You can make bicycle fenders with your own hands in several ways using different materials. Everyone will be able to choose the most acceptable, simple and inexpensive method for themselves.
Made of metal
The most difficult thing is to make fenders for a bicycle with your own hands from metal. Firstly, the difficulty lies in finding a suitable material that is durable, but at the same time easy to process. Secondly, metal is difficult to work with. You need at least minimal skills, patience, and a tool. But such wings will be a source of pride, envy and admiration.
To create such elements, you will need to cut strips of the required size from tin. To give them a rounded shape, you will need special molds and a hammer. The blows should be soft and unhurried, since it is necessary to gradually give the material the required shape.
Homemade bicycle fenders made of metal
From a plastic canister
Finding an empty five-liter canister in which motor oil, antifreeze or other product was stored is not difficult. Using a stationery knife, you need to cut out two blanks. To eliminate mistakes, not spoil the canister and save your time, you can first make a blank on paper.
In the lid of the canister we drill two (for greater reliability, four are possible) holes through which the cable ties will pass. We drill the holes together with the well-screwed wing element. We pass the tie through the holes made and tighten it on the clamp at the place where the wing is attached. To add reliability to our design, it is necessary to secure the cover and clamp. To do this, you can use superglue in the form of a gel or hot glue.
Using the second element from the canister, you need to build up the wing. We make a couple of adjacent holes for rivets or screws with nuts, depending on what fasteners will be used. Installation of such a wing is carried out in the same way as the installation of the original element.
Bicycle fender made from a plastic canister
From wooden profiles
Wooden fenders for a bicycle are a real curiosity that will take the breath away of passers-by, and your fellow commuters will definitely want to make the same ones for themselves. To make such wings, you need to have two wood profiles. For the front wheel, the length of the wing will not exceed one meter, and for the rear wheel a one and a half meter wing is required. A workpiece thickness of 1 cm is ideal. A thicker profile will be inconvenient to work with, and a thin wing will not be reliable enough. Thin fibers located along the length of the workpiece are another mandatory requirement for wood that will be used in further work.
To give the profile the required shape, you will need to have a pulley with a lever and a belt on hand. Wood will not bend so easily; it must first be soaked. The profile can be placed in a bathtub with water, or blanks can be made from plastic pipes. A special plug is installed at one end or the pipe can be carefully sealed, a profile is placed inside and water is poured to the very top. The workpieces should remain in this position for several days.
We take the soaked wood out of the water and attach it to a wheel that has wide disks (approximate diameter is 66 cm). The profile must remain in this position for at least two days, during which time it must dry completely. After this time, the tree can be removed from the wheel. On the resulting workpiece we measure the required dimensions and carefully cut off all excess.
Bicycle fender made of wood
We round and smooth the edges of the wings using a sander or fine-grain sandpaper. Sanded fenders can be painted and mounted on wheels. When working with the front fender, it is necessary to screw it tightly, since the attachment is only to the fork. It's good to have steel fasteners on hand that are left over from old fenders. To install the rear wing, the presence of steel elements is not necessary, since this part is attached to the rack and frame.
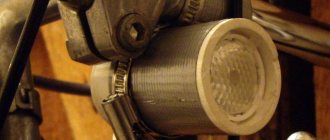
Shortening the mustache
The ideal option for installing the wings is only in the picture in the instructions. Soldering iron with a flat nozzle and a mustache before soldering. Now you need to shorten the mustache attaching the wing to the feathers.
Fortunately, the brackets are already in place, and you can measure how much to shorten them. Soldered mustache, 27 extra millimeters cut out
I screwed the whiskers to the feathers, the wing stood in place. And using a regular ruler, I measured that the shortening should be 27 millimeters. Then the hole for the fastener will be exactly in the middle of the fender slot, and it will be possible to adjust the gap between the fender and the wheel.
Carbon plates
Then I found the most even area on the mustache, without a strong difference in profile. And he barbarously cut this work of art with an ordinary hacksaw.
Ready for gluing
For reverse gluing, I installed a flat tip in the soldering iron. At first I set the temperature to 270 degrees - the plastic didn’t work. I set it to something like 380. The plastic began to give in. I simply pressed two parts of the mustache at once on both sides of the flat tip. And with a slight movement he connected them together.
4 minute epoxy
The first time I brought them together a little crookedly. I tried to unfasten it - and... the glue turned out to be surprisingly strong. I even tried to break the whisker where it was glued. It didn't work out. I also soldered the second mustache crookedly.
The plates are glued and wrapped
I worked on everything with a file to make it more or less even. And I decided to cover the joint with carbon plates 0.5 mm thick.
2nd layer of thread with superglueI cut these plates with scissors to 3 centimeters - six pieces for each mustache. I took hobby epoxy. I thought it was 15 minutes long, but it turned out to be 4 minutes; this turned out, as always, after I diluted the glue and started gluing the plates. Somehow she quickly froze
I wrapped the plates with nylon thread for strength - so that they would not separate (after all, epoxy does not adhere well to plastic). I spread the epoxy again, smeared the bandage around it again and wound the thread.
Painted forewing whiskers
Finally, I sanded the whole thing, wound it with thread and soaked it in cyacrine glue. I wrapped the mustache with masking tape, took matte paint in a can and painted it. If you look closely, you can see the place of winding. If you move about a meter away, then, without knowing, you may simply not notice it.
Top Articles: Titanium Bikes
Option number one - plastic fenders
Quite simple. You will need a bottle of liquid soap, a knife, an M5 bolt and 20 minutes of free time. You need to find a suitable plastic bottle and cut off the side of it with a stationery knife.
Plastic bottle
It will serve as a wing. The bottom of a plastic container is usually made denser than the sides. This is to our advantage; we will attach it to the fork through this part of the bottle. Try the future fender on the bike, mark the place where the mount will be. If you need to trim the shape in the right places, plastic lends itself well to processing.
Almost finished bike fender
After the hole for the mounting bolt is drilled, you can spray paint it in any suitable color. We screw the improvised fender to the bike and go to test the new thing.
The rear fender can be made from a 5 liter can of machine oil. The advantage is that it is already black, no need to paint it.
Oil canister
We cut the desired shape, approximately as shown in the photo. To attach it to the bicycle, we will use the bracket from the rear brake light (beacon). You need to drill or melt two holes in the lid of the canister. We thread a cable tie through them, which we use to tighten the cover and bracket.
Clamp connection
Now we fix the bracket on the seat post, and screw the cut out piece of the canister into the lid. For a more reliable connection, you can melt the junction of the screed and the wing with hot glue. Or melted plastic.
To increase the length if necessary, you can simply add a piece from the same canister. Place on rivets or bolted connections. Simple fenders for a bicycle are ready.
Bicycle rear fender
Where to begin?
First of all, if there are old mudguards, they need to be removed. The wheel rotates to the maximum angle, this is necessary for normal access to the mudguard. It happens that you need to remove a wheel, for this you will need a jack. Then unscrew the plastic screw and 2 self-tapping screws located in the wheel arch. When unscrewing the last screw, you need to gently press the mudguard so that the screw does not turn in the plastic sleeve. Before screwing on the mudguard, it is necessary to clean the area of future attachment to the car. It is better to purchase Toyota mud flaps from official dealers.
On the new mudguard you need to make a mark for the future hole. To do this, you need to attach the splash guard to the future installation location, and apply light pressure where the screw was. In the place where the print remains, drill a hole and screw a self-tapping screw into it. To prevent the rubber from tearing, you need to place a washer under the screw head.
Now you need to make a mark on the car, on the wheel arch and secure the mudguard in the last two places. A washer is placed under each screw. To secure the top edge well, you need to press the mudguard against the arch, and then make a through hole through the end of the wing and screw in a small self-tapping screw, but with a wide head.
Top articles: What to drink when cycling
The second option is aluminum wings
This option is more complicated, but they turn out to be noble, quite high quality and attractive in appearance.
Making aluminum fenders for a bicycle
Materials used in homemade wings: aluminum strip approximately seven centimeters wide. Choose an arbitrary length, depending on the diameter of the wheel and your preferences. The thickness should not be less than 3 mm, otherwise the wing will be too soft. Steel wire with a diameter of 3 mm and M5 bolts for mounting on a bicycle.
View from above
First you need to make a template from cardboard, so as not to redo finished aluminum parts later. I made a regular arched shape, but you can make it as you wish, depending on your imagination. It is advisable to immediately mark the holes for future mounting. One hole should be made where the wing will be attached near the carriage and near the seatpost. For additional fastening with wire, you need to drill four more holes. Two ten centimeters away from the edge, and two in the middle between the edge and the hole near the seat post.
How to choose fenders for a bicycle
It is easy to guess that “standard” and “ordinary” wings do not exist in nature. They all differ in several ways.
Selection of fenders according to tire diameter and width
First of all, fenders are selected according to the diameter of the wheel, which you can find out by looking at the side of the tire. After all, they are all so different - from 12 to 29 inches. Once you know it, you can safely go to the store and ask to see all the possible options for your wheel size.
However, the wings do not differ in diameter by the same diameter. Look at the width of the fender so that it can completely cover your tire. This is especially true for mountain bikes, where tires can be quite wide, and even more so for fat bikes.
Selection of fenders according to places for mounting on a bicycle
Once you've decided on the diameter and width, look at your frame and fork. Are there holes for attaching the wing? On the fork they should be on the gorilla (the bridge connecting the 2 parts of the fork) and at the bottom where the wheel is attached. There should also be holes on the frame (or “ears”) near the place where the wheel is attached to the frame, in the jumper connecting the upper frame stays, and also at the bottom on the jumper connecting the lower stays of the frame.
If there are holes, then feel free to take a set of full wings - this will be the most practical option. The most that can get dirty is your shoes. Although this can be prevented by installing a mudguard (it can be included in the kit). There is no need to worry about the appearance of your bike, even if you have a mountain bike. The not-so-cool appearance of a bike with fenders is easily compensated by your neat appearance, regardless of the amount of water and dirt on your way.
Fenders for bicycles without fasteners on the frame
If you have a full-suspension mountain bike or a hardtail without frame mounts, then we have bad news for you. It will not be possible to completely protect against dirt and water due to the lack of necessary fasteners for installing full wings. But quick-detachable wings can protect you from total washing.
With such wings, clothes below the waist will still be dirty, but if you were going to meet a girl, you can hide behind a bush and give her flowers from there. After all, you will look impressively good from the waist up.
In general, of course, on mountain bikes, fenders are not the most practical accessory and rarely provide complete protection. This does not apply to city bikes, folding bikes, or cruisers. There, fenders are a necessary element, without which it is impossible to imagine such bicycles, because they are equipped with fenders as standard from the factory. True, you may not always be satisfied with the wings offered by the manufacturer. After all, even full-size wings have significant differences, primarily in material.
Differences between full-size wings by material of manufacture
Perhaps the most impractical option. Their only advantage is that they are cheap. Everything else is a minus. They have a lot of weight, significantly making the bike heavier. They are very unreliable when shaking - the corner mount tends to fall off the wing and often does this successfully. When driving, they create annoying noise, constantly rattle, and require frequent tightening of connections.
Aluminum. Lighter than metal ones, but they are very rare for the above reasons, and are much more expensive.
Plastic. Also quite a rare option. They are much lighter than metal ones, inexpensive, but also not very reliable.
The most popular, reliable and lightweight. Thanks to the thin metal base and plastic surfaces, they have high strength, crack much less from many irregularities, and are quite elastic.
Choosing a size
Size, when choosing wings, plays a huge role: will the mudguard perform its function in full, or will it become just an unnecessary accessory?
Therefore, it is important to know that wings are chosen by size:
- Wheel diameter;
- Tire width;
- Type of frame.
Thus, most of the manufactured fenders are standard in size and can be installed on bicycles with wheel diameters in the range of 24-29 inches. But there is also such a class as retractable mudguards. Initially, it was intended that such protective elements would gain popularity due to their versatility. But in practice, the products have not proven themselves to be the best, causing inconvenience to owners. According to the standard, the width of the swamp is 6 cm, but they can be produced both larger and smaller in this indicator. One thing can be said with confidence - the wider the swamp, the better the protection.
There are also differences in the type of fastening, namely:
- Fixation on seatpost or tube;
- On a dedicated jumper (located on the frame and arch);
- Using the seat clamp eccentric.
- On the rod (for this they use a special nut - an expansion nut);
- On the grorilla or crown of forks and arcs;
- By using fastening straps on the fork legs.
Exceptions to the rules
Not all bicycle models have the possibility of fixing a swamp. This applies to those types that are intended for driving on tracks. There are few such models, but they still exist. In addition, there are cases when wings cannot be installed, for example:
- If you have a rear shock absorber, it will be enough to install only a carriage shield.
- A category of bikes whose purpose is not so much to ride around the city/highway, but rather to ride in special places (in other words, sports class bikes for racing).
- Lack of mounting space. Found on some modern models
Top articles: Children's bicycle helmets
If your vehicle does not fall into any of the listed categories, then there is nothing to worry about - installing a mudguard is possible.
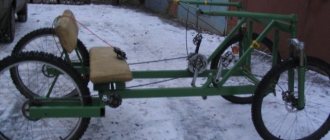
How to make wings for a bicycle with your own hands
First of all, I would like to say that bicycle fenders or so-called mudguards are not always a stylish element, especially if they are made of plastic. However, when it rains, they simply become an irreplaceable part of it, which poses the question: should we put fenders on our bike or not?
And since I spend all day on my bike, I decided to create stylish wooden fenders for my bike with my own hands.