Surely every home has old headphones that are either broken, simply tired, or have been replaced by a newer, higher-quality model. Don’t rush to throw them away - you can make a huge number of other useful things from such material. This can be either a gift to someone close to you, or just a simple craft for yourself or for interior decoration.
What can you make from old headphones? Wouldn't this be too difficult for someone who has never made any homemade items before? You will learn about all this in this article.
Main design elements
Despite its small size and obvious purpose, the roulette device, especially its highly professional models, has a complex design. In a tape measure, the main element is a measured piece of steel strip made of another, durable but elastic material. In professional instruments used for field measurements, these can be strips of carbon fiber, fiberglass sheets, or thickened stainless wire with a meter scale printed on it. Tools are available with a fabric measuring tape with a centimeter scale printed on it
All of these devices use a different scale, so when measuring, the accuracy class of the tape measure is taken into account, because the error when working with a steel tape will be less than with a tape made of fabric or tarpaulin
The measuring tape, like other structural elements, is located inside the housing. In most modern devices, the housing is made of impact-resistant plastic. But there are also copies with a metal case made of stainless steel. Cases are compact, open or closed. The compact size of the case is used for tape measures of 1 and 3 meters in length. The open case is used for special geodetic tape measures, the length of which is 50 and 100 meters.
For operation, it is important that the device includes a mechanism for winding up the measuring strip or simply a tape measure mechanism. In older models, this role was played by a rotating drum on which the tape was wound
And such a drum was driven using a folding handle. For construction tapes with a length of 1, 3, 5, 7.5 and 10 meters, the mechanism is most often spring-loaded today - when unlocked, it automatically winds the tape back into the body.
A hook is installed at the end of the measuring strip. In different models it has a special appearance. For ordinary construction tapes, this is a metal tip in the form of an angle with one or more slots. There are tips in the form of a metal bracket or even with an installed carabiner, and professional logger tapes are also equipped with a hook for fixing in the wood.
There are several buttons – latches – installed on the body of automatic roulettes. They are used to block the mechanism for rolling up the measuring tape so that during operation the tape does not uncontrollably wind up into the housing. If you remove the strip lock, it will automatically go into the housing.
The hitchhiking device is designed for quick but controlled rolling of the web to the desired length
This is very important especially when one person operates the device.
The design of a measuring tape, especially modern models, has a number of additional components that make working with it easier.
First of all, additional equipment includes:
- Built-in flashlight is an indispensable feature for working in dimly lit areas;
- Clip – a device that allows you to install it on a belt, quickly remove and put it on;
- Strap – allows you to hang the instrument on a hook for storage or carry it on your wrist.
- Laser pointer - allows you to use a bright beam to form a point on an object so that the tape measures the shortest distance in a straight line, and not the relief;
- Pencil holder - allows you to use this measuring device to draw circles without using a compass;
- Magnets on the hook and body - allow you to fix the tape on metal objects and free your hands for other work.
We can extend the life of devices
Don't rush to put your old phone in the closet. Look around - suddenly among your friends and relatives there are people who will need it. If not, then you can try to sell it on Avito or other similar markets. Before you buy a fitness bracelet, ask your friends to see if they already have the exact same one lying around.
Dust off your old consoles and do a console swap with your friends. Tell them about your favorite games that can be played on the PlayStation 3, Xbox 360, Nintendo Wii and other formally obsolete consoles. Not only will you give your console a new lease of life, but you'll get to know the greats of the past and get to know your friends' tastes better.
If the device no longer turns on at all, do not rush to throw it away - find out how much repairs will cost. Unfortunately, modern technology is difficult to repair, but replacing some components, such as the battery in a phone, can cost several times less than buying the same device in person.
Read more on the topic Dozens of countries are abandoning plastic bags. How are things going in Russia?
Inscriptions
The base of the toy has been assembled, but you won’t be able to guess with it yet. The main thing missing is predictions. They are eagerly awaited by every participant in the entertainment, regardless of their belief in the veracity of what is written. In order for a paper figurine to turn into a real fortune teller toy, you need to put numbers, images and, in fact, “fateful” messages on it. You can do this yourself, using colored markers and a gel pen, or use ready-made printable stickers. Today, with the return of fashion for paper fortune tellers, more and more spectacular designs are being developed for them.
How to make a toy step by step:
- We place the origami with the outer flaps facing up. On each of the squares we write the name of an object or color, the direction of the world, and so on. The main thing is to keep the words short. For example, a selection of animals: elephant, rat, fish, cat. Words can be replaced with pictures, but without deviating from the conditions described above.
- Turn the product over. We write numbers from 1 to 8 on each segment. How to do this is shown in the example.
- Open the triangular valves with numbers written on them.
- We write our predictions in square sectors. If it is not known to whom they will be addressed, it is better to limit yourself to general phrases, like:
- "probably",
- "soon",
- "Not sure it's going to happen".
And so on. For a specific player, you can choose something more specific.
- Let's put the fortune teller back together.
Step-by-step instructions for creating a toy
Having prepared everything you need, proceed to your plan:
- Bend the paper to form a right triangle. This stage is important if the paper was not originally square.
- Cut off the excess.
- Form a triangle again to get an identical shape, but smaller.
- Open the square completely and pay attention to the fold lines.
- Fold the corners so that they meet in the middle.
- Turn the resulting figure over.
- Fold all corners inward again. So that the new layer perfectly covers the bottom one.
- Turn over the resulting “envelope” and bend it in half along the middle horizontal line. You will get a rectangle.
All that remains is to transform the product into the desired final form. Grab the top corners of the rectangle, those located on the fold, and move them inward. The rectangle along the fold lines will turn into a “double square” - the basic formation in this technique.
- Gently pull out the single-layer corners to form pockets.
- Along the fold lines, when unfolded, the toy looks like this.
- Schematic sequential instructions.
All that remains is to paint and decorate, if you did it from scratch. If there is a basic template, the toy is immediately suitable for use.
Homemade products from the microwave
Do-it-yourself microwave oven crafts
Many craftsmen wonder what can be made from an old microwave. To understand and understand this, you should consider in this article from the construction magazine samastroyka.ru what a microwave oven consists of and what mechanisms it has inside.
What does a microwave oven consist of?
In order not to delve too deeply into the structure of a microwave, the article is still not about that; you can briefly take a look at what this useful household appliance actually consists of.
So, the main elements of a microwave are:
- Heating element, which uses special vacuum lamps;
- AC step-down transformer;
- Fan;
- “Brains” with a microcontroller and all kinds of electromagnetic relays, a buzzer, and other parts;
- Metal body;
- Engine.
From some models of microwave ovens, for example, with a grill, you can remove various heating elements, infrared emitters, etc. They can also be adapted for making useful homemade products.
As you can see, a microwave oven consists of many elements that can be easily adapted to your own needs. However, we will start with the simplest things, and moving from simple to complex, we will show what exactly can be made from a microwave.
What homemade products can be made from a microwave?
So, let's look at the most popular microwave homemade products that you can make quite easily with your own hands.
- Electric oven;
- Microwave bread bowl;
- Small locker;
- Low-power 220 Volt generator;
- Spot welding machine;
- Charger for car.
In addition, microwave electrical components are useful for making all kinds of electronics.
Microwave bread bowl
Making a simple but original microwave bread bowl is very easy. For these purposes, you will need to use one single thing from this household appliance - a metal case.
It would be best to remove everything unnecessary from the microwave in advance and unload it as much as possible. In order to decorate a homemade bread box, you can use various stickers, of which in our age there are countless different options.
Microwave welding machine
You can make a welding machine for spot welding from a microwave transformer. The essence of altering the transformer is to change the number of turns of the secondary winding, for which thicker copper wire is used.
A charger for a car is made in almost the same way. For this purpose, you will have to select the required number of turns of wire (so that the output is 12 Volts), after first getting rid of the secondary winding of the transformer.
Generator from microwave engine
Some craftsmen make a homemade generator out of a microwave engine. The motor installed in the microwave is capable of generating electric current, and its power is about 50 W.
To make a small generator from a microwave, you will need to build a housing and attach a handle to the motor shaft. Also on the case you need to place a small socket to which you could connect a flashlight and other electricity consumers.
Attention, a homemade generator from a microwave engine is capable of generating voltage over 110 Volts, which is very, very dangerous to health. Therefore, be more careful when making this kind of electrical homemade products.
Microwave oven
In addition to all of the above homemade microwave ovens, individual parts of this household appliance can be skillfully used for a variety of purposes.
For example, a fan from a microwave oven is perfect for installation in a homemade incubator.
By the way, using an electric heating element with a power of no more than 1 kW, you can make an excellent oven from the body of a microwave oven. What you need to do is to place the heating element in the lower part of the body, having first removed from it all the parts unnecessary for use.
Personal Computer
Using a Raspberry Pi single-board computer (sold here), you can turn an old monitor into a full-fledged PC for about $50. All you need to do is connect your Raspberry Pi to your monitor. In addition, based on the Raspberry Pi, you can create a retro video game console or a multifunctional watch, for example, such as the PiClock.
As conceived by the author of the project, the gadget is capable of displaying the current time, weather forecast in the region where the user is located, as well as a radar map. The developer has posted step-by-step instructions on how to build the device on GitHub, but essentially all you need to create a PiClock is a monitor, a Raspberry Pi, a keyboard and mouse, and an active Wi-Fi connection.
♥ ON TOPIC: Why red-haired people are born and how they differ from others.
Common problems
The design of the tool is quite simple, but it can easily break. The most serious failure is associated with a defect in the main function. The measuring tape stops rewinding, making work difficult. You can fix it yourself; for this it is important to know how to disassemble the tape measure. Most often, this problem occurs in devices with mechanical tape return.
In any of these cases there is a possibility of repair. No special knowledge is required on how to make a tape measure.
Repair features
There are several reasons why the centimeter does not curl back on its own:
- the tape has come off the spring;
- the spring burst;
- the spring jumped off the pin to which it was attached;
- the tape broke and a kink formed.
To determine the cause of the breakdown, you need to disassemble the casing of the tape measure; this is quite simple to do.
- Remove the side by unscrewing the bolts holding it, of which there are from one to four pieces.
- Remove the backstop.
- Extend the measuring tape to its full length. If the tape is not detached from the spring, then carefully remove it from the hook.
- Open the coil in which the coiled spring of the return mechanism is located.
If the tape is disconnected from the spring, then to repair the tape measure you need to:
- hook the tape back if it just slipped off;
- cut a new tongue for the hook if the old one is broken;
- punch a new hole in the tape if the old one is torn.
If the spring has come off its attachment point, this will be visible immediately when you open the coil. To resume operation of the winding mechanism, you need to return the tendril to its place. If the tendril is broken off, then you need to cut another one of the same shape. To do this, you need to remove the coil spring from the coil, making sure that it does not break off and hurt your hands. Due to the different stiffness of the spring, the tendril can be made using pliers; you will also need to heat the spring before processing, otherwise the cold metal will break. After cutting out a new tendril, carefully return the spring to its old place, carefully making sure that there are no fractures or bends.
DIY microwave spotter! Own version of performance.
Hi all! A lot has been written on this topic, a lot of sensible information and a lot of meager information. This is always the case with information, of what is on the Internet, only 5% is trustworthy... and then you need to check these 5% yourself) Today I will describe my version of making a spotter from a microwave and my own observations.
First of all, what is it for, a spotter?
Just to pull out crumpled metal on body elements where there is no access from the reverse side. Welded, pulled, tore off. So as not to throw a bunch of putty on the elements. This is what it looks like. Here is a video of this master with a capital “W”, they help many achieve perfection in bodywork... I haven’t seen more detailed material.
What guided me when creating such a craft?
Well, firstly, with my own desire to take a break from the boring bustle and create something new) After all, rest is a change of activity. Sometimes, of course, you just want to lie down and do nothing, just restore lost energy... This method of rest leads to the fact that our energy tanks only decrease in volume over time if we simply recover without overloading. After all, the supply of vital energy and energy tanks can be pumped up like the muscles of the body, through extreme changing loads and rest. Therefore, frequent repetitive activity does not make us stronger or smarter, but on the contrary... Linear life is like a line on an artificial life support device...
Therefore, sometimes you want to create something and get a charge of positive energy) Blow your brain or just overload it) So to speak, delve headlong into something new, but so that it would be naturally useful for later life... For example, delve into the study of “black holes” completely I don’t want to, it won’t be useful right now, and it’s completely unnecessary to fill your head with unnecessary thoughts. The flash drive in the head also has a certain resource, because we use only 10 percent of our brain, we need to fill this 10% with the skills we need right now)
By the way, before using this spotter, I used a regular battery)
And you know, it’s enough for simple...and complex repairs. But complex work as a spotter is a utopia... Therefore, if you just get the hang of it. It's not just about the instrument. Yes, the tool, of course, is 10% of success, but everything else is skills, ingenuity, little tricks and the ability to adapt to the master’s situation. Flexibility is the sister of talent))
A huge plus of a battery spotter is that its production requires a minimum of expenses! 2 thick cables, 2 terminals, a retractor from the starter, a car relay, a micro button... and of course a battery, every car has it)
Another big plus is that it does not load the network. The light does not blink, household appliances do not fail due to your fault! Neighbors in your garage or country house won’t bang on your door, screaming!)
Mostly, I have simple dents, so this device was enough for my eyes! Naturally, the battery runs out and this is not convenient during long-term operation. But paired with a charger, a device of this type has become widespread among garage workers! If, for example, you choose between screwing self-tapping screws into a part or welding rings with a semi-automatic machine, then the battery spotter wins many times over!
You can also make equipment for a spotter yourself using available materials. The return hammer is a shock absorber rod and a weight. A lathe turned the load for me. The splitter is made from a sealant gun; the washer gun is made of something I don’t remember, like a gas burner)
But I decided to go further and make a device from the network.
Initially I wanted to make a spotter based on TOR. I found a torus in a landfill and found a body from an old welder!
But it seemed to me like some kind of long-term hemorrhoids that cannot be completed in 2 days) Therefore, I was interested in the topic of making a spotter from a microwave! I'm generally interested in the topic of making something with my own hands)
To understand the process, I watched a lot of videos... and realized that people are just monkeying with each other! Some people succeed at random, others don’t! The only sensible video where you can understand the manufacturing theory is here!
The first thing I started doing was transformers, the basis of the spotter. Namely, get rid of the secondary winding and shunts, as shown in the video! I understood the first fact leading to failure... All modern microwave ovens are made of bullshit! Or rather their transformers!
The windings are made of aluminum. Not only is it impossible to really knock out aluminum, but also the resistance of the primary winding is high, which means, in principle, such a power transformer will not allow you to need 4 of them for a spotter) Therefore, I put one of the transformers aside, because my second one was copper! The microwave was manufactured in 2010. By the way, copper ones are sorted out with a bang!
I had cables; I once bought 20 meters of cable with a good cross-section along with TOP. it cost me 2000 rubles.
I went to the landfill, or rather to the scrap metal collection point. I’m already “my” person at these points, because I collect everything that interests me there) Mostly this is equipment from the USSR, which someone is still getting rid of, and someone is still buying).
I was interested in old microwaves made before 2010 and, if possible, with a grill, powerful ones, with a large iron! Right on the spot I disassembled them and pulled out the transformers! From a copper transformer for 150 rubles, I bought them for 200, aluminum ones generally for the price of chernukha, their price was 50 rubles...
At home I looked and compared! Large transformers with copper windings were needed!
The photo shows the difference in size of the transformer from an ordinary modern microwave and transformers from old appliances with a grill!
At first I had the idea of making a device from 3 trances, but I was afraid for my electrical network in the house! After all, even one working microwave gives a drawdown in voltage, can you imagine what will happen with 3 at once?) So I went to the landfill again and found a good trans from a powerful microwave!) So now the device will be on 2 trances and here is a photo for comparison!
At the same time, I found a step-down transformer to produce 36 volts. More precisely, not 36 but 30 and a few kopecks, but this should be enough...
The device will be controlled from a button, which means a reduced voltage must be supplied to the button. I saw diagrams where people take a 12 volt step-down transformer to power a car relay. The relay in turn powers a 220 volt magnetic starter! Here is a sample diagram.
But you understand what’s the matter, why make it so complicated, use so many contact elements at the same time? I thought it was unnecessary. Therefore, in the same landfill I found 36 volt magnetic starters. The problem with removing an unnecessary contact element (and this is a delay in switching time) is immediately solved.
All the parts are there and I'm starting to assemble!
First, I removed the insulation from the cable. I twisted it as tightly as possible and began to wrap it with PVC and rag tape.
Then I implanted the resulting cable into the trances. I didn’t make 1.5 turns, because that doesn’t mean anything, but 2.5 turns, so that the output would be about 6 volts. This is what the workflow looks like)
The next step was to rebuild the magnetic starter. I also went through these starters in the year 2002 on refrigeration units) It was necessary to grind all the contacts, as well as polish the iron at the point of contact so that the starter would not buzz and work silently. I am adding a description of the starter bulkhead.
I connected everything with wires. When connecting transformers, you can confuse the phase and zero on the primary winding; on the secondary winding the voltage will then be near zero. Therefore, you need to connect correctly. In principle, it makes no difference where to connect the phase and zero to the primary winding of the trance. As well as winding the secondary, clockwise or counterclockwise, it also makes no difference.
The working part is ready!
I took the cables and cut them off 1.5 meters each. With the expectation that if there is not enough voltage, then I will cut the mass cable if something happens. The terminals were made from an ordinary copper water pipe with a diameter of 20.
I connected the cables in a similar way.
I immediately checked the device in action. It doesn’t burn the metal and everything is welded perfectly!
Now we need to give the body a little appearance.
The paint on the body is flying off, so I decided to give it a quick spray of paint. Cleaned off the old paint and painted it.
Then I just assembled everything into the case!
As you can see in the photo, the step-down trans powers a 36-volt magnetic starter.
The device turns on automatically on the side. Cooled by a 220 volt fan.
The ground terminal has an internal welded part, and a brass contact ring is screwed on the outside. The terminals are covered with heat shrink.
The control button is also attached to the cable using heat shrink. Using the button, power is supplied from the step-down transformer to the starter. The button has 36 volts, so it won’t kill you if something happens)
This is what the device looks like from the control side. I tried to simplify the design as much as possible. No extra buttons or lights! Turned it on and it works. The power cable with cross-section 3, multi-core, was made long so as not to use extension cords.
And the final photo of the device with equipment!
As a result, the device performed well, it works fine. Everything welds perfectly. It can even burn holes when you press the button for a long time. It does not sag the network much, since there are only 2 transformers and a sufficient number of turns. Small spotter repairs are quite enough, but large ones... take a lot of time and, accordingly, the margins of these works are not large compared to others... so what the heck!) So I’m glad if my experience is useful to someone!
Let me emphasize once again what affects the good operation and performance of the device!
1. This is a good COPPER transformer. Need a microwave with grill! 2. Good multi-core cables with good conductivity. 3. There is only one contact group in the connection diagram, with load distribution across the contacts. You don’t need a bunch of switches and starters... Thank you all. I hope the article will be useful when you make a similar device!)
Decorated container for storage or planting
Making crafts from trash with your own hands is a successful creative activity for summer residents. A flowerpot, a leaky bucket or an old pan that has lost its attractiveness can be restored to its aesthetic appearance.
To do this, the outside of the container must be decorated. For the transformation, they use an interesting looking trifle:
- Coins;
- Pebbles;
- Beads;
- Buttons;
- Pieces of broken glass.
The desired picture is formed from decorative elements.
- You can glue them in disarray, which will also become a definite design move.
- If you try, you can get a real masterpiece.
- The decorated vessel is often not used for its original purpose.
Typically, the container becomes a flower pot, an urn, or storage for various items.
What to make from an old microwave?
Today it is easier to buy a new household appliance than to repair an old one. But in the case of a microwave oven, it’s a pity to throw away a nice case, especially considering that half of the “filling” remains intact. We suggest you figure out how to use a broken microwave oven for other purposes - for benefit or for the soul.
Important! When working with electrical devices and their parts, follow safety precautions and properly insulate the wiring.
Let's find out what you can make from a microwave with your own hands.
Low-power oven for heating food
Proceed strictly according to the scheme:
- Remove unnecessary parts from the housing. To do this, remove the back panel, having previously discharged the high-voltage capacitor using a well-insulated high-resistance conductor. Twist the transformer, magnetron and turntable motor. All this will be useful in the manufacture of other useful products. Be sure to remove the glass disc and its drive from the camera.
- Go to the market, to an electrical parts store, or find an online market of the appropriate profile. You will need an air heating element up to 1 kW. Install the unit at the bottom of the device. The heating element requires reliable fixation, so before installation, take care to install the metal guides. The heater must be positioned so that the connected part is completely removed from the chamber.
- Connect the heater to the wires that come from the microwave oven's electrical filter.
- Place grates or a baking tray of a suitable size inside the chamber, leaving 3-4 centimeters from the heater.
- When connecting the product to a 200V network, use high-quality wires with a high-temperature insulating layer.
So in just a couple of hours you can turn broken equipment into a fully functional device with which you can easily heat up food, prepare hot sandwiches or defrost semi-finished products. To cook in an “oven”, you need to include a thermostat in the electrical circuit, and equip the door with special tempered glass, which in turn is taken from an old oven. In such a homemade oven you can already cook any dishes, including meat and baked goods, at temperatures up to 200 °C.
Vintage bread box
Don't want to fuss with electrical parts? Use your creative imagination and transform the unsightly body of an old microwave oven (MVP) into an original antique bread box. Your manipulations with tools will be limited only to dismantling the internal parts. It is necessary to dismantle not only the parts, the turntable with the motor, but also the power cord. Next, carry out the following work (one or all at once):
- Paint the body with paint of your choice. We have already written about how and with what to paint a microwave.
- Decorate the outside walls with stickers or decorate them using the Decoupage technique using napkins with vintage patterns.
- Add an LED strip to the camera - regular, blue, green, red or RGB, and activate it in the dark. In this case, you should leave the power cord, and you will have to install a step-down transistor inside the case to power the backlight.
As a result, depending on your efforts, you will end up with a bread box - either simply unusual or with the function of a lamp.
Put electrical components into use
If you made a bread box or an oven, you still have a mountain of unused components. Working spare parts can be put up for sale on Avito or other trading platforms. And give the rest a second life if desired.
- Fan. Use it for a homemade freezer or incubator. Having beautifully designed the fan, you can install it indoors.
- from a transformer , including welding machines and chargers.
- Turntable electric motor . It will be useful in a homemade incubator for the purpose of automatically turning eggs. To adjust the time intervals between procedures, you need to build a time relay into the electrical circuit. Also, together with the glass disk, the engine turns into a decorative stand or an unusual lighting fixture in a garden or summer cottage.
- The capacitor, control module and other radio components are excellent “toys” for radio amateurs, who, at their discretion, turn them into intricate, sometimes unnecessary, but very interesting products.
Important! When using MVP parts, be careful: they may contain dangerous components.
Tips from the web
The former trend of going to forums for advice has become obsolete. Nowadays, few people are nostalgic for these nice conversations in cozy “online rooms,” and advice is drawn from social networks or information sites. After reading a couple of such conversations, we found both banal and creative advice on re-equipping the profit center. The winner was the advice - to make a house for cats out of the microwave casing. The author of the post advises first to correlate the device with the size of the cat, and then remove the door if necessary.
Important! Don't put your cat in a microwave, even if it's not working. We are for respectful and decent treatment of animals.
As you can see, an old microwave should not be sent to a landfill! With a little ingenuity and your own efforts, you can make anything out of it (within reason). Share your own original ideas and homemade products in the comments to the article. Thank you for your attention.
Second life of the microwave
What can you make from an old microwave oven?
If your old mechanically controlled microwave oven has deteriorated, for example, the MOT (Microwave Oven Transformer - microwave oven transformer) or magnetron has burned out, or for some other reason you will not repair this kitchen appliance, you can try to make a regular oven out of the microwave by installing instead of a motor that rotates a tray, a heater (heater) or a burner, for example, from an electric stove.
True, there are still questions about the temperature regime of the device, but you can try. You can even leave the mechanical control unit and additionally install a temperature sensor. True, most likely, you will have to replace the glass with heat-resistant glass and make guides for the baking sheet.
Perhaps the rework will revive the microwave and give you an equally interesting device. Apparently, it won’t be possible to bake pies on it - the door and other parts are not very heat-resistant, but heating food (and the microwave is very often used for this) may be possible.
If the magnetron burns out and an air heating element is also installed, then only the heating element can be used. But in a situation where there is absolutely nothing to restore, all that remains is to use the device in parts.
Microwave body
You can make anything from the case If the processor module is working, then the bread box will have a clock!
Transformer
You can make a resistance welding device from MOT
Fan
Use the fan for its intended purpose, for example to mix air in an incubator, etc.
Plate rotation motor
The tray motor with gearbox can be tamed to turn eggs in the incubator by adding a time relay to it.
Control block
But the control unit may be useful for other work.
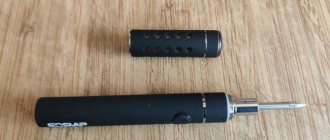
Let's use a control unit from an old microwave oven with mechanical control to regulate the temperature of the soldering iron tip.
The appearance and designation of the terminals may differ, but the principle of operation and control should not; you just need to use a measuring device to find out which contact is which.
Microwave diagram
A radio amateur, especially a beginner, needs a soldering iron with adjustable tip temperature.
The usual practice is to assemble a device using a thyristor, according to circuit diagrams common on the Internet.
But for those who are still “you” with electronics, you can use a mechanical regulator.
This option has many advantages - it is suitable for regulating the power of soldering irons connected through a step-down or isolation transformer. The proposed regulator has a wide range of power adjustment, and this can be useful, for example, when used for heating an etching solution or melting plastics, or when feeding a tin bath. Of course, it does not have the functions of a thermostat, its advantages are simplicity and functional completeness!
The mechanical control unit of a microwave oven consists of a low-speed motor and 2 gearboxes, one of which operates as a timer, the other as a power regulator. At the output of the gearboxes, software gears and associated cams are installed, interacting with contact pairs. One pair of contacts is responsible for the time delay, the other for regulating the power in the load.
The cams of the power control gear are designed in such a way that when you turn the power setting knob, the ratio of the time of the closed and open state of the contacts changes. And the timer cams move along the spiral of the program gear, the shape of the spiral is made in such a way that the time scale is stretched at the beginning and compressed at the end, at long time delays.
The timer is usually set to 60 minutes. When the shutter speed ends, a special hammer knocks on the bell and the entire circuit is de-energized. It is convenient, for example, to limit the time spent working with a soldering iron for a minor; inhaling soldering products is not at all useful.
In other words - no electronics! A more detailed description of the device and operation can be found on the Internet.
For general safety, you can install a fuse on the power side, as well as 3 light indicators - the presence of mains voltage, the switched-on state of the soldering iron, and an indicator that voltage is supplied to the soldering iron. The latter allows you to visually evaluate the ratio of the times of the on and off states. Indicators can be neon, for example, bulbs from unusable electric kettles, or LED.
Diagrams for connecting LEDs to the 220 network can be found on the Internet. The drive motor operates almost silently.
The timer allows you to turn on the soldering iron only for a while, without thinking about the fact that it is unproductively consuming electricity, and the bell will notify that the load is de-energized.
Since the power of an amateur radio soldering iron rarely exceeds 100 watts, additional relays do not need to be installed; the contacts are designed to connect an MOT with a power of 600-800 watts. The device can be placed either in a small box made of insulating material or built into an existing laboratory bench.
The pins can be connected according to the diagram either by soldering or using automotive-type connectors. A power wire of the required cross-section and insulation level is installed at the input of the device, and at the output there is a socket of the same type as the soldering iron plug. It is best to use standard network ones. In this case, the device can be used for other purposes - for example, periodically turning on lighting or ventilation.
To connect powerful loads, it is necessary to use relays with unloading contacts. You can install one or two more sockets by connecting them in parallel to the motor circuit, then, for example, the backlight of the mounting table or the exhaust fan will be turned on for the entire time the soldering iron is working.
It is best to leave the original control knobs from the microwave, and if you don’t have them, then choose similar ones from a washing machine or gas or electric stove. They have already been ergonomically designed by the designers, are mechanically strong and electrically insulated.
The device allows you to change the time delay at any time, turn it off completely, or change the value of the input power, as they say, “on the go.”
The device itself has been tested but has not yet been manufactured. Since the manufacture of the housing depends on the available materials and capabilities of the radio amateur, we can only offer a variant of its execution. See picture above.