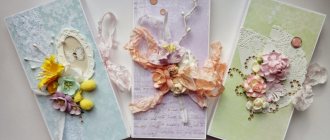
Good day everyone. Today we will learn how to make wax “impressions”.
They can be used as a worthy decoration for your works. They don't crumble or break. Pleasant to the touch and create the effect of a natural wax seal.
They can be tinted and decorated. This one is hastily tinted with pastels, glitter and dots are added. When the wax is still warm, you can insert sequins, beads, beads, rhinestones... I am beginning to discover the secret of creating these delights)).
Due to my job, I have various devices, but this is not necessary. I will tell you so that you can use it at home. Well, we got to the discovery of the secret)). This is wax, it is available in different forms, in various containers, packaging and packages. The main condition is that you NEED WARM WAX. Just ask the seller. Such things are sold in stores for hairdressers, cosmetologists, etc., although recently I have seen them in ordinary hardware stores, in women's small items. It is much better to work with than candle wax. It holds its shape perfectly, does not break, does not crumble. This is the same wax that is used for wax depilation (if necessary, I can tell you how this procedure is done). The expense is not high. In terms of cost, it turns out to be very cheap. There are several different colors, but this is not particularly important, because... can be tinted in any color.
Pour the wax into a metal jar and set it to heat on low gas. I have such a wonderful device for these purposes. But until he was away, I used a gas stove.
That's how handsome he is. It doesn't take long to melt. Melting point from 50 degrees.
While my kids weren’t looking, I made an excellent spoon from them)).
Using this spoon, I poured the wax. Oh, I almost forgot, I put baking parchment underneath, the wax comes off perfectly.
I use the most ordinary acrylic stamps. The girls ask where to get them. I tell you: the stamps are sold in stores like “Everything for needlework”, “Art”, “Everything for scrapbooking”, “everything for handmade cards”. Well, the meaning is clear)). Or in online stores. They are not expensive, the choice is huge. There are various drawings and inscriptions. If you want a personalized stamp, you can order it in salons that produce seals and stamps. It will be several times more expensive. Or you can do it yourself. I'll tell you below. And one more main point: open the stamp with oil.
I have this, but it doesn’t matter, you can even use regular refined oil.
When the wax has cooled a little (about 10 seconds), apply the stamp and press.
That's how well everything lags behind if you pre-lubricated it with oil. My paper is also oiled.
And this is what I did on the reverse side. It turned out double-sided. You can do it on a ribbon or on a string. Or you can just do it, then stick it wherever you need it. Glues well with silicone thermostat.
The wax seal was first used in the 15th century by Ivan III. During his reign it was very common, so it needed to be decorated in some way. For decoration, rings with seals were ordered from Serbia. This ring featured a drawing of a double-headed eagle, borrowed from the symbols of Byzantium.
On the front side of the ring was depicted St. George the Victorious killing a serpent. Now such symbols are used on ruble coins of the Russian Federation.
The seal of Ivan III is considered the very first drawing made on wax. The wax was red with distinct graphics. Under the picture was the inscription “John, by the grace of God, sovereign of all Rus'.”
Postal transfer forms, parcel forms
| Postal order form 142×105 mm | |
Enlarge | Download, 44.8 Kb | |
| Postal transfer form for an individual 200×200 mm | |
| front side Enlarge Download, 275 Kb | reverse side |
| Postal transfer form for a legal entity 200×200 mm | |
| front side Enlarge Download, 278 Kb | reverse side |
| Combined form of forms 113 and 117 on A4 sheet | |
| front side Enlarge Download, 400 Kb | reverse side |
| Accompanying address for the parcel. Form 116. 210×147 mm | |
| front side Enlarge Download, 174 Kb | reverse side |
Legend:
- — default forms in the distribution kit for the Russian Federation.
- — default forms in the distribution kit for Ukraine.
All the forms listed above are available in both the Russian and Ukrainian distributions of the program. To use forms that are not assigned by default, you need to import them (see instructions). The templates supplied with the program are usually located in the folder C:\Program Files\RussianIT\PrintEnvelopes\blanks
.
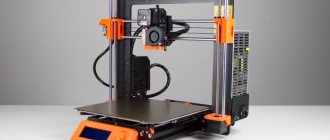
Image creation programs
Making a print begins with creating a design for the print. Graphic programs are used for this:
- Stamp is a popular and free software for creating image layouts. Intuitive, even an inexperienced user can work with it. You can only download the demo version for free.
- "Stamp" is a free program with wide functionality.
- Corel Draw, Illustrator - vector graphics editors for creating detailed images. Requires basic skills.
- Fine Print is a paid program for inserting a print image into a text document.
The process of creating a print layout in Corel Draw
Creating an envelope for any celebration
How to make an envelope out of paper with your own hands - 7 simple and clear master classes with photo ideas
In order to make a money envelope for any holiday, we will need:
- lace ribbons for scrapbooking, ribbons;
- watercolor paper;
- rhinestones;
- beads and buttons of different colors and sizes;
- heat gun;
- curly scissors;
- stickers with words of congratulations;
- felt-tip pens and colored pencils;
- glue (preferably “Moment”);
- ruler;
- a simple pencil;
- eraser;
- special paper for scrapbooking (it is called scrap paper, design - according to your taste);
- decorative flowers.
Operating instructions
- If you already have a purchased envelope for money somewhere at home, you can simply outline it. If not, then you can find templates on the Internet and choose the one you like best from a variety of options (or use the one we offer below).
- After the contours are outlined, you need to use a ruler to mark the fold lines and bend the paper along the contours. Make all notes with a simple pencil so that they can be easily erased with an eraser.
- Now the envelope can be decorated. Glue the selected scrap paper onto its outer part, you can go around the edges with a hole punch or make tiny holes with a sewing needle - here just do what your imagination tells you.
- Now, from all the details for decoration, you can put together an original composition: again, everything is arbitrary, to your taste. Place a congratulations inscription, determine where you want to see stickers and beads; lace and buttons around the edges will look very impressive. The most beautiful element will be one or more decorative flowers, which can be tied with a ribbon or ribbon made of satin fabric. Or you can tie the entire envelope with a ribbon - this way it will be packed more tightly.
- Glue all the parts with glue, not forgetting to put the money in the envelope after that.
Imitation
It is worth saying that wax seal is already a common noun combination of words, because now this is the name given to any seals made not only from wax, but also from other, alternative materials that cope well with the task assigned to them. Craftsmen who are passionate about scrapbooking shared their finds and ideas with us. How to make a seal indistinguishable from wax from scrap materials? If you are interested, then let’s quickly see how to make a wax seal at home from simple materials that handicraft lovers probably have lying around.
Envelope letter
How to make an envelope out of paper?
The most economical way to create an envelope. Suitable when you need to pack a written message written on A4 paper:
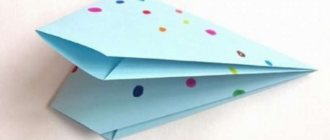
- fold the paper in half in the crossbar;
- smooth the sheet and bend its upper right corner until the side line coincides with the central fold line;
- fold the lower left corner in the same way;
- the right and left sides of the sheet are folded into strips so that their lines coincide with the edges of the bent corners - you get a rhombus with truncated sharp vertices;
- rotate the workpiece into a horizontal position counterclockwise to form a parallelogram with truncated sharp vertices;
- the upper right corner of the figure must be bent down so that the line of its “truncated” top is equal to the bottom edge;
- the top of the bent corner is tucked behind the fold line of the side to which it is directed;
- The lower left corner is folded in the same way, tucking into the resulting pocket between the bent right corner and the fold of the upper side of the figure.
The envelope is ready and sealed. For greater strength, you can use tape along the edges.
Thus, regardless of the available accessories, you can create your own paper envelope. The choice of manufacturing method remains a matter of taste.
Excel-Office
online now
How to type an address on an envelope in Word.
DIY money envelope without glue and scissors from A4 sheet
First, let's look at how to write addresses and print those addresses on a paper envelope through a printer.
So, Word tab “Mailouts” - “Create” - “Envelopes”.
Button “Add a postage stamp” - check this box only if we have access to an electronic stamp (if we bought it on the Internet). I don't have access to the stamp, so I'm skipping this point.
Then fill in the “Return Address”. You can also select it from the address book.
Nearby there is a “do not print” button - it is needed in order to enter the address in the address book, but not to print on the envelope now.
The “Sample” section shows the appearance of our envelope.
Button “Options...” - this dialog box appears.
If we click the “CR Only” button here, we can select the option of feeding the envelope into the printer tray. See the pictures in this dialog box. Fill it out like this.
The result was an envelope like this. Addresses can be moved, see above. If you need an envelope, then click the “Print” button.
You can insert a picture or company logo into the envelope in Word. For example, a picture was inserted here. How to insert a picture, image, photo, see the article How to insert a photo, drawing into a Word document.
How to save an envelope in Word.
It will be saved and attached to the document. To do this, in the Envelopes and Stickers window, in the Envelope Options section, after filling in the addresses, click the Add button.
The article Many Envelopes with Different Addresses in Word describes a way to quickly sign many envelopes.
For information on how to quickly write many letters to different clients of different companies, see the article Many letters with different names in Word.
Wax seals in decoration: options for use
With the help of wax impressions you can design a wide variety of objects. Textured prints give them a vintage look, making them elegant and impressive.
- Applying sealing wax to paper and cardboard.
- Applying sealing wax to fabric.
- Applying sealing wax to wood.
- Applying a wax impression on glass.
Classics of the genre are scrolls and envelopes with wax seals. There are no difficulties with applying stamps to envelopes. As for the scrolls, there is one trick here. To make a scroll, take a round stick and wrap paper on it. You need to pour sealing wax into the right place - it should not be too liquid, otherwise the clot will spread. The sealing wax needs to be pressed firmly onto the cliche, and the scroll is ready.
This way, for example, you can decorate gift bags beautifully. Feature: when applied, sealing wax flows through the fibers of the fabric. Therefore, you need to place something metal under the canvas - a thin ruler or a trowel.
Rope sealed with a wax seal looks very impressive on gifts and scrolls. To get such a print, take a metal sheet or a construction trowel and grease it. Place ropes on the metal, fill them with sealing wax and place the cliche. After complete hardening, the wax seal will easily come off the metal surface.
We often use this technique to decorate wooden boxes with corporate gifts. By the way, a wax seal can be combined with a label. Applying sealing wax to wood, as a rule, does not cause any problems.
This method can be used when decorating bottles. To apply to glass, thick sealing wax with the consistency of “sour cream” is required. To get it, it is enough to lower the heating temperature of the stove. You can also add a few solid pieces to a cup of melted sealing wax and stir the mass vigorously.
Create and print or save an envelope
On the Mailings tab, in the Create group, click Envelopes.
In the Recipient Address field, enter the mailing address.
If you want to use an address from the electronic address book installed on your computer, click the Insert address button
To format text, select it, right-click, and then select Font from the context menu.
In the Return address field, enter your return address or select a ready-made value.
If you want to use an address from the electronic address book installed on your computer, click the Insert address button
If you want to save the return address for future use but do not want to add it to the current envelope, select the Do not print check box.
If you have an electronic stamp (for example, purchased online), you can add it to the envelope.
Select the Add postage stamp checkbox.
If you don't have stamp software installed, Word will prompt you to install it and connect to Office.com. There you can find more information and links to other sites that offer electronic stamps.
To configure the settings of the program for working with postage stamps that is installed on your computer, click the Stamp Properties button.
Do one of the following:
To print an envelope without saving it for reuse, insert the envelope into the printer as shown in the Feed box and click Print.
To save the envelope for reuse, select Add to Document, then click the File tab, select Save As, and enter a name for the document.
Word adds the envelope to the current document as Page 1. If necessary, you can use the rest of the document to print a letter, which will automatically be stored with the envelope.
To print text on an envelope, insert the envelope into the printer as shown in the Feed box on the Print Options tab of the Envelope Options dialog box, and click Print.
We save the return address data
To set up your address you need:
- Open Word editor.
- Go to the "File" section.
- Find the "Options" tab.
- Go to the "Advanced" section.
- Scroll down the page until the “Mail Address” line appears, then the “General” groups.
- Enter return address.
- Click “OK” to save.
The editor will save the entered address so you can use it every time you need to add it to the document.
How can you replace a gift envelope at a wedding?
If someone takes the position that a wedding gift envelope cannot be replaced with anything, then such people are very mistaken, because gift wrapping can be replaced with boxes, bags and other interesting details.
For example, instead of an envelope, bills can be folded into a small box, wrapping the bills in a tube or folding them neatly and not tightly.
If you pack banknotes in a small gift bag, then the most practical option would be to attach such a bag to a bouquet or other gift. Thus, the banknotes in the gift bag will complement the main gift. Accordingly, if money is not planned to be given as the main gift, then it should not be packaged in this way.
Gifts for any holiday and celebration, including a wedding, are always interesting and beautiful. Exquisitely designed and correctly selected gifts are pleasant not only to receive, but also to give, and money placed in a pleasant and suitable package, in this case in a gift envelope, will not be an exception.
Despite the fact that the package will contain banknotes, the design of the gift will be done with your own hands, which means that sincerity and a real relationship with the couple to whom this gift will be presented will be invested.
Test Drive
Now you can try the finished print in action. Take wax, sealing wax or other material suitable for printing (we will talk about alternative materials for printing below), spread it with a candle or lighter, and drip it in the place where you want to place the seal. Give the material a couple of seconds to set. Dip the stamp in regular oil, blot off the excess with a napkin. Press it evenly and firmly onto the material and leave until completely hardened.
When it hardens, carefully remove the seal. If you are afraid of damaging it, then swing the signet a little so that it lags behind a little inside. Once lifted, you will receive a neat, beautiful handmade print. The wax seal, made at home, is ready.
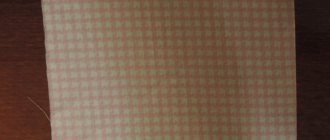
Beautiful envelopes for unusual gifts
A simple sheet of colored paper makes very beautiful pieces. There are many manufacturing options, here are a few of them.
Envelope with an animal face
The sheet is folded in half, cut out in the shape of a heart, and the top and bottom parts are folded to the center. Receive a fancy little envelope. Ears, arms, legs are cut out from the remaining paper and glued to the mold. They finish drawing the face and sign it. The packaging is ready.
Another option for a simple envelope:
From circles
It can be a large or small envelope with a gift and congratulations.
They do it like this:
- Cut out 4 circles from colored thick paper. They must be the same size.
- Each circle is folded in half. Lay out the circles so that their edges overlap each other.
- The workpiece is glued in the center.
Now the form is closed, decorated with ribbon and an envelope is received.
Album of envelopes
An original gift for any celebration can be made quickly with your own hands if you have:
- sheets (A4 8 pcs.);
- glue;
- scissors;
- pencil.
The sheets are colored and embossed.
The gift is constructed like this:
- A square is made from a rectangular sheet. Stepping back from the edge, draw 2 horizontal and vertical lines.
- Cut off the corners between the lines. Three flaps are folded towards the center and glued together - this is an envelope.
- Fold the remaining envelopes. Collect all the forms in an album.
The end result is this gift:
Decorate it to your liking.
Gift envelope with heart
Romantic confessions are presented in such packaging.
Make the preparation like this:
- take a square sheet;
- fold diagonally;
- turn the form at an angle towards you;
- bend the bottom corner to the center;
- bend the workpiece into a triangle;
- the sides are slightly bent so that one corner overlaps the other;
- the ends of the corners are bent perpendicular to the shape of the envelope;
- get a small diamond-shaped pocket;
- the upper triangle (flap) is folded, inserting the corner into the pocket.
The diagram will help you understand the construction of the envelope:
Open envelope using origami technique
To make a mold you need a sheet of double-sided colored paper and colored tape. The corners of the sheet are folded to form a triangle. Then the right and left sides are folded towards the center, then the lower part is folded towards the center. The corners are secured with tape. They get very beautiful packaging for money, postcards or thin brochures, diaries.
Closed origami envelope
The blank is also made from a square sheet of paper. Assemble the form as follows:
- Divide the sheet into 3 parts, iron the folds. Unfold the square and fold it again, getting 9 squares.
- Connect opposite corners - on both sides diagonally. Then the workpiece is unrolled.
- Each corner is bent to the opposite one, leaving a distance of 1 square out of 9.
- The corners are bent, giving a circular direction. Each corner goes under the next.
They get a square whose corner remains free, this is a valve. The diagram will help you understand:
Here is another option for making a closed origami envelope:
Envelope box for a gift
First, print out the template.
And then beautiful boxes are folded along the lines.
For a chocolate bar they build the following packaging:
Fold the envelope along the lines of the template, cutting off the parts that are marked with shade. Then the blank is decorated and a gift is given:
Knowing how to make a letter envelope out of paper, it is not difficult to build various forms for gifts, cards, and money. The more beautiful the source material, the more impressive the workpiece will be. The basic rule is that if the paper is embossed, patterned, or patterned, it should not be overloaded with additional decor.
Wedding envelope with money
Almost all guests at a wedding consider it necessary to give the newlyweds at least some amount of money - this has already become a tradition. In order for a cash gift to correspond to the festive occasion, it is necessary to arrange it accordingly. To make such an exclusive craft, we will need:
- watercolor paper;
- wedding-themed scrap paper;
- stamps with congratulations;
- details for decoration - half beads, buttons, ribbons, stickers.
Manufacturing process
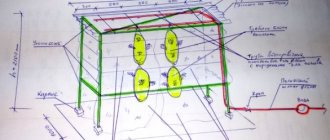
Cut out a blank for the envelope from cardboard, mark the fold lines with a ruler, taking into account the correct dimensions. It is necessary to draw 3 lines at distances of 8, 17 and 24 cm. Bend the first two lines inward, and the last one outward.
- If you have a hole punch, use it to process the edges for decoration, make a corner on the edge of the envelope so that the openwork edge is inside.
- Now you need to form an envelope. Use double-sided tape to seal the edges. You can use colored pencils to go over the areas you like for shading.
- Make a template from scrap paper and glue it to the back, coloring the edges with a dark marker. Inside, go through stamps with wishes everywhere, but try not to put too many of them so that the product does not look cheap.
- Decorate the sides of your money envelope with satin ribbons or tie it in an original manner in the center so that the contents do not fall out.
- Now you need to decorate the front side. Decorate the edges with lace ribbons, various artificial flowers, and wooden templates in the shape of hearts or angels. Add all sorts of half beads and rhinestones. If you have glitter, run it around the edges or surfaces of the hearts and flowers.
Experiment with ideas, compare several options for compositions for the envelope, try several types of scrap paper and see what looks more luxurious and expensive. When you have assembled the most successful composition, glue the parts, tie the ribbons - your envelope is ready. You can invest your money and run to congratulate your newly-made husband and wife.
Scrapbooking has no rules and boundaries; it encourages flights of imagination and this distinguishes it from other types of needlework. After all, there is nothing better than a gift into which you have invested your soul, imagination and all your creative ideas.
To learn how to make an envelope for money with your own hands, see the following video.
What kind of letter is certified by a seal?
- on documents certifying the rights of the bearer;
- on those that record facts related to cash flows;
- in other cases requiring certification of the authenticity of the signature.
The law does not establish a clear list of documents on which this or that seal is affixed. But, if you follow the recommendations of the above-mentioned GOST, a stamp is placed on the letter if it:
- is guaranteed;
- confirms the fulfillment of previously assumed or the assumption of new payment obligations;
- establishes a delivery schedule or, for example, a phased payment schedule.
Is a stamp required on an official letter?
Previously, when the forms of organizations and enterprises were produced exclusively by printing and each of them had its own registration number, there was a rule according to which a seal was not placed on a letter printed on the form. With the exception of letters with financial content, of course. But nowadays, in almost all enterprises, in order to save time and money, forms are created in ordinary text editors installed on any computer and printed immediately on a printer. There is no particular difficulty in forging any form.
Note:
If the letter is unstamped and printed on a form, but there are doubts about its authenticity, you must contact the sending organization at the contact numbers indicated in the header of the form and clarify whether they sent such a document.
It makes sense to draw up a local regulatory act that will regulate the procedure for using seals at the enterprise and will clearly state which letters need to be certified with a seal. This document will define a list of business papers that must necessarily require certification, and will also establish rules in which cases and on which documents a stamp or equivalent stamp will be affixed, and on which - a simple one.
Should I put a stamp on a cover letter?
The cover letter itself does not have any information load. This type of business correspondence is drawn up in the form of an introductory part, usually consisting of a standard stamp phrase: “At the same time, we are sending you;. "and a numbered list describing each document included in the shipping package.
There is no direct need to put a stamp on the cover letter, even if the package of documents includes some business papers that have the nature of financial and guarantee obligations, the same contracts, for example.
Note:
It is strictly forbidden to put a stamp on blank letterheads or blank sheets of paper - this is a direct path to abuse and fraud.
Printing Thank You Letters
As a rule, to prepare letters of gratitude, especially if they are intended for a ceremonial presentation to one of the employees, ready-made printed color postcards are used, rather than standard enterprise letterheads. In this case, it makes direct sense to put a stamp on the manager’s signature under the letter of gratitude.
If such a letter is sent to a customer, client or business partners, the organization’s standard form is usually used to complete it. If this is so, there is no need to put a stamp or an equivalent seal on such a letter of gratitude.
Requirements at the state level are established only for those seals that bear the image of the coat of arms of the Russian Federation and, in particular, the coats of arms of the constituent entities of the Federation, municipal and rural entities. There are no such general regulations regarding the seals of commercial structures.
Therefore, if an enterprise actively uses printing on outgoing letters and other business documents to certify signatures, it is advisable to develop a local regulatory act that will regulate such issues as:
- what types of seals are used in the organization;
- the procedure and rules for using impressions of various types of seals;
- how they are stored and who is responsible for their safety;
- procedure for updating seals and their disposal, etc.
Gift Envelope Decoration Ideas
Even the most ordinary envelope made of A4 paper can be beautifully decorated with scrap materials. Today we will tell you what is best suited for this, and show examples of how to make exquisite packaging.
Drawings with paints, pencils and felt-tip pens
The simplest solution is to use paints and markers for decoration. A simple pencil or pen will also work.
Step-by-step instructions for decorating an envelope in the style of vintage typography with openwork handwritten text:
- Select a picture on the Internet and print it at a suitable scale.
- Cut the template along the contour.
- Use a pencil to transfer the template to the front of the envelope. To do this, you can put a lamp under the glass, put a template on it, and an envelope on top. The second option is to transfer the drawing into the daytime through the window glass.
- Sign the envelope: write your address in the upper left corner.
- You can make a congratulatory inscription with a felt-tip pen.
- In a vintage style, add the recipient's name.
- Trace the lines with markers and pen.
- Larger patterns can be decorated with paints.
Vintage Typography Template Complete the decoration with vintage stamps
The given master class is one of many ideas for non-standard envelope decoration. We invite you to look at a few more design options.
Delicate decorations with beads, ribbons and buttons
Envelopes decorated with beads and rhinestones look very gentle. Such crafts are suitable for wedding invitations, lovely ladies can put money in them, and also for birthday cards. As an addition, they use satin ribbons, lace, colored tape and even buttons that can be glued to the front side. For inspiration, we suggest looking at some ideas in our gallery.
Decorations in vintage style with ropes and sealing wax
Decorating the envelopes with ropes and sealing wax suits the vintage style. To make such envelopes, it is better to use craft paper or artificially age it. To do this, you must first crumple a regular sheet, then wipe the surface with a cotton swab dipped in a slurry of water and cocoa. After complete drying, you need to burn the edges a little.
The finished envelope is wrapped vertically, horizontally or crosswise with string and sealed. Instead of sealing wax, you can use the following compositions:
- hard wax from a cosmetic store. It should be melted in a water bath, painted in any color with watercolors, pour a little of the composition onto a knot of rope and put a stamp on top; instead, use a metal button from old jeans;
- Using a hot glue gun, seal a piece of rope located on tracing paper or film, and immediately seal it with a button. After a couple of minutes, remove the button and separate the seal from the tracing paper. Additionally, it can be painted in the appropriate color, and then glued to the envelope using double-sided tape.
Before you get started, we suggest you look at some interesting ideas for decorating envelopes in a vintage style.
Other ideas for decorating envelopes
There are a huge number of decoration options, it all depends on the imagination of the craftswoman, on the reason and theme of the gift. We offer a small master class on decorating a festive envelope for a wedding or birthday.
For work we will need:
- white paper envelope;
- decorative paper;
- satin ribbons and small flowers as decoration;
- Moment glue, double-sided tape and scissors.
| Illustration | Description of action |
| Attach ribbons to both sides of the envelope using double-sided tape. | |
| Cut out pieces of decorative paper on the front and back sides. They should be 5 mm smaller than the envelope size on each side. Glue them to the base. | |
| Glue decorative flowers to the front of the envelope. |
You can watch the whole work in more detail in the video:
Watch this video on YouTube
How to make a wax seal with your own hands
You will need:
- hot glue gun
- wax pastel
- envelope
Step 1
Prepare the wax crayons by removing the wrapper from them. Prepare all the colors you plan to use.
Step 2
For the process, you will need a separate glue gun that will be used exclusively for pencils. The cheapest one you can find will do, but after wax pastels it will no longer be suitable for glue. Carefully place the pencil into the glue gun; in the future you will have to push it further with your hand. The melted pencil will start to leak, so lay down newspapers just in case.
Step 3
Seal the envelope with wax - in our case we used a red pencil, to which we then added a few drops of orange to achieve shimmer. Wait for the seal to harden.
Features of wax seals
Of course, today such products are used extremely rarely. Any stationery store has a lot of ready-made stamps for children, which differ in colors and low prices.
But there are also those people who love interesting experiments. For example, you can pleasantly surprise your beloved if you give her a beautiful confession, which is sealed in wax with a beautiful logo. Making such seals can be interesting as a hobby. Moreover, making such products is not difficult.
How to make an envelope from A4 paper. Option 2
Another option “ How to make a light envelope from A4 paper
" The product will be 18*14 cm in size and contains a rectangle at the base. The materials for work will be the same as in the previous method.
The paper sheet should be laid horizontally. Measure 16 cm on the left side and draw a vertical line. The sheet is folded along the marked line, and a pencil is drawn along the edge protruding beyond the other. Along the side – short – sides, using a ruler, make “marks” with an indentation of 1.5 cm from the edge of the workpiece. And bend it as shown in the diagram.
The sheet is unrolled and the excess edges are trimmed along the bend lines. The resulting valve is bent inward. Cuts are made diagonally along the top edge. The side flaps are glued to the envelope.
Option 3
For the following simple method, “
How to make an envelope from A4 paper yourself,
” you do not need to make extra folds that will spoil the appearance of the product. First, according to the diagram, the sheet is marked with lines in pencil, and only those that form the envelope itself are folded. So, take turns folding horizontally and vertically, and then - the corners to the center of the sheet.
Tip: To turn an envelope into a gift bag with your own hands, use scrapbooking paper, wrapping/gift paper, foil paper, or just colored stationery paper to make it. And also for the work “ How to make a beautiful envelope from A4 paper
“They don’t skimp on decor: they stick on rhinestones, sequins, lace, decorate with decoupage elements, etc.
Option 4
A visual assistant in your work will be “
How to make an envelope from A4 paper” video
or step-by-step photo instructions. The same as for an envelope made of paper square. Initially, a square is cut out of the sheet and placed vertically. Connect the side needles and make a fold. The workpiece is straightened. Now bend the bottom corner as in the diagram. Bend and unbend the sides towards the center. The workpiece is folded and the side seams are secured with glue. The upper part is closed with a valve.
Option 5 – for money
It's very easy to work from templates. In this case, the lesson “ How to make a rectangular envelope from A4 paper
for money" consists of printing or transferring the template you like onto a sheet of paper.
After this, the workpiece is cut out, transferred to scrap paper and “assembled” along the intended lines. Option 6
A fun and somewhat original way to make an envelope for money with your own hands is to use the origami technique.
Thus, the model according to the proposed scheme is repeated identically or modernized/changed at its own discretion. For origami “ How to make an envelope from A4 paper step by step
”, take a square sheet and lay out the folds according to the diagram (photo 1-3).
Then carefully assemble the product so as not to bend the tip. Otherwise, the improvised lock will come out crooked and will not be able to close.
Option 7
The heart envelope is a fairly light model that will replace a Valentine's card on Valentine's Day. The initial blank is a big heart (you sketch it or simply download and print it). This option can be assembled in a few steps without any difficulties.
Option 8
The next product, although not made from a whole A4 sheet, is also made from paper. It is based on 4 circles of the same diameter, cut from scrap paper. In addition, you need glue, satin ribbon, pencil, scissors.
Each cut out circle is folded in half. They are placed one on top of the other in a circle, overlapping. Then the structure is fixed in the center (with glue or a stapler). An envelope postcard comes out, into which you can put a small souvenir or surprise. The envelope is closed and tied with a satin ribbon.
And finally, the last thing. Learn how to make a large envelope from A4 paper
, not difficult. It is much more important to decorate it. This will take more time. As mentioned above, for the envelope itself, they choose not boring plain paper, but scrap paper or packaging rolls. And the decor depends on who and what the letter is intended for. Determine the theme: will it be an invitation to a children's party or strictly a business dinner. For the first situation, satin ribbons, buttons, and mini-figures will be used; but for the second, you need to maintain a business style and limit yourself to a minimum of elements.
| Comments on the news “ How to make an envelope from A4 paper. TOP - 8 ideas with photos
» is already 0:
Large paper envelope
An envelope of any size can be folded from a sheet of paper of the appropriate size, giving it a square shape. For work, you can take A-3 paper or a piece of beautiful wallpaper.
Operating procedure.
- Having decided on the overall dimensions, you should cut a square-shaped blank from the prepared material.
- Fold it diagonally in half, carefully smoothing out the fold.
- Fold the left corner inward, then the right corner. The top of the right corner should coincide with the fold of the left corner.
- The upper part is folded back and folded inward, tucking the top of the triangle into the resulting envelope.
- All folds are carefully leveled.
- The remaining valve is bent.
The big envelope is ready. If desired, it can be supplemented with decorative elements.
You can quickly fold an envelope from a large square blank using the simplest origami patterns.
New Year's mail: envelope templates and designs
Everything related to the New Year is traditionally decorated. Even letters in an ordinary purchased envelope often have painted fir branches with a toy or several snowflakes. And postcards packed in homemade envelopes retain the special warmth of the person who made them.
Making a New Year's envelope yourself is not at all difficult. To do this you need to follow the diagram:
A simple white A4 paper envelope
- Take a piece of A4 paper and, cutting off the excess (72 mm on each side), make a rhombus out of it.
- Align all four corners of the paper diamond in the middle.
- One corner should be bent, the other three should be secured by gluing a small piece of tape or paper on top.
- The resulting slits along the sides of the square should be taped with tape (transparent, thin paper or decorative colored tape).
- You can also seal an envelope with a letter using tape.
Or you can use these patterns:
The paper for making crafts can be plain white - in this case you can paint and decorate it yourself. You can also use ready-made templates that will serve as an excellent basis for colorful packaging.
Printer software
To print on a larger format than the printer allows, you can use its regular software. To do this you need to do the following:
- Open an image saved in the correct format (JPEG, PNG). To do this, you can select any built-in utility - for example, the Windows photo viewer.
- Go to the print menu and select the printer model, quality, paper type and size (in this case, A4).
- Open the printer properties and check the “Multi-page” box on the multitasking tab.
- Select poster printing, specify its size and go to settings.
- Set poster parameters - select those sheets that will not be printed, cut lines, alignment marks or overlap.
Having set all the settings, you can proceed to printing. The result will be one large image printed on standard size sheets. After careful gluing, it turns out to be A3. Although, if frames are selected, the actual size will be 5-10 mm smaller on each side.
It is also possible that the image will overlap - then the print dimensions will be standard (297x410 mm). However, there will be white stripes (borders) along the edges, and there is only one way to glue the sheets together - with tape from the back of the paper.
If your printer settings differ from those described, you can use other methods for printing A3 on an A4 device, which we describe below.
Save the envelope template in Word
We return to our file and click on the “Envelopes” button again. The same Envelopes and Labels window opens, but now it includes our return address.
Click on the “Add” button, and the Word page turns into an envelope of the format we specified:
We align the address and change its font:
In the same “Envelopes and Stickers” window, set any address to see how it will look. If something doesn’t suit you in the default settings, format it manually. After this, the envelope can be sent for printing.
Word envelope template is ready. We remove the recipient's address from it (the settings of this field are saved) and save it as a template. To do this, go to the File tab and select the “Save As” command. Select “Word Template” as the file format.
Let me remind you: the template differs from a regular document in that when opened, it creates a new Word file with the settings already specified. In a number of other files, the template icon is decorated with a bright orange stripe at the top:
Using the envelope template is very simple and pleasant: insert the address and send it to print. Much more interesting than writing addresses with a pen or making applications. And for the holidays you can create a whole series of special envelopes. How to do this is described here.
Image by Master isolated images // www.freedigitalphotos.net
You won't spend much more time typing the lettering on the envelope in Word, but it will look more professional and readable.
So let's get started. In Word, go to the “Mailouts” tab and find the “Envelopes” function in the top menu on the left. In the next dialog box, select the “Envelopes” tab and enter the recipient’s address in the upper area and the sender’s in the lower area. If you do not need to specify a return address, check the “Do not print” checkbox.
After entering addresses, check your print settings. In the dialog box, click Options. On the Envelope Options tab, you can select the envelope size, for example, Size 10 is a common envelope size that corresponds to an A4 sheet of paper folded into three equal parts parallel to the smaller side. Envelope Size 6 corresponds to an A4 sheet folded in half twice.
Envelope printing. Word provides many envelope formats - all you have to do is enter the desired text and .
On the “Print Options” tab, you can configure the method for submitting the envelope for printing. Having set the necessary settings, click the “Print” button to create an envelope, or “Add” to add it to the document as the first page - it’s so convenient to print the envelope immediately along with the text of the letter.
Photo: manufacturing company
To create a mail stack to merge envelopes in Word 2013 that is much classier and more professional than using peel and rub and delay mail marks, follow these steps:
Creating a seal
So, how to make a wax seal at home? Saw off a piece from the stick, approximately 5–6 cm long. Use your hand as a guide and measure out a piece that will be convenient to use. Sand it well on all sides. Be careful about the one on which the stamp itself will be placed.
Make a print with a simple image for a stamp that fits the diameter. Cut it out in a circle, then use a thin knife to cut through the design, making a stencil from the printout.
Mirror the design to the surface of the future print so that the print gets the correct impression - from right to left. Use a pencil to paint over the cut out holes, do it carefully. To prevent the stencil from moving, it can be secured with a small piece of tape.
Next, start burning. Heat up the wood burning device, try to burn the image at the same depth so that the print is even and clear.
Treat the finished seal with drying oil or other special moisture-resistant impregnation for wood. Wipe the area thoroughly with a cloth and leave it to dry for a day, otherwise it will stain your hands. Here's how to make a wax seal at home. Within a day you can safely use it.
Gift envelope for money
Many people like to give gifts in the form of money because they don’t have to worry about what to give. The hero of the occasion will be able to buy everything he needs for himself.
To create original packaging you will again need ordinary materials, these are:
- 2 sheets of paper of different colors (one with a pattern and the other plain)
- Scissors
- Glue
- Ruler
- Pencil
- Satin ribbon of different colors
Let's start making an envelope for money with our own hands:
- On paper we mark the width and length of the future envelope. Basically, this option is made by calculating the length and width of the bill. The optimal size would be 20 by 40 cm.
- Mark the middle on the rectangle and fold the 2 long edges inward towards the center.
- Then we also bend the sides to the central point and then unbend them.
- Now the edges of the sides need to be folded in the form of triangles. The result is a rectangle with sharp edges.
- We unfold the envelope. We glue paper with a pattern (20 by 23 cm) on the outside in the central part of plain paper. We also glue the triangles on the sides with glue to the base.
- On the outside of the envelope, in the middle, we attach a ribbon, only leaving the ends so that you can tie a bow.
- We heat the ends of the ribbon, fold the envelope and knit a bow. Ready.
How to make a wax seal at home?
Light the candle wick. When the wax begins to melt, create a stamp-sized puddle of wax from the falling drops. Let the puddle cool for about 15 seconds and press the stamp onto it. To prevent the seal from sticking, first dip it in olive oil and wipe it quickly.
Interesting materials:
How much does parking cost in Tsum Moscow? How much does a foam block 20 30 * 60 cost? How much does the first vaccination for dogs cost? How much does the St. Petersburg toll road cost? How much does it cost to change data on an air ticket? How much does it cost to replace the compressor on an Indesit refrigerator? How much does it cost to change the power controller on iPhone 7? How much does a pump cost for a Priora? How much does a Sheltie dog breed cost? How much does a parcel from Belarus to America cost?
How to make an envelope in Word 2007
So, to begin with, in the Mailing menu, select the item
If the document is expanded, then go to the Mailings menu, then the Envelopes tool:
After the Envelopes and Stickers window has opened. We are now interested in the Envelopes tab. Here you can enter the Recipient Address and Return Address:
You don’t have to print the return address; to do this, you need to check the box, as in the picture:
You can also change the envelope settings; to do this, go to the parameters:
Here you can select the envelope size:
Also change the fonts of the Recipient Address and Return Address:
It is also possible to change the printing settings; to do this, go to the Print Settings tab. Here you can choose the serving method, you can address up or address down, and also rotate it 180 degrees. And click OK:
After all the transformations you need to click the Add button:
Turning the letter itself into an envelope
The simplest thing you can do is to do without an envelope altogether. Its role can be played by the letter itself, written on one side of an A4 sheet. In this case, the second side will be intended to indicate the addresses of the sender and recipient, or will remain blank.
If the sheets are folded into a triangle with the text facing inward, you will get the legendary soldiers' letters. During the Great Patriotic War they were called front cocked hats.
The contents of what is written on the sheet will be hidden if you fold it into a curly rectangle. The method is multi-stage and a little complicated to implement, but the message looks very presentable.
Online Envelope
Filling out the data on the envelope is based on the standards introduced by the Russian Post. One of the services that transfers the address and name of the recipient is the free Envelope Online service. To gain access to the full functionality of the site, you need to register in the system. On the main page of the site, the user is asked to first select the type of envelope, which is designed specifically for comfortable placement of a whole sheet or folded one. The formats may be as follows:
- B4 is a format that can accommodate up to 20 standard sheets. Its size is 250x353 mm;
- C4 is one of the largest, measuring 229x324 mm. It is used to send business correspondence or catalogs, as well as documents;
- C5 – documents or sheets of A4 and A5 format folded in half are usually sent;
- C6 – small size, where small cards, receipts, letters can be placed. Due to its compact size of 114x162 mm, an A4 sheet will have to be folded 4 times;
- DL is a standard for business correspondence; it holds a regular sheet of paper, folded three times lengthwise, and has a size of 110x220 mm.
https://konvert-online.ru
In addition, in the “Horizontal” and “Vertical” sections you can select the location of the envelope on an A4 sheet. Once you have decided on the type, proceed to filling out the “Sender” and “Recipient” sections. Here you need to write the name, address and postal code of the recipient and sender. After entering all the necessary data, click on the “Create envelope” button, after which a window with the resulting address will open. It can be downloaded or opened in a new window in full size.
Folding without scissors
A convenient way when it is not possible to cut paper to the desired size. The sequence of folding the envelope will look like this:
- on sheet A4, draw a line along exactly in the middle (if it is not possible to draw a line, you can mark it with a fold, bending the sheet in half);
- the corners of one of the short sides of the sheet must be bent towards the middle until they touch;
- on both sides of the long edges of the sheet, bend strips 3.8 cm wide;
- The bottom of the paper should be folded up to the point where the folded corners of the top meet.
The envelope is ready for use. All that remains is to put a letter, postcard or other flat object inside (behind the side curved stripes). When an object is placed in the product, it is covered with the bottom.