Making toys with your own hands is becoming an increasingly popular creative activity. Moreover, all the necessary materials for sewing or knitting are easy to find in regular stores. But with such a seemingly trifle as eyes, difficulties often arise. After all, finding something similar to them in the store is not easy. In this case, it is useful to learn how to make eyes for toys with your own hands. This will solve the problem perfectly and won't take much time.
The benefits of making eyes yourself
The world of accessories is rich in its variety of ready-made elements for new creations: noses, eyes, eyelashes, mustaches. But all these products are aimed at mass factory production. Undoubtedly, in such an assortment you can select the necessary parts. But do-it-yourself toy eyes are radically unique.
The important advantages of your self-production will be the following:
- any material. You don’t need to get attached to finished products; imagination and creativity will help make the toy unforgettable;
- the desired shape, because in stores the eyes are usually round or oval. But no one forbids a doll to make heart-shaped eyes;
- suitable color, which is also presented in a rather meager assortment (yellow, blue, green, brown or black). It is rare to find iris colors that differ from the standard ones.
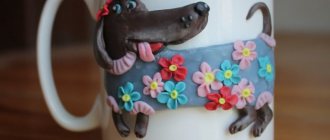
Create black eyes from yarn and glue for dolls
This is another simple and straightforward way to make eyes for a toy from scrap materials. Yarn is needed in two colors - black and a color suitable for the iris (green, blue, brown, etc.). It only takes a little. Therefore, you can take any leftover thread from knitting or ask someone who knits.
You need to choose transparent “moment” glue. We lay out the main yarn in the form of a circle, with a small black circle on top. Squeeze the glue onto the yarn in a drop of a suitable size and let it dry. Excess yarn must be cut off with scissors.
In addition, eyes can be made from round or oval buttons of suitable size. You can paint the buttons with acrylic paints. Instead of buttons, you can also use beads.
On some toys, eyes made of fabric or leather will look good, which can be made like eyes made of felt in the master class given above.
Choosing the material for future eyes
In fact, in this matter the main assistant is your unlimited imagination. After all, the material can be anything (or something that can be glued well). The main nuance is that the eyes should be durable and not tear after a day. More stringent quality requirements apply to children's toys: well glued or sewn, safe, not fragile. If you are considering a doll or toy that will stand on a shelf for beauty, then the choice will be wider.
To give your thoughts a boost, we can list the most popular and used materials for toy eyes (it’s not at all difficult to make them with your own hands):
- glass (transparent cabochons as a base);
- cabochons made of epoxy resin as an alternative to glass;
- wooden elements (buttons, blanks of the desired shape and size);
- eyes felted from wool;
- leather or felt patterns;
- connected eyes;
- beads;
- nuts (great option for steampunk or robot style);
- plastic or polymer clay.
Owl made from natural materials
In the world around us, you can always find materials for creativity that nature gives us completely free of charge. Children often make crafts from natural materials in kindergarten or school. This is a great activity to develop your child's sensory skills. Doing this kind of work is a pleasure.
Owl made of pine cones
For such crafts we need fir cones (pre-dried). They will serve as the basis and body for the owl, but the remaining parts can be made from anything. The work will require good wood glue, natural materials and additional decor.
Felt is an excellent material for arts and crafts.
Decorative panels
Panel painting is a labor-intensive type of activity. However, the time spent and hard work will bring great success. Panels made from natural materials will richly decorate your interior.
Wooden owl
Wood is an excellent material that can be found everywhere. The most amazing thing is that for crafts, unwanted wood cuts, twigs, edged blocks and even bark are often used. Let's consider several such options.
From wood cuts
For this craft you will need wood cuts of different sizes. A large blank is suitable for the base (body) of the owl, and small ones for the eyes. The wings and beak are made from wooden pieces. For the eyes you will need plastic bottle caps with pupils painted on them. All parts are connected with nails, the gaps are glued with PVA glue.
Such an owl can become the basis for an entire composition.
Owl from saw cuts and logs
The head is made from saw cuts, and the body is made from logs and bark. We glue everything with glue suitable for wood. The beak can be made from pine cones or felt.
Such crafts can be an excellent decoration for your summer cottage. And some even play the role of a scarecrow.
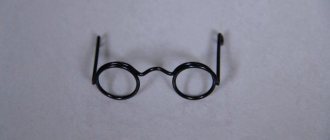
Classics of the genre
The most common and common are glass eyes for toys. You can create them with your own hands in a matter of minutes.
For manufacturing you will need three types of components:
- glass cabochons of the desired size and shape,
- base for attaching to the toy,
- materials for adding color to the eyes.
To connect the eye together you will need glue. Typically, experienced needlewomen recommend “Crystal,” superglue for shoes, and a glue gun. This depends on personal preferences. The set of other tools will depend on the selected materials.
It is convenient to make the fastening from the base of stud earrings. It is easy to stick to the eye on one side and it is not difficult to make a convenient loop on the other side. As another option, you can suggest gluing the finished eye to a toy or sewing it on.
And finally, there was the choice of material or materials to add color to the eyes. In this case, the uncontrollable imagination of the creator comes into play again. The easiest way is to print the picture and cut it out. Please note that the paper may be damaged when washed. The second option is to draw the iris and pupil on the flat side of the cabochon. To do this, you can use paints (acrylic, oil, you can try gouache or any fairly thick paint), nail polishes (according to reviews, you get rich colors), markers, felt-tip pens. In general, everything you can draw with.
Having prepared all the necessary tools, we begin to assemble glass eyes for toys with our own hands using glue. As you can see, there are a great many ways to create them.
Similarly, instead of glass cabochons, you can use their epoxy resin version. One of the advantages of this material is that you can make the mold yourself. That is, you will no longer be tied to size, shape or convexity.
A distinctive feature of this type of peephole (made of glass or resin) is the volume of the part and natural reflections. The doll or toy will seem to have a lively look.
Felt owl
Felt is a very popular material among needlewomen. It has a lot of advantages:
Toys. Soft decorations
To make such toys, you need to have hand sewing skills.
Draw the necessary details on paper. Transfer to felt. Cut it out. We sew it together, filling the inside with sandwich. We decorate the finished toy.
Felt handbags
What could be nicer than receiving a stylish felt handbag as a gift? Little fashionistas will especially appreciate this gift.
The handbag is sewn like a toy. We cut out the necessary parts and sew them together using special fittings. The edges do not need to be overlocked or hemmed, which simplifies the execution technique. Also, don't forget about the straps.
Here are examples of how to make an owl craft with your own hands. Using these examples, it's easy to create a wonderful owl decoration for your home or gift. Imagine and you will succeed.
Source
For those who are for the environment
In an era of desire for natural materials, wooden buttons or wooden blanks of the desired shape and size (found in arts and crafts stores) are an excellent option for eyes. Add painting with paints, felt-tip pens (again at your discretion, use whatever you draw). For better protection from external factors, coat with protective varnish. And the new toy looks at the world around him with wooden eyes. You can make many details for wooden toys with your own hands: nose, brooches, buttons. By combining two or more elements, your creation will look harmonious and complete.
- buttons or wooden blanks,
- paints or markers,
- varnish to fix the design,
- needle and thread (if the eyes will be sewn on),
- glue (if the eyes will stick).
Owl made from natural materials
In the world around us, you can always find materials for creativity that nature gives us completely free of charge. Children often make crafts from natural materials in kindergarten or school. This is a great activity to develop your child's sensory skills. Doing this kind of work is a pleasure.
Owl made of pine cones
For such crafts we need fir cones (pre-dried). They will serve as the basis and body for the owl, but the remaining parts can be made from anything. The work will require good wood glue, natural materials and additional decor.
Felt is an excellent material for arts and crafts.
Decorative panels
Panel painting is a labor-intensive type of activity. However, the time spent and hard work will bring great success. Panels made from natural materials will richly decorate your interior.
Wooden owl
Wood is an excellent material that can be found everywhere. The most amazing thing is that for crafts, unwanted wood cuts, twigs, edged blocks and even bark are often used. Let's consider several such options.
From wood cuts
For this craft you will need wood cuts of different sizes. A large blank is suitable for the base (body) of the owl, and small ones for the eyes. The wings and beak are made from wooden pieces. For the eyes you will need plastic bottle caps with pupils painted on them. All parts are connected with nails, the gaps are glued with PVA glue.
Such an owl can become the basis for an entire composition.
Owl from saw cuts and logs
The head is made from saw cuts, and the body is made from logs and bark. We glue everything with glue suitable for wood. The beak can be made from pine cones or felt.
Such crafts can be an excellent decoration for your summer cottage. And some even play the role of a scarecrow.
Felt, leather. What else will you add?
To make eyes for toys with your own hands from similar materials you will need:
- scissors, preferably manicure ones, since the parts must be made carefully and usually of small size,
- glue,
- pieces of leather or felt of the desired colors (if multi-colored ones are not available, you can use paints).
You need to cut out three parts for each eye: the sclera (the largest circle or oval, this is the white of the eye), the iris (a medium-sized part), the pupil (the smallest circle, usually black, but this is your unique toy, so you can experiment).
The next step is to glue your blanks layer by layer into a single structure. Then you connect it with the toy.
It is worth noting that you need to glue very carefully, especially the edges of the patterns. To prevent the eyes from becoming disheveled in the future, carefully glue the circles around the perimeter.
In addition to leather or felt, you can use any thick fabric. The patterns, connected in three layers, give the eyes a convex shape, which looks voluminous and quite natural.
Felt owl
Felt is a very popular material among needlewomen. It has a lot of advantages:
Toys. Soft decorations
To make such toys, you need to have hand sewing skills.
Draw the necessary details on paper. Transfer to felt. Cut it out. We sew it together, filling the inside with sandwich. We decorate the finished toy.
Felt handbags
What could be nicer than receiving a stylish felt handbag as a gift? Little fashionistas will especially appreciate this gift.
The handbag is sewn like a toy. We cut out the necessary parts and sew them together using special fittings. The edges do not need to be overlocked or hemmed, which simplifies the execution technique. Also, don't forget about the straps.
Here are examples of how to make an owl craft with your own hands. Using these examples, it's easy to create a wonderful owl decoration for your home or gift. Imagine and you will succeed.
Making toys with your own hands is becoming an increasingly popular creative activity. Moreover, all the necessary materials for sewing or knitting are easy to find in regular stores. But with such a seemingly trifle as eyes, difficulties often arise. After all, finding something similar to them in the store is not easy. In this case, it is useful to learn how to make eyes for toys with your own hands. This will solve the problem perfectly and won't take much time.
Button eyes
After all, that’s what they are often called. And for good reason. After all, a variety of decorated buttons, snaps, and beads act as eyes.
For example, beads pair well with round head pins. The metal needle at the end is rounded, holding the two parts together. At first it may seem absurd to connect two balls together, but in practice it looks very original.
To make the buttons look like an eye, you can paint them and glue rhinestones on them.
Such ideas are also relevant, so you shouldn’t refuse to make eyes for toys with your own hands.
Get hooks, knitting needles, threads
Knitted toys deserve special attention. Eyes for them can be made in several ways.
First, knit voluminous balls to fit, glue pupils from a different material onto them or embroider them in a contrasting color.
Secondly, flat eye patterns are crocheted separately and then attached to the toy (again, either glued or sewn on). This option is convenient because the eye is immediately made from multi-colored threads. If you use a ready-made diagram, then the main thing is not to forget to make the parts symmetrical.
Thirdly, you can use the technique of cross stitch or satin stitch. You can achieve amazing results if you use multi-colored threads.
This is how you create your own eyes for knitted toys. A good option is that the same material is involved in the work - threads. Therefore, the creation will look holistic.
How to make eyes for toys from threads: step-by-step instructions
First of all, you need to decide on the creation method that will be used for embroidery. Afterwards, you can begin preparing the tools required for the job.
Preparatory process:
- thin threads of any shade;
- needle;
- scissors;
- pencil (can be replaced with a marker with a thin rod);
- floss threads (black and white tone, third to choose from);
- safety pins.
In order to embroider with a French knot, you need to mark the position on the face of the toy in advance. A pencil will be useful for this. The thread is used in two folds, the ends must be tied into a tight knot.
Attention! When working, you should use a thin needle. A dense tool may cause holes.
They are alive
We are talking about the pupils, which can move if the toy is shaken. There are ways to make them yourself so as not to have to search in stores.
To do this you will need the following materials and tools:
- empty blister packs from tablets (don’t forget to wash them from medicines),
- as a pupil of a bead, half a pea (everything will depend on the desired size),
- glue,
- scissors,
- paper or cardboard for the main background of the eye (optional white),
- paints.
The first step is to paint the pupil black (or the color you need) and give it time to dry.
From the empty package of tablets we cut off two sections into which we place the colored pupils.
Carefully glue cardboard or paper onto the background.
Now all that remains is to carefully trim the finished eyes with scissors and glue them to the toy.
Decor of objects Master class Applique EYES FOR AN OWL Paper Cardboard Glue
This is how I made eyes for an owl, made using the modular origami technique:
(note: large-sized ready-made eyes are difficult to find or they are not cheap. The second reason why I made them myself: the pupils of an owl (a nocturnal predator) are large and with a yellow-orange rim, and on sale you usually find eyes of a different color, certainly not owl-like. The third reason is that it’s cheaper to use improvised means and you can make it yourself according to the desired size. In my opinion, it will turn out believable - you, dear origamists, can judge. Thank you all for the COUNTRY MASTERS!. If my creative ideas are useful to someone, then I will be very glad. I covered the top of the owl's eyes with tape so that the felt-tip pen would not cause stains and so that the eyes would be more truthful. By the way, owls have motionless pupils, like other birds and that's why she can turn her head as much as 270-300 degrees! MK first - don't judge strictly. Creative work everyone!
1. Glue yellow or orange paper onto a sheet of cardboard (any organic glue, but it’s better not to use PVA)
2. Bubbles were smoothed out with a cold iron
3.Use a pencil to trace a suitable round object (I have a stack). I think you can use a compass.
4. We outline the contours with a black felt-tip pen - this will be the outline of the eye.
5. Cut out the pupils from black thin cardboard or black paper (I used a 2-ruble coin). Use scissors to cut out a corner.
6. Glue the pupils onto the yellow base, then using a toothpick or needle, glue a white triangle or circle. Use a felt-tip pen to shade the excess white area. The eyes become more expressive and natural.
7.Different peephole options:
8. The size of the eye is as follows. 8. For an owl made from medium modules (from A4-16 pieces), this size is ideal. For an owlet, I advise you to take modules that are 2 times smaller (1/32) and, accordingly, the eyes are also 2 times smaller.
Source
Eyes for toys: DIY master class
Increasingly, you can find handmade dolls in homes. For those who are interested in making toys, a master class on making eyes will be useful.
In a store where it would seem you can buy eyes for crafts, it is difficult to find a finished part. The work doesn't take much time.
Selecting material for work
The material used for the work is affordable. For the most part, all the necessary elements for work are found in every home.
Plastic spoons
The easiest way to make eyes is to use oval scoops from disposable plastic spoons. This item is suitable for a large soft toy and a large doll.
The work doesn't take much time. The surface of the oval part of the spoon is sanded, which will enhance the adhesion of acrylic paint.
The part is mounted on double-sided tape and is used to attach it to the surface of the cardboard. Future eyes are ready to be decorated with acrylic paints.
The first layer is a white tone. Next, green or blue outlines of the irises are depicted.
The pupils and the outline of the iris are painted in black. White paint is used for the highlights, and flesh-colored paint is used for the eyelids. The work is done.
The photo shows how felt is an excellent material for making eyes for crafts. These details are used to complete the look of handmade dolls.
- You need to stock up on: a piece of felt, cardboard, Moment adhesive base, small scissors, a simple pencil.
The desired eye shape is drawn on cardboard - this will be one cardboard template. The inside of the eye is drawn in a smaller size - this is the second template.
Eye stencils for crafts are cut out along the contour. A pupil is cut out on one of the templates. A blank is cut out of white felt to form the shape of an eye along the contour of a large template.
Using the dimensions of a smaller template made of green or blue felt, the inner part of the eye is formed for crafts. Two felt parts are connected to each other with glue.
Contours are drawn with a black felt-tip pen. The eyelashes are glued “instantly”. The work is done.
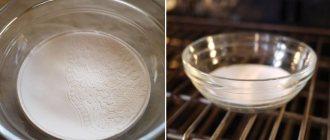
Epoxy resin
Beautiful eyes are made using epoxy resin. The starting material is diluted in accordance with the instructions. For tint, ink from gel pens is added. Any color can be selected.
It is necessary to prepare empty transparent containers for pills and baked plastic pupils. The black pupils are placed in a container of tablets and filled with epoxy resin.
You can use a toothpick to direct the pupil to the desired location. The parts are left in this state for 48 hours until completely dry.
After time, the container is cut strictly along the contour. You can match the eyelashes to your eyes.
Yarn and glue
You can quickly and easily make a part using yarn and glue. You don't need a lot of thread. A strand of yarn is laid out in a spiral to form a circle. This is the base of the eye.
There is a small black circle on top. Everything is covered with a drop of Moment glue. It is suitable for work because of its transparency. Leave to dry. The last step is to remove the excess strands of yarn with scissors.
Buttons and fabric
Round or oval buttons are also used to make eyes for crafts. The design is done with acrylic paints. Beads are painted using the same principle.
- To make the eyes, leather and fabric are used according to the method of working with felt.
Paper and glass stones
Volumetric eyes for handmade crafts are made of paper and glass stones.
A paper blank of the iris is made. The desired color is selected. Before you print out eye irises for crafts, you need to make sure that the diameter of the workpiece will not be larger than the glass stone.
Decoupage glue is applied to the flat part of the stone. The iris blank is applied with the front side to the surface of the stone with glue. Leave until dry.
It is important to use decoupage glue when working. It will not affect the transparency of the stone and will not distort the design.
A thin layer of glue is again applied to the dried surface. Threads of yarn are laid out on it, everything is covered with a white sheet.
You need to press it onto the paper with your finger so that everything sticks well. It takes some time to dry.
Excess paper and threads are cut off along the contour of the stone. You can use the eye blank for crafts.
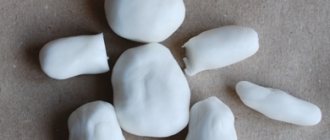
Clay
Flat eyes are made from polymer clay. The material is rolled out and the desired eye shape is squeezed out of it. The parts are baked. Later they are painted with acrylic paints.
Before making eyes for crafts in volume, the clay is formed into balls and divided in half. Next, the material is baked and the iris is painted, and a black pupil is applied.
Crochet
Needlewomen crochet eyes. Such parts are used for knitted and soft toys.
Eyes for garden crafts
For garden crafts, plastic lids are used, which are decorated with paints.
You must first cut out the shape of the eyes from foam plastic, and only then apply the entire design. But since garden crafts are left outside for the winter, the old eyes will need to be replaced with new ones in the spring.
- It is possible to make decorative eyes for crafts in different ways using available materials and imagination.
Photo of a peephole for crafts
Did you like the article?
We sew beautiful eyes for toys from plastic spoons
Plastic spoon eyes are perfect for large soft toys and dolls. They can be made very simply and quickly.
To work you will need two plastic spoons, acrylic paints, double-sided tape and sandpaper.
You will only need oval spoon scoops, so these need to be carefully cut from the handles. You need to lightly sand the convex surfaces so that the paint sticks to them well.
We attach the future eyes to the cardboard with double-sided tape and apply white paint. On top we draw the contours of the irises - green (blue or brown) ovals.
Draw black pupils and a black outline of the iris. Apply small highlights with white paint. We draw the eyelids with flesh color. The eyes are ready!
How can you crochet eyes correctly?
Knitted eyes are perfect for knitted toys, but they can also be used for other soft toys.
To work you will need:
- Yarn in three colors - white, green and black.
- Hook
- Sewing needle
Description of knitting work.
Our master class begins with knitting with black yarn: you need to cast on 3 air loops, close them in a ring and knit 9 half stitches with nikadas from them. Then we attach the green thread and knit in the next row 2 half double crochets in each of the previous rows.
Then we knit with a white thread according to the following pattern: chain stitch, 2 single crochets, half double crochet, half double crochet and double crochet, double crochet, double crochet and half double crochet, half double crochet, 2 single crochets, connecting post, fasten and cut the thread long enough to form a highlight on the pupil.
Using small lines we embroider highlights on the pupils. The eyes are ready!
MK. EYES FOR DOLLS. TWO OPTIONS
There are now a lot of tutorials on the Internet for making eyes for dolls. I decided to add my own version of the eyes.
- We will need:
- 1.Colored plastic
- 2.Sharp knife or scalpel
- 3.Sandpaper
- 4.Acrylic paints
- 5.Clear nail polish
First we will need cyan and blue plastic to make the iris.
Roll out a flat cake from blue plastic, and roll a “sausage” from blue plastic,
which we will wrap in a flatbread...
... and roll it well on the table to get a cylinder.
Bake the workpiece in the oven, but set the temperature a little lower than indicated in the instructions, since the plastic is thin and can burn quite quickly. I set the temperature to 120°, because... The diameter of my workpiece was 12mm.
Tilda's eyes, how to make. Mini master class from Nkale Embroidering Tilda's eyes
Usually they advise embroidering Tilda's eyes with a French knot - I don't really like it, the eyes turn out to be very convex, like a crustacean's (for me, in any case((and the threads often get tangled((I embroider the eyes with iris, you can just use thick black threads)) first draw dots like eyes and a mouth with a simple pencil; if at first you don’t succeed, it’s okay, you can erase it with an ordinary soft white eraser (I don’t draw, I embroider right away - but sometimes I have to redo it). Then insert a needle from the back of the head, just below the top of the head - bring it to the drawn point-eye,
After 2-3 transverse threads towards the other eye, you insert the needle again - pull it out through the second drawn point-eye;
also insert through 2-3 threads, now towards the embroidered eye stripe,
return to the first eye,
Then you embroider with a cross, first with a regular cross:
then - Bulgarian, on top of the usual one - diagonally (in fact, Bulgarian is not quite the same, diagonal stitches are longer).
How to make eyes for nylon dolls from ordinary buttons
Dear lovers of nylon dolls, once upon a time I was asked to do a master class on how I draw eyes for dolls. I finally got it together) I hope you find my method of creating button eyes useful.
I use the following materials and tools:
- buttons
- acrylic paints
- toothpicks
- nail polish (white and clear)
- tassels
- pencil
- stencil ruler
These are the buttons I use for doll eyes. If the button has a protruding leg, then you can bite it off with wire cutters.
Cover the buttons with white nail polish. For 2–3 layers. Dry it well.
Using a stencil ruler, draw a circle with a simple pencil, which we will then paint.
We take acrylic paints. Use the main color (green, blue, brown) to paint the circle...
...without allowing the main color to dry, we take white paint and, starting from the center, highlight our iris. Due to the fact that the main color has not yet dried, it mixes with white.
The upper left part of the iris can be made a little darker, and the lower right part a little lighter. In the process, you have to work alternately with dark and white paint to achieve the desired effect.
Dry the paint and draw rays on the iris.
On blue eyes it will be blue and white, on brown eyes it will be yellow and brown.
Draw a pupil in the center with black paint. Since the white base is varnish, we can easily correct the contour of the iris by carefully wiping off the excess with a wet cotton swab wrapped around a toothpick.
Use a thin brush or toothpick to add white highlights.
Small eyes for dolls are drawn in the same way. Only the squirrel can be left out. Draw an iris over the entire surface of the button.
Dry the paint well and cover the eyes with clear varnish. At least 3-4 layers. Dry each layer well.
Glue the eyelids and eyelashes onto the finished eyes. E. Lavrentieva and other masters have a detailed MK by century. I see no point in repeating myself.
- Here are other eyes for example:
Now you know how to draw eyes on a doll, or rather how I do it. I hope my master class is useful to you!
SHARE! "Cross" will not give bad advice!