Zero sandpaper is a fine abrasive sandpaper for rubbing surfaces when performing repairs and construction and finishing work. The use of one of the varieties of fine-grained, “zero” sandpaper is determined by the quality of the surface and the processing characteristics of a particular material. Smoothing out uneven surfaces, finishing sanding - for these and many other finishing processes it is necessary to use a zero.
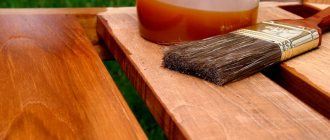
Working with sandpaper Source static-cdn2.vigbo.tech
How to make your own sandpaper
Sandpaper
- A coated abrasive used primarily to smooth surfaces and remove tiny particles from them. Sandpaper can be made from a variety of materials, such as aluminum oxide, silica and chromium oxide. Sandpaper was first called glass paper, and in the past people used shark skin as a form of sandpaper as well.
Nowadays you can also make your own sandpaper, but you need to pay a lot of attention when you do this project. It may take you a lot of time because you cannot figure it out right away, so this job requires some patience as well. Be very careful when you attach things together with glue and try not to run off more than necessary.
Step 1 - Wrapping and Marking the Paper
Wrap the sander belt with the paper and make sure to leave some space, about half an inch. Use a pencil to place the markings on the paper. Now turn the paper over and place the line marking in the corner of it. Measure the angle with the combination square first. Many belt sanders use an angle of approximately 32.5 degrees. You can use this angle as a guideline.
How and with what to sand putty on walls?
The quality of finishing work directly depends on the preparation of the wall surface. This process can be roughly divided into three working stages:
- rough leveling with plaster;
- thin coating with putty;
- sanding or polishing.
If rough leveling is enough for laying tiles, and putty and primer are enough for wallpapering, then for high-quality painting the surface of the walls must be perfectly prepared.
It is possible to achieve an absolutely flat plane and remove the most minor defects only by grinding. Lumps, scratches, roughness and unevenness are formed on the putty as a result of movements of the sharp edges of the spatula and at the junction of adjacent treated areas.
Is grinding always required?
A thin layer of glossy paint is not able to hide existing defects in the wall surface and must be sanded. But for laying ceramic or clinker tiles, as well as gluing, local grinding can be done, eliminating only obvious defects. These materials are thick enough to successfully mask minor scratches and imperfections.
Grinding tool
How to sand putty on walls? For sanding walls after puttying, three types of plastering tools are used:
- graters with sanding mesh;
- block and sanding sponges;
- hand grinders.
To better see wall defects, shine a bright light on it at an angle of 65-80°. The shadow will accurately show you the places of sagging, cracks, holes and other imperfections.
Graters with grout mesh
A grater for grinding putty is a hand tool in the form of a flat rectangular platform with a handle. On the short sides there are clamps for tensioning the mesh for grinding. It is offered for sale in three categories:
- No. 40-60-80 for rough leveling of starting putty compositions, as well as for processing large areas;
- medium roughness No. 100-180 for grinding the starting putty before applying the finishing putty;
- fine mesh No. 200-240-280 for sanding the last finishing layer.
The mesh numbers are determined by the grind size of the abrasive material applied to them. The main advantage of meshes when performing grinding is the reduced amount of dust that remains inside the cells of the braided tool.
Stone and sanding sponges
A block is the simplest available device for sanding putty. It is a piece of flat wooden beam, galvanized profile or a rectangular piece of polystyrene foam, wrapped in sandpaper for sanding walls after puttying.
As a type of whetstone, we can consider special grinding sponges supplied to our country from European and Chinese manufacturers. They are a parallelepiped made of rigid porous polymer, covered on 4 sides with abrasive material. Their use makes the work more efficient, but such a tool costs more than a grater or a handy block.
Hand grinders
The most common grinding machines are small “grinders” equipped with special round attachments. The abrasive material is made in the form of circles of sandpaper with Velcro glued to the back. Using hand-held power tools allows you to process a large surface area, but the quality will be average at best.
Grinding technology
After preparing the tool, you can begin grinding work. You need to sand each subsequent layer after it dries. Consequently, this operation is performed at least 2 times, on the starting and finishing layers of putty. In practice, this is at least 3 times.
What can replace sandpaper?
For many jobs, sandpaper has to be rolled onto a block. To grind small parts, it is easier to use a matchbox instead of a block. It is always at hand and it is very easy to attach the skin to it. A piece of the required size is placed on top of the open box, the edges are folded inward and the box is pushed back.
A travel soap dish can be turned into a sanding tool. Replacing worn out sandpaper with new one is a matter of a few seconds.
When sanding small parts with sandpaper, it is easy to damage the skin on the tip of your fingers. This can be avoided by placing the sandpaper on a block, bending the edges and holding it in a vice.
When sanding wooden and metal objects with a large surface, it is convenient to use a device made of two wooden blocks connected by a strip of leather. The sandpaper is secured with the sharp ends of nails driven into the top block.
Another way to secure the skin to a block. Insert one end of the sandpaper into the oblique cut, secure the other with a pushpin.
The easiest way to cut sandpaper (any base) is to use a nail. Its tip is drawn several times along the underside of the sheet, and then the desired piece is torn off. The edge is smooth and not stretched.
It is very convenient to sand large surfaces, such as floors, with a kitchen grater nailed to a wooden block. This device is more durable than simple sandpaper.
How to sand walls
We continue to publish articles on our website dedicated to wall surface treatment.
Today's review will be devoted to such an important issue - how to sand a wall. This is actually almost the final touch before hanging new wallpaper! So let's get started!
Content
- Why is wall sanding done?
- How to sand walls after puttying
- Which is better, sandpaper or mesh?
- Sanding mesh
- Sandpaper
- How to sand walls
- Sanding walls video
Why is the wall sanded after puttying?
All the repair work that we talked about earlier: plaster and putty refer to work on leveling the wall surface. Plastering processes are more coarse, puttying processes are more subtle. And then the final procedure of sanding the walls begins. Because even after finishing puttying, small roughnesses, bumps and pits remain on the surface of the wall, resulting from the use of a spatula with sharp edges.
Because of this, during puttying we recommend that you use a large spatula so that the leveling area of the wall structure is as large as possible. However, the joint areas are, in any case, quite noticeable in some places. As a result, upon completion of the puttying process, you must wait for it to dry completely (at least 24 hours) and begin sanding the walls.
Under no circumstances should you prime the wall after finishing the putty work! Otherwise, you will seriously complicate your life; sanding must begin after the putty!
How to sand walls after puttying
Now, let's start studying what will be useful to us to start sanding the walls .
Sanding walls is often done using a special sanding block:
In addition to this, for grinding you need to purchase a sanding mesh or sandpaper, and secure them before starting work on the block.
Which is better, sandpaper or mesh?
There is no clear leader in this confrontation. Typically, craftsmen use the tool they are more accustomed to. Therefore, you can try both options and evaluate which you like best.
Sanding mesh
The advantage of the sanding mesh is that during operation it is not subject to clogging with putty. Since the entire mesh area is perforated, all putty dust removed will escape through the holes. It needs to be changed when it visually wears out. For example, if in some areas it is torn or you notice that the sanding of the wall is not particularly high quality, replace the mesh with another one.
Most often, the mesh is supplied to hardware stores in ready-made sheets with dimensions suitable for the block, and you just need to insert it and begin the grinding process. However, we must not forget that the block can have different dimensions. As a result, when buying a mesh, immediately select a bar for it. In addition, let us remind you that the mesh costs more than sandpaper.
Sandpaper
During sanding, sandpaper tends to become clogged with removed dust and therefore you will be forced to change sandpaper much more often. It is necessary to understand that sandpaper, despite the fact that it costs less than mesh, is also not a cheap building material. It can be bought in absolutely different designs: square pieces, small rolls, large rollers. If you want to sand the walls using sandpaper, then you need to decide how you will cut it, taking into account waste savings.
Naturally, you don’t have to worry about cutting sandpaper, but buy ready-made sheets for your size of block, but this is a more expensive option! Our material also has such a parameter as grain size, so we recommend that you buy sandpaper to work in the grain range of 60-100. Since paper with a grain size of less than 60 is quite rough, and more than 100, it will quickly become clogged with putty during sanding and must be replaced many times.
One more tip. If you already have sandpaper with the required grain in your pantry, then naturally use it. No need to go to the supermarket to buy a net.
How to sand walls
The sanding procedure is much easier than, for example, plaster or putty. You just need to take a block, attach a sheet of sanding mesh or sandpaper to it using fasteners and start working.
You need to understand that sanding a wall is quite a “dirty” process! Therefore, before you start, take care to protect yourself, your belongings and other rooms from dust.
Now we install a mesh or sandpaper into the block and begin work. It is optimal to start sanding the wall from any corner and move in the opposite direction. Typically, specialists sand the walls from the ceiling to the floor in narrow strips (about one meter wide). Having reached the floor, they begin the next lane.
How to sand a wall? Take the block in your working hand and smoothly begin to move it over the surface of the putty with little pressure. Make movements: left-right, up-down. The main thing: make sure that in the area where the surface is already flat, there is no need to continue processing. Do not forget that excessive zeal can also harm our business, since you can remove all the putty down to the concrete, which is absolutely not necessary for us. We noticed that the fragment of the wall was even and smooth - we moved to the next one.
Cleaning the kitchen
If you have a cast iron pan at home that is starting to rust, this life hack can be very useful. Using a little sandpaper to sand away the rust can restore your cookware to its original appearance. This method will also help you easily remove some uneven surfaces on the pot or pan. It is recommended to work with gloves.
Advice from Novate.ru:
Sandpaper is excellent for removing rust and dirt from cast iron cookware. However, you should not use such an aggressive method to clean new dishes. It's better to start with less radical remedies: for example, using salt and vinegar. These two ingredients must be mixed until a slightly liquid paste is obtained, and then applied to the contaminated areas. Let it sit for a while, and then remove the plaque with the coarser part of the sponge or a non-metallic brush.
Other sanding materials
In addition to sandpaper, which is used for sanding, you can rub the finishing putty on the walls with other materials or devices. These include:
- Abrasive mesh - used for manual processing in the same way as sandpaper. It differs from sandpaper in that it does not become clogged with dust and lasts longer. The price of mesh is higher compared to sandpaper, but due to lower consumption and convenient use, the cost is justified.
- An electric paper grater is a device with a handle onto which sandpaper is attached and moves on shafts like a belt. The skin wears out more slowly, the processing process goes faster.
- An electric grater with a mesh is similar to the previous device, only an abrasive mesh is attached to it. It works due to vibration and displacement of the rubbing surface in different directions relative to the handle.
- An electric grater that works using a rotating plane with an abrasive coating. Sandpaper or abrasive mesh is used.
It’s not difficult to figure out which sandpaper to use for grouting walls. Labeling the material will help with this. The most difficult thing is to achieve decent results. Mastery comes with time and experience.
It is better for a novice master to choose a manual grinding device. Sandpaper is much cheaper than other materials for grouting walls. And if you choose it correctly, then a good result will not take long to arrive.
When choosing which sandpaper to rub the putty with your own hands, you should opt for coarse-grained sandpaper marked from 120 to 180. For finishing sanding, fine-grained sandpaper with numbers from 220 to 280 is perfect.
Post Views: View statistics 8,279
Tidying up the bathroom
No matter what we do, over time the seams between the tiles tend to become so dirty that no means can remove them. If this problem has appeared in your life, you should try a radical cleaning remedy. To do this, take sandpaper, fold the piece in half, and then use the edge to lightly sand the seams. Care should be taken not to scratch the tile.
Sandpaper-zero
“Null” sandpaper is the most delicate sandpaper with the least abrasive coating. According to the international standard, such paper has a rating from P400 to P2500 and is used for final and ultra-fine grinding of coatings:
- P2500 (M5/N-00) has a grain size of 3-5 microns;
- P2000 (M7/N-01) – 5-7 microns;
- P1500 (M10/N-0) – 7-10 µm;
- P1200 (M14) – 10-14 microns;
- P1000 (M20/N-1) – 14-20 µm;
- P600 (M28/N-2) – 10-14 µm;
- P400 (M40/N-3) – 10-14 microns.
This is interesting! The grain size of the “zero” is so small that it is practically not noticeable to the touch.
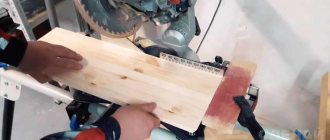
Monotonous but necessary work with “zero” Source usamodelkina.ru
Updating the cutting board
Over time, a wooden cutting board tends to become covered with knife grooves, darken and acquire an unpleasant odor. In the formed cuts, food debris can accumulate, which becomes fertile ground for the development of microbes. To refresh your cutting board and give it a good clean that regular detergent and sponge won't provide, you can lightly sand the cutting board with fine sandpaper to make it look like new. To make the board completely perfect, a non-toxic type of mineral oil can be used to coat the wood so that it does not absorb odors.
How to sand plaster without dust
- Jan
How to sand plaster without dust
Sanding is a type of finishing work that is performed after plastering. It is used for:
- smoothing out unevenness and imperfections on dried layers
- insulation of walls inside and outside
- giving an aesthetic appearance to rooms and buildings
- reducing moisture permeability
- fungus prevention
Types of grinding
Depending on the use of water, there are:
- Dry sanding method. It does not require re-wetting. The grinding process is carried out on well-dried areas.
- Wet method. Provides wetted and well-saturated surfaces with water. Re-grinding of such areas can be done with virtually no dust.
General rules for sanding surfaces after puttying
- The most important condition for performing quality work is lighting. Sanding should be done under the same light source. Refraction of light rays affects the uniformity and quality of the coating.
- The work begins with a detailed study of the site. It is necessary to place the light source very close, perpendicular to the surface, to examine the condition of the coating and all defects. Mark any imperfections with a simple pencil and sand them step by step.
- Check the polished plaster with a level.
- The choice of sandpaper for putty is important. If you do not have such information, you can contact your sales consultant.
If the predicted result is not achieved
Your first repair experience did not bring you the desired result. Mastery will come with time. Now go to construction companies, where they guarantee:
- unique finishing quality
- saving your time
- significant reduction in uncomfortable living conditions indoors (dust, dirt, etc.)
- inadmissibility of adjustments and alterations
Such companies have a variety of construction materials and equipment, as well as professional specialists.
One type of finishing equipment is grinding machines. They are necessary for mechanical processing of surfaces containing wood, steel, cast iron, and stone.
Scope of application of grinders
This tool is convenient and reliable. You can't do without it:
- construction industry
- rough finishing work
- installation of metal structures
- welding, fittings, electrical installation activities
- removing wallpaper remnants
- surface treatment after plastering and puttying
- repair of furniture, doors, various types of decor
Plant protection from pests
If you place flower pots in your garden or country house on top of a piece of sandpaper, they will be reliably protected from various pests, especially slugs. These moisture-loving lovers of living vegetation will not want to touch the paper, since it has a rough texture that makes them uncomfortable. Thanks to this simple life hack, slugs will not be able to get into the pot and damage your favorite flowers.
When is wall sanding done?
Sanding is the process of treating a wooden surface before finishing, painting or varnishing. Sanding removes defects and makes the wood smooth, allowing you to achieve an even paint layer; it is used in the following cases:
- When building a new house
. Sanding walls made of timber is done by waiting for the timber to dry, after the building has settled. During the work, irregularities that appear after the wood has dried are eliminated; work can be carried out at any time of the year. - During the restoration of an old house
. This grinding renews the color of the timber walls, after which they are re-coated with paint and varnish.
Walls are polished during the construction of a house and periodically during operation Source drevogid.com
Why do internal timber walls need to be sanded?
Sanding timber walls inside the house solves several problems:
- Prepares the surface for painting
. Before construction begins, any wooden material is treated with an antiseptic and fire retardant. Since most antiseptics are water-based, after getting wet and drying, the wooden wall becomes covered with lint. Sanding removes lint and simultaneously levels the wall, some of the crowns of which may protrude above the surface (sometimes by 1-2 mm). Smooth walls mean easier painting and savings on materials, which can be a noticeable amount if the house is large and the paint is high-quality. - Emphasizes the beauty of wood
. During operation, coatings become obsolete, so wooden walls require periodic treatment. Sanding removes the old paint layer and reveals the texture of natural wood. - Extends the life of the house
. Protective impregnations are absorbed deeper into the newly sanded wooden surface. This is especially true for buildings with irregular winter heating.
Walls made of timber often need tone equalization Source indeco.ru
See also: Catalog of construction companies that have a full production cycle
Video description
About correcting wall defects before sanding in the following video:
- Condition of the walls
. If walls made of profiled timber are covered with paints and varnishes, you will have to pay additionally for cleaning the old coating. It will also be more expensive to process walls with a large number of defects (jags, irregularities and resin). - Expected Result
. It depends on the customer how many passes will be made before covering the walls with wax, varnish or oil. - House height
. If the work requires the use of scaffolding, the cost of working at height will be higher. - Comprehensive services
. If you order sanding of corrugated timber walls together with painting, the work will cost less than separately.
The cost of sanding internal walls made of planed timber (profiled or glued) is:
- Sanding walls
. Standard processing includes two passes (first with coarse, then with fine sandpaper) and costs from 200 to 350 rubles/m2. - Polishing the walls
. From 170 to 250 rubles/m2. The surface is treated once. - Finishing
. It is carried out after applying wax or varnish. From 320 rub./m2.
The customer determines the degree of treatment of the internal walls Source roomester.ru
Useful tips
Sanding timber walls is a labor-intensive and painstaking process. To ensure high-quality and long-lasting results, the following rules are followed in our work:
- Timing
. Sanding is carried out after completion of the drying process (for profiled timber), before installing windows and doors, and before installing a clean floor and ceiling. The limitation is due to the dustiness of the work. - Preparing the walls
. Before sanding the timber inside the house, remove the resin that has appeared on the surface. The work is completely manual: the resin is removed with a scraper or other suitable tool, and the resin pockets are treated with a solvent. This moment is an important stage in preparing the walls for sanding - the resin can very quickly render the abrasive unusable, clogging its structure, and besides, the remaining resin will not allow the paint to lie flat on the wall. - Technique parameters
. A grinder used for processing timber walls must have a power of at least 1 kW. The operator, working on a weaker machine and trying to involuntarily speed up the process, can increase the pressure. As a result, grooves remain on the surface, which are not easy to remove.
An industrial hair dryer melts the remaining resin from a resin pocket Source starkwood.ru
- Working methods
. In order for sanding to proceed smoothly and give a high-quality result, the stroke of the sanding machine and the direction of the wood fibers must match. - Work planning
. Sanded wood quickly loses its freshness and darkens, which can affect the quality of the future paintwork. To avoid having to repeat sanding (and waste additional time and money), you should stock up on paint in advance.
Process steps
Sanding a house made of timber, when a dry surface is processed, including the ends, takes place in two stages:
- Rough grinding
. The walls are leveled using a belt sander or grinder with an abrasive wheel with numbers 40-60. At this stage, all significant defects are removed, and the surface is prepared for subsequent, finer processing. The attachment on the sander quickly becomes clogged with wood dust and needs to be replaced frequently. - Fine grinding and polishing
. To perfectly level the surfaces, treatment is carried out with a vibrating or orbital sander using a fine-grained abrasive (up to 100). For fine sanding, hand sanding is used using sandpaper (numbers 120-180). Alignment of corner joints is carried out manually, using a narrow chisel. Unprofessional processing can leave scratches and grooves that will have to be corrected with additional polishing. After fine sanding, the surface of the walls becomes smooth, pleasant to the touch and ready for subsequent painting.
Fine sanding of timber inside the house using a vacuum cleaner to collect waste Source nl.decorexpro.com