How to make scales at home
Sometimes a lot of different junk accumulates at home. This trash can be thrown away, or you can make very useful things out of it, for example, scales. In the kitchen, you often need to measure small amounts of ingredients for a complex recipe. If you are doing chemical experiments, then you cannot do without the exact weight of the substance.
Scales come in equal-arm, shoulder, lever and electronic scales. In order to make the first three types of scales, what you find at home is quite suitable: a clothes hanger, a ruler, a knitting needle from a broken umbrella, used lids and much more that, in principle, will not be useful to you. But the device of electronic scales is quite complex. In order to make electronic scales, you may need strain gauges, inductors, transformers and similar devices, which certainly don’t just lie around like trash.
We suggest you familiarize yourself with How to clean tiles in the bathroom: folk remedies
Equal-armed scales resemble a swing in appearance. So to make these you will need a straight shoulder bar. The role of this bar can be performed by an ordinary ruler, an umbrella knitting needle, or any other straight stick.
You need to attach bowls to the edges of the plank. For these purposes, you can use any two identical containers. These could be drink caps, metal canning lids, measuring cups, etc. Along the edges of these containers, you should make three holes equidistant from each other and attach threads, fishing line, and thin wire to them.
In the center of the strip, another strip should be glued (or welded) perpendicularly, only shorter. This arrow will show the balancing of the arms of the scales. You can even use a needle for these purposes. Your scales are ready, all that remains is to secure them on some kind of stand, for example, hang them on a hook on a vertically mounted rail.
Shoulder scales are good because they allow you to measure not only absolute weight, but also measure out the required amount, for example, of a bulk composition. The main difference between such scales and equal-arm scales is that the cups can move along the rail and be installed at different points relative to the suspension.
It is best to use a thin rack as a bar for such scales. You can also hang it on a hook. If the rail is very thin, then it is better to make a groove in the middle rather than a hole. Make a needle arrow there too, which will indicate the deviation of the scales.
From the suspension point in both directions, measure equal distances, numbering them as you move away. You can make notches at the marks so that the scales do not slide on the bar during weighing. The bowls are made in the same way as for equal-armed scales, only they are not attached to the edges of the bar, but are suspended. When weighing, inverse proportionality is used: L1/L2 = M2/M1.
Lever scales are also easy to use. In order to make them, you will need some kind of platform or tripod. Lever and cup for weight. A lever is attached to the tripod using screws, and a weighing cup is attached to one side of it. The other side of the lever is the scale arrow. By experience you establish weight divisions.
We invite you to familiarize yourself with 4 ways to remove rust from clothes
Kettlebells can be purchased at the store. Tablets that have a very clear weight indicated on the package can also serve as weights. In addition, you can use ordinary coins as weights, establishing their exact weight experimentally.
Homemade mechanical scales from improvised means
Sooner or later you come to the understanding that measuring everything by eye or in a measuring cup, and then wondering why you couldn’t get the desired result, is not right. If a long-established formula says to measure by weight, then you need to do so, and then the result will completely coincide with your expectations.
Let's think about where we can get ready-made scales. If you are a schoolboy or student, you can, for a little “thank you,” ask for (get it out, if it’s more convenient for you) a chemical scale. office, it will probably be the old Soviet bowl-shaped scales. Ask your friends, maybe someone uses them at work, but they are already broken, and you agree to repair them and keep them... If you didn’t find them for free, then take the money and go shopping. In medical equipment you will find pharmacy scales, in a hunting store you will find hunting scales. In any case, both will cost you a lot. You can try to find electronic scales in specialized stores or various online stores with delivery. For pyrotechnics, you will have enough scales with an accuracy of 0.5-1 grams and max. weighing limit 0.5 kg. Currently, amounts for such scales start at 50 euros, if you manage to find it cheaper, close this article and run for a product that you are unlikely to use more than a couple of times a month.
For the rest of you who want to earn those 50 bucks in one day of your time, instead of spending it in the store, I suggest you consider the following option of making your own bowl-shaped scales from improvised materials.
The following was found on the farm: 1) A box (cable channel), a piece 0.5 m long 2) A tall box (cake) for CDs (for 50 pieces) 3) Two sealing lids for glass jars 4) Strong threads 5) One bolt with a small section without threads, several nuts and washers
We disassemble the cable channel, we get two parts, one in the form of a ruler, the other in the form of the letter “P”. The first will act as a rocker, the other as a tripod. The tripod does not need to be made too high, it should be slightly shorter than the beam. Almost at the very top of the tripod, exactly in the middle, we drill a hole with the same diameter as the found bolt. Accordingly, the middle is located on the rocker arm and a hole is also drilled. Now they need to be fastened in such a way that they do not rub and rotate freely relative to each other. I did it this way: the bolt itself is firmly screwed to the tripod with two nuts, and the crossbar itself rotates freely with minimal friction in the unthreaded area between the two washers, with minimal backlash. If, with the tripod level, the crossbar has an advantage in one direction, then you just need to stick pieces of plasticine on the corresponding shoulder. Now let's move on to the stand. I was very lucky, since part of the box (our tripod) fits tightly onto the pin of the disk box. A hole is made in the transparent cover in which the tripod is held tightly and does not move around. The lid screws on as usual, and you can put a couple of heavy objects inside this box for greater stability. Let's move on to the bowls. Three small holes are made in the seaming lids in a circle for threads. At the same time, they should be at the same distance from each other. Bowls can be made from anything, from any lids, platforms, etc. Who will make like me from these covers, remember when you mark three holes, the distance between the points in a straight line is 7.5 cm.
A hole is also made along the edges of the crossbar on both sides. Next, it’s not difficult, take one end of the thread, thread it through any hole in the lid, then through the shoulder of the crossbar, another hole in the lid - again the crossbar, and so on. As a result, you will have a double thread going to each point. The end is tied with a knot on the crossbar. Adjust and set the desired height of the bowl, cut the second end of the thread from the spool and also tie it on the crossbar.
All this is done so that you don’t have to worry about cutting threads to achieve the same length. As a result, the lid itself can be adjusted as desired so that there is no distortion. Do the same with the second bowl. On my scales, the height from the bowls to the floor was 10 cm. The final balancing and balancing of the scales is done in a simple way - a small piece of plasticine is stuck to the end of the arm, which turned out to be lighter. Done, a minimum of work and you have a scale that, although large, is easy and quick to disassemble. They have an accuracy of 0.5 grams. This was tested as follows: one tablet weighing 0.5 grams was placed on each of the bowls, the scales naturally became balanced, then another tablet of the same weight was placed on any of the bowls, as a result of which the bowl completely dropped to the floor. Personally, it’s enough for me, perhaps the same result would have been if I had put in half a tablet, then the scales would have generally had an accuracy of 0.25 grams, I just didn’t check. And mind you, I didn’t even have to make markings on the tripod and an arrow on the crossbar and monitor its deviation; the indicator that the bowl, weighing half a gram more, completely lowered to the floor was enough.
IMPORTANT: The maximum accuracy you will achieve depends on the coefficient of friction between the support and the crossbar; the smaller the area of contact and friction, the easier it will be for the crossbar to change its position, that is, to react to the slightest changes in weight on any of the bowls. On medical scales, the crossbar is not held on by a bolt, as I did, but approximately in the following form:
That is, as you can see, the crossbar hangs on the tip of the tripod, with a minimum number of points of contact.
How to work with scales: To work with scales, you need to prepare weights and small weights of different weight ratings. You can take any small objects or even prepare them yourself from plasticine and measure their weight on some kind of control scales, preferably electronic ones. If this is not possible, then you can use certain items if you know their exact weight, that is, indicated somewhere by the manufacturer. These can be various tablets (the weight of one tablet is often written on the packs), coins of different denominations (on the Internet you can find information about how much any coin weighs) and other things that you come across. Weights are placed on one of the bowls with a total weight equal to how much powder you need to weigh, and then the powder itself is poured onto a piece of paper on the second bowl until the scales are completely balanced. That's all, I hope the material is described in sufficient detail and no one will have any questions, but if there are any, I will be happy to answer.
Source vzrivpaket.ru
Equal-armed scales
Equal-armed scales resemble a swing in appearance. So to make these you will need a straight shoulder bar. The role of this bar can be performed by an ordinary ruler, an umbrella knitting needle, or any other straight stick. You need to attach bowls to the edges of the plank. For these purposes, you can use any two identical containers. These could be drink caps, metal canning lids, measuring cups, etc. Along the edges of these containers, you should make three holes equidistant from each other and attach threads, fishing line, and thin wire to them.
Equal-armed home scales
Equal-arm homemade scales for measuring grams are similar to a swing; to perform them you need a level bar (ruler, knitting needle, level stick, etc.). “Cups” (small plastic bowls or bottle caps) are attached to the edges of the bar.
Three holes are punched in them at equal distances, into which a thread or fishing line is attached. A small strip is attached perpendicular to the center of the plank. It will play the role of an arrow that fixes the balancing of the shoulders. The scales are then secured to the stand and used effectively for their intended purpose.
Equal-arm scales, known to everyone from school, are made from a pencil, fixed with a heavy textbook on the edge of the table, and a ruler hanging on it in the form of a swing.
IMPORTANT!
The pencil should be positioned exactly in the center of the ruler. This is called determining the center of gravity.
An object of a certain weight is placed on one end of the ruler, and the load to be measured is placed on the other end. In this way, you can weigh oversized objects whose weight does not exceed 50 g. Due to the fact that there is a danger that the ruler will break. There is also a danger that it will turn over and the bulk materials under study will scatter.
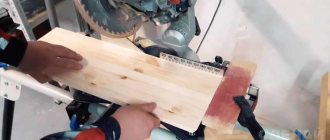
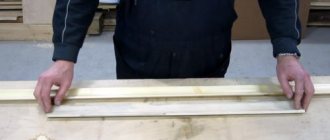
Using the indicated principle, simple scales are made for larger and heavier objects. Instead of a ruler, use a board, and instead of a pencil, take, for example, a log.
Simple equal-armed scales
We all once made this option from an ordinary school ruler and pencil in physics lessons. But over time, for some reason, many people forgot about them. And in vain, because it’s easy to make such scales, and the result will be accurate.
We suggest you read: How to clean bathroom tiles
The main task is to position the pencil clearly in the center of the ruler. When the ruler lies perfectly flat on the pencil, you have found the center of gravity. Now you need to place an object on one edge of the ruler, and on the other - a load with a previously known weight. Small objects and bulk materials are weighed on a ruler. Their weight should not exceed 50 g. Otherwise, the ruler will break.
Using this principle, you can also make scales for heavier objects. The ruler needs to be replaced with a wide board, and the pencil with a cylindrical beam of suitable diameter.
But still, this option is not particularly convenient, especially for bulk materials, since there is always a risk that the ruler will turn over.
Setting up lever scales:
To set up a lever scale, you will need a set of weights, or something with a strictly defined and pre-known exact weight. The pointer position without the weight will be your zero reference. Next, simply place the weight on the cup and see how much the scale arrow deflects - this will be your maximum measurement limit. You can maneuver the measurement limits by changing the force of the counterweight (use larger or smaller counterweights)
PS: I tried to clearly show and describe non-tricky tips. I hope that at least something is useful to you. But this is not everything that can be imagined, so go ahead and study the site
Shoulder weighing devices
Such devices are good because they can be used to measure not only any weight, but also measure out the required amount of bulk compositions.
Important! They differ from equal-arm scales in that their bowls are able to move along the rail; they can be installed at any point relative to the suspension.
- It is better to make a bar for them from a thin strip. It can be hung on a hook if desired.
- If you only have a thin strip, then it is recommended to make not a hole, but a groove in the middle. A needle arrow is also made here, indicating the deviation of the scales.
- Then it is necessary to measure equal distances on both sides of the suspension point, numbering them as they move away.
- It is better to make notches at these points so that the bowls do not slide on the bar when weighing.
Important! You can make bowls the same as we described earlier, only here they are not attached to the bar, but suspended. Weighing on such scales is carried out using inverse proportionality.
How to make scales in nature
Sometimes in nature there is a need to weigh something. And this task is achievable. After all, you can make scales with your own hands from almost any available materials. You just need to apply a little imagination.
So, in order to weigh small objects, you can make scales from an ordinary plastic bottle. To do this, you need to make vertical slits closer to the neck and insert an even stick or straw into them. Tie either the object to be weighed and a load, or two bottle caps, to the ends on threads or ropes. Put what you need to weigh in one of them, and the counterweight in the other.
It is clear that with the help of such a device it is impossible to find out the mass of something heavy. But you can apply this principle using larger things.
You can make your own scales from a thick stick, which is tied to a tree or crossbar by the middle. It should hang perfectly straight. Then the object to be weighed is tied to the ends of this stick on one side and a load on the other. The only difficulty in the forest may arise from finding a load of known mass. Bottles of water, a bag of cereal, and cutlery are perfect for these purposes. It is unlikely that in nature you will need to weigh something with an accuracy of a gram. It is quite easy to find out the approximate weight with such scales. And the accuracy with a well-chosen load can reach an error of only 50-100 g per several kilograms.
Simple lever scales
There is another good way. In order to make lever scales, you will also need available materials. Use clothes hangers, hanging either cups or bags from them on both sides. A load whose weight is known is placed in one of them. Many, by the way, are wondering where to get it. Bags of sugar, salt, cereals, and so on are perfect for these purposes. You can pour water into a container or put any other household item with a known mass. You don't have to use special weights to weigh the item you need. For small objects, coins or pieces of wire can serve as a counterweight. Some people use regular tablets, since their weight is always indicated on the package.
Homemade scales for fairly large items
You can also weigh objects up to 100 kg at home or on the go.
To complete them you will need:
- steelyard,
- two very strong bars 1.5 and 1 m long
- strong twine
- cargo hook
The design itself is presented in the diagram below.
According to the diagram, it is clear that the values of 10 and 100 cm were not chosen casually. The data from the steelyard will need to be increased 10 times. It is necessary to accurately position the hole on block 1. You can use a clamp (a) to hang the object. Moving the clamp with a known weight along bar 1, you should determine its correct location and secure it in this place with a nail. If you need scales for loads over 100 kg, then the bars for the structure need to be longer. But the second one is always 10 times larger than the first one (for example, 15 and 150 cm, then the load should supposedly weigh up to 150 kg), and the steelyard indicators are multiplied by the length of the first one (in the example, by 15, respectively).
Toy Modeling construction How to make toy scales Paper Cardboard Glue
Well, our scales are ready! If you did everything correctly, then you should get something like this:
Hi all! Today I will tell you how to make toy scales. We will need:
-Glue (I have a Globe) and tape
-1 matchbox
-2 sheets of cardboard
-Marker (preferably red)
1. Take the plate and lift it and glue it with glue on the back side to the colored side of the cardboard (if the glue doesn’t hold, seal it with tape on top). This will be a screen with buttons.
2. We lie down so that the screen is at the top. Take the second sheet of cardboard and place it under the long part of the plate and secure it with tape at the top and bottom.
3. Glue the matchbox to the lower right corner of the 2nd sheet of cardboard. This will be the machine from which the sticker comes out.
4. Using a marker under a ruler, draw a square on the bottom cardboard, there will be numbers there.
5. In this square we now draw the numbers from 1 to 9, and 0.
6. Wait until everything glued is completely dry.
And now I will tell you how to make buttons. We will need:
-Pencil and colored pencils
1. On paper under the ruler, draw squares measuring 3x3 cm, about 10 pieces.
3. Now, with a colored pencil or felt-tip pen, draw something in the middle, such as cookies, candy, fruit, whatever.
4. Under the picture, write the name in a different color, for example, tomato.
5. And the last thing: in the upper left corner we write a number in a different color, for example, 12.
6. Glue the finished button onto a metal screen.
That's all! And the last thing I’ll tell you is how to make a sticker. We need: everything is the same as for buttons.
1. Cut out several rectangles measuring 4.5x3 cm on paper.
2. In the middle, write a name with a felt-tip pen, for example: orange(vag).
3. Under the name we write, price per 1 kg, for example: 13.75 per kg.
4. On the contrary, we write how much was taken.
5. Last thing: put the sticker in the matchbox.
How to play: Place your toy food on the cardboard to the right of the numbers. then we press the button on the screen, take the button out of the matchbox and stick it on the bag of food. Everything is very, very simple.
Thank you for your attention! Have a good game.
Source
How to make scales on the go
Many people have faced the need to measure the weight of something in nature. To solve this problem, you can make scales from plastic bottles. Identical vertical holes measuring 1 cm by 5 cm are cut in the sides of the bottle from the top closer to the neck. A stick or straw is inserted into them.
Either the object being weighed and a load of known mass, or two bottle caps are tied to its ends with strings. The object being measured is placed in one, and the counterweight in the other. It is logical that this device will allow you to weigh only light objects. But the principle itself is perfectly applicable in the case of large objects.
To do this, find a thick, strong stick, hang it by the middle to a strong knot or to a crossbar.
IMPORTANT!
The stick should hang very evenly.
An object to be weighed and a load of known mass are tied to it from different sides. Its role can again be played by bottles of water, unopened packages of cereals/salt/sugar. It is not difficult to measure the approximate mass in this way.
Examples of homemade lever scales, how to make lever scales:
In order to make a lever scale, all you need is: a platform, a tripod (can be made of wood or plexiglass), and a lever (it can be cut from a sheet of iron), and, of course, cups for the weight. The design of this kind of scales is so simple (as is the principle of their operation) that only separate explanations are needed in Figure No. 1.
Figure No. 1 – Design of lever scales
Figure No. 1 shows that the platform has set screws - they are necessary to level the scales (by screwing or unscrewing them) - this is important for weighing. The scale should be level, and you can even attach a water level to your structure. I would also like to draw your attention to the so-called “stopper”, Figure No. 2.
Figure No. 2 – Sketch of some structural elements
A stopper in lever scales is necessary so that the counterweight does not fall, and you do not have to level them every time, in short, for ease of use.
Of course, if you wish, you can do without a stopper and counterweight - it is also convenient to use a design with an elastic band or a simple spring, Figure No. 3.
Figure No. 3 – Lever scales with an elastic band instead of a counterweight
But be warned! There is one difficulty - choosing an elastic band that is suitable in strength.
Making a housing for scales
We decided to make the body of the scales from PVC; for this we cut four rectangles from PVC measuring 20x5 cm (side walls), and the base of the scales measuring 20x20 cm. We fastened these parts together with glue.
But don’t rush to fix (fix) one of the sides because you still need to place buttons, LEDs and an LCD display on it. We used a plastic bowl on top of the scale body - we will put the items to be weighed in it. You also need to make sure that there is enough space between the load cell and the top of the scale body as the load cell will bend during the weighing process - for this we used bolts and nuts as shown in the following figure.
We then placed the LCD, LEDs and buttons on the front of the scale and connected them to the rest of the circuit with long insulated jumper wires. We then glued the front panel to the main body of the scale at a slight angle so that we could easily read the LCD display without bending over. After that, we installed the main power switch and finished assembling the scales.
Of course, you can make the scale body as you wish, based on the materials available to you.
How to make your own electronic scales
Making electronic scales with your own hands is not the easiest task. First you need to carefully study the components and operating principle.
External components are:
- The weight processor is a separate block with a screen, keys, and microcircuits.
- A keyboard that should have working buttons “0” - “9”.
- Screen.
- Platform.
- A housing that hides all internal parts.
- Adjustable legs. For measurement accuracy, it is necessary to place the device level.
The measured load exerts pressure on it due to its gravity. Depending on the weight, the force of pressure of the measured object on the platform will change proportionally. Numerical values will be displayed on the screen.
The conversion of pressure data is facilitated by:
- Strain gauge
- Analog-to-digital converter ADC
- Microcontroller or processor.
Making scales with your own hands involves a careful study of each of the listed devices, their varieties, and a clear definition of what you need.
The heart of electronic scales can be considered a strain gauge. The strain gauge on which the strain gauge is based has a property that causes it to change resistance when deformed.
A voltage is sent to the strain gauge, and the output takes on a changed value, interacting with the strain gauge.
The analog-to-digital converter converts this voltage value into a digital code, which is then processed by the microcontroller. And the weight value is displayed on the screen. It happens in an instant.
There are several types of strain gauges:
- Single-point is built under the platform in the center. Used in trade, floor, packaging, technical and beam scales.
- Beam strain gauge. Intended, for example, for platform electronic scales.
- A rod strain gauge is required in particularly large scales - automobile, carriage, bunker. Used when weighing cargo from 20 tons.
- The S-shaped load cell is designed for overhead and crane scales.
- The double beam is used when weighing loads over 10,000 kg during transport weighing.
IMPORTANT!
When choosing strain gauges, take into account the further conditions of its use. For high-quality functioning, they must be reliably protected from moisture and dust. Also, before installing the strain gauge, carefully study the connection diagram. An undamaged, high-quality wire must run from the strain gauge to the analog-to-digital converter.
Connecting multiple strain gauges is extremely difficult. If you want this connection to be guaranteed to be of high quality, it is better to entrust this task to a professional.
The platform is made of stainless steel. Its service life is unlimited, which makes it possible to work with it in an aggressive environment without consequences. An organization specializing in rolled metal can help with the production of such a platform.
The housing for desktop electronic scales is made of plastic, while the housing for floor-standing, industrial scales is, of course, made of metal. A qualified welder can make a housing for industrial scales. The body needs to be painted to protect it from corrosion.
When producing homemade devices, the goal is always to save money, but when making electronic scales with your own hands, there is a risk of losing wasted money if you do not approach the process seriously and thoughtfully. The costs of the components are quite high. It is worth reading the instructions very carefully.
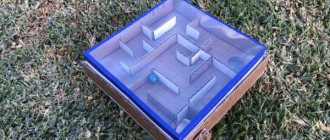
Do-it-yourself scales for the role-playing game “Shop”
Irina Serganova
Do-it-yourself scales for the role-playing game “Shop”
Good afternoon, dear colleagues! I present to your attention a master class on making scales for the store game .
At home I accidentally came across a box with weights from the times of the USSR.
And then I got the idea to make my own scales . For this I needed an ordinary shoe box, two round flower trays, colored paper , cardboard, an awl, scissors, a simple pencil, and blue tape.
I took an ordinary cardboard shoe box and covered it with blue tape to make blue scales .
Then I made a template for the top of the scale. I traced the template on cardboard, cut it out, and covered it with blue paper.
Next I started decorating the inside of the scale.
I printed out the numbers and cut out an arrow from black cardboard.
I glued the top of the scale to the cardboard lid of the box.
I added two cups for scales on both sides. You can glue them or sew them with a needle in the center, after first piercing holes in the scales with an awl.
At home there were dummies of vegetables and fruits.
I put everything together and got these scales , now I can take them to work. Children will have fun playing shop , naming vegetables, fruits and colors. I have my first junior group.
In the future, I plan to make weights from salt dough and paint them in primary colors: red, yellow, green and blue.
Thank you, dear colleagues, for watching! I will be glad if any of you find my master class useful.
“Cash register” for a role-playing game in a store. Children lose all life situations, be it a trip to the hospital with their mother, or to the store. To play the store we need a store that...
DIY attributes for the role-playing game “Shop” To gain gaming experience and the ability to develop a game plot, it is necessary to teach children the game. In play, the child shows initiative and creativity.
Summary of a role-playing game for the first junior group “Vegetable shop” Purpose: To develop initial skills in role-playing behavior. Materials and equipment: scales, cash register, models of vegetables and fruits, bag, wallet, suit.
Weights for homemade scales
Kettlebells can be purchased at the store. Tablets that have a very clear weight indicated on the package can also serve as weights. In addition, you can use ordinary coins as weights, establishing their exact weight experimentally.
Need to measure out the right amount of something once or twice? Because of this, you shouldn’t run to the store and spend extra money on accurate scales. In such a situation, you can get by with a simple method of making homemade lever scales based on the same plastic bottle.
So, what you will need for work: a bottle; wooden skewer 30 cm long; threads; a pair of bottle caps; matches; paper corner.
Watch the video of the scale making process
The paper triangle serves as an indicator of the balance of the cups. At rest, the top of the triangle is installed opposite the thread, or rather on the same line with it. You can use pieces of plasticine to adjust the cup weights. After aligning the cups, you can do test weighings, focusing on the approximate weights of different things.