In this article, I'll show you how I turned my manual height-adjustable desk into an automated IoT desk. I'll cover how to size and run the motors, and how to connect your IoT device to Google using Heroku as the public interface. In short, this project has two features. First: the table connects from Google Smart Home to Heroku using voice commands, and second: Heroku and the table itself communicate using the MQTT Internet of Things protocol. MQTT is a good solution for the Internet of Things and also for overcoming some of the other obstacles that we will have to face.
First of all, I will say that I did this project just to have fun. I hope you find the article entertaining and that it motivates you to take the time to do something of your own.
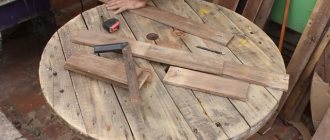
The same table
Hardware
The first and probably most difficult part of the job is redoing the table. In a previous life, the table had a detachable handle, it was located at the edge of the tabletop. At first I thought about attaching something to the handle hole without having to interfere with the design of the table. I purchased several drives to figure out how to attach the motor to the table, but to no avail. Then an idea appeared: a rod running the length of the entire table, which would connect its legs so that they would lower and rise at the same time. If I attach a suitable drive to the rod, then I can use a belt to connect the rod and the motor. It would also be possible to equip the table with a motor without interfering too much with its design.
Advantages and features of adjustable structures
An adjustable table is a special design that has a mechanism that changes its height. Thanks to manual movement of the tabletop or the presence of a special electric drive, a seemingly ordinary piece of furniture can be used in different positions - both sitting and standing. The advantages of such a solution are obvious:
- With the help of a universal desktop, an office worker can alternate the positions of his body, because sitting all the time, as we know, is harmful to health.
- The problem of a mismatch between the worker’s build and the size of the desk is solved: due to his high stature, a person has to slouch, and due to his short stature, his neck is constantly in a tense state.
This model is also ideal for children. With its help, many hours of homework will not affect the health of the child's spine. The height is adjustable to suit the child's height, and the variable tilt angle allows you to maintain an even posture. Another advantage of a desk with height adjustment is its versatility. Over time, the baby will begin to grow, but the children's furniture will not have to be replaced with new ones - you just need to adjust the tabletop to the student's height.
The Importance of Torque
After ordering the drive and belt I needed, I started looking on Amazon for a high torque motor.
And - oh, miracle! — I found many suitable engines! Or so it seemed to me... Having bought a small motor, I waited about a month for its arrival from China. I was so excited when the motor finally arrived! I couldn't wait for the weekend to finally put everything together and have my motorized desk. Things didn't go according to plan. I spent the day cutting a hole for a rod in the metal paneling of the table. At that point I only had hand tools, so the process took longer than I expected. Towards the end of the day I finished assembling the table and was ready to try it out.
I turned on the motor, the voltage on my desktop power supply and... nothing happened. A few moments later, the motor began to rotate and grind the teeth of the purchased belt. I learned two lessons from this: the belt obviously doesn't do the job, and "High Torque Motor" doesn't mean "I can lift anything." Second lesson: you need to look at the size of the motor compared to your fingers. Mine turned out to be tiny!
On the left in the photo is the motor and belt. At the top right is a motor attached to the table (you'll see more about what's going on later). Bottom right is the motor in position on the table.
How to determine the optimal height
When working at a desk, it is very important to be in the correct position, because the condition of the human body depends on it. If the posture is incorrect, blood flow is disrupted and a strong load is placed on the spine, which leads to its curvature. As a result, fatigue appears and ability to work decreases. This is why it is so important to customize the individual height of the tabletop, taking into account the specifics of your activity:
- When writing. Your back should be straight, slightly touching the back of the chair. If you lean too far back, increased stress will be placed on your neck, and if you lean forward, it will put more strain on your spine. There must be a small distance between the table and the body of the person sitting; the elbows should be completely on the surface (this will relieve tension from the hands). Bend your legs should create a ninety-degree angle, completely touching the floor.
- When working at a computer. Determining the optimal height is simple - just look at the center of the monitor: if your head is tilted down, you need to raise the tabletop; if your eyes are not looking straight, then lower it up.
- While reading. The book should be at a distance of 35-45 centimeters from the eyes. You need to keep your head level. You should not tilt it back or tilt it forward too much, as this will increase the load on your neck. Doctors recommend reading in a position at an angle of 135 degrees, while leaning back in a chair, so blood circulation is not impaired and the spine does not experience discomfort.
It is better to avoid standing cross-legged - it disrupts blood flow and leads to various diseases, including the development of varicose veins.
For people who spend a lot of time at a desk, regardless of their type of activity, orthopedists recommend adhering to the Sit & Stand concept, that is, alternating sitting and standing postures:
- In the first case, the optimal vertical position of the back: the angle between the spine and the hip joint, the knee and hip joints should be 90 degrees.
- In the second, the tabletop should reach the person’s belt or waist. You need to bend your elbows and place them on the table surface: if they form an angle of 90 degrees, this is the optimal height, if not, it needs to be adjusted.
For an adult with a height of 170-185 cm, the optimal table height will be 70-80 cm. For short people below 160 cm, this parameter should be about 60 cm. For those above 190 cm, furniture is often made to order and reaches 85- 90 cm.
The design with adjustable dimensions is optimal for children. Since the child’s body is constantly growing, the level of the tabletop can be adjusted to suit his current growth. It is important that the student sits straight, without bending his torso, and his head is slightly tilted forward. The legs should rest on the floor with the entire foot, bend at the hip, knee and ankle joints at right angles. Your back should rest on the back of a chair or armchair, and your hips should occupy approximately 2/3 of the seat.
Suitable motor
To select the appropriate motor, it was necessary to calculate how much torque was required to raise the tabletop.
I was surprised at how easy it was to do. Torque is force multiplied by the length of the lever arm. Well, I had the lever arm (this is the handle of the table), I just needed to calculate the force that would easily turn the lever arm. I loaded the table by strapping a milk jug to the handle and gradually added water to the jug until the lever began to rotate. Turning the handle up with the jug filled, I made sure that the weight easily turned the handle. I found out that the lever arm length is 11 cm and the required force is 4 lbs. Substituting these numbers into the formula, I found out that the motor must produce a torque of at least 19.95 kgf.cm. And he began to look for him.
I decided to redo the table permanently. I knew that the rod passing through the middle of the table was hollow. By looking for a twin shaft motor, I could cut the rod and reassemble it with the motor in the middle. By purchasing two motors with a torque of 20 kgf.cm, I ensured that there was enough torque to lift the table.
On another fine Saturday, I disassembled my table into four parts, filing the motor shafts so that they could be used when assembling the rod. I made more holes in the metal to accommodate the motors. This time there was no belt: the motors were connected directly to the rod, the holes were quite large. As evening wore on, I reassembled the desk and loaded it with office supplies.
The top two photos are the motors fully installed on the table.
The two bottom photos are of an integrated rod that runs along the length of the table with the help of motors. I connected the motors and connected them to the power supply. When I turned on the power, I saw the table move! This time I was more confident because I had chosen the correct motor sizes. I doubled the engines power just to be sure, but it was amazing to see them moving!
However, let me clarify that the table was slow. I made a video to show a friend how the table works, but he had to turn on the time acceleration on the video so as not to watch 5 minutes of the table changing the position of the tabletop.
Materials
In order to reduce the cost of the design, some materials, in particular metal corners, were purchased at scrap metal collection points. To make the machine, the author used the following materials:
- Metal corners.
- Low speed 2 kW electric motor.
- Metal sheet 7 mm thick.
- Two pulleys.
- Four U-shaped channels with welded bushings 60 mm long.
- Two U-shaped channels 620 mm long.
- Drive belt.
- Saw blade shaft.
- Saw blade.
- Four sprockets from the rear wheel of the bicycle and bushings with internal thread M 10.
- Four studs with a countersunk head, 120 mm long and external thread M 10.
- Four locknuts with internal thread M 10.
- Bicycle chain.
- Fastening elements.
- Engine protective casing against sawdust made of galvanized sheet.
- External cladding made of galvanized steel.
Turnovers are important. Final version
I finally realized that it all comes down to two things: torque and RPM.
It was necessary to find a motor with a sufficient number of revolutions at an already known torque. It wasn't that difficult. Although I did not find a dual shaft motor, I did find a right angle gearbox that converts a single shaft motor into a dual shaft motor.
Long story short, the next month was a month of waiting for the transmission from China, and the Saturday after the wait I had a table that moved at the right speed.
The last motor itself is on the left, and the installed one is on the right. A little hardware and a lot of software.
I wasn't happy with the huge power supply sitting on my desk just to control the height of the tabletop. In addition, in order to change the position of the table from one to another and back again, I swapped the wires. A small problem, but the design was made to ideally just press a button and have several height presets.
Requirements for a homemade table
In production conditions, furniture is tested for compliance with the quality guarantee and recommended standards. When working independently, the master himself monitors the compliance of new furniture with safety requirements:
- Sufficient strength. Any furniture, even decorative, must withstand the slightest load. It is especially important to check the strength of fasteners and joints on dining and student tables.
- Environmental safety of the materials used. You should not build a table from materials containing harmful resins or toxic impurities. Also, such compositions cannot be used for decorative processing.
- Moisture resistant. If the table being manufactured is intended for eating and preparing dishes, care should be taken to ensure high-quality and timely impregnation of the surfaces with appropriate compounds.
- Mobility, compactness, possibility of transformation. The presence of such qualities will only play into the hands of owners of small apartments, houses, and summer cottages. After being used for its intended purpose, the folding table can be stored in the pantry.
Article on the topic: DIY transformable bed table
In the process of independent work, it is important to strictly follow the prepared drawing and plan, because the quality and possible service life of the future product directly depend on this parameter.
Bluetooth
The first solution was to add Bluetooth to the table.
After all, it seems like almost every device in the house has Bluetooth, and the phone seems like a convenient control interface for something like my desk. So now I bought a motor controller board, a Nordic NRF52 Bluetooth board, distance sensors and started messing around with the controller firmware.
At the end of the article I will leave links to the software and firmware that I wrote for the project. Feel free to comment on the code: I don't do firmware professionally and would like some guidance.
As a quick introduction, the ESP32 is written in C++ using Arduino libraries to interface with the BLE Terminal app on the phone. Installing and configuring BLE is quite complex. First you need to create all the characteristics for the values that you would like to control via BLE. Think of a characteristic as a variable in your code. BLE wraps a variable in many handlers to get and set the value of that variable.
The characteristics are then packaged into a service with its own UUID, which makes the service unique and identifiable from the application. Finally, you must add this service to the advertisement payload so that your service can be discovered by the device. When a remote device connects to your service and sends data via characteristics, the table recognizes that the user wants to adjust the height to a different preset and begins to move.
To adjust the height, the tabletop has a TFMini-S LiDAR sensor built into the bottom that determines the current height. It's a funny sensor: it's called LiDAR, but it's actually a laser. It uses optics and an LED to determine the flight time of IR radiation. One way or another, the sensor determines the height of the table. The control board then detects the difference between the current height and the requested height and starts the motor, which rotates in the desired direction. Some major parts of the code are below, but you can see the entire file here.
void setup() { Serial.begin(115200); Serial2.begin(TFMINIS_BAUDRATE); EEPROM.begin(3); // used for saving the height presets between reboots tfminis.begin(&Serial2); tfminis.setFrameRate(0); ledcSetup(UP_PWM_CHANNEL, PWM_FREQUENCY, PWM_RESOLUTION); ledcAttachPin(UP_PWM_PIN, UP_PWM_CHANNEL); ledcSetup(DOWN_PWM_CHANNEL, PWM_FREQUENCY, PWM_RESOLUTION); ledcAttachPin(DOWN_PWM_PIN, DOWN_PWM_CHANNEL); state_machine = new StateMachine(); state_machine->begin(*t_desk_height, UP_PWM_CHANNEL, DOWN_PWM_CHANNEL); BLEDevice::init("ESP32_Desk"); ... BLEServer *p_server = BLEDevice::createServer(); BLEService *p_service = p_server->createService(BLEUUID(SERVICE_UUID), 20); /* ——————- SET HEIGHT TO PRESET CHARACTERISTIC ————————————— */ BLECharacteristic *p_set_height_to_preset_characteristic = p_service->createCharacteristic(...); p_set_height_to_preset_characteristic->setCallbacks(new SetHeightToPresetCallbacks()); /* ——————- MOVE DESK UP CHARACTERISTIC ———————————————- */ BLECharacteristic *p_move_desk_up_characteristic = p_service->createCharacteristic(...); p_move_desk_up_characteristic->setCallbacks(new MoveDeskUpCallbacks()); /* ——————- MOVE DESK UP CHARACTERISTIC ———————————————- */ BLECharacteristic *p_move_desk_down_characteristic = p_service->createCharacteristic(...); p_move_desk_down_characteristic->setCallbacks(new MoveDeskDownCallbacks()); /* ——————- GET/SET HEIGHT 1 CHARACTERISTIC —————————————— */ BLECharacteristic *p_get_height_1_characteristic = p_service->createCharacteristic(...); p_get_height_1_characteristic->setValue(state_machine->getHeightPreset1(), 1); BLECharacteristic *p_save_current_height_as_height_1_characteristic = p_service->createCharacteristic(…); p_save_current_height_as_height_1_characteristic->setCallbacks(new SaveCurrentHeightAsHeight1Callbacks()); /* ——————- GET/SET HEIGHT 2 CHARACTERISTIC —————————————— */ … /* ——————- GET/SET HEIGHT 3 CHARACTERISTIC ——— ——————————— */ … /* ——————- END CHARACTERISTIC DEFINITIONS —————————————— */ p_service->start(); BLEAdvertising *p_advertising = p_server->getAdvertising(); p_advertising->start(); xTaskCreate( updateDeskHeight, // Function that should be called "Update Desk Height", // Name of the task (for debugging) 1024, // Stack size NULL, // Parameter to pass 5, // Task priority NULL // Task handle); } There's a lot more going on in the file, but this code has enough context to understand what's going on. Note that we create and configure all BLE callbacks for all characteristics, including manual movement, setting and retrieving preset values, and most importantly, aligning the table according to the preset.
The image below shows the interaction with the characteristics for adjusting the table height. The final piece of the puzzle is the state machine, which knows the current table height, the user's desired height, and operates on those two values.
So finally I had a table that did everything I wanted. I could save heights to presets and retrieve heights from memory to set the desk to my favorite positions. I used BLE Terminal on my phone and computer so I could send raw messages to my desk and monitor its position. It worked, but I knew the battle with BLE was just beginning.
A bare bluetooth interface... All that remained at the moment was to learn how to write applications for iOS...
After all this, my wife said something that changed the whole project: “What if we made it controlled by your voice?”
In addition to being cool and adding a new device to the Google Assistant list, there was no need to write an application for iOS to control the table. And you no longer had to take out your phone to adjust the height. Another small victory!
How it works
Table for standing and sitting work with electric lift ergostol in working position
The main essence of this invention is clear from the name. The highlight is that the table can change and fix the height at any level due to its design. So, it consists of:
- two composite legs with guides;
Set of desk supports for standing and sitting work
Assembled supports with table frame
Changing the height of the tabletop
Adjustable table control system
Electric drive for lifting table supports for standing and sitting work
The table can also have an additional vertical board-screen for mounting a monitor. Depending on the modification, the product is supplemented with cabinets, niches, and a footrest. A common option is an addition in the form of a processor mount. For convenience, the monitor and system unit are screwed to the table.
Height-adjustable desk with attached system unit
Since you sometimes have to change the height, this addition is very convenient. For models with electric lift, there is a remote control that displays the lifting height in centimeters, which allows you to remotely adjust the lift.
The upper border of the monitor should be at eye level; for this you can install the monitor on a stand or a special bracket
The lifting weight varies from 55 to 200 kilograms depending on the base material and design. The system can have any shape and dimensions. It all depends on the parameters you need. If you are fascinated by this invention and decide to purchase it, pay attention to the existing variety of models.
Ergostol table height-adjustable with electric drive
High-quality organization of a schoolchild’s workplace (growing desk + orthopedic chair) allows the child’s body to be in a natural position
Laptop table for standing and sitting work
We can divide existing models according to several criteria. They will also become a checklist when choosing a product. So:
Table with mechanical height adjustment
The simplest form is a table with a mechanical lifting system without additions. Its cost will be within 14 thousand Russian rubles. If you want a table with an electric drive and additional functions, expect to spend from 30 thousand rubles on it.
Electrically adjustable table
Adding IoT
Now let's talk about upgrading the table to voice control via Google Smart Home and how to connect it with Wi-Fi.
Adding Wi-Fi was easy enough. I replaced the Nordic NRF52 microcontroller with an ESP32 with built-in WiFi. Most of the software was portable because it was written in C++, and both devices could be programmed using Platform.IO and Arduino libraries, including tfmini-s, which I wrote to measure the current height of the table.
Below is the architecture of the table interaction system with Google Smart Home. Let's talk about the interaction between me and Google.
So, Bluetooth was turned on. It's time to figure out how to interact with Google Smart Home. This technology controlled the home using Smart Home Actions. What's interesting about its actions is that the service acts as an OAuth2 server, and not as a client. Most of the work done on the server involved implementing an OAuth2 Node.js Express application that reaches Heroku and acts as a proxy between Google and my desk.
I was lucky: there was a decent implementation of the server using two libraries. The first library, node-oauth2-server, was found here. The second express-oauth-server library for Express connectivity was found here.
const { Pool } = require("pg"); const crypto = require("crypto"); const pool = new Pool({ connectionString: process.env.DATABASE_URL }); module.exports.pool = pool; module.exports.getAccessToken = (bearerToken) => {...}; module.exports.getClient = (clientId, clientSecret) => {...}; module.exports.getRefreshToken = (bearerToken) => {...}; module.exports.getUser = (email, password) => {...}; module.exports.getUserFromAccessToken = (token) => {...}; module.exports.getDevicesFromUserId = (userId) => {...}; module.exports.getDevicesByUserIdAndIds = (userId, deviceIds) => {...}; module.exports.setDeviceHeight = (userId, deviceId, newCurrentHeight) => {...}; module.exports.createUser = (email, password) => {...}; module.exports.saveToken = (token, client, user) => {...}; module.exports.saveAuthorizationCode = (code, client, user) => {...}; module.exports.getAuthorizationCode = (code) => {...}; module.exports.revokeAuthorizationCode = (code) => {...}; module.exports.revokeToken = (code) => {...}; Next comes setting up the Express application itself. Below are the endpoints required for the OAuth server, but you can read the full file here. const express = require("express"); const OAuth2Server = require("express-oauth-server"); const bodyParser = require("body-parser"); const cookieParser = require("cookie-parser"); const flash = require("express-flash-2"); const session = require("express-session"); const pgSession = require("connect-pg-simple")(session); const morgan = require("morgan"); const { google_actions_app } = require(“./google_actions”); const model = require(“./model”); const { getVariablesForAuthorization, getQueryStringForLogin } = require(“./util”); const port = process.env.PORT || 3000; // Create an Express application. const app = express(); app.set("view engine", "pug"); app.use(morgan("dev")); // Add OAuth server. app.oauth = new OAuth2Server({ model, debug: true, }); // Add body parser. app.use(bodyParser.urlencoded({ extended: false })); app.use(bodyParser.json()); app.use(express.static("public")); // initialize cookie-parser to allow us access the cookies stored in the browser. app.use(cookieParser(process.env.APP_KEY)); // initialize express-session to allow us track the logged-in user across sessions. app.use(session({...})); app.use(flash()); // This middleware will check if the user's cookie is still saved in browser and user is not set, then automatically log the user out. // This usually happens when you stop your express server after login, your cookie still remains saved in the browser. app.use((req, res, next) => {...}); // Post token. app.post("/oauth/token", app.oauth.token()); // Get authorization. app.get("/oauth/authorize", (req, res, next) => {...}, app.oauth.authorize({...})); // Post authorization. app.post(“/oauth/authorize”, function (req, res) {…}); app.get(“/log-in”, (req, res) => {…}); app.post("/log-in", async (req, res) => {...}); app.get("/log-out", (req, res) => {...}); app.get("/sign-up", async (req, res) => {...}); app.post("/sign-up", async (req, res) => {...}); app.post("/gaction/fulfillment", app.oauth.authenticate(), google_actions_app); app.get('/healthz', ((req, res) => {…})); app.listen(port, () => { console.log(`Example app listening at port ${port}`); }); There is quite a lot of code, but I will explain the main points. The two OAuth2 routes used by the server are /oauth/token and /oauth/authorize. They are used to obtain a new token or refresh expired tokens. Next, you need to make the server respond to Google's action. You'll notice that the /gaction/fulfillment endpoint points to the google_actions_app object.
Google sends requests to your server in a specific format and provides a library to help process those requests. Below are the functions needed to communicate with Google, and the entire file is here. Finally, there is the /healthz endpoint, which I'll cover at the end of the article.
The /gaction/fulfillment endpoint uses a middleware called app.oauth.authenticate(), the hard work of running the OAuth2 server went into making this middleware work. It verifies that the bearer token provided to us by Google refers to an existing user and has not expired. The route then sends the request and response to the google_actions_app object.
Google sends requests to your server in a specific format and provides a library to help you parse and process those requests. Below are the functions needed to communicate with Google, but you can view the entire file here.
const { smarthome } = require('actions-on-google'); const mqtt = require('mqtt'); const mqtt_client = mqtt.connect(process.env.CLOUDMQTT_URL); const model = require('./model'); const { getTokenFromHeader } = require('./util'); mqtt_client.on('connect', () => { console.log('Connected to mqtt'); }); const updateHeight = { "preset one": (deviceId) => { mqtt_client.publish(`/esp32_iot_desk/${deviceId}/command`, "1"); }, "preset two": (deviceId) => { mqtt_client.publish(`/esp32_iot_desk/${deviceId}/command`, "2"); }, "preset three": (deviceId) => { mqtt_client.publish(`/esp32_iot_desk/${deviceId}/command`, "3"); }, }; const google_actions_app = smarthome({...}); google_actions_app.onSync(async (body, headers) => {...}); google_actions_app.onQuery(async (body, headers) => {...}); google_actions_app.onExecute(async (body, headers) => {...}); module.exports = { google_actions_app }; When you add a smart action to your Google account, Google will issue a sync request. This request allows you to find out which devices are available from your account. Next comes the polling request: Google queries your devices to determine their current state.
When you first add a Google activity to your Smart Home account, you'll notice that Google first sends a sync request and then a polling request to get a holistic view of your devices. The last one is a request that Google tells your devices to do something.
How to make it yourself
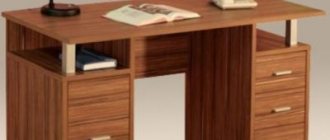
Many furniture companies offer cutting services for chipboard and MDF panels. Therefore, many people prefer to assemble their own furniture from prepared elements. In this case, you can create a table “for yourself” - of a certain size, with a drawer for fabrics, shelves for accessories, magazines. For production you will need furniture fittings (wheels, drawer guides, hinges), a table top, side panels, shelves of the required size. Stages of work:
- Assembling the body of the structure - using self-tapping screws, connect the tabletop, side and supporting panels. The back wall is nailed to the side supports using nails and a hammer.
- The wheels are screwed to the cabinet (using self-tapping screws).
- According to the drawing, shelves and drawer guides are fixed inside the table.
- The final stage is to attach the doors to the cabinet and screw the handles to the door panels. Drawers are inserted.
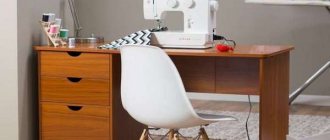
When drawing up a drawing, you need to take into account the wishes of the needlewoman and the area of the room. When assembling a table for cutting, it is recommended to add a lower shelf for rolls of fabric and drawers for cutting tools (scissors, knives). For a sewing machine that has a significant weight, it is advisable to build a special lifting mechanism into the table.
Ready-made drawings of various models with detailed dimensions can be found on specialized online resources.
If you clearly decide on the type of hobby or how to make money from handicrafts, it will not be difficult to organize a comfortable workplace. Initially, you can use a simple budget model of a sewing table. And if necessary, it’s easy to assemble a table with your own hands that satisfies all the whims of the craftswoman.
Table drawing, height is indicated with wheels
Assembly diagram of the main cabinet
Assembly diagram of a cabinet with drawers
This is what the finished design looks like
Assembled table with installed machine
“Features” (trait) of the Google Smart Home device
Google uses device features to provide user interface elements for managing your Google devices and to create voice control communication patterns.
Some of the features include the following settings: ColorSetting, Modes, OnOff, and StartStop. It took me a while to decide which feature would work best in my application, but later I decided on the modes. You can think of modes as a drop-down list where you select one of N predefined values, or in my case, height presets. I named mine "height" and the possible values are "preset one", "preset two" and "preset three". This allows me to control my desk by saying, “Hey Google, set my desk height to preset one,” and Google will send the corresponding execution request to my system. You can read more about the features of Google devices here.
Models with height adjustment: a little about design features
Adjustable desks are very popular today. They are purchased for furnishing offices of companies, institutions and other organizations. You can buy a wide variety of models of such furniture in specialized online stores.
In addition to increased functionality, adjustable models are extremely reliable. Their supporting structures are most often made of durable alloys or steel. To increase their wear resistance, metal elements are chrome-plated or coated with a special paint. The rigidity of the structure is enhanced by special devices: screens or traverses.
The tabletop is usually made of laminated chipboard, much less often - from natural wood (due to its high cost). Its configuration can be different: rectangular (the most common option), square, round and even oval.
Project in action
Finally, Google Smart Home and my computer started communicating.
Previously, I used ngrok to run the Express server locally. Now that my server is finally working well enough, it's time to make it available to Google at any time. This meant hosting the application on Heroku, a PaaS provider that makes it easy to deploy and manage applications. One of the main advantages of Heroku is its add-ons mode. With add-ons, it's very easy to add CloudMQTT and a Postgres server to your application. Another advantage of using Heroku is that it is easy to build and deploy. Heroku automatically detects what code you are using and builds/deploys it for you. You can find more information about this by reading about Heroku Buildpacks. In my case, whenever I push code to Heroku's git remote, it installs all my packages, removes all development dependencies, and deploys the application, all with a simple "git push heroku main" command.
With just a few clicks, CloudMQTT and Postgres were available to my application, and I only needed to use a few environment variables to integrate these services with my application. Heroku did not demand money. However, CloudMQTT is a third-party add-on for $5 per month.
I believe the need for Postgres needs no comment, but CloudMQTT deserves more attention.
Rules for placing a children's desk at home
Before installing a children's table, there are several factors to consider:
- It is best to install the table near a window to provide good lighting;
- The light should come from the side;
- For small rooms, you can choose corner models;
- If two children live in the room, you can purchase double models;
- The appearance of the table should harmoniously fit into the interior of the children's room to create a harmonious environment.
Convenience and comfort of use depends on the correct location of the table.
Rules of care
Caring for the table directly depends on what material it was made from. But in any case, it is necessary to regularly clean the table and inside the shelves, wipe off dust and prevent paint, glue or plasticine from getting on the countertop. The surface of the countertop can be cleaned with special means – polishes, which are suitable for a specific material.
From the Internet to a private network. The hard way
There are several ways to provide access to an application or, in my case, an Internet of Things device.
The first is to open a port on my home network to expose the device to the Internet. In this case, my Heroku Express application will send a request to my device using the public IP address. This would require me to have a public static IP as well as a static IP for the ESP32. The ESP32 would also have to act as an HTTP server and listen to instructions from Heroku all the time. This is a large overhead for a device that receives instructions several times a day. The second method is called "hole punch". With it, you can use a third-party external server to allow your device to access the Internet without the need for port forwarding. Your device basically connects to a server, which sets an open port. Another service can then connect directly to your internal device by receiving an open port from the external server. Finally, it connects directly to the device using this open port. The approach may or may not be entirely correct: I only read part of the article about it.
There's a lot going on inside the hole puncher, and I don't fully understand what's going on. However, if you're interested, there are some interesting articles that explain more. Here are two articles I read to better understand hole punching: Wikipedia and an MIT article written by Brian Ford and others.
We make a height-adjustable table with our own hands for schoolchildren
If your child has gone to school, then one of the most important problems that parents face is choosing a desk for the child. This question concerns furniture installed at home. We suggest you make a height-adjustable table with your own hands. It has a large number of advantages compared to other pieces of furniture for teaching lessons and the cost of this desk is quite low.
Important! Making an adjustable table will allow you to change the height of the tabletop from 57 to 72 cm, in increments of 5 cm. In addition, you can change the angle of the table from 0 to 90 degrees. The last indicator is theoretical, the adjustment step does not exceed 5 degrees.
The Ministry of Health recommends changing the angle of the desk depending on the purpose:
- for drawing use 0-5 degrees;
- letters - 10-15;
- for reading - 20-30 degrees.
Materials for work
To make a height-adjustable table with your own hands you will need:
- base;
- lifting mechanism;
- tabletop.
Important! The desk with an adjustable tabletop is made of planed wood. This material will need to be pre-polished, as described in the first part of our article.
Instructions for assembling the adjustable table:
- We purchase planed wood.
- We grind the surfaces.
- According to the design on the guide board, we mill a special groove. Its size is 1x1 cm.
- We round off all sharp corners on the structure. This is best done with a sander. Can be done with different types of sandpaper.
- We connect the adjustable tabletop. To do this we need threaded rods, nuts and washers.
- We attach the top shelf and footrest using confirmations.
- The lifting mechanism is manufactured according to the drawing.
- It is necessary to mill two grooves measuring 1x1 cm on the lifting mechanism. Four holes with a diameter of 2 cm should be drilled in the center of the surface.
- When assembling the structure, you need to insert the lifting mechanism into the base, then secure the tabletop. This is done using studs, nuts and bolts.
The height-adjustable table is ready!
From Internet to Private Network via IoT
I wasn't very happy with these decisions.
I've connected a lot of smart devices in the house and never had to open a port on the router, so there was no port forwarding. Also, hole punching seems much more complex than what I'm looking for and is better suited for P2P networks. Upon further research, I discovered MQTT and learned that it is a protocol for IoT. It has several advantages such as low power consumption, configurable fault tolerance, and does not require port forwarding. MQTT is a publisher/subscriber protocol, which means that the table is a subscriber to a certain topic, and the Heroku application is the publisher of this topic. So Google contacts Heroku, this request is analyzed to determine the requested device and its new state or mode. The Heroku app then publishes a message to the CloudMQTT server deployed as an add-on on Heroku, instructing the table to move to the new preset. Finally, the table subscribes to the topic and receives the message published by the Heroku app, finally the table adjusts its height as requested! In the googleactionsapp file, you will notice that there is an updateHeight function that publishes one number in the MQTT topic for a specific device ID. This is how the Heroku app publishes a request to move a table in MQTT.
The last step is to receive the message on the ESP32 and move the table. I'll show some highlights of the code for the table below, and all the source code is here.
void setup() { Serial.begin(115200);
… tfminis.begin(&Serial2); tfminis.setFrameRate(0); ... state_machine = new StateMachine(); state_machine->begin(*t_desk_height, UP_PWM_CHANNEL, DOWN_PWM_CHANNEL); setup_wifi(); client.setServer(MQTT_SERVER_DOMAIN, MQTT_SERVER_PORT); client.setCallback(callback); ... } When the table boots up, we first start communication between the TFMini-S - the distance sensor - to get the current height of the table. We then configure the state machine to move the table. The state machine receives commands via MQTT and is then responsible for matching the user's request with the actual table height read by the distance sensor. Finally, we connect to the Wi-Fi network, connect to the MQTT server, and set up a callback for any data received on the MQTT topic we are subscribed to. Below I will show the callback function. void callback(char *topic, byte *message, unsigned int length) { ... String messageTemp; for (int i = 0; i < length; i++) { messageTemp += (char)message ;
} if (messageTemp == "1") { state_machine->requestStateChange(ADJUST_TO_PRESET_1_HEIGHT_STATE); } if (messageTemp == "2") { state_machine->requestStateChange(ADJUST_TO_PRESET_2_HEIGHT_STATE); } if (messageTemp == "3") { state_machine->requestStateChange(ADJUST_TO_PRESET_3_HEIGHT_STATE); } ... } The state machine logs the state change received in the MQTT topic. It then processes the new state in the main loop. void loop() { if (!client.connected()) { reconnect(); } client.loop(); state_machine->processCurrentState(); } The main loop performs several tasks: first, it reconnects to the MQTT server if it is not already connected. Then it processes all data received through the MQTT topic. Finally, the code executes by moving the tabletop to the desired location requested in the MQTT topic. That's all! The table is fully voice controlled and communicates with Google to receive commands!
Varieties of adult models
The choice of adult models is quite extensive. Height-adjustable desks are suitable for both sitting and standing positions. But depending on the purpose, such models may differ. The design for standing work provides high supports, a narrow tabletop and minimal functionality. If the employee sits most of the time, the furniture will have slightly different dimensions and have more varied functionality.
In addition, models are distinguished by the automation of their adjustment. The table can be mechanical or with an electric lift. In the first case, the height of the structure is adjusted using a handle, and in the second, thanks to an electric drive.
Mechanical, in turn, can be represented in two varieties:
- Stepped. This mechanism involves changing the height of the table by moving the tabletop into grooves that were previously installed at different levels. You can also put plugs in the holes on both sides of the supports and thus change the length of the legs.
- Screw. This mechanism provides a different principle of operation: the height of the table changes due to circular rotation of the legs.
You can make a table with a mechanical adjustment mechanism yourself, which will allow you to significantly save on an expensive purchase.
When choosing the right model for your needs, you should also consider the availability of additional options. If there are none, and the design provides only a tabletop with supports and an adjustment mechanism, such a table will cost much less. If convenience is a priority, you should pay attention to improved options - with a height control panel and built-in sockets, which will allow you to connect a computer or other office equipment without stringing wires across the room.
In addition, the structural features and functionality of the table may depend on its purpose:
- Writing. Such models often provide the ability to change not only the height, but also the inclination of the table top, which is very convenient for working with documents, but is not suitable for installing a computer. The design usually has a mechanical adjustment mechanism.
- Computer. Its main feature is its dimensions. The dimensions of the tabletop often provide space only for a laptop and mouse. The working surface can be folding and have movable elements: one half of the table is intended for installing a computer, the second for the seated person’s hand, on which he will rest. Stationary designs do not provide wide functionality and look like a standard table with a leg in the middle. Bedside models, in turn, are equipped with wheels for movement, side support and a rotating axis. They are made in C or L-shape.
- Office models. Office desks that change their height are the most functional representatives of the line. They are equipped with all kinds of shelves, sockets, footrests and other additional elements that make the employee’s work as comfortable as possible. However, there are often budget options - laconic tables without frills.
For working at a computer, the ideal desk would be a model with a built-in cooling system. With its help, you can prevent overheating of your portable device and extend its service life.
Latest notes
The last endpoint I didn't mention is the /healthz endpoint.
This is because Google expects a fairly quick response, and loading the Heroku app on every request doesn't work for me. I set up a ping service to ping the /healthz endpoint every minute to keep the service up and ready to respond. If you plan to do something like this, remember that it will use up all the free hours at the booth. Everything is fine now: this is the only application used on Heroku. Plus, for $7 a month, you can upgrade to Heroku's Hobby plan with always-on app support. Creating an IoT device involves a lot of overhead at the beginning. I designed the hardware, built the control circuit, configured the MQTT server, wrote an Express OAuth2 server, and learned how to interact with Google Smart Home through actions. The initial overhead was huge, but I feel like I've achieved a lot! Not to mention, the MQTT server, Express OAuth2 app server and Google Smart Home Actions can be used for another project. Smart homes are interesting to me, and I may try to expand my repertoire of IoT devices to include sensors that monitor what's happening around my home and report it via MQTT. Sensors for soil monitoring, temperature and light sensors will be very interesting to monitor and analyze.
What's next?
Countertop heights are now measured unreliably at best.
I use a generally working infrared distance sensor TFMini-S. It has been noticed that the height of the table changes slightly throughout the day as the ambient lighting in the room changes. I ordered a rotation angle sensor to count the rotations of the rod as it passes through the table. This should give me more precise movements at any time of the day. I also have access to a server that I host in the basement. On it I can explore my own Mosquitto MQTT server, Node-RED and Express OAuth2 applications if I want to host something myself. Finally, now all the electronics are right on my desk. I plan to organize the devices so that everything is nice and neat! Thank you for reading the article! For convenience, I provide all the links.
- Torque Calculator
- 90 degree right angle gear box
- BLE Terminal
- Platform.IO
- TFMini-S Arduino Driver
- Google Smart Home Actions
- Node OAuth2 Server
- Express OAuth2 Server
- ESP32 IoT Desk Server model.js
- ESP32 IoT Desk Server index.js
- ESP32 IoT Desk Server google_actions.js
- Google Smart Home Device Traits
- NGROK
- ESP32 IoT Desk Firmware
- Node-RED
- Heroku
- Heroku Hobby Plan
- Heroku Buildpacks
- Wikipedia Hole Punching
- MIT Paper on Hole Punching by Bryan Ford et al.
- C++ developer
More courses
- Data Science Profession Training
- Data Analyst training
- Profession Ethical hacker
- Frontend developer
- Profession Web developer
- Course "Python for Web Development"
- Advanced course “Machine Learning Pro + Deep Learning”
- Machine Learning Course
- Course "Mathematics and Machine Learning for Data Science"
- Unity game developer
- JavaScript Course
- Profession Java developer
- Data Analytics Course
- DevOps course
- Profession iOS developer from scratch
- Profession Android developer from scratch
Assembly of Levado tables
Assembly of the table pleases with its simplicity. Additional complex tools and two higher educations are not needed here - the foundation is assembled simply. It is enough to turn it upside down, raise the legs and fix them, after which you can mount the tabletop. Unless, if necessary, you will need to adjust the width of the base to the required one by loosening the bolts on the base.
Morgana sedum
To install the base, just remove and fix the legs
Installation of the countertop is carried out in a matter of minutes using VersaTop Clamps. The width of the base is adjustable: its edges are aligned with the edges of the tabletop and the fastening bolts are tightened until they click.
VersaTop Clamps
But you can do without VersaTop Clamps and attach the tabletop with ten screws and a screwdriver or screwdriver.
By default, the power supply is already fixed to the base, and the touch panel is mounted separately in any place convenient for the user. You can glue it with double-sided tape or fasten it with screws - both fastening options are included in the kit.
The power supply is already on the base
Afterwards the panel is connected to the power supply and configured. When you hold down the movement button and the “M” key, the table top will lower all the way in the “sitting” position. Next, you need to save the desired positions in memory, following the instructions.
The control panel is mounted where it is convenient for the user
By the way, it is possible to maintain comfortable positions for two users - this is convenient when you are not using the table alone, and you and your colleague are of different heights.
By the way, the warranty on the lifting mechanism is 7 years, and on the table base - as much as 15 years. Since the manufacturer is so confident in the quality of its product, then the user can be calm in this regard.
| Characteristic | Levado height adjustable table |
| Base color | matte silver |
| Tabletop color | white, gray, maple, oak, walnut |
| Tabletop size | 140/160/180 x 80 cm |
| Table top thickness | 2.5 cm |
| Lifting mechanism | 2 electric motors |
| Travel speed | 36 mm/sec |
| Voltage | 220-240 V |
| Height adjustment | 64 – 126 cm |
| Width adjustment | 122 – 182.9 cm |
| Load capacity | Up to 100 kg with tabletop |
| Recording capability | Yes, up to 4 positions |
| Noise level | 46-48 dB |
| Additionally | Cable channel, 2 holes ⌀60 mm |
| Price | i61 652/i61 971/i62 291 |
Anyone who has had to build something in their yard is faced with the lack of the necessary tools for the job. Factory versions of such machines are not cheap.
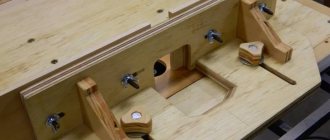
I offer for readers consideration a budget version of a modified circular saw design. Using this machine, you can not only make longitudinal or transverse cuts of lumber, but also saw grooves in the beams of a given depth for subsequent transverse connections.
The figure shows a fragment of such a connection:
Cuts in bars and cross connections
To adjust the depth of the cut, a manual method is used to set the height of the tabletop relative to the saw blade.
Height adjustment is carried out using a mechanism on 4 sprockets from the rear wheel of the bicycle, 4 studs with M10 threads and a bicycle chain, which synchronously drives the gears, raising or lowering the table top. In the presented design, the movement of the chain is carried out manually.