Do-it-yourself frill made of satin ribbons: tips for making
Many clothing decorations that were popular many years ago are being reborn in modern fashion.
One of these things is the forgotten jabot. This accessory can literally transform a strict office outfit, giving it originality and freshness. It is easy to build using a minimum of materials, with a little imagination and spending a couple of free evenings. Even a novice craftswoman is quite capable of coping with this process.
To see this, let's take a closer look at the entire process. We will tell you how to make a frill from satin ribbons with your own hands.
Which tapes are suitable?
Ribbons go well not only with festive outfits, but also with sports and business suits. The most important thing is to choose the right accessory so that it harmoniously emphasizes the chosen style.
The following types of ribbons are used to create hairstyles:
- When using styling with ribbons for festive events, you should opt for products with rhinestones and
corrugated glitter; - velvet;
- lace;
- satin.
Lace options look great against the backdrop of summer sundresses and dresses. Satin products perfectly emphasize the elegance of classic clothing. When using styling with ribbons for festive events, you should opt for products with rhinestones and sparkles.
When choosing thin ribbons, it is recommended to wear them above the forehead area. It is worth remembering that they are unable to hold the hairstyle and perform only a decorative function. Wider models are suitable for those with long curls. Such an accessory will cope with the task of maintaining the created styling shape, which is very practical.
Dark-haired representatives of the fair sex will suit light-colored accessories , and blondes should pay attention to blue, gray and brown models. Owners of fiery red hair can afford any color scheme.
Materials and tools
Jabot is one of the varieties of the tie we are used to. Before you start creating it, you need to prepare the necessary materials and tools.
To create it you will need to prepare the following
- Satin stripes of various widths. The color can be either monochromatic or contrasting, depending on your idea.
- Felt in the same color as the main color;
- Fastening . As a basis, you can use it to create a clothespin.
- Source of open fire : candle or lighter.
- Ruler, scissors, pins for temporary fixation;
- Glue or glue gun.
- Decorative elements : cameo, beads, rhinestones, sequins.
Reference! Instead of an open fire, you can use a wood burning device or even a regular soldering iron.
DIY kanzashi frill tie
Tie-brooch, frill for school. Kanzashi MK.
Saturday, July 30, 2016 14:21 + to quote book
Tie-brooch, frill for school. Kanzashi MK
- The Tie-Brooch for Day of Knowledge – September 1 / Tie Brooch for September 1st
Posted: Jul 3 2015
- DIY tie for school. Master class from Nata Liana. “Kanzashi”
Posted: Aug 30 2015
- Tie for school
Posted: Aug 11 2015
- Tie and flower Kanzashi Master Class / Kanzashi by Kulikova
Posted: May 20, 2015
In this video tutorial, I will show you how to create a tie for a girl for the last call or to kindergarten, and in addition to it, a flower made of flat sharp Kanzashi petals on a duck clip. Tools and materials: – satin ribbon 2.5 cm wide peas (65 cm ) and plain (13 cm); – lace 2.5 cm wide (13 cm); – satin ribbon 6 mm wide (50 cm); – glue gun, candle, scissors; – decor (owl pendant, rhinestone); – a needle and thread to match the ribbon; – base (duck hair clip); – “handmade” tape; – polymer glue in a syringe.
- Kanzashi brooch tie for September 1st. MK Kanzashi (video).
Posted: Jul 30 2015
Kanzashi brooch tie for September 1 and hairpin, made in the same style. The master class was carried out according to requests. I would like to draw your attention to the fact that it is convenient to use double-sided tape when assembling a tie and hairpin, but I recommend completely securing the composition with a thread and a needle, because the tape does not hold tightly.
- Tie-Brooch for September 1 | Together with the Nata Liana channel | KANZASHI
Posted: Aug 26 2015
- Kanzashi master class. Decorations made from grosgrain ribbon. Kanzashi tie for school/Tie Kanzashi for schools.
Posted: Aug 19 2015
Master class in Kanzashi technique. Now in the master class we are making our own decoration - a tie for school from grosgrain ribbon. We decorate the tie with beautiful ruffles made of grosgrain ribbon and mesh. Fortune in creativity!
- How to make a brooch tie their hands
Posted: Jan 3 2015
- Very simple! School brooch jabot/DIY/Tutorial
Posted: Aug 14 2015
How to make a frill from satin ribbons
The process of creating this unusual thing is quite simple. To verify this, I propose to consider the creation of an object using a specific example.
To implement it, you will need a satin strip 5 cm wide of dark blue color in sufficient quantity, a cameo (you can use a large rhinestone), black narrow lace and a satin ribbon for the base.
Completing of the work
- Cut four pieces of varying lengths from the navy blue ribbon. Each subsequent cut when gathering should be larger than the previous one.
- Fold the main ribbon into a bow-base.
- Attach the smallest tier to the main bow.
Reference! Instead of PVA and a glue gun, you can use Moment-gel.
- Next, attach the shuttlecocks incrementally to each other.
- Glue the resulting blank to the main tape.
- Attach the central element.
Tips and tricks
- Hairstyles with ribbon are great for special occasions, business meetings and romantic walks. The versatility of this styling has led to enormous popularity in a short period of time. It is very important to choose the right color, shape and length of the fabric bandage.
- Weaving with ribbon retains its chic look even the next day. This type of styling can be used from one to four days. By building such a masterpiece, you can significantly save time on morning preparations for several days.
- something new from your own hair every time
- master weaving with accessories quite quickly without the help of professionals.
- Before styling, the hair should be washed and dried. Only after this can you begin the process of creating a hairstyle.
- Braids with ribbons are especially relevant in winter , since wearing hats does not cause significant styling defects.
- It is recommended to choose thin headbands with bright colors that perfectly match the outfit.
- Using a fabric bandage as a headband, you can pass it both under and above the bangs.
Ribbon jabot
- In the master class “Do-It-Yourself Jabot from Ribbons and Lace” I will show you how to make a fashion accessory yourself.
- Photo 1. For work we will need such materials and tools.
- Photo 2. Cut 6 strips of lace.
- Photo 3. From a satin ribbon 5 cm wide, cut 2 strips of 12 cm each, 4 strips of 13 cm each, 1 strip 15 cm long.
- Photo 4. Cut a strip of tape 15 cm long on one side into a semicircle, and treat the cut area with fire. We have received the base for the frill - we will glue the lace onto it.
- Photo 5. We sequentially assemble a bow from pieces of satin ribbon. We glue the parts together.
- Photo 6-7. We make small folds on the strips of lace and collect them on a thread.
- Photo 8-9. Glue the largest ruffle along the edge of the frill base.
To read the rest of the article, go to the next page below
How to make school hair bows
Bows for school are made using the kanzashi technique, similar to a tie. They can be attached to any base, including elastic bands and hairpins. The issue of making such an accessory with your own hands is relevant for those parents whose children go to school. By making school bows with your own hands, you can save a lot on the purchase of similar products.
To make such an accessory, you will need a base (an ordinary hair tie) and ribbons - grosgrain or satin. You need to cut 2 identical parts and 1 smaller strip from the tape. Identical parts will need to be rolled into rings and secured crosswise to the base. In the center it is worth tightening them with a loose strip and gluing them for strength. The finished product can be decorated with various decorative elements, for example, beads.
Creating a brooch-jabot “Amazing”
By popular demand, I want to share with you how I create frill brooches. Today my object was the “Amazing” brooch for a high school student and just a lady
We will need: grosgrain ribbon in 2 colors - white and black 5.4 cm wide, satin polka dot ribbon 4 cm wide, satin with a pattern 2.5 cm wide, scissors, thread, needle, lighter, cabochon, felt , metal brooch base, Moment glue or glue gun.
Cut four pieces of equal length. I applied a satin ribbon 4 cm wide. with polka dots on a grosgrain ribbon 5 cm wide.
Sew in the middle:
DIY brooch-jabot made of satin ribbons
We make a butterfly blank from identical pieces of two colors of grosgrain ribbon:
The blanks are a bow and a ribbon sewn in the middle. In the future we will superimpose them on each other. Can be sewn or glued.
We assemble our bow without gathering it. Cover with 2.5 cm tape with a pattern in the middle:
We glue our blanks. Align.
From a 4 cm ribbon we make Kanzashi petals with 2 folds. I will need 9 petals.
We prepare 3 pieces for the frill. We sew them together.
Let's create a composition. I find it easier to work with hot glue. But, whoever is more comfortable!
The reverse side (not yet beautiful - and this, for now, is permissible)
Glue the felt base. We attach the base for the brooch. If there is glue sticking out somewhere, it is better to remove it with tweezers while it is hot. It will be more difficult to do this later.
You can sew or glue twisted/biased tape along the edge of the felt. But you can do without it. The view couldn't be any worse!
In fact, I don't think this master class is very holistic. I never measure lengths in cm - I do it the way I see the work. More precisely, until I imagine what I want to get, I won’t undertake it. Otherwise it will be nonsense.
I really hope that each of you will find something useful for yourself in my simple master class! Perhaps it will somehow simplify the task of creating such products. If you have any questions, I will gladly try to answer!
I apologize for the quality of the photo, if somewhere it is not very good - I took it at night.
Everyone who liked my first master class at the Masters Fair, add to My Circle so as not to miss new master classes!
Thank you everyone for your attention!
Let the creative powers know no bounds in your hands!
The easiest and fastest ways
Malvinka
Two strands of hair are fixed at the back of the head with a bow or hairpin, perhaps a little higher or lower. This modest, minimalist hairstyle is perfect for the office .
Braids
After the braid is braided, it is fixed at the end and decorated with a bow. It is preferable to choose small bows.
You can also secure the base of the braid with a hairpin with a bow, i.e. the place where the weaving begins. A butterfly bow would work here.
This braid is suitable for the office and everyday walks.
Tail
Hair gathered into a ponytail can be secured at the base with a bow . It is better to use a small bow, it will add some lightness to the image, while a large one will create the effect of a child’s hairstyle.
This hairstyle is more suitable for informal occasions. For home, meetings with friends, sports.
Bun
If you make a neat, elegant bun and decorate it with a discreet bow, you will get a hairstyle for a festive occasion. And if you give the bun the effect of slight negligence and secure it with a small but bright bow, you will get an image for a youth party or a trip to nature.
Jabot. Master Class
Jabot. Master Class
Good afternoon, our dear readers! Today we would like to introduce you to the step-by-step process of sewing a frill from ribbons, which you can decorate at your discretion.
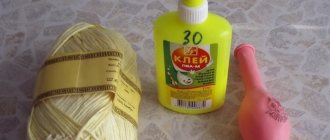
To make a frill we need:
- tape 5 cm and 2.5 cm wide;
- threads of white and any other color;
- pins and decoration.
Jabot step by step:
The first piece is one and a half meters of tape 2.5 cm wide. We cut the ends obliquely and melt them.
The second piece of tape is 2.5 cm wide. and length 21 cm. We melt the sections.
Take a 5 cm tape. And cut 1 piece 26 cm long. and 2 pieces of 23 cm, fold in half and melt.
We mark the middle and get started.
We pin the first two sections with a length of 23 cm.
Then 26 cm. in the center.
We baste, sew and remove the pins.
Take a tape 2.5 cm wide. in pieces: 1 pc. — 20 cm, 2 pcs. — 1 9cm, 2 pcs. — 17 cm, 2 pcs. – 15 cm, fold in half and melt.
Take 1 pc. 20 cm and place it in the center.
Then 19 cm. And we pin it next to each other on both sides, BUT check the length!!
We baste and remove the pins.
We take 2.5 wide tape and make segments: 2 pcs. — 15cm, 2 pcs. – 14 cm, 2 pcs. – 13 cm, 2 pcs. – 12 cm, fold in half and melt the sections.
We pin it as in the photo.
We baste and remove the pins.
Take pieces 5 cm long. Width 2.5 cm.
Fold in half and melt the cuts.
We baste and remove the pins.
This is already a face, we take a tape that is 1.5 meters, look for the center and attach it to the center of our work. We take a sewing machine and stitch the edges of the tape at the top and bottom.
This is the back part, we clean it of threads that we no longer need.
And then ladies, let your imagination play.
Try another color...
This is what I got (I attached everything with hot glue).
Frill brooch made from 1 meter of grosgrain ribbon
I hope everything is clear. Good luck everyone!
MK author: Alena Filipeva
Braids for little ones
The main requirement is ease of execution, so that any mother can quickly create a beautiful hairstyle for her fashionista daughter.
Two braids for a girl
The most ordinary paired braids can be turned into a festive option. Weave in the “snake” or “dragon” style from the frontal or parietal zone, as well as in the usual way. Let's consider weaving a ribbon into paired braids of three strands.
Interesting ideas for little ones in a selection with photos:
One braid “in the field warrior”
Two braids are good, but one braided beauty can also win hearts.
A short master class with an unusual idea that is easy to implement.
Tender heart for Valentine's Day
Everything ingenious is simple. A master class for beginners with a romantic idea for a little fashionista for the holiday.
Crown for the princess
Every mini lady dreams of becoming the queen's daughter and receiving the symbol of the monarchy on her beautiful head. Some cute ideas in the photo:
Kanzashi on tape
A spectacular hairstyle will suit both a girl at a party in kindergarten or school, and a girl of any age. It looks festive and romantic; this braid is especially suitable for a photo shoot or a special event.
To create such a hairstyle you will need flowers with a ribbon, which are called kanzashi. It is advisable to choose an accessory with a hairpin.
The process of creating a spectacular braid with kanzashi hair decoration is that the flowers are attached at equal distances from each other. For example, if three decorative elements are involved, then they should be at the root, in the middle, and the last one at the end. The braid is made using a simple three-strand method with a ribbon.
Christmas mistletoe
Brooch-jabot “Canon”
Decorating clothes with frill trim is distinguished by sophistication and elegance. But modern fashion trends allow you to wear neat frill brooches instead of large and fluffy collars.
To create such a frill brooch you will need: - a light green ribbon 0.7 cm wide. - blank for a brooch. - glue gun. - green satin ribbon 2 cm wide. - scissors.
Description of work. Cut three long strips from light green ribbon to create the base of the brooch. All segments must reach 16 cm.
Then we take each tape separately and glue the edges together, aligning them in the middle of the part. We also glue all three segments together.
Collar for school Kanzashi Part 1 Master class DIY Collar Kanzashi Part 1
We receive such blanks. Now we collect a bow from them, placing one on top of the other, crossing them in the center.
We put the resulting part aside and begin to create blanks for the main bow. We prepare 6 identical pieces of green tape, each 8.5 cm long. Then carefully singe the cuts on all the pieces. And using a glue gun we connect the two edges of each piece together, creating loops from them.
Now we attach these parts on top of the light green bow, aligning them, but retreating 2-3 mm from the edges.
We attach the loops on the second side of the bow in the same way.
We get this double bow. Next, cut out two strips of light green ribbon, each 5 cm long.
We singe their sections and glue them together into two loops. Then we attach these parts to the prepared bow, but placing them strictly diagonally and along the center.
We put the created bow aside and prepare a voluminous tail for it. To do this, cut 4 pieces 7 cm long from the green ribbon and burn the edges. We form loops from the three, and leave the last strip as a straight piece. Then we cut 10 strips from a light green ribbon, each 6 cm long. We also singe all the existing sections and glue them into a loop shape. Now we place a piece of green ribbon vertically, it will serve as the basis for the tail of the brooch and glue 3 light green loops on the lower cut, folding them like a fan.
Next, we attach one green loop along the base strip. We take two light loops and cover with them the place where the previous part was glued, directing them in different directions.
It remains to gradually attach the last two green blanks, covering their sections with details from light green ribbons.
Then we complete the created row of green blanks with an attached loop of light green ribbon.
We get this tail for the brooch. We attach the previously set aside double bow to it. And in the center of the bow we glue a button wrapped in ribbon.
We unfold the part with the wrong side up and glue the steel brooch blank.
Roses from satin ribbons: making roses from satin ribbons using different techniques
Star made of satin ribbon. how to make a star from satin ribbon for a Christmas tree?
What can be made from satin ribbons: creative crafts from satin ribbons
DIY satin ribbon brooch: various techniques.
How to make leaves from satin ribbon? step-by-step production of a simple sheet, a rose sheet, a corrugated sheet and a large sheet.
How to make topiary from satin ribbons? materials and tools. step-by-step algorithm. subtleties of manufacturing parts.
How to beautifully tie a bow from a satin ribbon: a lush bow from a thin satin ribbon.
DIY satin ribbon boxes, instructions
DIY bow tie made from satin ribbon. step by step instructions on how to make a classic butterfly for girls.
Snowflakes made of satin ribbons: DIY voluminous snowflakes using the kanzashi technique
DIY satin ribbon headband: how to cover and decorate
DIY satin ribbon pig: step-by-step master class
DIY satin ribbon crown: tools and materials, master class
Embroidery with satin ribbons: patterns for beginners, master class
Tape for hemming trousers with an iron: what is this tape called? how to glue it correctly. step-by-step instructions on how to hem trousers using adhesive tape.
DIY men's frill collars
Jabot
(French
jabot
) - trimming a blouse, dress or men's shirt in the form of a frill of fabric or lace, going down from the neck down the chest, also a type of collar. It first appeared in European costume in the 17th century. as a detail of a man's suit. The jabot appeared in women's and children's fashion from the middle of the 19th century.
Also the term "jabot"
called a special plastic panel installed in front of the windshield of a car. The car frill is designed to protect the car filter from rainwater and melted snow. Usually made of frost-resistant plastic.
Links
| Jabot on Wikimedia Commons? |
- Clothing details
- History of the costume
Wikimedia Foundation. 2010.
Useful
See what “Jabot” is in other dictionaries:
frill - uncl., cf. jabot crop (in birds). 1. In the 18th century. lace or muslin gathered trim around the collar and on the chest of a man's shirt. MAS 2. <Young people> had fashionable buttons around their chests, and their necks were tied into jabots. Satyr. Vest. 1 4. Tied to him... ...Historical Dictionary of Gallicisms of the Russian Language
JABO - (French jabot). 1) a muslin or lace frill on the chest of men’s shirts in the 18th and early 19th centuries. 2) a wide men's tie with a bow. 3) now a lady's lace decoration on the chest. Dictionary of foreign words included in the Russian language... ... Dictionary of foreign words of the Russian language
JABO - unchanged; Wed [French jabot] Elegant lush trim made of lace or light fabric (gathered, folded, corrugated) on the chest at the collar of a blouse or dress. Lace, cambric. Elegant blouse with f. Pin it brooch * * * JABO JABO ... Encyclopedic Dictionary
JABO - JABO, uncl., cf. (French jabot) (source). Long gathered trim of lace or muslin around the collar and on the chest of a man's shirt; a linen stand-up collar that covered the bottom of the cheeks. “And look, our Mirabeau of old Gavrilo whips him in the mouth for his crumpled frill... ... Ushakov’s Explanatory Dictionary
JABO - (French jabot) trimming a blouse, dress or men's shirt in the form of a frill of fabric or lace, descending from the neckline down the chest. It first appeared in European costume in the 17th century. as a detail of a man's suit. In women's and children's fashion, frills... ... Big Encyclopedic Dictionary
JABO - JABO, uncl., cf. Lush trim at the collar made of lace or light fabric. Ozhegov's explanatory dictionary. S.I. Ozhegov, N.Yu. Shvedova. 1949 1992 ... Ozhegov's Explanatory Dictionary
frill - trim, frill, collar Dictionary of Russian synonyms. frill noun, number of synonyms: 3 • collar (16) • frill ... Dictionary of synonyms
jabot - JABO, uncl., Wed A piece of clothing that is lace, light fabric folded or gathered, sewn on the chest at the collar of a blouse, dress, shirt. The groom was wearing a luxurious lace frill... Explanatory dictionary of Russian nouns
frill - A detail of a garment made of light materials or lace for decorative design at the collar with gathers or folds. 44 frills [GOST 22977 89] Subjects of details of garments ... Technical Translator's Guide
How to make a frill tie from satin ribbons with your own hands step by step with photos
For work we will need the following materials and tools : - white satin ribbon 2.5 cm wide; — satin ribbon 1cm wide with polka dots/any color; - felt circle with a diameter of 4 cm; - fastening; - middle; - lighter (candle); - ruler; - scissors; - tweezers, clamp; - thermal gun.
Labor safety rules when working with scissors:
1. Scissors should have blunt, rounded ends. 2. Work with well-adjusted and sharpened tools. 3. Place the scissors with the rings towards you and the closed blades away from you. 4. Do not leave cutting tools open. 5. Watch the movements of the blades while cutting. 6. Pass the scissors rings forward, holding them by the closed ends. 7. Do not play with cutting instruments, do not bring them to your face. 8. When working with scissors, do not walk around the office. Work at a desk. 9. Use these tools only for their intended purpose.
Labor safety rules when working with candles, matches, and lighters:
1. Remove loose hair. 2. Do not lean low over the flame of a candle or match. 3. The candle should be in a glass or tin container. 4. Do not throw burnt matches into the trash can, but put them in glass or tin containers.
Labor safety rules when working with a heat gun:
1. Do not leave unattended. 2. When working, place the heat gun on the stand, and not lay it on its side. 3. Work only with a serviceable tool. 4. Do not touch the tip of the gun or handle the hot glue. 5. When finished, turn off.
The frill consists of two parts. Let's start with the top one - an imitation bow. Take three pieces of white satin ribbon 2.5 cm wide and 18 cm long.
How to sew a simple frill
Using the pattern, we cut out two identical parts, fold them right sides inward and sew them on the machine, leaving the neck open.
We turn it inside out, iron it, and mark where the lace will be sewn. We gather the lace and sew it on, starting from the top. Having reached the opposite top edge, cut off and begin sewing the next row. We wrap the neckline inward and sew it up by hand. We sew a narrow ribbon or elastic band to the upper corners. Let's get a frill in the shape of a butterfly. If you need a longer or wider frill, then you should make the appropriate adjustments to the pattern.
A little history
Bows appeared in ancient times. In Ancient Greece and Rome, respectable matrons decorated their hairstyles with them. However, bows came into fashion during the time of Louis XV, thanks to his favorite Madame de Pompadour. A bow can be seen in almost all portraits of the king's official mistress.
True, in fairness, it should be noted that bows were also in use under the Sun King Louis XIV, but then they acted as an original form of jewelry.
DIY school set (bows and frill tie) made from ribbons.
In the 20th century, recognized as a style icon, actress Audrey Hepburn loved to decorate herself with the most exquisite bows. So, as you can see, the bow has been and remains one of the most popular elements of decorating a person’s toilet.
Tape connection of braids
This miracle method is called “lacing”. The name speaks for itself. Executed in order:
- Several parallel French braids are braided.
- The selected tape is used to connect them, as if lacing shoes.
- By bringing certain areas closer or relaxing, various, sometimes intricate, shapes are created.
The color of the ribbons, the location and format of the braids also affect the result.
The method of connection or “lacing” also changes the visual appearance of the hairstyle:
Video tutorial: How to beautifully join braids
Hair ornament
When preparing the little girl for school, stocking up on the necessary school supplies, uniform, shoes, knee socks, parents do not forget about one more decoration - a bow. It makes sense to make a school bow from satin ribbons with your own hands, because... purchasing the materials needed for the job will cost five times less than purchasing a finished product.
Materials
To work, you will need to buy three types of tapes:
- white satin, with a width of five centimeters and a length of one meter forty;
- red (dark blue, blue, green, etc.) three centimeters wide and half as long as the first;
- narrow (one centimeter) lurex, ten centimeters long.
Well, such things as a ruler, pins, a lighter, threads and a needle, and a hair tie can be found in any home.
Preparation of blanks
First, the white tape is cut into pieces of ten, 11.5 and thirteen centimeters (each piece is four pieces).
The red ribbon is cut into three pieces of 22 centimeters each. The lurex piece remains unchanged.
Step-by-step instruction
We start with a tape of 13 centimeters:
- We take two pieces, fold them at right angles, and then put one on top of the other.
- We carry out a similar operation with segments of 11.5 centimeters.
- We perform the same actions with ten-meter segments.
- We place the blanks one on top of the other, equal at a right angle, and the upper and lower parts are shaped like a Christmas tree.
- We secure the blanks with a pin.
- The corners of the bottom row are bent, turned back and secured with a pin.
- The same operation is carried out with the top row of the workpiece and as a result we get a figure similar to a square.
- Using a ruler, measure two and a half centimeters from the lower right angle and draw a line with a pencil.
- Using a double thread, we make a basting along the drawn line, trying to keep the stitches symmetrical.
- We take out the pins, but don’t touch the thread!
- Stepping back from the stitches a few millimeters, we cut off the excess material.
- We bring a lighter to the cut and melt the edge so that the tape does not crumble.
- We tighten the thread tightly and get a workpiece in the form of a bud.
- With the remaining pieces of white tape, we carry out the operations described and get a second bud.
- We sew the buds together and the white part of the bow is ready.
Decoration Features
There are many types of hairstyles using ribbons . In this case, the length of the hair can be different. But on long hair (from the shoulder blades to the lower back), which in itself gives a special sophistication to the image, hairstyles with ribbons will look most advantageous and complete.
Let's pay attention to the easiest and most common hairstyles, which are successfully complemented by ribbons.
Headband
The base ribbon (the best width is wide or medium) is wrapped around the head and the ends with a knot are hidden under the hair. Very quick and easy installation.
For a special occasion, you can leave your hair loose, after curling it.
Bun
A bun of any shape and any location on the head is made and wrapped with a ribbon. It is most convenient to use the widest possible tape , but you can also use a thin one. Suitable for both romantic dates and everyday activities.
Tail
The hair is combed into a ponytail, secured with an elastic band, preferably an invisible one, and wrapped with tape. It is most convenient to do this with a wide braid.
In this case, the ribbon adds elegance to an ordinary ponytail, which is suitable for both the office and a holiday.
Braids
You can easily add brightness and personality to simple braids by adding ribbons. You can weave it either into the side strands or into the central one. It is possible to use two or more tapes .
Malvinka
The basic idea is to take strands of hair from the forehead to the top of the head and secure them at the back of the head with a ribbon. The rest of the hair remains loose.
If you curl curls or waves, then this hairstyle is suitable for a special occasion. Here it is most convenient to take a thin or medium-width ribbon.
Colored ribbon
First, we singe the edges of the tape. Then:
- Fold the pieces in half, marking the middle.
- We bend the edges of the tapes towards the center of the workpiece and fasten them with pins.
- We place two blanks side by side, and the third on top of them in the center.
- We take out the pins and use double thread to make a basting with large stitches.
- We tighten the thread, getting a colored bow.
- We put a white bow on the colored one and fasten them with thread.
- Attach a hair tie to the bow.
- Cover the junction of the two colors and the elastic with lurex.
- We sew up the edges of the silver ribbon.
The two-color bow is ready. If desired, you can decorate it with rhinestones, beads or some unusually shaped button.
If the description of the steps for making the decoration is not sufficient for the job, you should find instructions on the Internet with step-by-step photographs of making a ribbon bow with your own hands.
Decorative items
Miniature bows are perfect for the role of elastic bands, barrettes or other hair decorations. Similar products can be woven into braids or used to decorate postcards with congratulations for some significant event.
DIY JABO from Ribbons | Kulikova Anastasia
To create an original souvenir, you will need two pieces of thin satin ribbon up to 15 centimeters long.
The manufacturing work will take place in only five stages.
- A bend is made at a distance of 5-6 centimeters from the edge of the tape.
- The tape is folded at a right angle so that its end points down.
- The same operation is performed with the second end.
- The second blank is made according to the same principle, only if in the first tape the bottom edge was bent first, then here you should start from the top.
- Both blanks are stitched and secured to a hair elastic.
A miniature decoration for a gift box, postcard or hairpin is ready.
Finery
You can make small voluminous bows from satin ribbon. To make one thing you will need four pieces 10-12 centimeters long.
And here the work progress consists of just a few steps:
- The segment is folded in half.
- The edges bend down, forming a kind of house with a triangular roof.
- The triangle is folded down and secured with a pin.
- The sides are brought to the center of the workpiece.
- The resulting workpiece in the form of a rose is secured with threads.
- The same actions are carried out with the three remaining segments.
All that remains is to connect all four “buds” together and the voluminous trinket is ready.
What can “ribbons” be made from or what can they be replaced with?
Any oblong strip of fabric with finished edges is suitable for weaving. The main thing is that the color matches the clothes, accessories, event or just the mood. An excellent option is nylon or satin school bows that can be unraveled. Sewing accessories stores sell braid and laces of various colors and shades. A lace stripe will look amazing in an openwork braid. It can be selected according to your own taste in any tone with an attractive large or small floral pattern or ornament.
Classic version
To create a traditional bow you will need:
- wide satin ribbon;
- translucent tape twice as narrow as the first, but in the same color scheme;
- lighter or candle;
- lace and artificial flowers, threads;
- beads and beads, etc.
Satin ribbons tend to “scatter” along the cut line, so they need to be set on fire.
Progress
Creating a classic bow requires just a few simple steps:
- you need to cut three pieces 20-22 centimeters long and three more 18-20 centimeters long;
- a narrow tape is superimposed on a wider one;
- “secure” the edges of the workpiece with a lighter;
- two long fragments are folded in half and rewound with thread in the center, thus making a double bow;
- similar actions are carried out with shorter pieces of tape;
- a smaller bow is placed on top of the larger one;
- both workpieces are secured with threads.
Decorative elements - lace, beads and beads - are attached to the center and edges of a handmade item made from satin ribbons.
How to wear a hairstyle with a ribbon
There are different ways of wearing:
- If it is uneven, with a decorative side and a back part, try fixing the decorative side on the forehead, and hiding the back side under the hairs on the back of the head. Please note that if the item is held with a tight elastic band, a deep groove may remain on the skin after removal.
- Girls with a small forehead are recommended to wear a copy at the beginning of the hairline. This way they will open and emphasize the forehead, making it visually larger.
Malvinka hairstyle (52 photos): how to do it on short, medium and long hair?
Note! For a harmonious look, in which the advantages of the figure, height and oval of the face are emphasized and the shortcomings are hidden, it is necessary to choose a suitable ribbon. Its low rise is acceptable for a long face and large features. In other cases, it is better to attach the decoration directly to the styling.
- Models are sold that are put on in two turns. As a rule, they stretch well. With their help, it is easy to secure buns and hold your hair in the desired position. Most often they are worn over a smooth, loose hairstyle, such as a bob.
- In vintage looks, fabric headbands are attached above the hairline. They look great on high hairstyles. But for an image a la “20s of the XX century”, a modest narrow strip with a spectacular accent in the form of a feather, brooch, or large flower is fixed on the forehead. In this case, the mop should be perfectly combed to a gloss and not collected.
Contrast bow
The combination of white and black is a classic option for any decorative decoration. The traditional headdress for girls is no exception.
For production you will need:
- white tape;
- ribbon with black stripes or polka dots;
- black lace;
- scissors;
- rhinestones or beads.
Stages of work
- Stage No. 1. The variegated ribbon is cut into three pieces about 25 centimeters long.
- Stage No. 2. The white base is cut into shorter pieces - approximately a couple of centimeters less than the first.
- Stage No. 3. The simplest bow-loop is formed from ribbons and stitched in the center.
- Stage No. 4. A piece of black lace is sewn onto one of the white bows.
- Stage No. 5. The two remaining white bows are placed crosswise on top of each other.
- Stage No. 6. The colorful bows are folded like a snowflake and also secured in the center.
All that remains is to connect both blanks and a contrasting decoration can take its place on the girl’s head.
Decorating braids with ribbons
This is the easiest way to apply ribbons to any braid, even if your handles aren't positioned correctly for complex or simple braids. But, believe me, it is also very beautiful and stylish!
How else to elegantly decorate your hairstyle with braids? Of course, focusing on contrast.
Brooch-jabot and brooch-tie - we make fashionable school jewelry ourselves
Hello, dear friends and guests of my page! I’m not lost... I just don’t have time for spiritual communication. And the love for creativity is stronger than ever. Today I suggest you make this year’s fashionable jewelry-brooches in the form of ties and frills. The idea is not new and you can find a lot of similar products on the Internet, but I haven’t seen any Master Classes. If anyone knows, please indicate. So, let's begin...
For a frill tie we need: black and white satin ribbons, 5cm and 2.5cm wide, lace, threads and a needle, scissors, a lighter, a glue gun for needlework, a badge or an elastic band for attaching a brooch.
We cut ribbons 5 cm wide into pieces: 2 white 18 cm each, 1 white and 1 black 20 cm each. We process the edges of the ribbons with a lighter.
And ribbons 2.5 cm wide: 2 black 18 cm each, 1 black and 1 white 20 cm each.
I will not go into details of making these petals, but will give a link to a very clear, accessible Master Class, which presents two options for making it https://www.youtube.com/watch?v=__tjk4-0WsY. I used the second method. You need to make 21 of them.
Making a bow: sew the edges of the ribbon along the front side, slightly overlapping the edges with each other. We don’t cut the thread! It looks like bow-sayuri, but I do it a little differently.
I fold the bow in half along the seam line and mark the middle, align the seam and the middle and...
... I wind the thread, forming the middle of the bow. Finally, I stitch in the middle, thread the thread onto the inside of the bow, and make a knot.
This way we prepare all the bows.
I sew in pairs:
We start assembling with a 20cm black and white bow. tapes.
We sew 2 bows from 18 cm ribbon into a double bow.
We finish with a white and black bow from a 20cm piece. We sew and glue all layers. Who's used to it?
We heat up the glue gun and assemble the frill. To begin, we fasten together 3 petals - 1 layer of frill.
Carefully glue the resulting petals between the 2nd and top layers of the bow.
We glue the remaining petals in layers, one under the other.
I made 4 layers of 3 petals.
We add petals around the edges. Approximately 9 pcs.
We glue the icon.
We cover the not very beautiful “back” with lace, additionally giving the product strength.
Decorate the middle. Ready!
We wear it with a blouse like this. Here you can see the size of the brooch...
Brooch-tie number two is much easier to make. We need: gray and white ribbons (or other desired colors) 5 cm wide, threads, lace, accessories for decorating the tie, lighter, scissors, badge for fastening, glue gun. An iron will also come in handy.
We cut the white tape into pieces of 20 cm, and the gray tape into 18 cm and 28 cm, respectively.
We make bows according to the method described above.
We form a tie from 28cm ribbon.
Fold in half at a 90 degree angle.
We apply the upper corner of the resulting triangle to the lower one (the one under my finger) and iron it with an iron. It turned out to be a tie.
All details are ready:
We sew two white bows together, sew on the gray one, which I decorated with lace. I just glued it to the back of the bow.
Glue the tie with hot glue and mask it with lace.
We attach the icon.
We decorate as you wish. I have a “pearl” center, half beads, and a “pearl” thread. Ready!
I am decorating a gray and white blouse.
Group photo for memory...
stranamasterov.ru