02.02.2020 Cats made of beads Share
Three-dimensional beaded figures are a fascinating activity. When you first get acquainted with the diagrams of three-dimensional figures, it seems that making figures is a difficult task, but we hasten to assure you that this is not the case. One piece of advice - to add rigidity to structural elements, we recommend using thin wire.
Recently, the art of beadwork has become especially popular among needlewomen and craftswomen. This fashionable handicraft gives many people the opportunity to make beautiful and unusual crafts on their own. Beaded products are not only beautiful, they are also varied. Beaded cat figurines are especially popular, because they are the embodiment of affection, peace, comfort and kindness.
There are 2 types of beading: flat and voluminous. Volumetric beading is more complex than flat beading, but the product is more interesting. This type of needlework allows you to develop fine motor skills and creative thinking.
Cat for beginners
To weave a three-dimensional animal from beads (in this case a cat), we need wire (preferably light, since dark wire will stand out on white beads and spoil the look), black and white beads, as well as several beads of red (for the mouth), green (for the eyes), gray (for the tail) colors, as well as a larger pink bead for the nose.
Using the parallel weaving method, we carry out the work according to the scheme proposed above. We start weaving from the nose and end with the tail. If you wish, you can make a larger three-dimensional animal from beads, for example a fat cat, if you enlarge the pattern in proportion to the size of this one.
DOLPHIN made of beads WITH YOUR OWN HANDS / Full VIDEO LESSON
DIY composition of fresh flowers: photo
Chrysanthemums are best suited for decorating such figures. It has many different varieties that vary in color and shape. In addition, chrysanthemums can stand for a long time when cut. Create the base of the figure from piaflora (oasis) and decorate with flowers. A few ideas for you:
Ginger cat
We will be adding to our collection of kittens with such a cute, funny kitten made of beads. The master class will help you master the technique of three-dimensional bead weaving. The work of beading a cat is greatly simplified by a diagram that clearly demonstrates in schematic form the entire process of work. This master class is perfect for those who are just starting to master this type of work, and for those who already have experience.
For work we will need:
- wire with a diameter of 0.3 mm
- brown, white, orange, pink and green beads 2.5 mm
- fishing line
Let's get to work, first you need to cut a piece of wire, its length should be two meters. First you need to weave one large piece, which will be the head, then the body, then the tail for the kitten. After this, you can start weaving ears and paws, which are made separately.
We weave according to the pattern
We start with the kitten’s head, do not forget that during weaving, insert two pink beads for the mouth, and for the eyes you will need to insert two more green beads. We take two small pieces of wire for the ears and make triangles. In order to attach the ears to the head, you need to stretch the ends of the wire through the beads of the head rows.
Now we make the paws of the cat, for this we take four pieces of large-sized wire and make them according to the diagram, also according to the diagram shown, we attach the paws to the body. After this, we move on to designing the kitten’s face, namely making the eyes. Take black paint and draw pupils on each green bead. We insert small pieces of fishing line through the beads through the muzzle; these will be antennae. This cat can be used not only as decoration, but also made into a keychain or pendant for a backpack or bag.
First acquaintance with origami
At different ages, children quickly become interested in something and then become real masters. But often interest “burns out” and a desire arises to make something new. Paper origami, which came from Japan, is recognized in many countries around the world as useful for the development of children. It's better to start with cats - most people's favorite pet.
This type of needlework teaches consistency and accuracy, and also promotes the development of:
- intellectual abilities;
- spherical imagination;
- communicative function (in joint creativity);
- fine motor skills of fingers.
Look at the photo of an origami cat, perhaps your exciting joint activity will begin with something similar. It is recommended that teachers master it as part of a preschool development program.
This activity will be no less interesting for mothers of children in primary school. This introduces them to joint activities during leisure time on long winter evenings and in inclement weather.
Cat-ball
For work, prepare:
- beads
- fishing line (approximately 4 m)
- wire
- bead (diameter 15-20 mm, this is what we will braid)
We weave a mesh of three beads, the width is 2.5 diamonds.
When half the circumference of the large bead is ready, the fishing line must be secured (along the red line in the diagram). In this case, when we connect the mesh into a ring, the work will not spread out. No need to cut the line! Now we unwind another 1-1.5 meters of fishing line from the reel and weave the second half of the mesh. As you work, don’t forget to try the mesh on the bead. It should be pulled tight.
Before we connect the mesh into a ring, both ends of the fishing line must be on the same side. We don't touch the connection yet. It is performed with the same end of the fishing line that we used to weave the second half of the work. We separate the ends of the fishing line in different directions, threading it through the beads.
We finish the top of the bead with a mosaic. You can weave one at a time on each side so that the mesh does not slip. Here the length of the mesh is 14 diamonds, 4 rows of weaving without decreases, 6 beads are removed in the 5th row and 4 more beads are removed in the 8th row.
Muzzle
Volumetric beading is not at all difficult if you carefully study the diagram. Let's continue. In the photo, stars mark the places where the cheeks and nose are attached. Here you need to sew two or three times, but not tightly, we come out of the pink bead and pull it with two stitches to the very base.
We select the eyes.
At this stage we leave the muzzle. Let's move on to the cat from the end.
We bring the needle to the place where the tail is attached.
Let's move to the ears.
When the ears are ready, secure the tip of the fishing line and cut it off. If the paws are made of fishing line, we leave it that way.
Paws
Finding the axis of symmetry. We select the beads to which we will attach the legs.
To secure, we pass the wire through 2-3 beads. We come out of the beads from the paws.
We make the legs from the fishing line in two passes - on the second we pass the bead closest to the white beads. This is necessary for the cat to stand on its full paw.
The paws are ready.
Mustache
We wind 10-15 cm of fishing line. We tie the skein in the middle with a knot.
Using a small hook, we pull the loops of the skein between the spout and the cheek from the bottom up on each side. One tip must be passed through the bead of the base or spout and tied to the second tip, then tucked towards the skein. Trim your mustache.
That 3D beading lesson is over. Our cat is ready!
Volumetric heart box made of beads. Bead weaving. Beading. Beading
Cat and panther
Today we offer you a pattern for weaving keychains - three-dimensional figurines made of beads, a cat and a panther. The diagram is attached. In this case we see what a panther looks like.
Below we describe how to make balls based on a ring and 4 beads, because this is the method used in the technique of weaving our figures. The ball is made with one tip of wire or fishing line, without a base. The diagram for assembling the ball is shown in Figure 111. In weaving we use beads with large holes. We put 4 beads on the fishing line and close them into a ring, cross both ends (working and non-working) in the beads. How to do this is shown in Figure 112 a. Do not tie a knot at the end. We leave a tail 6-7 cm long. Again we collect 3 beads and close them into a ring, draw the end of the line into beads 7 and 2 base rings. See Figure 112 b. Collect 2 beads and close them into the next ring, pass the tip of the fishing line into bead 5 of the previous ring, from top to bottom and into beads 2 and 3 of the base ring (see Figure 112 c).
In the same way, we make another ring, we pass the fishing line into beads 8, 3 and 4, and then into bead 7 of the first ring from the bottom up (Figure 112 d).
We put 1 bead on the fishing line and pass its tip into beads 10, 4, 7 (see Figure 112 d). Now you need to tighten the ball, it will take on a three-dimensional shape. To do this, we pass the end of the fishing line through beads 6, 9, 11, 12. Pull the fishing line tightly. To finish the work, we stretch the fishing line into bead 7 from top to bottom (see Figure 112 e).
Next, we tie a knot from the fishing line of the working and non-working ends, cut the ends of the fishing line and melt them. The result is a ball of three vertical rows of beads, with 4 beads in each row. Total – 12 (see Figure 113).
Here's what we got:
Stencils: what are they?
All stencils can be divided into groups according to three criteria: application technique, material of manufacture, amount of use.
The choice of device depends on what result you would like to achieve in the end. Obviously, to create a relief image and, say, for a New Year's decoration on glass, you will need two completely different stencils.
You can make a stencil from the following materials:
- vinyl. Vinyl film templates are convenient to use when working with large areas and curved smooth surfaces. The material should not be too thin, as this will negatively affect the quality of the work. As a rule, stores offer disposable adhesive-based vinyl stencils. They cannot be reused, but the quality of the paint composition can be any, since the stencil literally sticks to the plane and does not allow the paint to smear. The stencil is ideal for working with glass, mirror surfaces, and ceilings. It is also convenient to make a stencil for windows using film;
- PVC. This type of plastic is thicker than film and can be reused many times. Suitable for creating reliefs, but fixing it to the surface requires some skill. It is recommended to choose quick-drying plaster compositions and paints;
- cardboard. The simplest and most accessible material. It is easier to make a template from cardboard, and the design can be applied with any paint. Recyclability depends on the quality of the cardboard;
- paper. Thick paper can also become the basis of a stencil. This material is chosen for temporary decoration of windows and mirrors. If you need to make a stencil decoration for the New Year, then paper is the best option. It's inexpensive, easy to install, and templates can be cut out effortlessly.
There are many more options for stencil bases online (foamed polyethylene, Oracal), but the general requirement for them is one: the material must be strong enough and of suitable thickness.
According to the application technique, they are distinguished:
single color image. All work is done in monochrome
In this case, it does not matter at all what tone the drawing is made in. It can be lighter than the main color or darker
Any option will do its job perfectly - focusing on a certain area in the room. It seems that making a one-color pattern on the wall is quite simple, but this is not entirely true. To make the decor look decent, you need to clearly draw all the details and contours. The better the stencil is cut, the fewer modifications there will be after painting; multicolor print. By using several colors at once, you can achieve the effect of a fresco or panel. The image can be applied layer by layer, using several stencils - each color has its own stencil, or using one template, but then you will have to act doubly carefully; relief print. When making decorations, templates made of dense and thick (2-4 mm) material are used. Since the work uses plaster, which needs time to harden, the base for the stencil must adhere well, not delaminate, and not get wet; flat image. The drawing does not protrude beyond the plane of the wall in any way, but may have a texture. The textured effect is achieved due to the characteristics of the coloring composition.
If we are talking about the amount of use, then the pattern could be:
- disposable (vinyl, paper);
- reusable.
Black cat
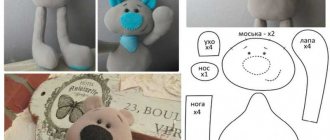
Selecting fabric for the toy. Fold it in half and cut it out. The diagram below shows which parts need to be cut and how.
Scheme
We sew together the details of the head, stuff the head with cotton wool, and sew up the hole. Make a small fold at the base of each ear and sew on the ears. We sew on a nose, eyes, embroider a mouth, make a mustache from threads.
Now we prepare the frame, as shown in the diagram below. To do this, you need to take 3 pieces of wire of the required length and twist them together in the center. We do this so that one of our wires becomes a neck, turning into a tail, the other two - paws.
Wrap the cat's body with cotton wool and thread. We attach the trim for the body to the back of the cat, having previously made small cuts on it for the neck and tail. We sew up the lower abdomen. We bend the front and back trim inwards and sew it up so that the edges are not visible.
We string beads onto the neck, paws and tail. We give the desired shape to our frame. The paws are gathered onto a thread, using a seam “over the edge”. We make a hole in the back of the cat's head and insert a neck loop made of wire into it. Sew up the hole.
Our three-dimensional beaded toy is ready!
Fat Cat
There is no diagram in this toy model, but the weaving principle itself will be presented below with a detailed description.
We need beads for the body of the cat - gray or black, white for the face, paws and abdomen and red for the nose, cotton wool for stuffing, wire for the base, monofilament and “Plastic” for the base.
Ingenuity is always welcome. Therefore, this figurine was made by the author from... chewing gum.
Weaving starts from the muzzle.
Direct weaving or mosaic is used. You can use beads of a different color to weave spots or stripes on the cat’s skin. You can make changes using larger beads, it all depends on your imagination.
The paws and tail are made using the mosaic strand technique; we sew them on separately.
Look at the cat from different angles, this way the weaving technique will become more clear.
Our three-dimensional beaded toy is ready!Crafts - making
We start with a square, standard size 15x15. Fold it in half, press the sides of the diamond, and fold it. Pay attention to the two triangles on top; they need to be bent towards the center. We will make an additional fold at the border of the figure.
- Fold along the prepared lines.
- The head is almost ready, open the left side.
- Then fold the right one in half.
- We make a bend and get a tail.
- Fold the accordion under the cat's head - these are the paws.
- Tuck the sharp edge towards the muzzle.
Schemes for folding origami cats will help where it is not clear.
Note!
- Origami vase made of triangular modules, assembly diagram for beginners. A selection of diagrams and instructions for folding origami vases
- Origami flowers: step-by-step instructions for creating tulips, lotus, irises, roses, daffodils. TOP 80 ideas and master classes on creating modular flowers. Interesting kusudama and modular bouquets
- Do-it-yourself voluminous origami toys: master class with ideas and diagrams. Creating a three-dimensional water lily, sword, dog, pinwheel
golden cat
We prepare a set of necessary accessories:
- beads of primary color (golden)
- for the color of the belly and paws, silver-colored beads
- green beads for eyes
- for the nose and mouth pink and red beads
- to create the body one large ball
- for the head the ball is slightly smaller than for the body
- wire for tail and paws
- fishing line for ears
- beading tools
- beads to match the thread
First we will make the body of the cat. To do this, you need to paint a large ball to match the main color, which will be the cat. We leave only the white belly unpainted. You can choose a ball in the desired color for the job.
After the paint has dried, we continue working. Along the entire circumference of the ball, we begin weaving a chain onto a thread with beads. For convenience, we secure the ball with improvised means, after that we continue weaving, constantly increasing it, remember that we need to insert silver beads, thus making the cat’s tummy.
When the row along the circumference of the ball is wide, we begin to decrease beads.
Now we begin to make the tail and paws. To do this, take a small piece of wire and fold it in half.
In the middle of the wire we put a bead in the color of the main color of the cat. We string the beads up to half the wire, then put on several silver beads and then golden ones again. You should end up with the same number of beads, now bend the wire in half and twist it. We do the same for all the other legs.
The longest piece of wire will be for the tail; we weave it in the same way as the paws. Using the ends of the wire of the paws and tail, we attach them to the cat’s body. We pass the wire through the bead in the intended place, and twist the remaining wires around the wire. We cut off the remaining ones or wrap them around the paw, while maintaining symmetry.
Now we are making the cat’s head, for this we take the ball that we prepared in advance. If this is not the case, then you can simply take a piece of foil and roll it up, making a ball with a diameter slightly smaller than the cat’s body. We paint the ball to match the main color of the cat with acrylic paint.
We secure it by passing a needle and fishing line through the ball, and begin to braid the head with beads. We start with the belt and weave it like the body. As the final stage, we create a cute face for the cat.
We take two green beads and sew them symmetrically, one next to the other. We weave the nose and mouth through the muzzle beads with pink beads.
For the ears, we create a corner from wire and string beads on it; they can be made in any shape as desired. For the mustache we use fishing lines, which we pass through the muzzle in place of the nose.
It remains to fasten the head to the body, and therefore on one of the two balls we weave one row of bead crosses, so we form the neck. Then we sew the head to the body and tighten all the threads tightly. For decoration, you can make a bow and attach the cat from any braid. Now the cat is ready.
Cat from a simple disk
You can make a classic origami cat craft, but this is a slightly outdated idea. Today, a craft made, for example, from an ordinary CD disc can be considered unusual.
The following materials will be needed:
- any CD or DVD disc;
- paper of different colors;
- felt-tip pen;
- corrugated paper with double-sided tape;
- scissors.
In order to make such a craft yourself, you must first look at a photo of the cat craft to understand how it should look in the end. After this, a circle is cut out of paper of any dark color.
It is important that its size is slightly larger than the size of the hole that is on the disk. Next, the circle is glued directly to the center of the disk so that the hole is completely closed. That's all - the cat's nose is ready.
All that remains is to cut out the eyes and ears from colored paper. They can be of absolutely any shape.
Cat in love
To make such a voluminous toy made of beads in the shape of a beautiful cat, we need: beads of two colors - for the color and for the tummy and paws. Red beads on the heart. Just a little bit of beads for the mouth, eyes and nose, as well as a ball (for ping pong). Fishing line, wire. Beads for the paws and tail (thicker) and ears (thinner).
We paint the ball to match the color of the cat and leave a circle for the tummy.
Weave a chain around the painted ball with a cross around its circumference. The ball should be pierced crosswise so that the braid does not slide over it.
We weave a strip on both sides of the white spot as shown in the photo. When the row becomes too wide, we decrease it (weave two beads as one).
We get a braided ball. This is the body of a cat.
Next, let's take care of the tail and paws. We put a bead on a wire folded in half and twist it, leaving pieces of 2-3 cm. We make 5 blanks. The longest one is for the tail. The shortest ones are for the front legs.
We attach the tail and paws to the cat’s body in this way: thread it through a bead, twist it and remove the tip (bite it off). You don’t have to bite it, just wrap it around it.
Now the paws and tail need to be braided. We do this using the mosaic rope method. In this case - on 5 beads with 3 beads at the base.
When we reach the bead, weave a cross with an addition onto the edge of the strand. After this we braid the bead itself. This is how we make all the paws and tail. For the head, take foil and roll it into a ball. We braid it in the same way as we braided the ball. There is no need to make any reductions in place of the muzzle.
The heart is made like this: the fabric is woven with a cross in the shape of a heart, we make 2 of these. Calculation – 5x3 crosses. Next we sew it with a cross, insert beads inside and all this must be sewn to the cat’s paws.
We make the muzzle: we sew on beady eyes. The nose and muzzle must be woven between the beads of our braid. Making ears and mustaches.
We braid the head to the body with a cross.
Secure with fishing line using a needle.
The voluminous beaded toy is ready. A cute cat that you wouldn't be ashamed to give as a gift.
White cat
For three-dimensional figures, such as a white cat made of beads, fishing line or wire is used; the product turns out better on fishing line. With volumetric beading, the number of beads indicated in the diagram is collected into a closed ring, and then new rows are added.
Using two needles, we collect a chain of 14 pairs of beads (Figure 1), close the chain into a ring, connecting the beginning and end. We bring both needles in one direction, through the pairs of rings located opposite the joint. We weave another chain of 6 pairs of beads. The result is the frame of a cat's head. We make the entire head according to scheme number 2.
We weave the cat's ears according to the pattern in Figure 3, weaving them to the base of the head in the place indicated in Figure 4. On this base of the head with ears, you need to make additional weaves that imitate wool (Figure 5). Mark the nose with 3 beads on the muzzle, make eyes and attach the nose. We weave the whiskers from small pearl beads - 8, 8 and 6 beads in each whisker of the cat (Fig. 6).
We braid the head to the beads and make the body (Fig. 7). After making the body, we braid the paws and tail to it (Fig. 8,9,10).
To make a white cat fluffy, you need to perform additional weaving (Figure 8). By weaving, you can get different figures of cats. You can make a white or a black cat, the choice is yours.
