What it is
Polymer clay has been produced around the world since the 1930s. The composition has changed over time and at the moment it is a plasticine-like material that hardens under the influence of heat, turning into polyvinyl chloride.
The mixture itself is colorless, and various additives give it color and plasticity. That is why, depending on the manufacturer, its properties may vary.
There are several types:
- Glow in the dark;
- Iridescent in the light;
- Mixture with metallic color;
- Liquid;
- Colorless or translucent.
What you need to work with homemade clay
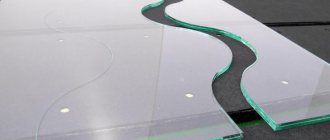
- Glass or plastic cutting board, tile or ceramic tile;
- Small knife.
- Acrylic roller or rolling pin for rolling out the mass;
- Confectionery syringe with attachments for making decorative parts of your products;
- Molds for figures (cutters);
- Various stacks;
- Varnish for finished products. Be careful when choosing, as some varnishes do not dry and continue to stick;
- Brushes;
- Toothpick or awl;
- Accessories;
- Napkins.
Attention! Do all work with gloves!
Manufacturers
To make a craft from polymer clay with your own hands, it is important to choose the right material for creativity. The following manufacturers are currently represented on the Russian market:
Russian-made clay, as a rule, is noticeably inferior to Western analogues, but is superior in price. Often the color range is quite narrow, and the finished craft can be fragile. The main companies on the market are Tsvetika and Artifact.
German clay presented by Fimo is one of the oldest on the market with a huge selection of colors. The only drawback is the high cost of one package, but it is ideal for professional work.
Each manufacturer, having their own clay production formula, endows it with special properties characteristic only of their company. For example, Kato clay must be baked at high temperatures, and Belgian Cernit may slightly change color after heat treatment.
Materials used in the product process
The workplace must be equipped and accompanied by a favorable atmosphere. The following criteria must be adhered to:
- work must be carried out on a hard surface: wood, glass, tile;
- before starting, you should cover the work area with polyethylene or a special oilcloth or paper surface;
- an even, smooth object for rolling out flexible pieces of clay;
- a special apparatus for rolling out clay, which also contributes to smooth color transitions;
- sharp knife;
- piercing, thin objects to create indentations;
- devices for smooth finishing;
- napkins;
- pliers;
- transparent varnish.
Necessary equipment
- Gloves that will help you avoid staining some light-colored material, such as white or light yellow.
- Various kinds of beads, buttons, sparkles, decorative threads and, in a general sense, everything that can be used to decorate a model.
- A plastic or wooden surface on which modeling will take place, since it can be problematic to clean it from the table.
- A knife that feels comfortable in the hand, and the blade is hard enough not to bend when cutting clay.
- Varnish, for processing the product, you can use construction varnish on water or from companies that produce clay.
- Moisture-resistant sandpaper for removing fingerprints and polishing.
- You can use toothpicks to make small holes.
- A roller for rolling out clay, such as a wooden rolling pin.
- Wire to form the frame of the model around it.
Required Tools
You will need a workspace with good lighting. Equip it with a glass or plastic work surface. Since you are a novice craftsman, there is no need to buy tools for complex shapes, so stock up on the essentials:
- acrylic rolling pin;
- stationery knife;
- needles, knitting needles;
- glue (for joining parts);
- sandpaper, cloth (for polishing), protective varnish;
- extruder (syringe with different nozzles);
- gloves.
Tips before you start
It is important to properly bake or treat the material to achieve polymerization. At any master class on how to make a craft from polymer clay, you will hear three possible options.
Note!
- DIY military crafts step by step: 150 photos of the best craft ideas for children for school or kindergarten
- DIY crafts for May 9 step by step: 150 photos of the best crafts for Victory Day
- DIY crafts for February 23rd step by step: master class with photos and descriptions of how to make crafts for Defender of the Fatherland Day
In the first case, the clay hardens on its own; you need to put the resulting craft in a closed box or container for several hours or days. For some materials, wrapping them tightly with plastic cling film will be sufficient.
In the second case, you will need to immerse the product in boiling water for several minutes, and then rinse in cold water. This method guarantees that the figurine will not burn from exposure to temperature.
Well, the most common way is to put the craft in the oven. The time can vary from five to forty minutes, depending on the size and manufacturer.
Some models will require the process to be repeated several times, alternating with cooling. The temperature is usually about one hundred degrees. After the time has elapsed, the figurine is taken out and allowed to cool.
Berries
Knead the clay in your hands to make it softer. Take white clay and any other berry color, we will use pink.
Make an even triangle out of white, like a small piece of cake, and roll out the second one, not very thin, to one millimeter thick.
Roll out small sausages from white and red flowers and connect them together.
Wrap the white sausage rolled out in step 2 so that the edges of the flat clay overlap slightly with the second one. Our berries will be formed from these sticks and they should not be large.
Note!
- DIY airplane craft: the best options for creating an airplane from paper, cardboard and plastic. 120 photo ideas
- DIY crafts for March 8 step by step - a review of the most beautiful crafts for International Women's Day (120 photo ideas)
- Diaper cake for a girl - 180 photos of ideas for original diaper cakes + DIY instructions with examples of finished products
The resulting product should be stretched in length, reducing its size in width. Be careful not to tear the sausage.
Cut the resulting result into small pieces.
A white piece rolled out to length is enveloped in a pink layer, to which the slices cut in step 6 are stuck in a circle.
Next, we will wrap the resulting result in a red flat sheet of red clay, rolled out in width and length.
Stretch the resulting sausage depending on what you want to get. If this is some kind of beautiful craft like a keychain, then it can be thicker and larger; if this is a future necklace or pendant, then make it smaller. Cut the resulting sausage and place it in the oven.
Button
Did you find an old beautiful button in your chest of drawers or at your grandmother’s? Why not try to apply it in our creativity. Although we will be making buttons, the process is similar for a century-old coin.
Make small balls from any color, you can even use leftovers. Attach a button to the resulting balls. Use a toothpick to make holes for the threads and place in the oven.
Sand the finished products, remove any unevenness and roughness from the edges, degrease and varnish.
There is a second version of this product using old tulle or any other textured fabric containing an expressive pattern. This is an ideal polymer clay craft for beginners.
Roll out a thin layer of clay of any color. Attach a piece of the fabric of your choice to it, then cover it with a plank and press it. Next, remove the fabric and use any round product, for example, a cork, to make a circle.
Take a toothpick and use the stencil of a real button to make holes for the thread. Send the resulting products to the oven, after which you can sand and varnish.
Processing Tips
Any material on which you bake a model leaves marks on the product. To rid the figurine of traces of being in the oven, degrease it and use fine-grained sandpaper.
Not every product needs to be sanded, but only those that need it. If after the oven you notice unevenness and lumps, then proceed to processing; if there are none, then degrease and varnish.
Volumetric models
These works already belong to the average type of complexity. Once you have gained the skills to work with tools and materials, you may want to do something more interesting. It’s understandable, buttons and berries are good, but someone also makes keychains, vases and even animals.
Below are instructions on how to make a Santa Claus and animals craft from polymer clay.
Material characteristics
The basis of polymer clay is polyvinyl chloride with the addition of liquid plasticizers. Various pigments are added to the composition of the material to obtain colored raw materials.
A small amount of substances such as kaolin, white porcelain is added when it is necessary to obtain transparency, and mica is added to obtain the effect of a metallic pearlescent luster.
In terms of plasticity, this material is similar to ordinary plasticine, however, after hardening, polymer clay acquires significant hardness. Therefore, you can often hear another name for this clay - plastic or thermoplastic.
Recommendations! When working with this material, experts advise using ordinary water in small quantities to soften it. It is very important here not to overdo it with adding moisture.
Today, there are specific products on sale that make it easy to soften polymer clay. Therefore, hardened clay pieces can be useful in further work.
Bunny
The basis of these cartoon characters is a sphere, and therefore we can make them without much difficulty. Choose any color you like and roll into a smooth round ball.
Make ears in the form of small ovals from the same material. Take some pink clay and tear off small pieces, roll them into small sausages, and then secure them to your ears.
Add a pink button nose to the bunny, and use a blunt pencil lead to make small holes under the eyes. Tear off tiny pieces of black clay and roll into small balls. Flatten them and place them where the bunny's eyes would be.
Attach the ears to the round head, slightly behind it. Make four small sausages from the same clay as the head. Longer for the arms, thicker and shorter for the legs, and secure them to the body.
The model is ready, you can put it in the oven. If desired, add a small chamomile to it as a decoration.
Remember that if you make a figurine, in the end it should not fall on its side or fall in any way.
A beginner's first job making flowers
We described the initial stage, now step-by-step instructions for making the first figure.
- Sprinkle the clay mass with talcum powder, knead it, separate a part, and make a sausage with a diameter of 5 mm. Cut it into 4 pieces, roll each into a ball. From each round piece we form a leaf.
- We take a wire 50 mm long and attach a round ball to the top. This will be the core and stem.
- Use tweezers to secure the petals around the round center. If you bend them slightly back, you get the effect of an unopened bud.
So your first little miracle was born!
Birdie
Roll a small ball, as in the case of the bunny, immediately making small indentations under the eyes with a blunt pencil. Make eyes from black clay and place them on the body.
Similarly, place the beak of a different color for our bird. Remember that in itself it is conditional and can represent a small, slightly elongated sphere.
Make a heart out of pink or red material - this will be our tail. When finished, flatten it slightly and place it behind your head. The bird must lean on it so as not to fall.
The wings will be the same color - two small flattened droplets on the left and right of the body.
Small sausages of the same color as the beak will serve as paws. Make four, two for each, and you can send the model to the oven.
Filigree
The pattern is created on a flat or slightly convex plastic surface. To create an elegant pattern, small clay parts are used, usually pressed or pierced in the middle with a needle. This technique is often used to create patterns reminiscent of folk painting. The predominant elements are leaves and flowers.
Santa Claus
The difference between Santa Claus and Father Frost is only in the color of his clothes. The American one is red, and the Russian one is blue. You can decide for yourself what you will do without any problems. Below are instructions for beginners.
Similarly to the bird and the hare, roll a small ball - this will be our head.
Make four tiny spheres, two larger ones from white clay and two smaller ones from black clay. Flatten the white pieces, you should have two small pancakes. Place them on the head, and on them there are black balls - the eyes are ready.
Make a beard of your choice from white clay, then place a button nose between the eyes, and from it two sausages that will be mustaches.
Roll out a small layer and make a red cone out of it and secure it on your head. The rim of the hat will be a thin white sausage. Top the hat with a white clay bead. Use a blunt pencil lead to create a mouth for grandpa.
Make Santa's ears from the same clay as his head.
According to the principle of how we made the hat, Santa should have a torso, legs and arms. Don’t forget about the boots and attach them to your feet and send the resulting model to the oven.
How to learn to sculpt from plastic
First of all, you need to get acquainted with the basic techniques that are used when sculpting from polymer clay. It is advisable to simultaneously train on a small piece of plastic or at least plasticine in order to immediately consolidate the information.
Basic sculpting techniques
When interacting with clay, only five basic techniques are used:
- Kneading. Before work, the clay needs to be kneaded well with your fingers so that it becomes more plastic and pliable.
- Pinching off. Using your thumb and forefinger, pinch the clay and tear off a small piece to work with.
- Rolling up. A small piece of plastic is rolled into a ball in a circular motion between the palms. Many elements are created from a spherical shape, so this technique will come in handy.
- Smoothing. Use your fingertips to smooth out uneven edges, smeared areas and other imperfect details.
- Connecting parts . Large products require many elements, each of which is created separately. Finally, they are connected using strong pressure and smoothing. You need to act carefully so as not to deform the work. If the elements are large, you need to connect them with glue, which will be discussed later.
These basic elements are enough to get started. Over time, you will be able to complicate them and develop them, and learn new techniques for interacting with clay. But in the first steps you should not complicate the learning process.
Polymer clay sculpting techniques
There are many different sculpting techniques, and over time more and more new ones appear. Let's look at some of the most interesting ones that may be useful to you.
1. Solyanaya
Make a small clay bead and roll it in salt. Press the crystals in carefully. Create as many beads as you need. Bake the beads with salt and then put them in water. Keep it there until the salt crystals dissolve. You will get an unusual texture, reminiscent of pumice or a sponge.
2. Millefiori
Sometimes it is called "cane" or "sausage". The technique is complex and painstaking, but the result is worth the effort.
Roll out the clay into a thin layer, place thin strips of other colors on top, and roll it up. After cutting the roll, you will see the original design, which will depend on the colors used and the arrangement of the elements.
A beautiful example of using the millefiori technique can be seen below.
3. Filigree
Imitates fine jewelry technology with the same name. To create thin patterns, you either need to roll out the clay into thin strips yourself, or use an extruder to create equal strips no thicker than 1 mm. You need to lay out a beautiful pattern from them.
4. Watercolor
Based on smooth transitions between different bright colors. To complete this you need to take three pieces of different colors: the main one, the basic light one and the basic dark one. Works that use contrasting colors (blue - pink) look beautiful.
Place the layers on top of each other (colored first, light on top and then dark). Carefully roll the layers until they become one, and in the process beautiful watercolor transitions between different colors are formed.
5. Mokume Gane
Similar to watercolor, but done a little differently. To work, you will need 3-6 thin layers of different colors. They need to be placed on top of each other and the edges trimmed so that they are all the same size.
Roll out thoroughly with a rolling pin so that excess air comes out and the layers fit snugly against each other. After this, you need to stamp them well, pressing hard so that the layers mix during the process. The chosen pattern and tools are not so important, so you can use any tools: toothpicks, molds, ruler, etc.
At the end, when the entire top surface is covered with stamps, use a thin blade to remove thin layers one by one. Each will have its own unique color pattern.
An example of execution can be seen below.
The most famous and popular techniques are listed above, but in fact there are many more of them. Over time, you can discover new techniques and use them in your creativity.
Gluing parts
Many polymer clay products are made up of several small pieces that need to be put together. For this, special glue is used - latex or epoxy.
Masters prefer latex, because... it is transparent and cannot be seen in the finished work.
Epoxy gives a yellow tint, which is clearly visible on white clay.
Beginning craftsmen should choose glue that hardens in at least 10-15 seconds, and not instantly. This will give you time to make adjustments to the product.
The gluing process consists of several stages:
- Degrease the joints.
- Using a toothpick, silicone brush or spatula, apply a small amount of glue to the desired point.
- Connect the elements and hold for as long as recommended on the glue packaging.
- Carefully place the finished work and do not touch it until completely dry.
You need to work with gloves in a well-ventilated area.
Baking the finished work
At home, a conventional oven is most often used. A microwave oven, slow cooker or grill is not suitable because... It is very difficult to regulate the temperature on them.
Polymer clay is baked at a temperature of 100 to 160°C (see instructions).
Be sure to check the specific temperature in the instructions for the clay - each manufacturer has its own requirements.
The baking process is quite simple, but it may seem difficult the first time:
- Turn on the oven so that it has time to heat up to the desired temperature. Strictly adhere to the temperature recommended by the manufacturer on the packaging - it is the most accurate.
- Place the finished product on the baking surface. A tile, baking tray or glass will do. Place parchment under the work to prevent the work from burning.
- Make sure the desired oven temperature has been reached and place the item inside.
- Keep track of the time and turn off the oven on time. The duration of frying depends on the thickness of the product - on average 20 minutes per 6 mm. The strength of the finished craft depends on the duration of baking. If it overheats, it will dry out, crack, lose shape or burn.
- Be careful - the clay is very hot and elastic immediately after “cooking” is completed. Hardening after cooling. It makes sense not to touch it and not take it out of the oven until it has cooled down.
During baking, polymer clay releases harmful substances that settle on the oven. If you use the oven for cooking, be sure to clean it after baking. Or you can place the product with the stand in a cooking sleeve, tie it, and throw it away. Then you won’t have to clean the oven every time.
Toxic fumes in the air are not enough to cause human poisoning, but just in case, leave a window open when baking something with polymer clay.
For those who don't have an oven, you can use boiling rather than baking. The finished work is not so durable, and a coating forms on it, which must be cleaned off, but in a hopeless situation it can be used.
Cooking time is calculated by the formula: 3 minutes + 1 minute per 1 mm of product. For example, if the thickness of the figure is 1 cm, it comes out to 10 mm * 1 minute = 10 minutes + 3 minutes = 13 minutes. It is impossible to digest the product.
Cooking is not suitable for products that use glue or liquid clay.
Grinding
They will come in handy if, after baking, you notice unevenness, roughness or fingerprints on the product.
For sanding, use sandpaper with a grit of 600, 800, 1000, 1250. Use coarse grits first and move on to fine grits.
Can be replaced with a four-sided sanding file.
Varnishing
The finished product can be varnished to make it smooth and shiny. Not all types of work need to be varnished, but it is often used for decoration.
Before applying varnish, the product must be degreased. It is enough to wash it with soapy water: soap your hands, rub the product and place it in a strainer or other container. Then, without contacting the plastic product with your hands, rinse it from soap.
Do not use acetone, gasoline, alcohol or other aggressive liquids.
Further actions should be performed with thin latex gloves so that fat from the sebaceous glands does not get on the figure.
Varnish will allow your work to be better preserved.
Construction wood varnish is suitable for varnishing. The ideal option is a transparent water-based polyurethane-acrylic. It dries quickly, after which a dense and invisible coating is formed on the product.
Do not use hair or nail spray - they are not suitable!
You can apply the glue using a brush with synthetic bristles. It is advisable to apply two layers of varnish. The second is applied after the first has completely dried.
Human Simulation
The most complex of the figures presented in this article. You may have seen various kinds of photos of characters made from polymer clay on the Internet. They are made using a wire frame. We have prepared some tips for you to ensure that your model turns out to be the most successful.
For tall animals or people, use a metal rod. If the character has a flat part, then it is possible to use a mesh on which the base will be applied.
Observe the proportions; for this, it would be a good idea to look at the instructions for artists, where all the necessary parameters are given.
The peculiarities of proportion include the fact that cartoon characters cannot have, say, five fingers, unless we are talking about completely realistic figures.
The wire frame will need to be secured to the table somehow so that it does not fall and is able to stand. The frame should be plastic and have medium softness; it is better not to use metal that is too hard.
Magnets
An ideal polymer clay activity for children would be making refrigerator magnets. Knowing the technique already, coming up with something for you will not be difficult.
Remember that you should always use your imagination, because the most difficult is not always the best. You may have many options for creativity - these are some kind of parrots, the face of your domestic cat, New Year's decoration in the form of magnets for the refrigerator. Moreover, using a magnet, you can make a holder for needles.
Making your own clay
You can buy polymer clay for crafts. If purchasing is not possible, do it yourself. The manufacturing process is easy and does not require large financial expenditures.
Ingredients
- Flour - 1 teaspoon;
- Corn starch - 1 teaspoon;
- PVA glue - 1 teaspoon.
- Oils for babies or baby cream - a few drops;
- A little acrylic paint.
Cooking method
Mix dry ingredients with PVA glue. Knead the mixture until it resembles clay. If the mixture sticks to your hands, drop a little baby oil or a little cream into it. If making a colored product, add paint.


