Do you like to create furniture with your own hands, make a staircase in your house, decorate your house or bathhouse with curly trim? In this case, it will be difficult to do without a lamella or key router.
What is this device and what is it for? A key router cuts linear grooves into a piece of wood to install keys or lamellas. The method of connecting wooden parts using lamellas (oval-shaped wooden parts) gives reliability and strength to the entire structure.
Frames, tables, chairs, cabinets made by your own hands will delight not only the home craftsman with their individuality, but also all those who touch them.
Peculiarities
The design of a manual lamellar router is very similar to a grinder.
Only the cutting part of the tool moves parallel to the sole during milling.
The body itself slides in a horizontal plane.
In order to cut a groove for the lamella, a disk cutter is used.
Main details of the lamellar (keyway) router:
- Power unit (electric motor);
- Cone-shaped gearbox;
- Disc cutter;
- Frame ;
- Cord with plug;
- Cast platform;
- Rubberized handle;
- Bag for chips and dust.
Depending on the power of the power unit, milling cutters are divided into three types:
- Small 750 W - for hobbyists who use the tool to make single products.
- Medium 1100 W - used for the production of small batches of furniture.
- Powerful from 1200 W - professional equipment designed for full-time work. They are in demand in small furniture manufacturing industries.
In large factories with mass production of furniture units, stationary type milling machines are installed.
Let's describe the principle of operation of a lamellar milling cutter in a nutshell - rotational torque is transmitted from the engine through the gearbox to the cutter. The cutter itself is securely fixed to the shaft. The casing protects hands and foreign objects from getting into the cutting area. The cast platform allows the milling tool to be securely mounted on the surface in which the groove is being made. The rubberized handle makes it easy to use and press down if necessary.
The milling process produces fine wood chips and dust. It not only gets clogged into the mechanism itself, but can also enter the nasopharynx and lungs of a person. To prevent this from happening, a bag was developed to collect dust and small chips. It does not allow clogging of mechanisms, and, accordingly, does not cause engine overheating. In some cases, the router is connected to a vacuum cleaner using adapters.
The connecting piece itself, the lamella, cannot be ignored. The lamellas for the router are oval-shaped keys. They are strictly standardized, the number is indicated on the lamella itself. They can be purchased in stores, but some amateur craftsmen make them themselves. For this, plywood or chipboard 4 mm thick is used. More elite materials are oak and cedar. The use of this expensive material is the prerogative of experienced craftsmen, who first plan a plank of oak or cedar of the required thickness, and only then make dowels from it.
Storage of the lamella requires dryness and tightness. Air humidity affects the shape of the lamellas - with high humidity they swell and do not fit into the groove. And when they overdry, the lamellas warp and either do not fit into the groove, or dangle a lot, and ultimately do not perform their functions as connecting parts.
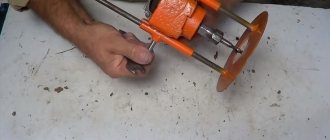
Making a router from a drill
Making a milling cutter from a drill with your own hands is easy and quick, since this tool already has a chuck into which you can clamp the cutter shank. But since the drill develops low speeds, about 3000 rpm, it will not be possible to achieve good quality machining of the part.
For comparison: a milling machine reaches speeds of up to 30,000 rpm.
A vertical drilling device, which can be purchased at a power tool store, is ideal as a stand for securing the drill. You just need to change the equipment, and the homemade router is ready.
Also, a similar stand can be made from laminated chipboard, as shown in the following figures.
Advantages
The main advantage of lamella routers is the cutting of grooves for the lamellas. And such connections have a number of advantages:
- The lamellar router can be used in horizontal and vertical positions.
- Connecting elements at any given angle. Such connections are very necessary when designing furniture products. This type of connection preserves the aesthetic appearance of the furniture.
- Performing technological operations at high speed. Very relevant for serial furniture production. When using a key router and a special cutting tool together, the productivity of the technological process can be significantly increased.
- Cost-effective when performing some work. Materials selected from the grooves can be used to insulate or decorate facades.
- Comparative safety.
Purpose of the tool
Lamellar routers are designed for cutting grooves for shaped dowels when connecting wooden parts. In practice, their application is much wider. In addition to wood, manual machines process:
- plexiglass;
- plastic;
- Fiberboard and chipboard;
- gypsum;
- aluminum;
- bronze;
- soft rock stone - tuff, shell rock, sandstone.
Why do you need a lamellar router, a highly specialized tool, in a home workshop? It is rarely used for its intended purpose. Much more often the owner performs other work on it:
- quarter sample;
- edge profiling;
- selection of long grooves;
- cutting out non-standard tenons;
- formation of gaps in the casing;
- creating patterns on platbands;
- leveling the board thickness;
- removal of defects.
You can remove the corner and make a quarter groove using other tools. The advantage of a lamella router is that it does not convert all the cut wood into chips. Having passed along two perpendicular planes, the master receives square blocks of small cross-section 20 - 40 mm. Slats can be used for insulation and cladding, and can be used to decorate the façade. Working with a lamellar router is much easier than making similar cuts with other electric tools.
The cutters are easy to change and have different shapes. When the tool moves along the edge, the end is figuredly turned, followed by grinding.
For a non-standard connection of two boards at right angles, a router is used to cut a groove along the plane of one part and create a long tenon at the end of the other. Connections for attaching the legs of the table and bedside table are created in a similar way.
When cladding a wooden house from the inside, you do not need to adjust the ends of the planks on the ceiling and walls with great precision. All you have to do is set up the router and go along the corners around the entire perimeter. A uniform expansion gap is ensured.
When laying the floor and hemming the ceiling, boards of the same thickness are required. The lamellar tool makes this job much easier.
- It is necessary to level one plane on the boards.
- Set the cutting height - the thickness of the board.
- Go along the perimeter to the entire depth of the cutter, relying on the base plane.
- Turn the board over and remove all excess along the markers created with the cutter.
After this, go through the corners with a router and you can lay the floor. It will be perfectly smooth without scraping.
The use of lamellar tools for wood carving was invented by craftsmen who are passionate about creating original decorations for the inside and facade of their home.
If a resin bag is found in the board, this place is cut out with a boat cutter. An insert of the appropriate configuration is then inserted into the selection. The protruding wood is sanded off. A large board does not need to be rejected due to a minor defect.
Recommendations for selection
When planning to buy a lamellar tool, pay attention to the following main characteristics:
- Engine power. Depending on what you are going to do with a lamellar tool, it depends on what power the tool should be chosen. For a home workshop, a small lamellar machine is quite enough. A medium-power machine is needed when building a summer house, or, for example, a bathhouse or sauna. Trimming steps, connecting side panels on a staircase, terrace or balcony, creating decorative elements of the facade, cutting grooves and cutting quarters - this can be easily done with a medium-power lamellar machine.
- Possibility of adjusting the working angle. Nowadays, most modern devices have this feature, but we couldn't help but pay attention to it as it affects the functionality of the device.
- Cutter rotation speed. The cleanliness of the processing directly depends on the rotation speed of the cutter. Do not use a high-speed router for working with soft materials and wood boards. They are easy to process at low speeds.
- Clamp type for cutter (collet). The collet must be made of high quality metal. Don't buy an expensive router just because of a quality collet. It is enough to purchase a collet made of hardened steel and replace it if you are not satisfied with what is available.
- Speed adjustment. Allows you to select the mode that is necessary for processing a specific material. For hard materials (stone, brass, aluminum) fast rotation is required, but for softer ones it is not necessary.
- Blocking. Automatic protection. If there are children in the house, then blocking and automatic protection are simply necessary. In fact, this feature ensures the safety of your loved ones.
- Smooth start. Allows you to start the process of cutting grooves without sudden jerks.
- Working stroke of the milling cutter. If you need to make parts with deep longitudinal grooves, or grooves for leveling floor boards, you should pay attention to the working stroke of the lamellar cutter.
- Connecting a garbage bag. A vacuum cleaner or dust bag can be connected through the connecting elements. This ensures comfort in the workplace and safety for the health of the master.
How to make a router from a grinder?
The first version of the router that we will consider is made from an angle grinder. First, we will provide a list of materials and tools that will be required to create it, and then directly the instructions for its manufacture.
Tools and materials
If we talk about materials and tools, you will need:
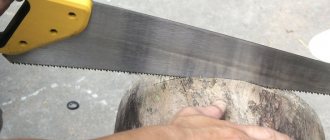
- small angle grinder with a 125 mm wheel;
- a pair of discs – stripping and trimming;
- vice;
- emulsion coolant;
- chalk;
- M14 type tap;
- a piece of sheet iron that is about 1.5 millimeters thick;
- a piece of I-beam 18 cm with a length of 200-250 millimeters or a sheet of iron 5 mm thick;
- a pair of elongated nuts, as well as a pair of regular nuts that have a diameter of 8 millimeters;
- a pair of bolts with characteristics 8 by 40 mm;
- drills 0.8 and 1 centimeter;
- a pair of bolts 8 by 10 mm;
- cord brush for an angle grinder that has metal bristles;
- drill chuck with a threaded connection measuring 1.5-13 millimeters;
- a round crown with a diameter of 4 centimeters for making holes;
- a pair of clamping bolts equipped with wings measuring 8 by 20 mm;
- a pair of 8mm nuts;
- 10 centimeters of square pipe 2.5 by 2.5 centimeters, as well as half a meter of profile 2 by 2 centimeters.
In addition, you will need drawings of the device. They can be found on the Internet or in specialized literature.
Step by step diagram
So, in order to make a manual wood router, we will first need to make a sole for it. To do this, you will need to take an iron sheet of 5 mm thickness to ensure the rigidity of the future structure, you will need to cut a piece measuring 12 centimeters, then clamp it in a vice and sand it well with a cord brush. Then all that remains is to place the plate using chalk according to a pre-created pattern.
Then, in a vice, you should carefully cut out the metal using a cutting-off disc, without going beyond the intended contours. To bring everything according to the markings, you should use a cleaning disk. After this, the part will be ready. It will be the basis of everything.
- Now you need to make a mount for the grinder itself. To do this, use a crown to make a hole with a 4-centimeter diameter in the remaining part of the metal plate. This can be done using a hammer drill, having first switched it to drilling mode.
- The metal here itself is thick, and in order to avoid seating of the crown, you should add emulsion coolant, which consists of oil and water, from time to time. The part itself should be held with a clamp. The work should be carried out on a wooden base. The result should be a thick puck with an even hole and even margins.
- After this, you should create a base for attaching the angle grinder to the previously created part. You just need to cut off unnecessary parts and treat it with an abrasive material. Now you need to adjust the hole to the part of the grinder gear motor, which is stationary and protrudes slightly. This will be the basis of the fastening.
- The spare part needs a little modification by cutting off the protrusions. After this, you should start creating brackets so that the tool can move upward. To do this, you will need prepared square-shaped pipe parts. The big one will move along the smaller one. And pipes measuring 20 by 20 will act as guides.
- Now you need to cut a pair of thin tubes 2 by 2 centimeters with a length of 30 centimeters on a cutting machine so that the chuck, where there is a long cutter, will fit, as well as sufficient distance to adjust the height. As a sled, we will have a pair of pipes 2.5 by 2.5 centimeters with a 4-centimeter length. In one you will need to make a hole with a diameter of 1 centimeter and weld an 8 mm nut. After this, when tightening the bolt, the slide will be locked with a wing bolt equipped with a guide pipe.
Now on the tacks you should create a structure from:
- pairs of guides 2 by 2 centimeters;
- pairs of slides 2.5 by 2.5 centimeters;
- designs for fastening to the angle grinder gearbox.
Carefully weld the guide brackets, attaching them tightly to the above-mentioned sole. Here you cannot overheat the metal of the tube, otherwise free movement of the slide will be impossible. After this, you should firmly weld the angle grinder clamp to a pair of pipe sections that will be required for vertical movement.
But this clamp will work normally only after creating a clamp.
It can be done as follows.
- A 5mm gap should be made in the middle.
- On one side of the resulting arc, we weld an elongated type nut, and on the other, a simple one. A thinner nut should be pre-drilled with a large drill so that the bolt moves freely. This is best done by first clamping the structure in a vice. After this, the bolt that is tightened will firmly fix the angle grinder to the protruding area of the gearbox in a vertical position. At this point, the part that is responsible for moving the tool is ready. True, some devices come without a gearbox, which are based on other devices.
- After this, you need to prepare the mounting ears for the hole in the gear housing. They are made of thin metal, the thickness of which will be no more than one and a half millimeters. An elongated oval is drawn with a marker, where a hole is made for the bolt on one side. The parts should be bent diagonally in a vice by gently tapping with a hammer. The lower part of the eyelet is welded to the created clamp, and the upper part should be screwed to the gear housing. The main part of our router is ready. Now the nozzle or chuck must be attached, after which all that remains is to assemble the product and configure it.
- The cartridge should be the simplest one. The diameter of the clamped router or drill will depend on the power of the angle grinder motor, as well as the tasks that are planned to be implemented. Any option that has a clamp spread in the range of 1.5 - 13 millimeters will be sufficient. The only important point to pay attention to is the threaded cartridge fit.
With a high degree of probability, neither the thread pitch nor the diameter of the hole will coincide with similar moments on the angle grinder. Then you will need to take an M14 tap, and then screw on a pressure washer. It remains to make sure that there is no play, which means that the pitch matches.
All that remains is to cut the thread and screw the cartridge onto the grinder spindle. This resulted in a finished product for attaching the cutter.
Now all that remains is to assemble. To do this, you must first paint and dry all the components. The finished parts are assembled onto the angle grinder, firmly clamp the gearbox into the mounts:
- We put the fasteners on the gear head, after which it should be screwed tightly;
- then it should be connected with bolts with fastening for rigidity;
- we install the cutter in the chuck, and then fasten it firmly;
- we mount the base and put on the tool with the slide;
- We adjust the height using tools and bolts on the slide.
That is, we have a reliable and high-performance homemade milling cutter made from an angle grinder.
Care
Every time after work, the router must be cleaned of wood dust.
This can be done with a vacuum cleaner, but the dust should not be sucked in, but blown out.
Or you can clean it with a brush - carefully sweep all surfaces of the instrument, removing dust and small particles.
In case of greater contamination (dirt that has become embedded in the connecting seams between parts), it is necessary to carry out radical cleaning with special products designed for wiping electrical equipment, or with gasoline. The entire cleaning procedure must be carried out with great care, preventing liquid from getting inside the instrument body or on the on-off system. If a similar situation arises, then the router needs to be dried very well and only then used.
In more expensive models, a vacuum cleaner is connected using adapters or a bag is installed to collect dust and small sawdust.
If vibration or unusual engine sound begins to bother you, then you should first of all pay attention to bearing wear. In these tools, the bearings themselves do not need to be maintained; if they wear out, they are replaced with new ones. It is better to replace bearings in a workshop, since special tools are needed to remove the old bearing and install a new one.
Do-it-yourself milling machine manufacturing technology
Assembling a homemade vertical milling machine with a bottom drive is carried out in the following order:
- Development of drawings. Carrying out marking of the movement of moving parts.
- Selecting an electric motor. Any motor with a power of 1–2 kW for a voltage of 220 V with a rotation speed of 700–3000 rpm will do. Often a motor from a washing machine or vacuum cleaner is installed. You can install an electric drill with high rotational force. It is important to consider that a motor with a power of up to 2 kW allows for a processing depth of up to 100 mm. To increase this parameter, you will have to install a 380 V motor.
- Assembly of the frame. It may have a bolted connection or a welded structure.
- Cutting and installation of the machine plate, including the formation of a hole for the working element.
- Fastening the guides.
- Suspension and fastening of the electric motor.
- Installing a spindle with a chuck on a lifting bar (vertical lift). Securing the drive.
- Installation of stops and limit strips.
- Installation of the dust collector.
- Completing the installation of the desktop.
- After installing the electrical panel, electricity is supplied and testing of the machine begins.
- To carry out the assembly you will need the following tools: a welding transformer, an angle grinder, an electric drill, a screwdriver, a jigsaw, a hacksaw, a hacksaw for metal, files and needle files, pliers, screwdrivers, wrenches and socket wrenches, calipers, a ruler, a square.
Characteristics of collet and dust extraction
If you want to purchase an Interskol lamellar router, it is important to consider that it may have a certain collet. Experts advise preferring the cone-shaped variety, which is recognized as the best
It is considered ideal for a tapered motor shaft. The collet must be made of hardened steel, since ordinary steel elements wear out quickly. Ultimately, this causes unnecessary sounds to appear, which complicate the process of working with the instrument.
“FMSh 100 710e” is a lamellar milling cutter that has a dust suction function. It is worth mentioning that modern devices of this kind are mostly equipped with a similar addition, which is very convenient. In order to achieve the highest quality results during the operation of the tool, you need a unit in which this functionality is a built-in mechanism. Installing a gateway usually has a worse effect on the appearance of the device. However, if you use a special table, the suction works properly.
The table, which is used in tandem with a router, has special requirements. It must have reliable fasteners and a height adjustment system. Among other things, the table must guarantee excellent visibility.
ADJUSTMENT SYSTEM AND OPERATING PROCEDURE
Correct use of a lamellar router ensures precise fit of the parts to be joined. Before starting work, you need to carry out a number of preparatory actions.
Based on the size of the lamellas used, the milling depth is set - this is done using a turret stop that limits the longitudinal stroke of the body.
The distance from the upper edge of the edge is adjusted by raising or lowering the movable corner stop - the support visor on the base of the router. Since in the vast majority of cases the groove is in the middle, the indentation is half the thickness of the part. This means that it is enough to measure the thickness, divide it in half and set the desired value on the router scale.
To cut grooves at an angle, the support visor must be removed, and the milling angle must be secured with a stopper. The workpiece itself also needs to be secured to the workbench with clamps.
During operation, the milling cutter is pressed against the part with a force sufficient to pull the cutter out of the housing.
With the angle stop removed, the milling cutter is pressed tightly against the plane on which the workpiece lies to make grooves in the edges of the workpieces.